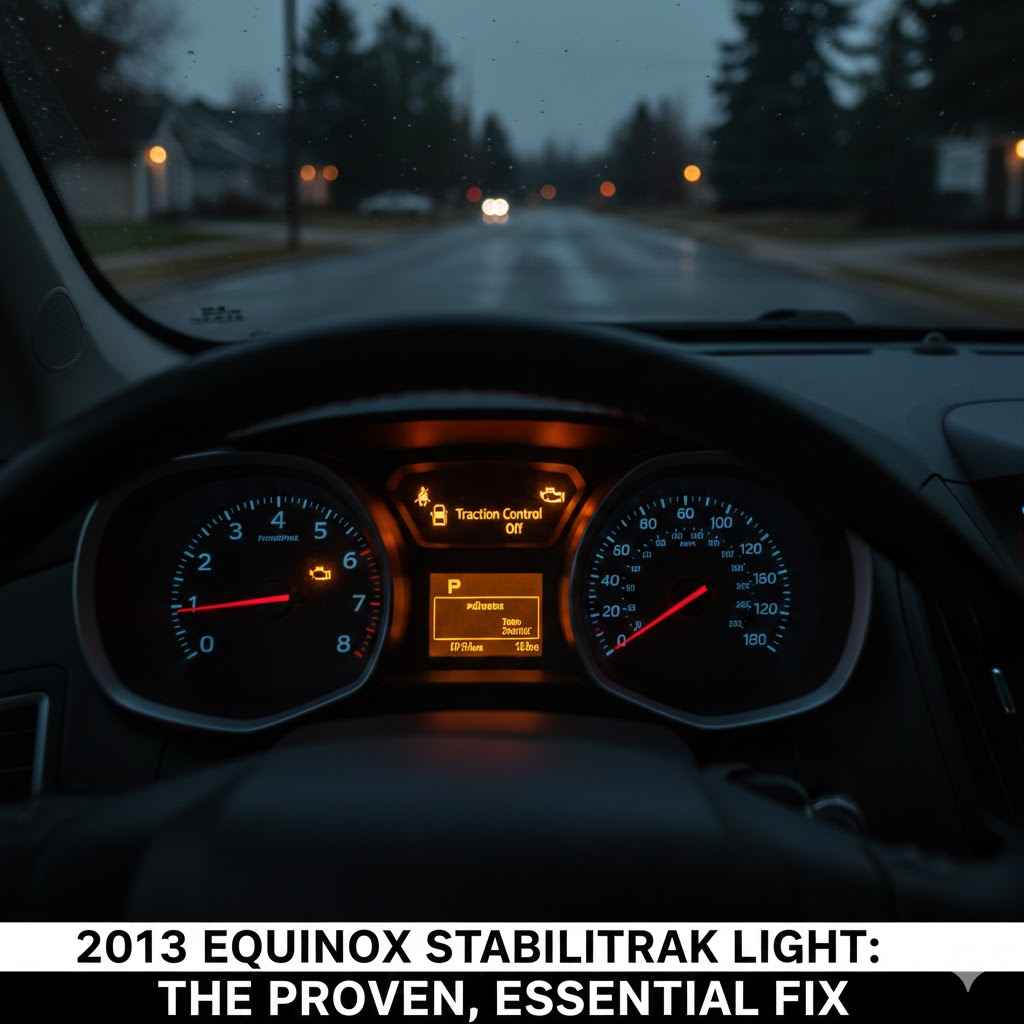
2013 Equinox Stabilitrak Light: The Proven, Essential Fix
If your 2013 Equinox Stabilitrak light is on, the most common and proven fix is inspecting the wheel speed sensor wiring harness at each wheel for damage. A pinched, frayed, or disconnected wire is the top culprit, especially after a wheel hub replacement. Carefully check the connection and the wire leading from the sensor before replacing any more parts.
Hi there, I’m Md Meraj. Seeing a warning light pop up on your dashboard can be stressful, especially one that says “Service Stabilitrak.” It sounds serious, and frankly, it’s an annoying problem that many 2013 Chevy Equinox owners face. You might have even replaced a wheel hub and sensor, only to see that stubborn light stay on. It’s frustrating, I know.
But don’t worry. You’ve come to the right place. We’re going to walk through this together, step by step. This problem is often much simpler than it sounds, and you don’t need to be a master mechanic to understand it or even fix it. In this guide, I’ll show you the most common, proven reason for this issue and how you can solve it for good. Let’s get that light turned off and get you back on the road with confidence.
What is Stabilitrak and Why is the Light On?
Before we dive into the fix, let’s quickly understand what we’re dealing with. Think of Stabilitrak as your car’s electronic stability control system. It’s a fantastic safety feature designed to keep you from skidding or losing control, especially on slippery roads or during a sharp turn. It works with your Anti-lock Braking System (ABS) to apply individual brakes and sometimes reduce engine power to help keep the car going where you steer it.
When the “Service Stabilitrak” light comes on, your car is telling you that this safety system has a problem and has been turned off. While you can still drive the car, you won’t have that extra layer of protection in an emergency maneuver. The system relies on a team of sensors to work correctly, and when one of them sends a bad signal, the whole system shuts down as a precaution.
The Most Common Culprits
The Stabilitrak system can be triggered by several issues, but for the 2013 Equinox, the list of suspects is usually very short. Here are the top reasons that light is glaring at you:
- Faulty Wheel Speed Sensor: This is the number one cause. Each wheel has a sensor that tells the computer how fast it’s spinning. If one sensor fails, the Stabilitrak system gets confused and shuts down.
- Damaged Wiring Harness: This is the secret, often-overlooked problem! The thin wire that connects the wheel speed sensor to the car can easily get damaged, pinched, or corroded. This is incredibly common after a wheel hub or suspension repair.
- Faulty Throttle Body: Sometimes, issues with the engine’s throttle body can trigger the Stabilitrak light, often accompanied by a “Reduced Engine Power” message.
- Steering Angle Sensor Issues: This sensor tells the computer which way you are steering. If it fails or needs to be recalibrated, it can disable Stabilitrak.
For our guide, we will focus on the most common and frustrating scenario: the light that stays on even after you’ve replaced the wheel hub and sensor.

The #1 Reason the Light Won’t Go Out After a Repair
You did the right thing. You diagnosed a bad wheel bearing, bought a new hub assembly (which includes a new wheel speed sensor), and installed it. But the Stabilitrak and ABS lights are still on. This is where most people get stuck and frustrated.
The proven, essential fix is almost always in the wiring harness that connects to the sensor. During the process of removing the old hub and installing the new one, this delicate wire can easily be:
- Stretched or Pulled: Causing a break inside the wire’s protective sheath.
- Pinched: Getting caught between a tool or a suspension part.
- Corroded at the Connector: The plastic plug where the sensor connects can get dirt or moisture inside, causing a poor connection.
- Not Fully Seated: The connector might feel like it clicked in, but it isn’t making full contact.
A brand new sensor is useless if the message it’s sending can’t reach the car’s computer. The computer sees a missing signal and keeps the warning light on, making you think the new part is bad. Let’s walk through how to find and fix this exact problem.
Tools and Materials You’ll Need
You don’t need a professional garage for this inspection. Here’s a short list of basic tools that will make the job much easier.
- Jack and Jack Stands: Safety is key. Never work under a car supported only by a jack.
- Lug Wrench: To remove the wheel.
- Socket/Wrench Set: You’ll need a few common sizes to remove bolts holding the harness clips.
- Flashlight or Headlamp: Good lighting is crucial for spotting wire damage.
- OBD-II Scanner: This is a highly recommended tool. It plugs into your car and tells you which specific wheel is causing the error. You can buy an affordable one online or borrow one from most auto parts stores for free.
- Electrical Contact Cleaner (Optional): Useful for cleaning a dirty connector.
- Electrical Tape or Heat Shrink Tubing (Optional): For repairing minor wire damage.
The Proven Fix: A Step-by-Step Guide to Turning Off the Stabilitrak Light
Alright, let’s get this done. Follow these steps in order. Take your time and be thorough. The goal is to find the problem, not rush through it.
Step 1: Park Safely
Park your Equinox on a level, solid surface. Engage the parking brake firmly. If you’re working on a front wheel, place wheel chocks behind the rear tires, and vice versa. Safety is your top priority.
Step 2: Use an OBD-II Scanner to Pinpoint the Problem Wheel
Before you lift the car, let’s work smarter, not harder. Plug your OBD-II scanner into the port under the driver’s side dashboard.
- Turn the ignition to the “On” position without starting the engine.
- Follow the scanner’s instructions to read the codes. You are looking for codes in the “ABS” or “Chassis” section.
- The code will tell you which wheel is at fault (e.g., “C0035 – Left Front Wheel Speed Sensor Circuit”). Now you know exactly where to focus your attention! This saves you from having to check all four wheels.
If you don’t have a scanner, you can still proceed by visually inspecting the wheel you most recently worked on, as that is the most likely source of the problem.
Step 3: Lift the Vehicle and Remove the Wheel
Using your lug wrench, loosen the lug nuts on the problem wheel while the car is still on the ground. Then, use your jack to lift the correct corner of the vehicle. Place a jack stand securely under the frame as a safety measure. Once the jack stand is in place, you can finish removing the lug nuts and take the wheel off.
Step 4: The Critical Inspection – Trace the Wire
Now, with the wheel off, you have a clear view of the brake assembly and the back of the wheel hub. Here’s what you need to do:
- Find the Sensor Connector: Look at the back of the new wheel hub you installed. You’ll see a wire coming out of it. Follow this wire a few inches to a plastic connector.
- Check the Connection: Unplug the connector. Look inside both ends. Is there any green or white corrosion? Is there any dirt, grease, or bent pins? If it looks dirty, you can spray it with electrical contact cleaner and let it dry.
- Trace the Entire Wire: This is the most important part. Start at the connector and slowly, carefully follow the wire back toward the car’s body. The wire is usually held in place by a few plastic clips. Feel the wire with your fingers as you go. You are looking for:
Pinched Spots: Places where the wire looks flattened.
Nicks or Cuts: Any spot where the outer black plastic coating is broken, exposing the colored wires inside.
Stretched Sections: The wire might look unnaturally tight or stretched over a suspension part. This often happens if it wasn’t clipped back into its proper place during the last repair.
A common trouble spot is where the wire has to flex as the suspension moves up and down. Check this area very carefully. The damage can be tiny, so use your flashlight and take your time.
Step 5: Repair or Reposition the Wire
If you found a damaged spot, you have your culprit!
- For Minor Nicks: If only the outer insulation is scraped, you can clean the area and wrap it securely with high-quality electrical tape.
- For a Cut Wire: If the copper wire inside is broken, you will need to splice it. This is a more advanced repair, but still very doable for a beginner. You can use butt connectors or solder the wires and cover them with heat shrink tubing for a permanent, weatherproof seal.
- For a Pinched or Stretched Wire: If the wire seems okay but was routed incorrectly, unclip it and make sure it has enough slack to move freely with the suspension. Re-secure it in the factory clips.
After the repair, plug the connector back in firmly. You should hear and feel a solid “click.”
Step 6: Clear the Codes and Test Drive
With the wire repaired and reconnected, it’s time to see if our work paid off.
- Put the wheel back on and tighten the lug nuts snugly.
- Lower the vehicle and then torque the lug nuts to the proper specification (you can find this in your owner’s manual).
- Get back in the car and use your OBD-II scanner to clear the trouble codes.
- Start the engine. The Stabilitrak light may still be on initially. That’s normal.
- Take the car for a short test drive. You typically need to drive a few hundred feet and exceed 10-15 mph for the system to re-check the sensors. In most cases, the light will turn off on its own during this drive.
If the light goes out and stays out, congratulations! You’ve just performed the proven, essential fix and saved yourself a costly trip to the mechanic.
What If the Light Is Still On? Other Possibilities
If you’ve thoroughly inspected the wiring and the light persists, don’t lose hope. The problem is still likely simple. Here’s a table of other things to check.
Troubleshooting Quick-Reference Table
| Symptom | Potential Cause | Next Step |
|---|---|---|
| Light is still on after wire inspection. | Faulty “new” part. | It is possible, though rare, to get a defective wheel hub assembly right out of the box. If it’s under warranty, consider exchanging it for another one. |
| Light came on after hitting a pothole, not after a repair. | The impact may have damaged the sensor or the wire. | Perform the same wiring inspection. The jolt could have broken an already weak wire. |
| “Reduced Engine Power” message appears with the Stabilitrak light. | This often points to a problem with the throttle body or accelerator pedal position sensor. | Scan for “P” codes (powertrain codes), not just “C” codes (chassis codes). This issue is separate from the wheel speed sensor circuit. |
| The steering feels off, and the light is on. | Steering Angle Sensor needs recalibration. | This usually requires a more advanced scan tool to reset the sensor to its “zero point.” This is a job for a trusted mechanic, but it’s typically a quick and inexpensive software adjustment. |
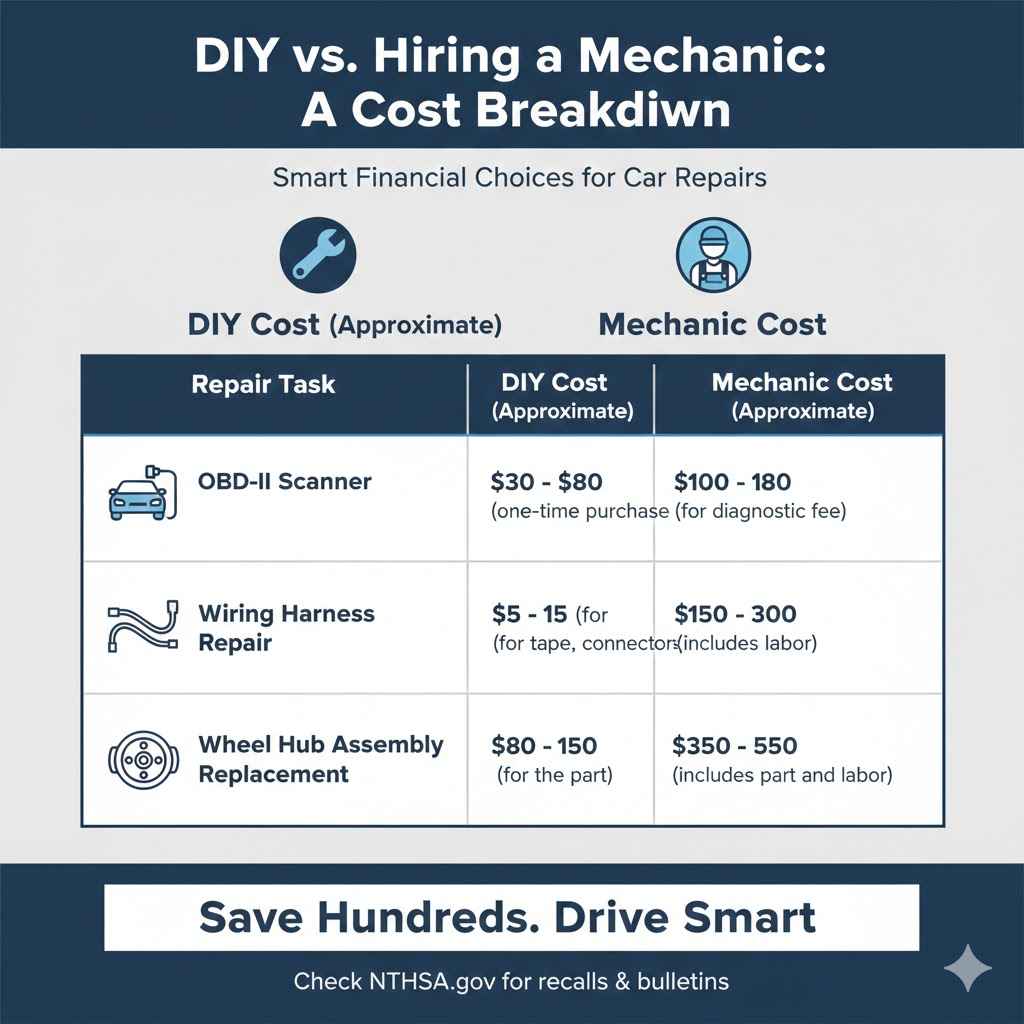
DIY vs. Hiring a Mechanic: A Cost Breakdown
Fixing things yourself is incredibly rewarding and saves money. Here’s a quick look at what you can expect to spend.
| Repair Task | DIY Cost (Approximate) | Mechanic Cost (Approximate) |
|---|---|---|
| OBD-II Scanner | $30 – $80 (one-time purchase) or free to borrow | $100 – $180 (for diagnostic fee) |
| Wiring Harness Repair | $5 – $15 (for tape, connectors) | $150 – $300 (includes labor for diagnosis and repair) |
| Wheel Hub Assembly Replacement | $80 – $150 (for the part) | $350 – $550 (includes part and labor) |
As you can see, simply finding and fixing a damaged wire yourself can save you hundreds of dollars. For more information on vehicle safety recalls and technical service bulletins, you can always check resources like the National Highway Traffic Safety Administration (NHTSA) website.
Frequently Asked Questions (FAQ)
1. Can I drive my 2013 Equinox with the Stabilitrak light on?
Yes, you can safely drive the vehicle. However, the Stabilitrak and ABS safety systems are turned off, so the car will not assist you in a skid. Drive more cautiously, especially in wet or icy conditions, until the issue is fixed.
2. Will disconnecting the battery reset the Stabilitrak light?
Disconnecting the battery for about 30 minutes may temporarily turn the light off, but it will not fix the underlying problem. As soon as the car’s computer runs its self-check and detects the faulty sensor or wire again, the light will come right back on. It’s always better to fix the root cause.
3. Do I need to replace the wheel hub again if the light is on?
Not necessarily. Before you replace the new part, you must rule out a wiring issue. A damaged wire is a far more common reason for the light to stay on after a hub replacement than a defective new part.
4. Why do the ABS and Stabilitrak lights come on together?
The Stabilitrak system relies on the same wheel speed sensors as the Anti-lock Braking System (ABS). Since they share this critical information, a failure in a sensor or its wiring will disable both systems, causing both lights to illuminate.
5. Is the wheel speed sensor part of the wheel bearing hub assembly?
Yes, on the 2013 Chevy Equinox, the wheel speed sensor is integrated directly into the wheel bearing hub assembly. You cannot buy the sensor separately. When you replace the hub, you are also replacing the sensor.
6. Can a bad alignment cause the Stabilitrak light to come on?
Yes, it’s possible. A severe misalignment can cause the steering angle sensor to send signals that don’t match what the wheel speed sensors are reporting. This conflict can confuse the system and trigger the warning light. If you’ve recently had an alignment, it’s worth checking if the steering angle sensor needs to be recalibrated.
7. My scanner gave me code C0040. What does that mean?
Code C0040 points to a problem with the “Right Front Wheel Speed Sensor Circuit.” This tells you to focus your inspection on the front passenger side wheel. Using a scanner to get the specific code is the fastest way to find the problem area.
Your Path to a Confident Repair
That warning light on your dash doesn’t have to be a source of stress or an expensive repair bill. More often than not, the solution to the stubborn Stabilitrak light on your 2013 Equinox is simple, hiding in plain sight along a small, overlooked wire.
By following the steps we’ve outlined, you’ve learned how to diagnose the problem like a pro, inspect the most likely culprit, and perform a lasting repair. You took control of the situation, armed yourself with knowledge, and saved a significant amount of money. That’s something to be proud of.
Remember to always put safety first, take your time, and trust the process. Your car is just a machine, and with a little guidance, you have the power to understand it and maintain it. Keep this guide handy, and you’ll be ready to tackle any warning light that comes your way with confidence. Happy driving!