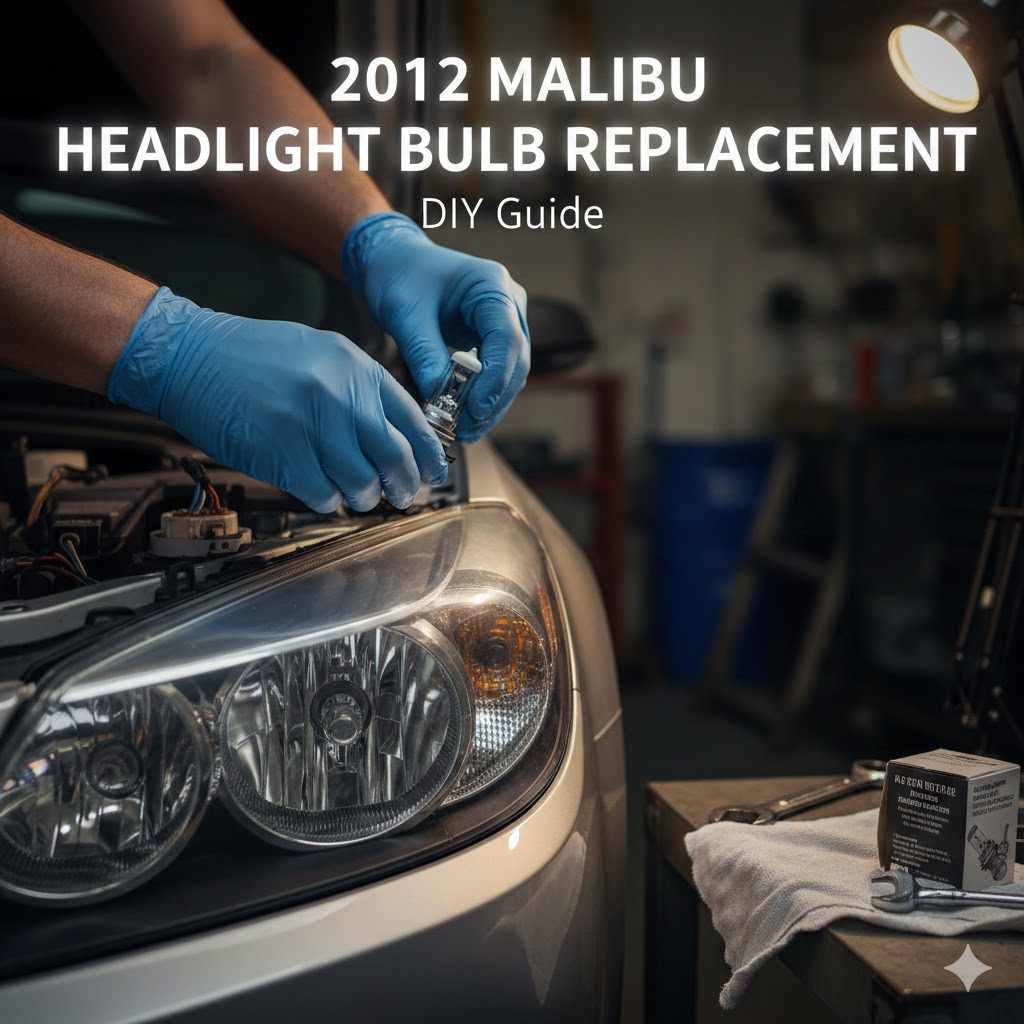
How to Change Headlight Bulb on 2012 Malibu
Changing a headlight bulb might seem tricky, especially if you’re new to car maintenance. You might worry about breaking something or not having the right tools. But don’t stress!
How to Change Headlight Bulb on 2012 Malibu is a common task that many people can do themselves. This guide will walk you through it step-by-step, making it super simple. Let’s get your headlights shining bright again.
How to Change Headlight Bulb on 2012 Malibu Safety First
Before you start any work on your car, especially something that involves electrical components like headlights, safety is your top priority. You want to make sure you don’t hurt yourself or damage your car. This section covers the basic safety precautions you should always take.
Following these simple rules will help ensure a smooth and safe experience.
Personal Safety Precautions
Working on a car can sometimes expose you to hazards. It’s important to be aware of these and take steps to protect yourself. This includes wearing the right gear and being mindful of your surroundings.
Safety isn’t just about avoiding injury; it’s also about preventing damage to your vehicle.
-
Wear safety glasses. Protect your eyes from debris or chemicals that might fall or splash. Even small particles can cause serious harm to your eyes.
Safety glasses are a cheap but very effective way to prevent eye injuries. Make sure they fit snugly and offer good coverage.
-
Use gloves. Mechanic’s gloves can protect your hands from grease, dirt, and sharp edges. They also provide a better grip, which can be helpful when handling tools or parts.
Some gloves are also cut-resistant, offering an extra layer of protection.
-
Ensure the engine is off and cool. Never work on the engine or lights when the car is running or the engine is hot. Hot components can cause severe burns.
Letting the car cool down for at least 30 minutes is usually sufficient.
Vehicle Preparation
Getting your car ready for the job makes the process easier and safer. This involves parking on a level surface and ensuring the vehicle won’t move. Proper preparation is a key step in any DIY car repair.
-
Park on a level surface. This prevents the car from rolling and provides a stable base for you to work. A slight incline could cause the car to move unexpectedly, which is dangerous.
Always choose a flat, solid area.
-
Engage the parking brake. This is an essential step to ensure the vehicle remains stationary. Even on a level surface, the parking brake adds an extra layer of security.
Make sure it is fully engaged before you start.
Disconnect the battery if necessary. For some electrical repairs, it’s recommended to disconnect the negative battery terminal to prevent any accidental short circuits. However, for simply changing a headlight bulb, this is usually not required but can be an extra safety measure if you’re unsure.
Locating and Accessing the Headlight Bulb
The next step in our guide on how to change a headlight bulb on a 2012 Malibu is finding the bulb you need to replace and figuring out how to get to it. Every car model has its own way of accessing these lights. For the 2012 Malibu, you’ll be working from under the hood, and sometimes reaching it can be a bit tight.
This section breaks down where to look and what to expect.
Identifying the Correct Headlight Assembly
Your car has two main headlights: one for the driver’s side and one for the passenger’s side. They are usually located at the front corners of the vehicle, behind the clear plastic covers. Each headlight assembly contains multiple bulbs for different functions, like low beam, high beam, and turn signals.
You’ll need to know which specific bulb is out.
Determine which bulb is burned out. If your headlight is dim or not working at all, it’s likely the bulb. You can usually tell by looking at them when the lights are on, or by checking if one is completely dark.
-
Consult your owner’s manual. This is the best resource for pinpointing the exact location of each bulb within the headlight assembly. It will often have diagrams showing you the different bulbs and how to access them.
The manual is your car’s best friend for DIY tasks.
Opening the Hood and Locating the Headlight Housing
The first physical step is to get access to the engine bay, where the back of the headlights are located. This is usually a straightforward process.
Pull the hood release lever. This is typically found inside the car, near the driver’s side dashboard or footwell. Once you pull it, you’ll hear a click, and the hood will pop up slightly.
-
Secure the hood. Go to the front of the car and find the safety latch underneath the edge of the hood. Lift the hood fully and support it with the prop rod.
Make sure the prop rod is securely in its slot.
-
Identify the headlight housing. Look behind each headlight assembly. You will see a large plastic housing or a metal bracket connected to the back of the headlight.
This is where the bulbs are accessed.
Accessing the Bulb from Behind the Assembly
This is often the trickiest part for beginners. The space behind the headlight can be cramped, and there might be other components in the way. You might need to work by feel more than by sight.
-
Remove any obstructing covers or components. Some vehicles have plastic covers or air ducts that need to be removed to get better access. These are usually held in place by clips or screws.
Your owner’s manual will be helpful here.
Locate the bulb socket. The bulb you need to replace will have a wire connector attached to it. This connector usually has a clip that you need to press or squeeze to release it.
-
Be patient. The space can be tight, and you might need to contort your hands to reach the bulb. Take your time to avoid forcing anything, which could cause damage.
Removing the Old Headlight Bulb
Once you can reach the back of the headlight assembly, the next step is to carefully remove the old, burned-out bulb. This involves disconnecting it from the car’s electrical system and then physically pulling it out. It’s important to handle the bulb gently and to note how it was positioned.
Disconnecting the Electrical Connector
The bulb is connected to your car’s wiring harness via a plastic connector. This connector needs to be safely detached before you can remove the bulb itself.
-
Identify the connector. It’s a plastic piece that plugs directly onto the back of the headlight bulb. You will see wires coming out of it.
-
Release the locking tab. Most connectors have a small tab or clip that needs to be pressed down or squeezed. This releases the lock and allows the connector to be pulled away from the bulb.
You might need to wiggle it a bit.
Pull the connector straight off. Once the tab is released, gently pull the connector away from the bulb. Avoid yanking or twisting it, as this could damage the wires or the connector.
Twisting and Removing the Bulb
Headlight bulbs are usually held in place by a socket that twists to lock and unlock. You’ll need to turn the bulb to free it from its housing.
Grasp the bulb base firmly. Hold the base of the bulb itself, not the glass part. The glass can be very fragile and can break if you apply too much pressure.
Turn counter-clockwise. For most vehicles, including the 2012 Malibu, you will need to twist the bulb base counter-clockwise (to the left). You should feel it loosen from its socket.
-
Pull the bulb out. Once it’s loosened, gently pull the bulb straight out of the headlight housing. Be careful not to drop it.
If it feels stuck, recheck that the connector is fully disconnected and ensure you are turning it the correct way.
Handling the Old Bulb
It’s a good idea to put the old bulb somewhere safe for a moment. This is also a good time to inspect the housing for any signs of damage or moisture.
Place the old bulb aside. Set it somewhere it won’t roll away or get damaged. This also helps you remember which bulb you just removed.
Inspect the housing. Look inside the headlight housing for any signs of dirt, debris, or moisture. If you see any, you might want to gently clean it with a dry, lint-free cloth before installing the new bulb.
Installing the New Headlight Bulb
Now that the old bulb is out, it’s time to put the new one in. This is the reverse of removal, but there are a few important things to keep in mind to ensure the new bulb lasts and works correctly. Proper installation is key to good lighting and safety.
Preparing the New Bulb
Before you put the new bulb in, there are a couple of crucial steps to make sure it works properly and lasts a long time. This is especially important for halogen bulbs, which are sensitive to oil.
-
Do not touch the glass. Halogen bulbs are filled with gas under pressure. Oils from your skin can cause the glass to heat unevenly, leading to premature failure.
If you do touch the glass, clean it thoroughly with rubbing alcohol and a lint-free cloth.
-
Verify the bulb type. Make sure the new bulb is the correct type for your 2012 Malibu. Check your owner’s manual or the packaging of the old bulb.
Common types are H11 or H7, but it’s essential to confirm.
Familiarize yourself with the base. Look at the new bulb’s base and compare it to the socket it will go into. There might be a specific orientation or tabs that need to align.
Inserting the New Bulb
This is where you place the new bulb into the headlight housing. It needs to be seated correctly to function properly.
-
Align the bulb with the socket. Look for any notches or guide tabs on the bulb base and the socket. These will help you orient the bulb correctly.
It should only fit one way.
-
Gently insert the bulb. Push the bulb straight into the socket until it feels snug. Do not force it.
If it doesn’t go in easily, it’s likely not aligned correctly.
Twisting and Locking the Bulb in Place
Just like removal, installation involves twisting the bulb to lock it into its secure position.
Turn clockwise. Once the bulb is seated, twist the base clockwise (to the right) to lock it into the headlight housing. You should feel it click or seat firmly into place.
Ensure it’s secure. Give the bulb a gentle wiggle to make sure it’s locked and won’t come loose. A properly seated bulb is essential for consistent light output and durability.
Reconnecting the Electrical Connector
The final step for installation is to reconnect the wiring. This ensures the bulb receives power from your car.
-
Align the connector with the bulb terminals. You should see where the connector fits onto the back of the bulb. It typically only fits one way.
-
Push the connector on firmly. Press the connector until it snaps or clicks into place. Ensure it’s fully seated so there’s a good electrical connection.
If it feels loose, try pushing a bit harder or re-aligning it.
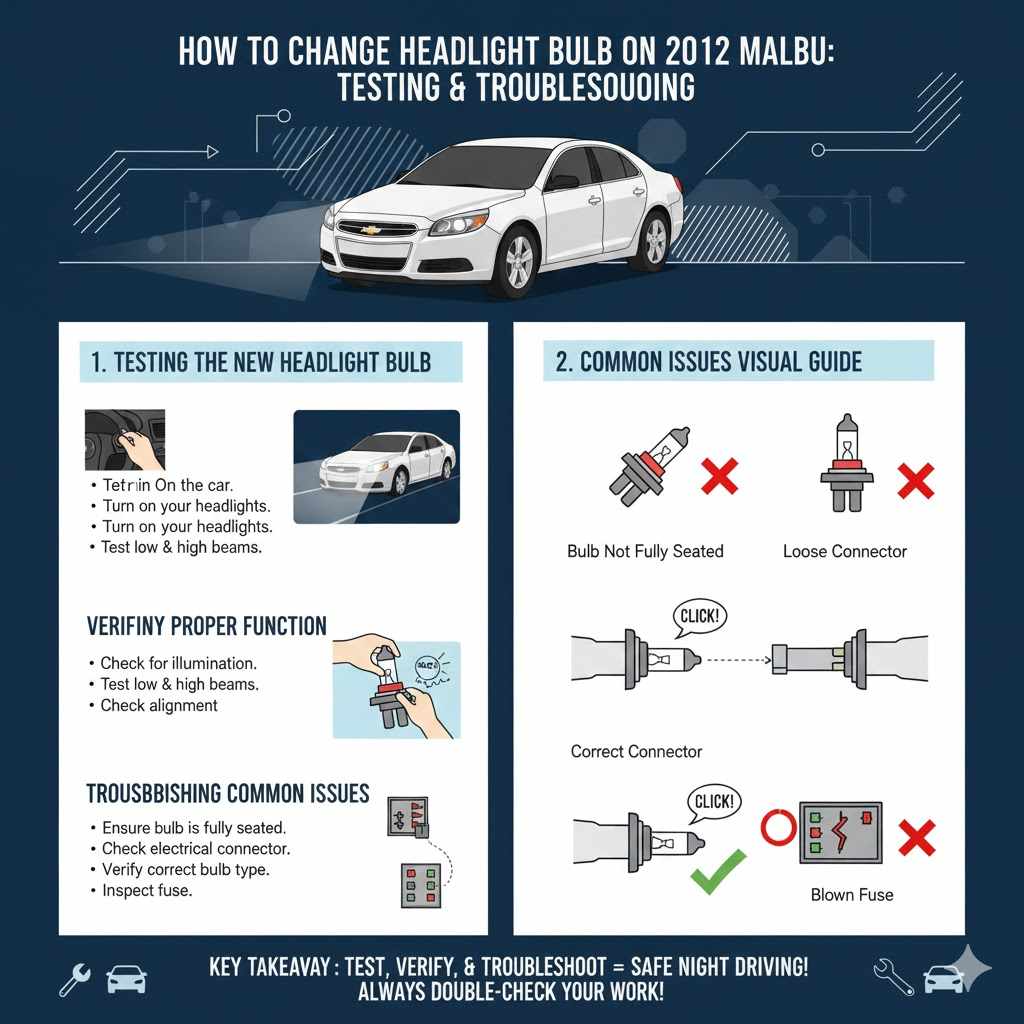
Testing the New Headlight Bulb
After installing the new bulb, you must test it to confirm it works. This is a critical final step to ensure your car is safe to drive at night. It also confirms that you have successfully completed the task of how to change headlight bulb on 2012 Malibu.
Turning On the Headlights
The moment of truth! It’s time to see if your new bulb lights up the road.
-
Get in the car. Sit in the driver’s seat and make sure the engine is still off for this initial test.
Turn on your headlights. Locate your headlight switch, which is usually on the steering column or dashboard, and turn it to the ‘on’ position. Make sure to test both the low beams and high beams.
Verifying Proper Function
You need to check not just if the bulb lights up, but also if it’s working correctly.
Check for illumination. Look to see if the new headlight bulb is producing light. It should be bright and clear.
Test the low and high beams. Switch between the low beam and high beam settings to ensure both functions are working. The high beams should be noticeably brighter and projected further.
-
Check alignment. While you can’t perfectly adjust alignment without specialized tools, a quick visual check can reveal if the beam pattern looks wildly off. The light should hit the road in a predictable pattern, not aimed too high or too low.
Troubleshooting Common Issues
If the new bulb doesn’t work, don’t panic. There are a few common reasons why this might happen, and they are usually easy to fix.
-
Ensure the bulb is fully seated. Double-check that the bulb is twisted all the way into its socket and locked securely. Sometimes, it needs a little more pressure to click into place.
Check the electrical connector. Make sure the connector is pushed all the way onto the bulb terminals and that the locking tab is engaged. A loose connection is a very common cause of a bulb not working.
-
Verify the bulb type. Confirm you installed the correct bulb model. If you used the wrong one, it won’t fit or function correctly.
Refer back to your owner’s manual or the packaging.
-
Inspect the fuse. Though less common for a single bulb failure, a blown fuse could be the culprit. Your owner’s manual will show the location of the fuse box and the specific fuse for your headlights.
Frequently Asked Questions
Question: How long does a headlight bulb typically last
Answer: Headlight bulbs, especially halogen ones, usually last between 500 to 1,000 hours of use. This can translate to several years of typical driving. However, this can vary based on the quality of the bulb, how often you drive at night, and the driving conditions.
Question: Can I use LED bulbs instead of the original halogen bulbs
Answer: While it’s technically possible to find LED bulbs that fit, it’s generally not recommended for headlights unless the vehicle is designed for them. LED bulbs operate differently, and using them in a housing designed for halogen bulbs can lead to poor light distribution, glare for other drivers, and may not be road legal in your area.
Question: Do I need special tools to change a headlight bulb on a 2012 Malibu
Answer: For most 2012 Malibu models, you don’t need specialized tools. You might need a Phillips head screwdriver or a socket wrench for any minor covers, but often, you can change the bulb with just your hands and perhaps a pair of pliers for stubborn connectors. Always check your owner’s manual for specific tool recommendations.
Question: How do I know if I need to change both headlight bulbs at once
Answer: It’s often a good idea to replace headlight bulbs in pairs. Even if only one bulb is out, the other one likely has a similar number of hours on it and could fail soon. Replacing them together ensures consistent brightness and beam pattern, and saves you from having to do the job again shortly.
Question: What is the difference between low beam and high beam bulbs
Answer: The low beam is designed for normal driving, providing adequate light without blinding other drivers. The high beam is brighter and projects light further down the road, used when there is no oncoming traffic. In most headlight assemblies, these are separate bulbs or different filaments within the same bulb.
The process for changing each might be slightly different.
Wrap Up
You’ve learned how to change a headlight bulb on a 2012 Malibu. It’s a straightforward process once you know the steps. Remember to always prioritize safety.
Now your car’s headlights are bright and clear, keeping you safe on the road.