New CRV Battery? The Best, Proven Code Reboot Guide
After installing a new battery in your Honda CR-V, rebooting the system is simple. First, let the engine idle for about 10 minutes to relearn its settings. Then, drive the car for 10-15 minutes at varying speeds. This allows sensors for systems like VSA, emissions, and TPMS to recalibrate and clear most warning lights.
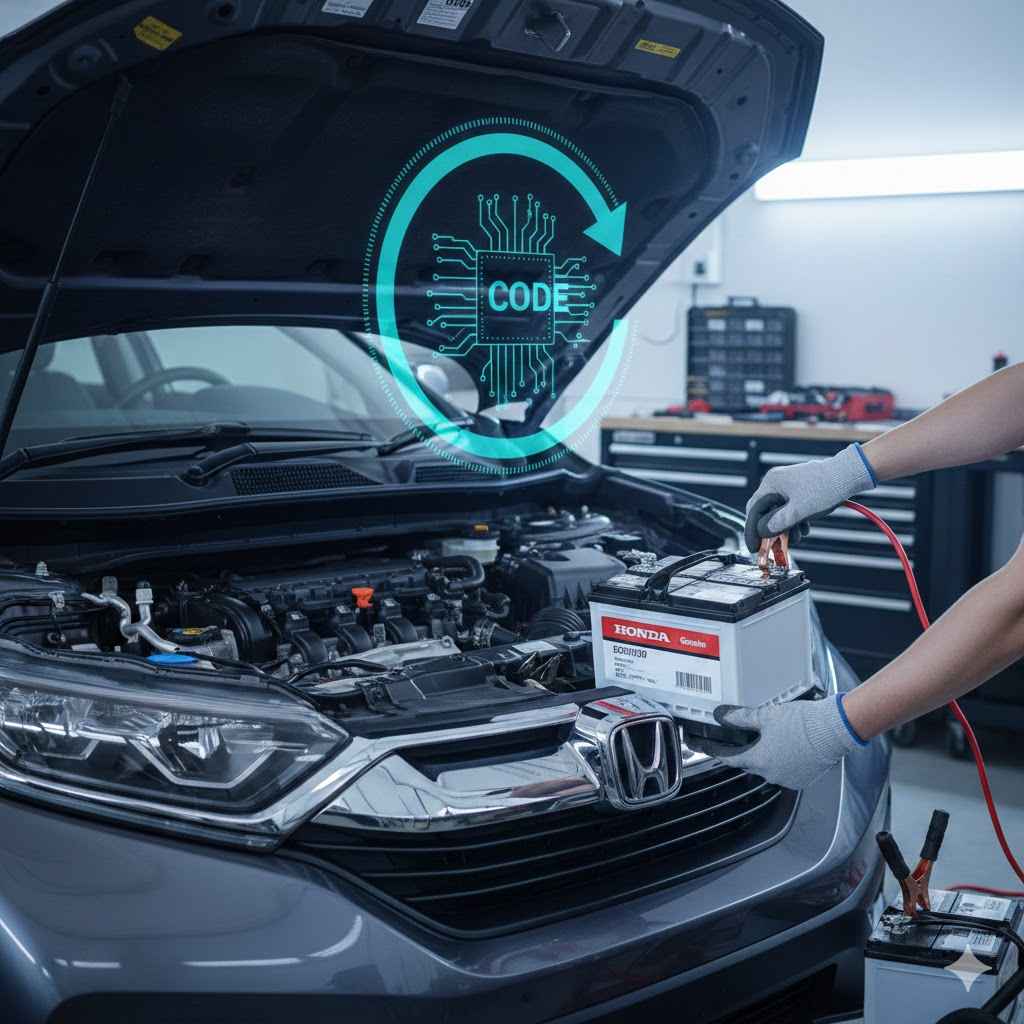
So, you did the right thing. You replaced the old, weak battery in your Honda CR-V with a fresh, new one. You turn the key, the engine starts up beautifully, but then… your dashboard lights up like a holiday tree. You see warnings for the braking system, power steering, vehicle stability assist (VSA), and more. It’s frustrating, right? You just fixed one problem, only to create another.
Don’t worry! This is a very common and completely normal situation. Your CR-V isn’t broken. It’s just a little confused. When you disconnected the old battery, its brain (the main computer) lost its memory. Now, it needs a little help to relearn how everything works.
I’m Md Meraj, and I’m here to walk you through the simple, proven steps to reboot your CR-V’s system. We’ll get those pesky warning lights turned off and have your car running smoothly in no time. Let’s get started!
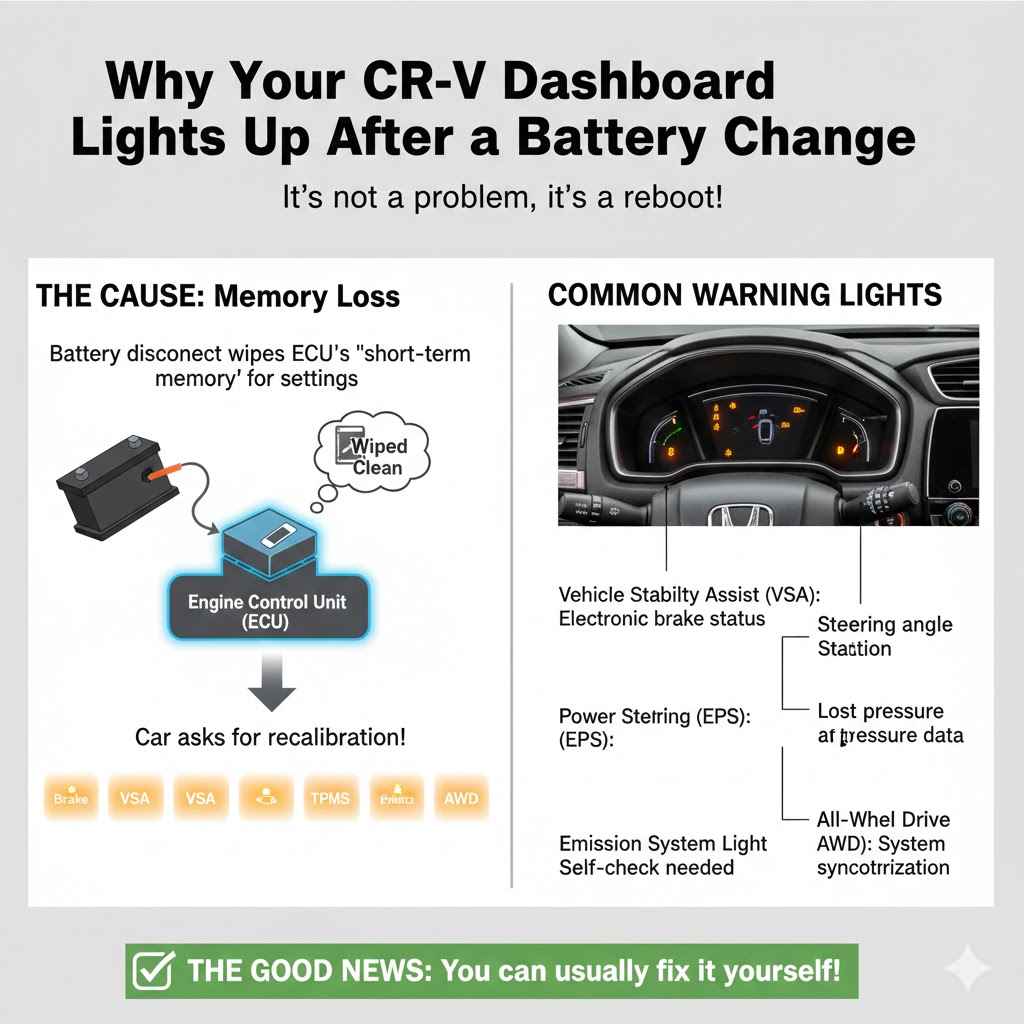
Why Your CR-V Dashboard Lights Up After a Battery Change
Think of your car’s main computer, the Engine Control Unit (ECU), as its short-term memory. It stores all kinds of information about how your car is running—from how much fuel to use to how the steering feels. When the battery is disconnected, this memory gets wiped clean. It’s like restarting your computer without saving your work.
When you connect the new battery and start the car, the ECU and all the other control modules wake up with no memory of their previous settings. They don’t know if the tires have the right pressure, if the steering wheel is straight, or if the engine is idling correctly. As a safety measure, they turn on their warning lights to tell you, “Hey, I need to be recalibrated!”
This is not a sign of a real problem. It’s just your car’s way of asking for a little time to get reacquainted with all its parts. The good news is that you can guide it through this “relearning” process yourself, without any expensive trips to the mechanic.
Common Warning Lights You Might See
After a battery swap, especially on a modern CR-V (like a 2017-2022 model), you might see a combination of these lights:
- Brake System Light: Often related to the electronic parking brake or brake hold feature.
- Vehicle Stability Assist (VSA) Light: The system that helps prevent skids needs to know the steering angle.
- Power Steering (EPS) Light: The electric power steering needs to recalibrate its center position.
- Tire Pressure Monitoring System (TPMS) Light: It lost the stored tire pressure data.
- Emission System Light: The ECU needs to run checks on the emissions components.
- All-Wheel Drive (AWD) System Light: The AWD system needs to confirm everything is working together.
Seeing all these at once can be alarming, but remember, they are usually linked to the same root cause: the temporary memory loss from the battery change.
Tools You’ll Need (Spoiler: Not Many!)
The best part about this process is that it requires almost no special tools. All you really need is:
- Your Honda CR-V Key: To start and drive the car.
- A Safe Place to Drive: A quiet road or an empty parking lot where you can drive safely and at different speeds.
- About 20-30 Minutes of Your Time: Patience is the most important tool here.
That’s it! No wrenches, no scanners, just you and your car.
The Step-by-Step Guide to Rebooting Your CR-V’s System
We’re going to follow a simple, two-part process: an idle relearn followed by a driving calibration. This combination solves the problem over 95% of the time. Follow these steps in order for the best results.
Step 1: The Idle Relearn Procedure (The “Wake-Up” Call)
This first step helps the engine computer relearn the correct idle speed. When the ECU’s memory is wiped, it forgets how to manage the engine at a standstill. This procedure teaches it again.
- Ensure Everything is Off: Before you start, make sure all accessories are turned off. This includes the radio, air conditioning/heater, headlights, and any interior lights. You want the engine to focus on just one thing: idling.
- Start the Engine: Put your key in the ignition and start your CR-V. Let it run in Park (P). Do not press the gas pedal.
- Let it Idle: Allow the engine to run undisturbed for about 10 minutes. You might notice the engine idle is a little rough or uneven at first. This is normal. As the ECU relearns, the idle should smooth out.
- Wait for the Radiator Fan: A good sign that the idle relearn is progressing is when the engine gets warm enough for the radiator cooling fan to cycle on and then off. On most vehicles, this happens within 5-10 minutes.
- Turn the Engine Off: After at least 10 minutes (or after the fan has cycled), turn the ignition completely off.
This simple process gives the main computer the baseline data it needs. For some of the less critical systems, this alone might be enough to turn off a few lights. But for the most important safety systems, we need to go for a drive.
Step 2: The Driving Calibration (The “Real World” Test)
Now that the engine knows how to idle, the other systems (like steering, stability, and brakes) need to see the car in motion to recalibrate themselves. This is where the magic really happens.
- Start Driving Smoothly: Start the engine again. Drive off slowly and smoothly. Avoid any sudden acceleration or hard braking.
- Find a Safe, Clear Road: Head to a road with minimal traffic where you can safely vary your speed. A quiet neighborhood street or an empty commercial area on a weekend is perfect.
- Vary Your Speed: Drive for about 10-15 minutes. During this time, gradually accelerate to around 40-50 mph and then gently slow down. Repeat this a few times if possible. The changing speeds give different sensors the data they need.
- Make Some Turns: Safely make a few left and right turns. This is crucial for the Vehicle Stability Assist (VSA) and Electric Power Steering (EPS) sensors to learn the steering wheel’s position relative to the wheels.
- Observe the Dashboard: As you drive, you should see the warning lights turn off one by one. The VSA and power steering lights are often the first to go out, followed by others. Don’t panic if they don’t all disappear at once.
- Park and Turn Off: After a successful drive, park the car, turn the engine off, and wait about a minute.
- The Final Check: Start the engine one more time. By now, all the warning lights related to the battery change should be gone!
Congratulations! You’ve successfully rebooted your CR-V’s computer system. It’s that simple.
What About Specific System Resets?
Sometimes, a couple of systems need a little extra nudge. Here’s how to handle them if they don’t reset automatically during your drive.
Resetting the Radio/Infotainment System
Older Hondas sometimes required a special radio code after a battery change. Thankfully, most modern CR-Vs (2017 and newer) don’t need a code. The audio system is linked to your car’s vehicle identification number (VIN). If your screen is asking for a code, try this first:
- Press and hold the audio system’s power button for a few seconds. This often forces the system to re-check the VIN and unlock itself.
- If that doesn’t work, you can usually retrieve your code online from the official Honda Radio/Navi Code website. You’ll need your VIN and the device’s serial number.
Resetting the Auto Up/Down Windows
Did your driver’s side window lose its “auto up” function? This is another easy fix.
- Roll the driver’s window all the way down by holding the switch.
- Once it’s down, release the switch and then press and hold it in the “down” position again for 3-5 seconds.
- Now, roll the window all the way up by pulling and holding the switch.
- Once it’s closed, release the switch and then pull and hold it in the “up” position again for 3-5 seconds.
The auto function should now be restored. Repeat this process for any other windows with an auto feature.
Calibrating the Tire Pressure Monitoring System (TPMS)
If the low tire pressure light stays on, it needs to be recalibrated. First, make sure all your tires are inflated to the pressure recommended on the sticker inside the driver’s door jamb.
Then, you can usually recalibrate the system through your infotainment screen:
- Go to ‘Settings’ on the touchscreen.
- Select ‘Vehicle’.
- Select ‘TPMS Calibration’.
- Select ‘Calibrate’.
The system will then begin the calibration process, which finishes as you drive.
Common CR-V Warning Lights and What They Mean After a Battery Change
Here’s a quick reference table to help you understand what your CR-V is trying to tell you. Remember, in this context, these lights are almost always due to a lack of calibration, not a real fault.
| Warning Light | What It Means Post-Battery Change | How to Fix It |
|---|---|---|
| VSA (Vehicle Stability Assist) | The system has lost its steering angle sensor calibration. | Usually clears after driving and making a few turns. |
| EPS (Electric Power Steering) | The power steering control unit needs to relearn the steering’s center position. | Clears automatically after driving a short distance in a straight line. |
| Brake System | The electronic parking brake and brake-hold systems need to re-sync. | Often clears after the idle relearn and a short drive. Applying and releasing the parking brake can also help. |
| TPMS (Tire Pressure Monitoring System) | The system’s stored tire pressure values have been erased. | Check tire pressures and use the infotainment screen to start calibration. |
| Check Engine / Emissions System | The ECU needs to run its self-checks, called “readiness monitors.” | Requires a drive cycle of mixed city and highway driving to complete. This can take longer than the other lights. |
Troubleshooting: What if the Lights Don’t Go Away?
If you’ve performed the idle relearn and gone for a 20-minute drive with varied speeds and turns, and one or more lights are still on, here are a few things to consider.
Give It More Time
Some systems, particularly the emissions system, require a longer and more specific drive cycle to complete their self-tests. If only the “Check Engine” light remains, you may just need to drive the car normally for a day or two. The U.S. Environmental Protection Agency provides details on how these on-board diagnostics (OBD) systems work to monitor emissions.
Check the Battery Connection
Go back and double-check your work. Are the new battery terminals clean and tight? A loose connection can cause all sorts of strange electrical issues and warning lights. The positive (red) and negative (black) clamps should not wiggle at all.
Check for Blown Fuses
It’s rare, but it’s possible to accidentally short something and blow a fuse during a battery installation. Check the main fuse boxes (usually one in the engine bay and one inside the cabin) for any blown fuses related to the systems with warning lights.
Consider an Underlying Issue
It’s possible, though unlikely, that a warning light is on because of a real problem that just happened to coincide with your battery change. If a specific light (like the ABS or SRS/airbag light) refuses to clear, it may be time to have a professional mechanic scan the codes to identify the specific fault.
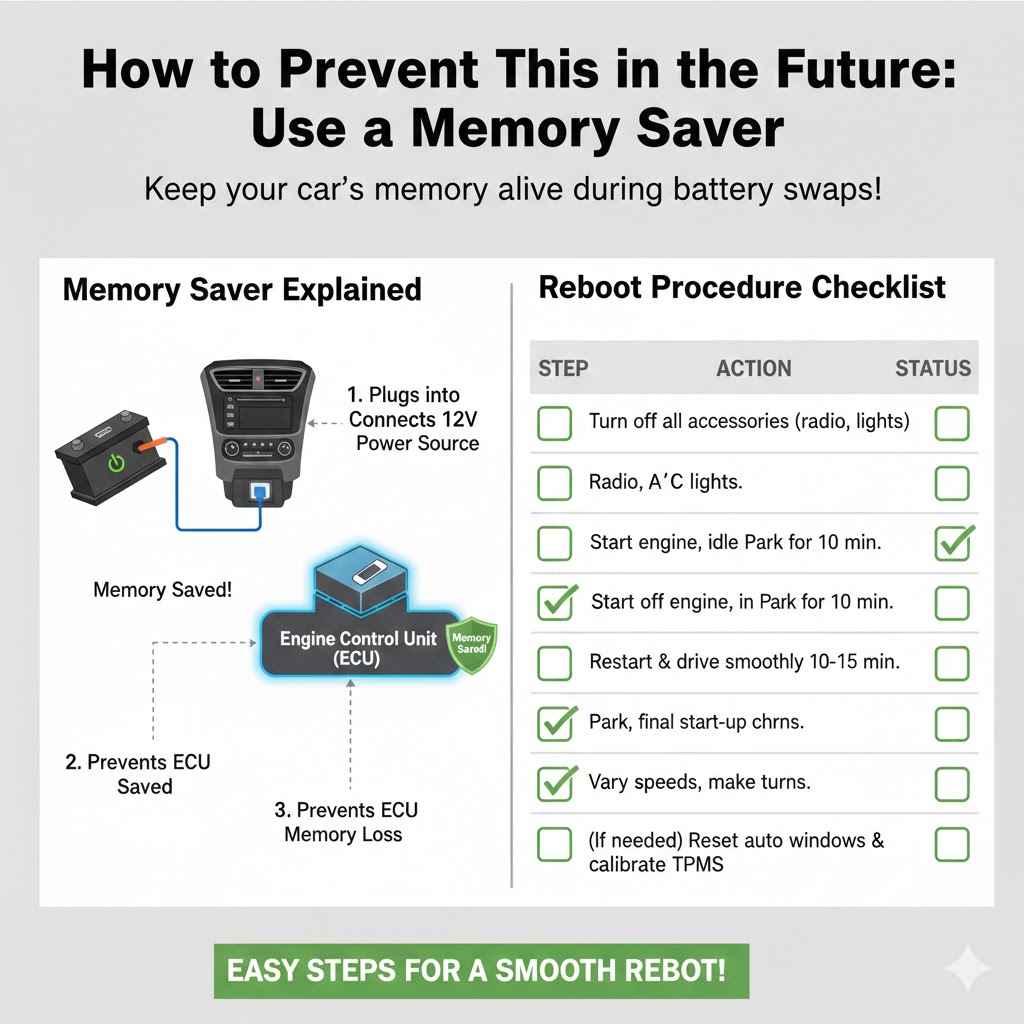
How to Prevent This in the Future: Use a Memory Saver
Want to avoid this whole reboot process next time? The trick is to keep the car’s computer system powered up while you change the battery. You can do this with a simple and inexpensive tool called a “computer memory saver.”
A memory saver is a device that plugs into your car’s OBD-II port (located under the dashboard on the driver’s side) and connects to a separate power source, like a small portable jump starter or another 12V battery. It provides just enough electricity to keep the ECU and other modules from losing their memory while the main battery is disconnected.
Reboot Procedure Checklist
Here is a simple checklist you can follow to make sure you cover all the bases.
| Step | Action | Status |
|---|---|---|
| 1 | Turn off all accessories (radio, A/C, lights). | ☐ Done |
| 2 | Start the engine and let it idle in Park for 10 minutes. | ☐ Done |
| 3 | Turn off the engine and wait 1 minute. | ☐ Done |
| 4 | Restart the engine and drive smoothly for 10-15 minutes. | ☐ Done |
| 5 | Vary speeds and make several left and right turns. | ☐ Done |
| 6 | Park, turn off the engine, and perform a final start-up check. | ☐ Done |
| 7 | (If needed) Reset auto windows and calibrate TPMS. | ☐ Done |
Frequently Asked Questions (FAQ)
1. Is it safe to drive my CR-V with all these warning lights on?
Yes, as long as the lights appeared immediately after changing the battery, it is generally safe to drive. The core functions of the car (engine, brakes, steering) are working. The lights are just indicating that the electronic safety systems need to be recalibrated. Drive cautiously until the lights turn off.
2. How long do I have to drive to reset the computers?
For most systems like VSA and power steering, a 10-15 minute drive is usually sufficient. The emissions system (check engine light) may take longer, sometimes a day or two of normal driving, to complete all its internal checks.
3. I did the driving reset, but one light is still on. What should I do?
If one light remains, first identify which one it is. If it’s the TPMS, perform the manual calibration through the infotainment screen. If it’s the check engine light, drive the car for another day. If it’s a critical safety light like ABS or Airbag (SRS) that won’t clear, it’s best to have it checked by a professional.
4. Will disconnecting the battery again fix the problem?
No, disconnecting the battery again will just restart the problem. The computers will lose their memory all over again, and you’ll be back to square one. The solution is the relearn procedure, not another disconnection.
5. Can a weak new battery cause these issues?
Absolutely. If the new battery is faulty or wasn’t fully charged when installed, it can provide unstable voltage, which confuses the car’s computers and can trigger warning lights. Make sure you bought a quality battery from a reputable source.
6. Why didn’t this happen on my older car?
Older cars had far fewer computer-controlled systems. A car from the 90s might only need to have its radio code re-entered and its idle relearned. Modern vehicles like your CR-V have dozens of interconnected modules for safety, emissions, and convenience, all of which need to communicate and be calibrated properly.
7. Do I need a special OBD-II scanner to do this?
No, you do not need a scanner for this standard recalibration procedure. The car is designed to relearn on its own through the idle and drive cycles. A scanner is only needed if you suspect there is a real fault code that needs to be diagnosed.
Conclusion: You’ve Got This!
Replacing a car battery is one of the most common and essential DIY maintenance tasks. Seeing your dashboard suddenly light up with warnings can be discouraging, but as you’ve learned, it’s a normal part of the process for a modern, sophisticated vehicle like the Honda CR-V.
By following the simple idle relearn and driving calibration steps, you are actively helping your car’s brain get back on track. You’re not just clearing codes; you’re restoring the precise settings that keep your CR-V safe, efficient, and comfortable to drive. You’ve saved yourself a trip to the dealership and gained valuable confidence in managing your own vehicle.
So next time a friend or family member faces the same issue, you can be the knowledgeable guide who reassures them and says, “Don’t worry, it’s an easy fix. Let’s go for a little drive.”