How to Check Transmission Oil in a 2012 Chevy Cruze
Many car owners find checking their transmission fluid a bit tricky. It’s not always as straightforward as checking your engine oil. This is especially true for newer cars like the 2012 Chevy Cruze, which might not have a simple dipstick.
But don’t worry! This guide will walk you through exactly How to Check Transmission Oil in a 2012 Chevy Cruze (With Pictures). We’ll make it easy, step-by-step, so you can feel confident doing this important maintenance yourself.
Understanding Your Chevy Cruze Transmission Oil
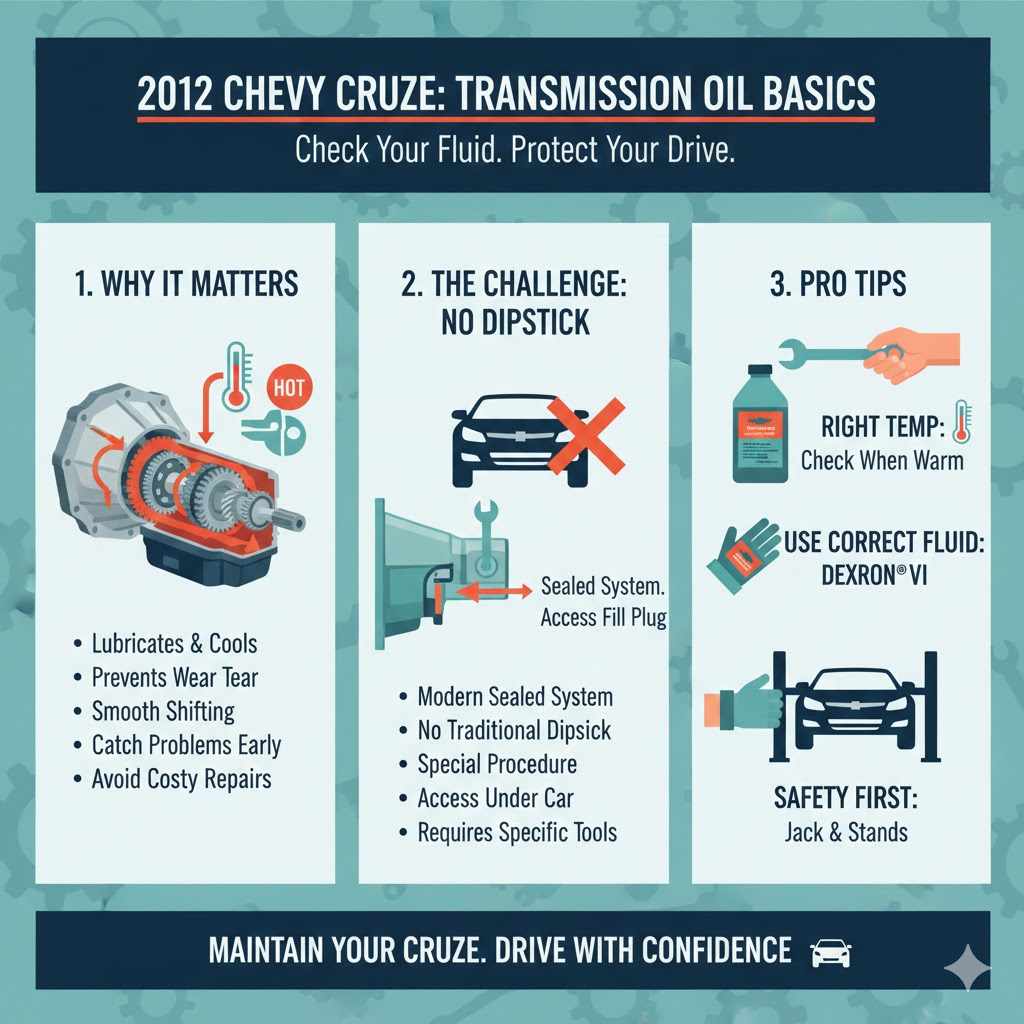
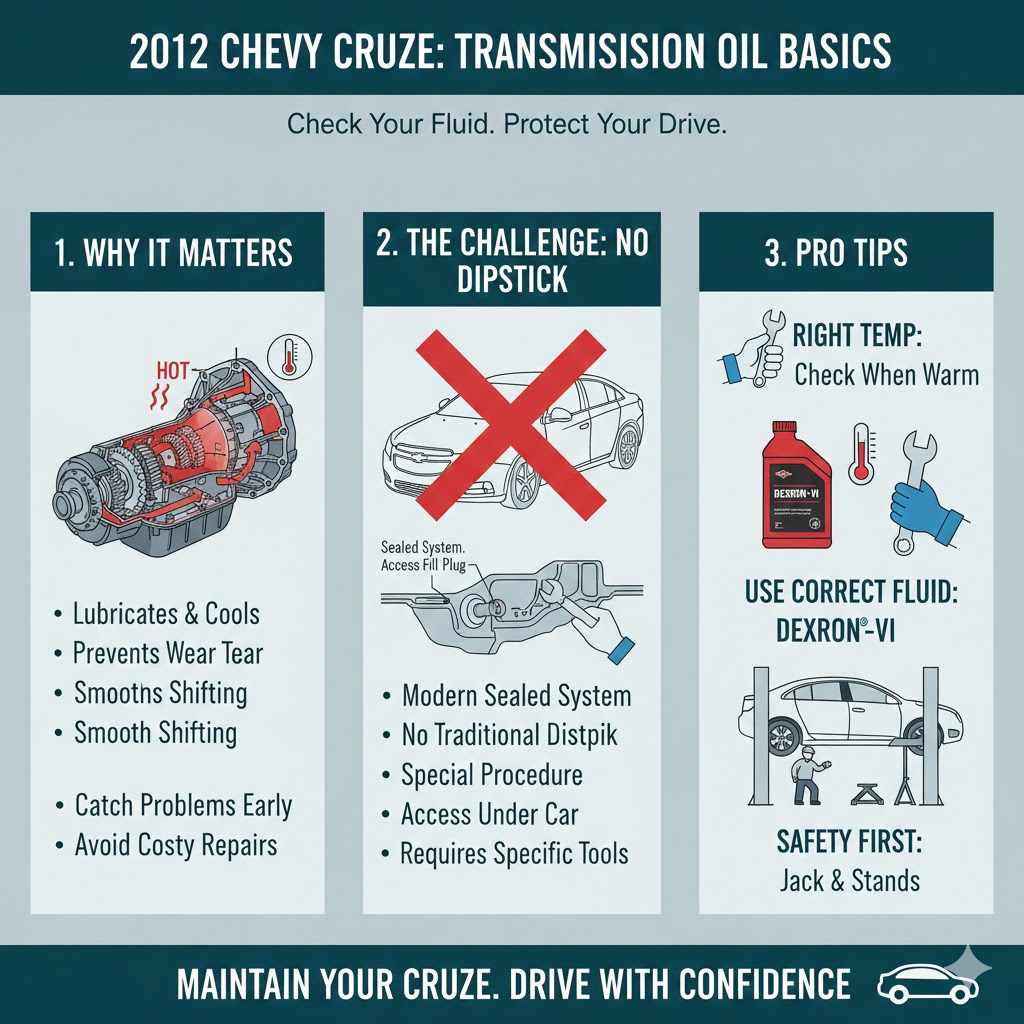
Checking your transmission fluid is a vital part of keeping your 2012 Chevy Cruze running smoothly. Transmission fluid lubricates and cools the transmission, allowing gears to shift properly. Low or dirty fluid can lead to serious transmission problems, costing a lot to fix.
Many drivers find this task challenging because modern cars often lack a traditional dipstick for transmission fluid. Instead, they might have a sealed system or a different checking procedure. This guide aims to demystify the process, providing clear instructions and visual cues.
Why Checking Transmission Fluid Matters
Transmission fluid is the lifeblood of your automatic transmission. It does more than just lubricate; it also cools the transmission components, prevents wear and tear, and helps with hydraulic pressure needed for shifting gears. When the fluid level is low, the transmission can overheat and parts can grind against each other, causing damage.
If the fluid is old and dirty, it loses its effectiveness, leading to poor shifting performance and potential component failure.
Regular checks help you catch problems early. You might notice rough shifting, slipping gears, or strange noises. These are often signs that your transmission fluid needs attention.
By knowing how to check it, you can address these issues before they become major breakdowns. This saves you money and keeps your Cruze reliable on the road.
Types of Transmission Systems
Your 2012 Chevy Cruze likely has an automatic transmission. There are different types of automatic transmissions, but the most common for this model year is a traditional hydraulic automatic transmission. Some vehicles also use Continuously Variable Transmissions (CVTs), which operate differently.
While the fundamental need for transmission fluid remains, the checking procedure can vary slightly.
For most 2012 Chevy Cruze models, you will be dealing with a standard automatic transmission. These rely on a complex system of gears, clutches, and bands, all bathed in transmission fluid. The fluid’s viscosity, cleanliness, and level are critical for the proper functioning of these internal components.
It’s important to use the correct type of fluid specified by Chevrolet for your vehicle.
CVTs, on the other hand, use belts or chains to provide an infinite range of gear ratios. While they also require fluid, the checking process might be different or even require a specialized tool. However, for the vast majority of 2012 Chevy Cruze owners, the focus will be on the hydraulic automatic transmission.
Common Challenges for Beginners
One of the biggest hurdles for beginners is the absence of a typical transmission dipstick. Many newer vehicles, including the 2012 Chevy Cruze, have a sealed transmission system. This means you can’t just pull out a dipstick and check the level like you would with engine oil.
This design choice is often made for several reasons, including preventing contamination and ensuring the correct fluid type is used.
Another challenge is knowing the correct procedure and the right tools. Without a dipstick, you might need to access a fill plug or a specific checking port. This requires getting under the car and identifying the correct components.
The lack of readily available information can also be intimidating. Many people feel unsure about working on their transmission, fearing they might cause more harm than good.
This guide is designed to overcome these challenges. We will provide clear, easy-to-follow steps that bypass the need for specialized jargon. You’ll learn how to safely access and check your transmission fluid, even without a dipstick, making this essential maintenance accessible to everyone.
Gathering Your Tools and Supplies
Before you start checking your transmission fluid, having the right tools and supplies makes the job much easier and safer. You’ll want to be prepared so you don’t have to stop mid-task to find something. This preparation ensures a smooth and efficient process.
Essential Tools You’ll Need
To accurately check your transmission fluid, you’ll need a few key items. First, you’ll need a car jack and sturdy jack stands to safely lift and support your vehicle. Never work under a car supported only by a jack.
You’ll also need a socket set, as you’ll likely be removing a fill plug or a level checking plug. A wrench might also be necessary depending on the plug design.
A flashlight is crucial for seeing into tight spaces under the car. You’ll also need a funnel with a long, flexible tube. This is important for adding fluid if needed.
Lastly, a clean rag or shop towel is indispensable for wiping away any excess fluid and cleaning up your workspace. Gloves are a good idea to keep your hands clean.
For inspecting the fluid itself, you might want a clean, light-colored container to catch a small sample. This allows you to see the fluid’s color and consistency more clearly. A small mirror on a handle can also be surprisingly helpful for seeing areas that are difficult to reach directly.
Choosing the Right Transmission Fluid
Using the correct transmission fluid is paramount. The wrong type of fluid can damage your transmission and lead to costly repairs. For your 2012 Chevy Cruze, it’s crucial to consult your owner’s manual.
Chevrolet specifies a particular type of fluid that is compatible with your transmission’s components.
The most common specification for automatic transmissions in vehicles like the Cruze is Dexron VI. However, always confirm this in your owner’s manual. Using a fluid that doesn’t meet the manufacturer’s specifications can cause shifting problems, increased wear, and even transmission failure.
It’s better to be safe and use the exact fluid recommended.
When purchasing fluid, look for a reputable brand and ensure the product explicitly states it meets the Dexron VI (or whatever your manual specifies) standard. Don’t rely on generic “universal” transmission fluids, as they may not provide the precise lubrication and friction characteristics your Cruze transmission needs.
Safety Precautions to Follow
Safety is the most important aspect when working on your car, especially when getting underneath it. Always park your car on a flat, level surface. Engage the parking brake firmly.
Use wheel chocks on the rear wheels for extra security.
When lifting the vehicle, use a reliable car jack and immediately place sturdy jack stands under the designated support points. Give the car a gentle shake to ensure it’s stable before you go underneath. Wear safety glasses to protect your eyes from any falling debris or splashing fluid.
Always allow the engine and exhaust components to cool down before working underneath the vehicle, as they can become extremely hot.
If you’re unsure about any step or feel uncomfortable, it’s always best to consult a professional mechanic. Your safety is more important than saving a few dollars. Following these safety guidelines will help prevent accidents and injuries.
The Step-By-Step Process
Now that you have your tools and supplies ready, let’s get started with the actual process of checking your transmission fluid. This procedure focuses on how to check transmission fluid in a 2012 Chevy Cruze without a traditional dipstick. We’ll guide you through each action clearly.
Preparing Your Vehicle
First, ensure your 2012 Chevy Cruze is parked on a level surface. Engage the parking brake securely. Start the engine and let it run for about 10-15 minutes.
This is important because the transmission fluid level needs to be checked when the fluid is warm and circulating. This mimics the conditions when the car is driven normally.
Once the engine has warmed up, turn it off. Now, you can safely lift the front of the vehicle using your car jack and secure it with jack stands. Make sure the jack stands are placed on solid frame points and the vehicle is stable before proceeding.
This gives you the necessary access to the underside of the transmission.
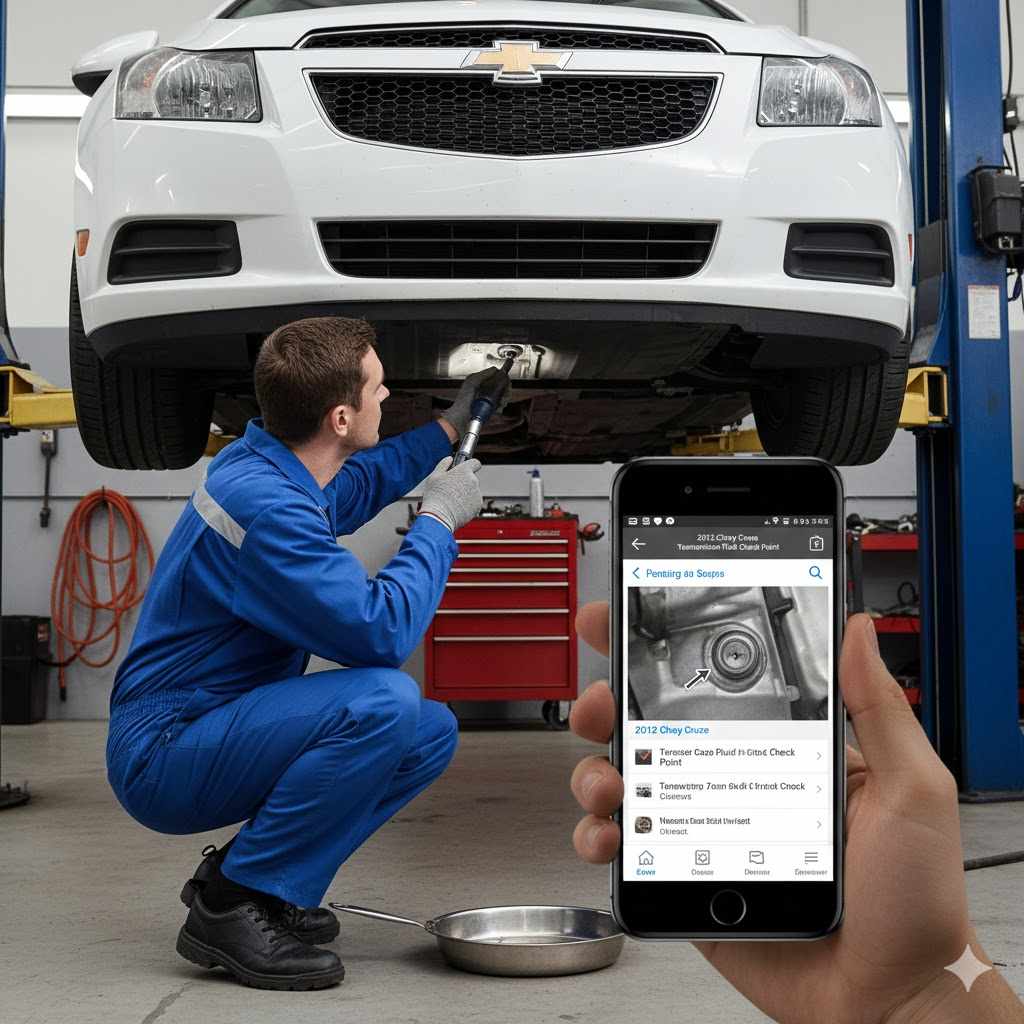
Locating the Transmission Fill/Check Plug
The transmission fluid level is typically checked through a specific plug located on the transmission housing. For many 2012 Chevy Cruze models, this plug is often a level checking plug or a fill plug that also serves as a level check. You will need to get under the car to find it.
Look for the transmission itself, which is usually located towards the front of the car, attached to the engine. On the side or bottom of the transmission casing, you’ll find a plug. It often looks like a bolt.
Sometimes, there might be two plugs: a fill plug higher up and a level check plug below it. The exact location can vary slightly depending on the transmission model. Consult your owner’s manual or an online service manual if you’re having trouble locating it.
The fill plug is typically larger and is where you would add fluid. The level check plug, if separate, is positioned at the correct fluid level for the transmission. In many sealed systems, the fill plug is also the point where you check the level.
You might need to remove an outer cap or shield to access the plug itself. Always ensure you are identifying the correct plug for the transmission, not for the engine oil or any other component.
Checking the Fluid Level
With the vehicle safely elevated and the plug located, use your socket wrench or appropriate tool to carefully loosen and remove the level checking plug. Be prepared for a small amount of fluid to drain out; this is normal. Have a clean rag ready to catch any drips.
Once the plug is removed, observe the fluid. If the fluid level is correct, it should just start to trickle out or be right at the bottom edge of the plug hole. If very little or no fluid comes out, the fluid level is too low.
If you can’t see any fluid at all, or only a few drops, it’s a strong indication that your transmission fluid is low. If fluid comes out in a steady stream, it’s too high. The ideal situation is a slow drip or just reaching the bottom of the hole.
This visual check is your primary indicator. If you are unsure, you can use a small, clean, thin tube or even a clean straw to gently insert into the hole and see if you can feel the fluid level. Another method is to catch the fluid in a clean, light-colored container to better assess its condition.
It is also a good time to assess the condition of the fluid. Transmission fluid should typically be a clear red color and have a slightly sweet smell. If it looks dark brown or black, or if it smells burnt, it’s a sign that the fluid is old and needs to be changed.
Adding Transmission Fluid (If Necessary)
If you determined that the transmission fluid is low, you’ll need to add more. Attach your flexible funnel to the fill plug opening (which might be the same plug you removed for checking, or a separate one slightly higher up). Slowly pour in the recommended type of transmission fluid, a little at a time.
After adding a small amount (e.g., a quarter of a quart), wait a few minutes for the fluid to settle. Then, re-check the level using the same method as before. Repeat this process, adding fluid incrementally and checking the level, until the fluid just begins to trickle out of the checking port.
It’s crucial not to overfill the transmission, as this can cause its own set of problems, including foaming and overheating.
Once the fluid level is correct, reinsert and tighten the fill/check plug securely. Do not overtighten it, as this could strip the threads. Lower the vehicle safely off the jack stands.
After adding fluid and reassembling, start the engine and let it run. Shift through all the gears (Park, Reverse, Neutral, Drive, and any manual modes), pausing for a few seconds in each. This helps circulate the new fluid.
Then, turn off the engine and re-check the fluid level one last time to ensure accuracy. This final check confirms the level is still correct after the fluid has circulated.
Assessing Fluid Condition and Color
Beyond just the fluid level, the appearance and smell of your transmission fluid can tell you a lot about its health and the condition of your transmission. This is a key part of the diagnostic process that many people overlook.
What Fluid Color Means
New automatic transmission fluid is typically bright red and translucent. It should look clean and appealing. As it circulates through the transmission and is exposed to heat and friction, it gradually darkens.
A slightly darker red or pinkish hue can be normal for fluid that has been in use for some time.
However, if the fluid appears dark brown or black, it’s a clear indicator that the fluid is old, degraded, and potentially contaminated. This dark color often signifies that the fluid has been subjected to excessive heat or that there are internal components wearing down, creating debris.
If you notice any signs of a milky or foamy appearance, this usually means that coolant has leaked into the transmission fluid. This is a serious issue that requires immediate attention, as the combination of coolant and transmission fluid can quickly damage internal transmission parts.
The Smell Test
The smell of your transmission fluid can also provide valuable clues. Healthy transmission fluid has a slightly sweet, oily odor. This is normal and expected.
If you notice a burnt smell, similar to burnt toast or burnt rubber, it’s a strong warning sign.
A burnt smell typically indicates that the transmission fluid has overheated. Overheating can be caused by low fluid levels, towing heavy loads, aggressive driving, or internal transmission problems. When fluid overheats, its lubricating properties degrade, and it can start to break down.
This smell means the transmission is likely working harder than it should be, and damage could be occurring.
If you detect a burnt smell, it’s highly recommended to have your transmission inspected by a qualified mechanic as soon as possible. Ignoring this warning sign can lead to premature transmission failure.
Signs of Contamination and Wear
When checking the fluid, take a moment to look for any unusual particles or debris. If you drain a small amount into a clean, light-colored container, you can examine it closely. Small, metallic particles could indicate wear on internal metal components like gears or clutches.
Rubber particles might suggest a failing seal or gasket. If you see gritty material, it could be evidence of internal corrosion or wear. Any significant amount of debris in the transmission fluid is a cause for concern and warrants further investigation by a professional.
The goal is to see clean, red fluid. If your fluid is dark, smells burnt, or contains visible particles, it’s a sign that a transmission fluid change might be due, or that there could be an underlying issue that needs diagnosing and repairing.
When to Seek Professional Help
While checking transmission fluid is a manageable DIY task for many car owners, there are certain situations where it’s best to let the professionals handle it. Recognizing when to call a mechanic can save you from potential damage and costly mistakes.
Signs of Serious Transmission Problems
If your transmission is making unusual noises, such as whining, clunking, or grinding sounds, it’s a clear indication of a problem. If you experience slipping gears, where the engine revs up but the car doesn’t accelerate as it should, this is another serious symptom.
Difficulty shifting between gears, or the transmission getting stuck in a particular gear, also points to a significant issue. If you notice transmission fluid leaks under your car, especially if the fluid looks dark or smells burnt, it’s time to seek expert advice. Any warning lights on your dashboard related to the transmission should also be investigated promptly.
When you check the fluid, if it’s extremely low and dark with a burnt smell, this suggests the transmission has been running under stress for some time. In such cases, a simple top-off might not be enough, and a more in-depth diagnosis is needed.
Complex Procedures Requiring Special Tools
While the basic check is straightforward, some transmission fluid changes or services can be more complex. For example, some vehicles require a specific procedure to drain and fill, or they might need a special fluid exchange machine. Some sealed transmissions might require a specific filling tool to ensure the correct pressure and level are achieved.
If your owner’s manual indicates a particular procedure that involves specialized tools or equipment, it might be wiser to take your car to a dealership or a reputable transmission shop. They have the necessary expertise and equipment to perform these tasks correctly, ensuring no damage is done to your transmission.
For instance, some manufacturers recommend specific methods for flushing the transmission fluid, which involves running the engine and circulating new fluid while simultaneously draining the old. This process requires careful execution to avoid introducing air into the system or damaging seals.
When in Doubt, Consult an Expert
If at any point you feel uncertain or uncomfortable with the process, don’t hesitate to seek professional help. It’s always better to pay a mechanic for their expertise than to risk causing expensive damage to your transmission. Mechanics have the experience and knowledge to accurately diagnose issues and perform necessary repairs or maintenance.
They can also confirm the correct type and amount of transmission fluid to use, ensuring your car receives the best possible care. A quick visit to a trusted mechanic can provide peace of mind and ensure your 2012 Chevy Cruze’s transmission stays in optimal condition for years to come. Remember, early detection and professional intervention can often prevent minor issues from becoming major, costly repairs.
Frequently Asked Questions
Question: Do I need to check my transmission fluid when the engine is hot or cold?
Answer: For most automatic transmissions, including those in a 2012 Chevy Cruze, it’s best to check the fluid when the engine is warm and running. This is because the fluid expands when hot and circulates through the transmission. Some vehicles may specify a cold check, so always refer to your owner’s manual for the exact procedure.
Question: How often should I check my transmission fluid?
Answer: It’s a good practice to check your transmission fluid at least once a month, or every other oil change. You should also check it if you notice any symptoms like rough shifting or strange noises. Regular checks help catch potential problems early.
Question: My transmission fluid looks dark red. Is that okay?
Answer: Dark red transmission fluid is often normal, especially if it’s not excessively dark or doesn’t smell burnt. Transmission fluid darkens over time as it circulates and is exposed to heat. However, if it’s black or smells burnt, it needs attention.
Question: What happens if I overfill my transmission with fluid?
Answer: Overfilling can be just as bad as having too little fluid. It can cause the fluid to foam, leading to poor lubrication, overheating, and potential damage to seals and components. It can also cause shifting problems and leaks.
Question: Can I use a different type of transmission fluid if I can’t find the recommended one?
Answer: It’s strongly advised not to substitute transmission fluid types unless specifically permitted by your owner’s manual. Using the wrong fluid can cause significant damage to your transmission. Always use the fluid recommended by Chevrolet for your 2012 Cruze.
Summary
Learning how to check transmission oil in a 2012 Chevy Cruze is an important maintenance skill. By following these clear steps and understanding what to look for, you can ensure your transmission stays healthy. Regularly checking the fluid level and condition helps prevent costly repairs and keeps your car running smoothly on the road.