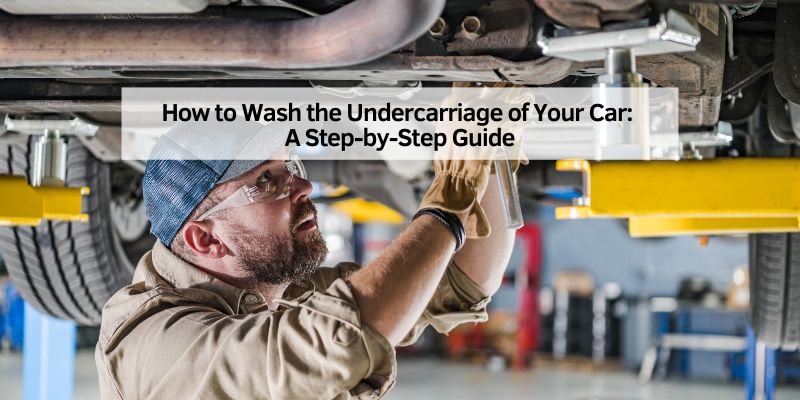
How to Wash the Undercarriage of Your Car: A Step-by-Step Guide
Hey there! If you’re like me, you probably love keeping your car looking sharp and running smoothly. But let’s be real—most of us focus on washing the shiny exterior and forget about the grimy underbelly of our vehicles. The undercarriage of your car takes a beating from dirt, salt, mud, and road grime, especially if you live in a place with harsh winters or dusty roads. Washing it regularly can extend your car’s life and keep it in top shape. I’ve spent years figuring out the best ways to clean my car’s undercarriage, and I’m excited to share my tips with you. Let’s dive into why and how to wash the undercarriage of your car, step by step, so you can keep your ride in pristine condition.
Why Washing Your Car’s Undercarriage Matters
I used to think washing the undercarriage was just for car enthusiasts who obsess over every detail. But after seeing rust creep up on an old truck I owned, I learned my lesson. The undercarriage is the part of your car that’s closest to the road. It gets blasted with everything—road salt in the winter, mud from off-road adventures, and even oil or grease from city streets. If you don’t clean it, that gunk can cause rust, corrosion, or damage to critical parts like the suspension or exhaust system.
When I lived in the Midwest, the salty winter roads were a nightmare for my car. Salt sticks to the undercarriage and eats away at the metal if you let it sit too long. Even if you’re in a sunny state like California, dust and debris can build up and trap moisture, which isn’t great either. Regular cleaning prevents these issues and saves you from expensive repairs down the road. Plus, a clean undercarriage just feels good—it’s like giving your car a full spa treatment.
Tools and Supplies You’ll Need
Before I start washing my car’s undercarriage, I make sure I have the right tools. It doesn’t take much, but having the proper gear makes the job easier and safer. Here’s what I use, and you can find most of these at your local auto store or online:
| Tool/Supply | Purpose |
|---|---|
| Pressure washer | Blasts away dirt, grime, and debris with high-pressure water. |
| Garden hose with spray nozzle | A backup for rinsing or if you don’t have a pressure washer. |
| Undercarriage sprayer | A special attachment for pressure washers to clean hard-to-reach areas. |
| Car wash soap | Cuts through grease and grime without damaging your car’s undercoating. |
| Degreaser | Tackles tough oil or grease buildup. |
| Jack and jack stands | Lifts the car safely for better access to the undercarriage. |
| Creeper or tarp | Lets you lie down comfortably while inspecting or cleaning. |
| Protective gloves | Keeps your hands safe from chemicals and sharp edges. |
| Safety glasses | Protects your eyes from flying debris or water spray. |
| Brush or sponge | Helps scrub stubborn spots if needed. |
I always double-check that my pressure washer is in good shape and that I have enough soap. If you don’t have a pressure washer, don’t worry—a garden hose with a strong nozzle can work, though it might take a bit more effort.
Preparing Your Car for Undercarriage Washing
I can’t stress enough how important it is to prep your car before diving in. A little setup goes a long way in making the process smooth and safe. First, I park my car on a flat, stable surface like my driveway or a garage. If I’m using a jack to lift the car, I make sure it’s on solid ground to avoid any accidents.
Next, I gather all my tools and supplies so I’m not running around mid-wash. I also check the weather—washing the undercarriage on a rainy day is a losing battle. A sunny or dry day is best so the undercarriage can dry completely afterward. If I’m lifting the car, I use a jack and secure it with jack stands. Safety is key here—never crawl under a car that’s only held up by a jack.
Before I start spraying, I put on my gloves and safety glasses. The undercarriage can have sharp edges or loose debris, and I don’t want to take any chances. I also make sure the car is cool to the touch. If you’ve just driven it, let it sit for an hour or two. Hot metal and cold water don’t mix well and can cause damage.
Step-by-Step Guide to Washing the Undercarriage
Now, let’s get to the fun part—actually cleaning the undercarriage! I’ve broken this down into clear steps based on what’s worked best for me over the years. Follow along, and you’ll have a sparkling clean undercarriage in no time.
Step 1: Rinse Off Loose Debris
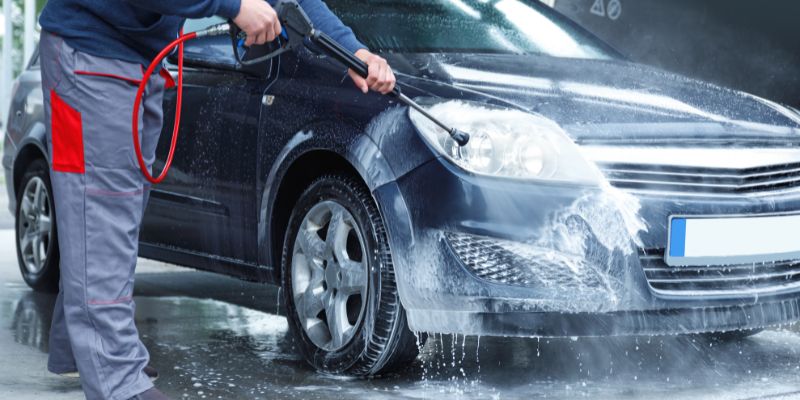
I start by giving the undercarriage a good rinse to loosen up dirt and grime. If I’m using a pressure washer, I set it to a medium setting—around 1500-2000 PSI—so it’s strong enough to clean but not so powerful that it damages anything. I aim the nozzle at a 45-degree angle to avoid direct hits on sensitive parts like wiring or seals. If I’m using a garden hose, I use a high-pressure nozzle and get as close as I can for maximum impact.
I work from the front of the car to the back, making sure to hit all areas, including the wheel wells, exhaust, and suspension components. This step is all about getting rid of the easy stuff so I can focus on the tougher grime later.
Step 2: Apply a Degreaser for Tough Spots
Some parts of the undercarriage, like around the exhaust or near the wheels, can get caked with grease or oil. I’ve found that a good degreaser is a lifesaver here. I spray it on the greasy spots and let it sit for a few minutes to break down the buildup. Be sure to use a degreaser that’s safe for automotive use—I learned the hard way that some household cleaners can strip protective coatings.
If I’m dealing with really stubborn spots, I’ll grab a brush or sponge and give it a quick scrub. But honestly, the degreaser usually does most of the work if you let it sit long enough.
Step 3: Use Car Wash Soap for a Deep Clean
After rinsing and degreasing, I mix some car wash soap with water in a bucket or use a foam cannon if I’m feeling fancy. I apply the soapy water to the undercarriage, either with the pressure washer’s soap setting or by hand with a sponge. The soap helps lift off any remaining dirt and gives the undercarriage a thorough clean.
I pay extra attention to areas like the wheel wells and seams, where dirt loves to hide. If I’m using a pressure washer with an undercarriage sprayer attachment, this step is a breeze—it gets into all the nooks and crannies without me having to crawl around too much.
Step 4: Rinse Thoroughly
Once the soap has done its job, I rinse everything off with clean water. I make sure to get every spot, because leftover soap or degreaser can attract more dirt later. I also check for any missed areas—sometimes I’ll spot a patch of grime I didn’t notice before. If I’m using a pressure washer, I keep the nozzle at an angle again to protect the car’s components.
Step 5: Dry the Undercarriage
Drying the undercarriage is just as important as washing it. If you leave it wet, especially in humid areas, you’re inviting rust to set in. I usually let my car air dry in the sun, but if I’m in a hurry, I’ll use a leaf blower or compressed air to speed things up. If I’ve lifted the car, I’ll lower it back down carefully once it’s dry.
Tips for Maintaining a Clean Undercarriage
Over the years, I’ve picked up a few tricks to keep my car’s undercarriage in great shape between washes. First, I try to wash it every couple of months, or more often if I’m driving on salty or muddy roads. If I know I’ve been through a particularly messy area, like a construction zone, I’ll rinse it off as soon as I can.
I also inspect the undercarriage regularly for signs of rust or damage. Catching these early can save you a ton of money. If you live in a salty region, consider applying an undercoating or rust protectant after cleaning. I did this on my current car, and it’s held up beautifully.
Another tip is to avoid driving through deep puddles or flooded areas if you can. Water can get trapped in tight spaces and cause corrosion. If you do get stuck in water, give the undercarriage a quick rinse as soon as possible.
Common Mistakes to Avoid
I’ve made my fair share of mistakes when washing my car’s undercarriage, so let me save you some trouble. One big no-no is using too much pressure with a pressure washer. I once got overzealous and damaged a rubber seal because I cranked the PSI too high. Stick to a moderate setting and keep the nozzle at an angle.
Another mistake is skipping the drying step. I used to think it wasn’t a big deal, but leaving water on the undercarriage led to some surface rust on my old car. Also, don’t use dish soap or harsh household cleaners—they can strip protective coatings and cause more harm than good.
Finally, don’t crawl under the car without proper support. I know it’s tempting to just slide under and start scrubbing, but a jack alone isn’t enough. Always use jack stands to keep yourself safe.
Benefits of Regular Undercarriage Cleaning
After years of washing my car’s undercarriage, I can tell you the benefits are worth the effort. For one, it prevents rust, which can eat away at your car’s frame and lead to costly repairs. It also keeps your suspension, exhaust, and other components in better condition, which means fewer trips to the mechanic.
A clean undercarriage can even improve your car’s resale value. When I sold my last car, the buyer was impressed by how well-maintained the undercarriage was. It showed I cared about the car, and I got a better price because of it. Plus, there’s just something satisfying about knowing your car is clean inside and out.
Conclusion
Washing the undercarriage of your car might not be the most glamorous task, but it’s one of the smartest things you can do to keep your vehicle in top shape. I’ve seen firsthand how a little effort can prevent rust, extend the life of your car, and even save you money in the long run. By following the steps I’ve shared—rinsing, degreasing, soaping, rinsing again, and drying—you can tackle this job like a pro. Grab your tools, set aside an afternoon, and give your car the care it deserves. Trust me, you’ll feel great knowing your ride is clean and protected from the elements. Happy washing!
Frequently Asked Questions
Why should I wash my car’s undercarriage?
Washing the undercarriage removes dirt, salt, and grime that can cause rust and damage. It keeps your car’s components in good shape and can prevent expensive repairs.
How often should I wash my car’s undercarriage?
I recommend washing it every two to three months, or more often if you drive on salty roads or through mud. A quick rinse after messy drives helps too.
Can I wash the undercarriage without a pressure washer?
Yes, a garden hose with a strong nozzle works, though it takes more effort. You can also use a sponge or brush for stubborn spots.
Is it safe to crawl under my car to clean it?
Only if the car is properly supported. Use a jack to lift it and secure it with jack stands. Never rely on a jack alone.
What kind of soap should I use?
Use car wash soap that’s safe for automotive surfaces. Avoid dish soap or household cleaners, as they can damage protective coatings.
Can washing the undercarriage prevent rust?
Absolutely. Regular cleaning removes corrosive materials like salt and dirt, which helps prevent rust and keeps your car in better condition.