Red Carbon Fiber Vinyl Wrap: Revamp Your Ride!
Red carbon fiber vinyl wrap is a high-quality adhesive film used for vehicle customization. It mimics the look of real carbon fiber while being more affordable and easier to apply.
Choosing red carbon fiber vinyl wrap allows you to elevate the aesthetic of your vehicle or project. This wrap offers a sleek, modern appearance that stands out on the road. It’s ideal for those looking to add a sporty touch without the high costs of real carbon fiber.
The vinyl is durable, weather-resistant, and easy to clean, making it suitable for various surfaces. Whether you’re personalizing your car, laptop, or other items, this vibrant wrap provides a unique look. With simple installation techniques, anyone can transform their belongings quickly and effectively.
Introduction To Red Carbon Fiber Vinyl Wrap
Red Carbon Fiber Vinyl Wrap is a popular choice for many. It offers a bold look that stands out. Choosing red adds a sense of excitement and energy to any surface.
Benefits of Carbon Fiber Vinyl are numerous. It is durable and can resist scratches and fading. This wrap is also lightweight and easy to apply. It can be removed without damaging the original surface. Plus, it provides a unique texture that mimics real carbon fiber.
Many people prefer this wrap for their cars and gadgets. It enhances the overall aesthetic and adds a touch of style. The striking red color helps in making a statement.
Tools And Materials Needed
For a successful installation of red carbon fiber vinyl wrap, specific tools are necessary. Here are the essential tools you will need:
- Utility Knife: For precise cutting of the vinyl.
- Squeegee: Helps to smooth out bubbles and wrinkles.
- Heat Gun: Makes the vinyl more flexible during application.
- Cleaning Supplies: Use soap and water to clean the surface.
- Measuring Tape: Ensures accurate measurements for the wrap.
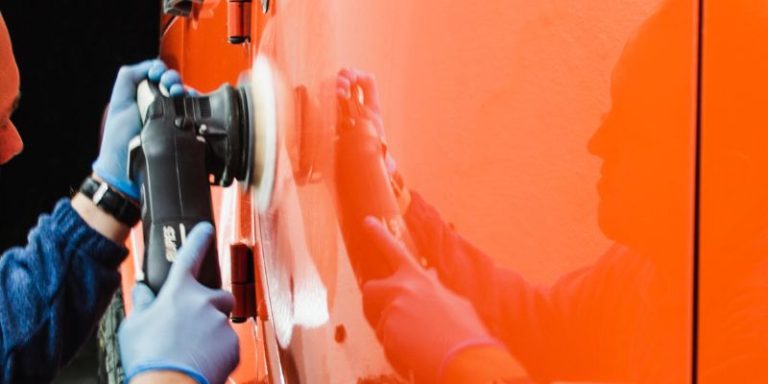
Preparing your vehicle is an important step. Clean the surface thoroughly. Remove any dirt, wax, or grease. This ensures better adhesion of the vinyl. Dry the surface completely before applying the wrap.
Step-by-step Installation Guide
Start by cleaning the surface thoroughly. Use soap and water to remove dirt. Dry the area completely before applying the vinyl.
Use isopropyl alcohol for extra cleaning. This helps remove any oils or residues. Let it dry completely before moving on.
Gather your tools: a squeegee, utility knife, and a heat gun. These tools will make the installation easier. Prepare the vinyl wrap by cutting it to size.
Make sure the wrap is slightly larger than the area. This allows for adjustments during installation. Keep the workspace tidy to avoid mistakes.
Check the temperature before applying. Warmer temperatures help the vinyl stick better. Follow these steps for a smooth installation.
Tips And Tricks For A Perfect Finish
To achieve a smooth finish, start by cleaning the surface thoroughly. This helps the vinyl adhere better.
Use a squeegee to push out air. This reduces the chance of bubbles forming. Work from the center to the edges for the best results.
For wrinkles, use heat. A heat gun or hairdryer can soften the vinyl. This makes it easier to stretch and smooth.
When dealing with edges and corners, cut the vinyl slightly larger. This allows for better coverage. Tuck the edges neatly for a polished look.
Always apply pressure on the edges. This helps them stick well and prevents peeling.
Maintenance And Care
Cleaning your wrapped vehicle is simple. Use a mild soap and water solution. Avoid harsh chemicals as they can damage the wrap. A soft sponge or microfiber cloth works best. Always rinse thoroughly to remove soap residue.
Dry the surface with a clean, soft towel. This prevents water spots from forming. Regular cleaning keeps the wrap looking new. Aim to wash your vehicle every two weeks for best results.
For longevity, park your vehicle in a shaded area. Sunlight can fade the wrap over time. Consider using a protective wax designed for vinyl. This adds a layer of protection against dirt and UV rays.
Keep an eye on any scratches or damages. Address them quickly to avoid further issues. Follow these tips to maintain your red carbon fiber vinyl wrap.
Cost Analysis
Choosing between DIY and professional installation affects your overall cost. DIY might save money but requires time and skill. Professional services ensure a high-quality finish but can be more expensive.
Here’s a quick cost comparison:
| Installation Type | Estimated Cost |
|---|---|
| DIY | $50 – $150 |
| Professional | $300 – $800 |
Consider your budget and the desired quality. Planning ahead helps avoid unexpected costs. Always factor in tools and materials for DIY projects. Choose what fits your skills and financial situation best.
Gallery Of Finished Projects
Check out these amazing before and after transformations using red carbon fiber vinyl wrap. Many community members shared their projects. Each photo tells a unique story of creativity.
Transformations show how a simple change can create a big impact. From cars to furniture, the results are stunning. Bright red wraps add a touch of style.
Gather inspiration from the community. Many users showcase their work online. You can find ideas for your own projects. Join the community and share your creations.
| Project Type | Before | After |
|---|---|---|
| Car | Old paint job | Shiny red wrap |
| Furniture | Wood finish | Modern red wrap |
| Gadgets | Standard look | Stylish red finish |
Faqs And Troubleshooting
Red Carbon Fiber Vinyl Wrap can have some common issues. One issue is bubbles forming during application. Use a squeegee to push bubbles out. For stubborn bubbles, a pin can help to release air.
Another problem is peeling edges. Ensure the surface is clean before applying the wrap. Use heat to secure edges better.
Fading can occur over time. Protect your wrap with a clear coat. This helps maintain the vibrant color.
Expert advice includes choosing high-quality vinyl. Always follow the manufacturer’s instructions. Practice applying on a small area first. This builds confidence and skills.
Regular maintenance keeps your wrap looking fresh. Wash gently with soap and water. Avoid harsh chemicals that can damage the vinyl.
Frequently Asked Questions
What Is Red Carbon Fiber Vinyl Wrap?
Red carbon fiber vinyl wrap is a high-quality adhesive film. It’s designed to mimic the look of real carbon fiber. This wrap is often used for vehicles, electronics, and home decor. It provides a stylish appearance while protecting surfaces from scratches and UV damage.
How Long Does Red Carbon Fiber Vinyl Last?
When properly installed, red carbon fiber vinyl can last 5 to 7 years. Durability depends on factors like exposure to sunlight and climate. Regular maintenance and care can extend its lifespan. It’s crucial to follow manufacturer guidelines for the best results.
Can I Apply Red Carbon Fiber Vinyl Myself?
Yes, applying red carbon fiber vinyl yourself is possible. However, the process requires patience and precision. Ensure you have the right tools and a clean surface. Watching tutorial videos can help you achieve professional-looking results without hiring a specialist.
Is Red Carbon Fiber Vinyl Easy To Remove?
Red carbon fiber vinyl is generally easy to remove. If applied correctly, it can be peeled off without leaving residue. However, heat may be needed for easier removal. Always follow the recommended guidelines to prevent damage to the underlying surface.
Conclusion
Red carbon fiber vinyl wrap offers a stylish and durable option for vehicle customization. It enhances aesthetics while providing protection. Easy to apply, this wrap transforms any surface with minimal effort. Choose red carbon fiber vinyl to elevate your ride’s look and stand out on the road with confidence.