Why Does My Car AC Keep Losing Refrigerant?
Is your car’s air conditioner blowing warm air even when you know it should be cold? You might be wondering Why Does My Car AC Keep Losing Refrigerant? This is a common issue that can be frustrating, especially when you’re not sure where to start. For many car owners, the inner workings of an AC system seem a bit mysterious.
But don’t worry, fixing this problem doesn’t have to be complicated. We’ll walk you through the common causes step-by-step and explain how you can get your cool air back. Let’s figure out what’s going on with your car’s AC.
Common Reasons for Car AC Refrigerant Loss
Your car’s air conditioning system relies on a special gas called refrigerant to cool the air inside your vehicle. When this refrigerant leaks out, the AC system can’t do its job effectively, leading to warm air. It’s like a leaky tire; if air escapes, the tire won’t hold pressure.
Similarly, if refrigerant escapes your AC system, it won’t be able to generate the cool temperatures you expect. This section explores the most frequent culprits behind these annoying leaks, helping you understand what might be happening under the hood.
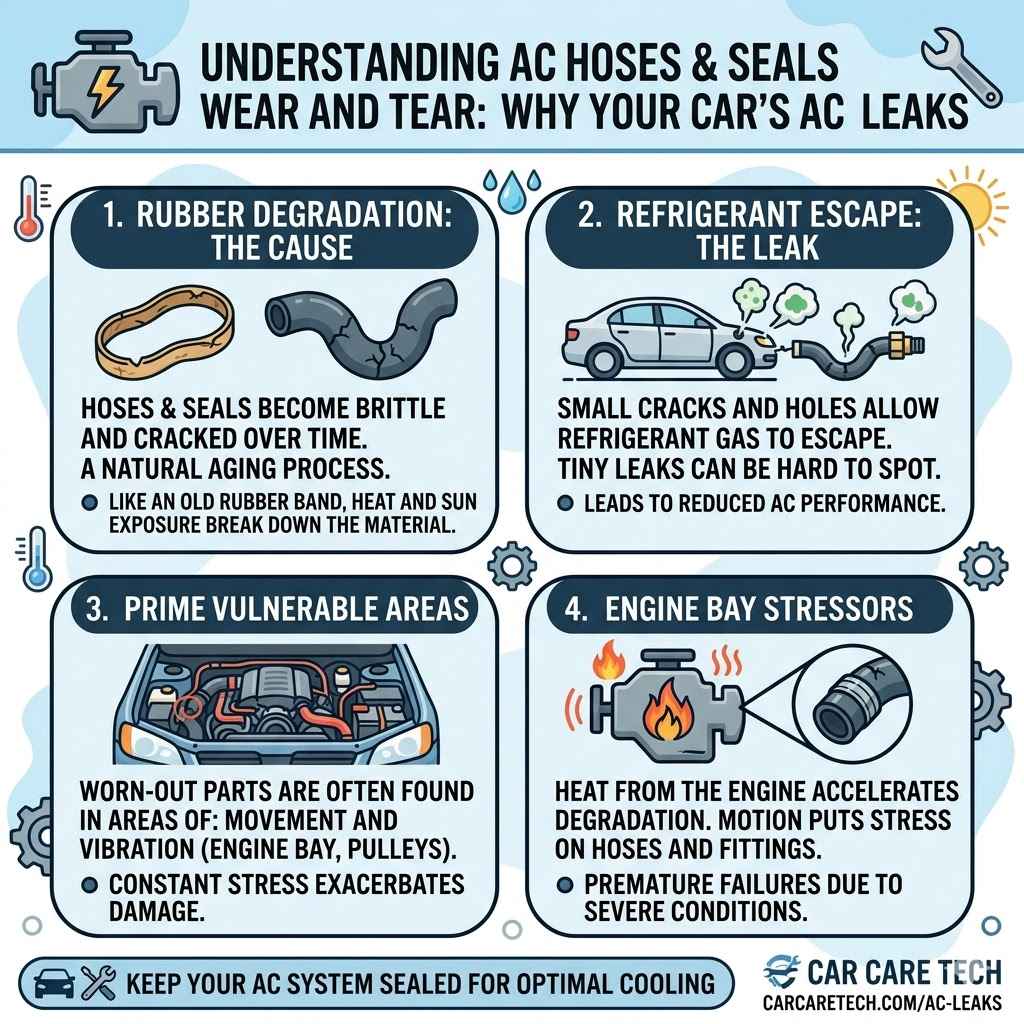
Hoses and Seals Wear and Tear
Over time, the rubber hoses and seals in your car’s AC system can become brittle and cracked. This is a natural part of aging for these components. Think of an old rubber band; if you leave it out in the sun for too long, it starts to break apart.
The same principle applies to the AC hoses and seals. When these parts develop small cracks or holes, refrigerant can slowly escape. These leaks might be tiny at first, making them hard to spot.
These worn-out parts are often found in areas that experience a lot of movement or vibration. The engine bay is a prime example, where constant motion can put stress on hoses. Heat from the engine also contributes to the degradation of rubber components.
How Hoses and Seals Fail
Hoses are flexible tubes that carry refrigerant throughout the AC system. They are made of rubber and reinforced with other materials to withstand pressure. Over years of use, exposure to engine heat, and contact with various fluids, the rubber can dry out, become stiff, and develop hairline fractures.
These fractures are prime spots for refrigerant to escape.
Seals, often called O-rings, are small rubber rings used to create airtight connections between different AC components. They sit at junctions where pipes connect to compressors, condensers, or evaporators. Like hoses, these seals can harden, shrink, or become damaged, allowing refrigerant to seep past them.
Even a tiny loss of refrigerant over a long period can significantly impact the AC’s performance.
It is estimated that up to 30% of AC refrigerant loss in a year can be attributed to minor leaks in hoses and seals. This is a significant amount that can quickly make your AC less effective. Regular checks can help identify these issues before they become major problems.
Component Corrosion and Damage
Metal parts within the AC system, such as the condenser and evaporator, can corrode over time. This corrosion can lead to small holes, allowing refrigerant to leak out. The condenser, located at the front of the car, is particularly vulnerable to damage from road debris.
Corrosion happens when metal reacts with substances in the air or moisture. In the AC system, this can be exacerbated by the constant presence of moisture and refrigerant chemicals. Over time, the metal thins and can eventually create pinprick holes.
The Condenser’s Role and Vulnerabilities
The condenser is like the radiator for your AC. It’s responsible for releasing heat from the refrigerant into the outside air. Because it’s typically mounted at the front of your vehicle, it’s constantly exposed to things flying off the road – rocks, dirt, salt, and other debris.
Over time, this bombardment can cause damage to the delicate fins of the condenser.
This damage can create tiny punctures or weaken areas of the metal. If a puncture goes deep enough, it can reach the internal passages where refrigerant flows, creating a leak. Salt used on roads in winter can also accelerate corrosion of the condenser’s metal surfaces, especially if the car is not washed regularly.
Evaporator Corrosion
The evaporator is located inside your car’s dashboard. While it’s more protected from road debris, it can still suffer from corrosion. This is often due to moisture and the presence of acidic substances that can form over time.
Mold and mildew growth on the evaporator can also contribute to its degradation.
When the evaporator corrodes, it can develop leaks. These leaks are particularly tricky because they often occur inside the cabin, and the escaping refrigerant might be harder to detect initially. Sometimes, the first sign is a musty smell in the car.
A study found that vehicles older than five years are more likely to experience refrigerant leaks due to component corrosion. This highlights the importance of maintenance as cars age. Regular inspections can catch these issues early.
Faulty AC Compressor Seals
The AC compressor is the heart of your air conditioning system. It pressurizes the refrigerant, allowing it to circulate. The compressor has seals that keep the refrigerant contained.
If these seals fail, refrigerant can leak out.
Compressor seals are subjected to high pressure and constant movement. They can wear out due to age, friction, or even contamination within the AC system. A failing compressor seal is a direct pathway for refrigerant to escape.
Understanding the Compressor’s Function
The compressor’s main job is to compress the low-pressure refrigerant gas, turning it into a high-pressure, high-temperature gas. This process is essential for the refrigerant to release heat at the condenser and then absorb heat at the evaporator. The compressor is driven by the engine, typically via a belt.
Within the compressor, there are various seals and gaskets designed to prevent refrigerant from escaping. The most critical seal is often the shaft seal, which prevents refrigerant from leaking out where the compressor shaft connects to the engine’s drive pulley. Over time, this seal can degrade, becoming brittle and allowing refrigerant to seep out.
Signs of a Bad Compressor Seal
A common sign of a leaking compressor seal is a noticeable loss of refrigerant, leading to poor cooling. You might also hear unusual noises coming from the compressor, such as hissing or grinding, as the seals fail. In some cases, you might see oily residue around the compressor pulley, which is often a sign of refrigerant oil mixed with escaping refrigerant.
If you suspect a compressor seal issue, it’s crucial to have it inspected by a professional. Replacing compressor seals can be a complex job that requires specialized tools and knowledge to ensure the system is properly sealed and recharged afterward. Attempting this repair without the right expertise could lead to further damage or inefficient repairs.
Improper AC System Service
Sometimes, refrigerant loss isn’t due to a wear-and-tear issue but rather to mistakes made during previous AC service. This can include overcharging the system, which puts excessive pressure on components, or not properly sealing connections after servicing.
When an AC system is serviced, it’s vital that it’s done by trained technicians using the correct procedures and equipment. Small errors can have big consequences for the system’s longevity and efficiency. A poorly performed service is a ticking time bomb for refrigerant leaks.
Overcharging the System
Every AC system is designed to operate within a specific pressure range. If too much refrigerant is added, the system’s pressure becomes too high. This excessive pressure can strain components like seals and hoses, making them more prone to leaks.
It can also lead to the system not cooling effectively, as the pressure imbalances disrupt the cooling cycle.
Imagine trying to inflate a balloon too much; eventually, it will pop or burst. While AC systems have safety mechanisms, extreme overcharging can still stress components beyond their limits, forcing refrigerant out through weak points.
Connection Leaks After Service
When technicians disconnect and reconnect AC lines for service (like recharging refrigerant or replacing a part), they must ensure every connection is sealed perfectly. If a fitting isn’t tightened properly, or if an O-ring is damaged or not seated correctly, a leak will form. These leaks can be significant, leading to rapid loss of refrigerant.
It’s not uncommon for a car that had AC work done recently to start blowing warm air again if the connections weren’t sealed properly. This is why choosing a reputable service center is important. They should use the right tools and follow strict procedures to avoid these post-service leaks.
Condensation Drain Blockage
While not a direct cause of refrigerant loss, a blocked condensation drain can cause water to back up. This water can sometimes get into AC components, leading to corrosion and potential leaks over time. It also creates a damp environment that can encourage mold and mildew growth.
The AC system removes moisture from the cabin air. This moisture collects as condensation and normally drains out underneath the car. If this drain gets clogged with leaves, dirt, or debris, the water has nowhere to go.
How a Clogged Drain Affects the AC
When the condensation drain is blocked, water can accumulate in the HVAC (heating, ventilation, and air conditioning) housing. This can lead to several problems. For instance, the water might saturate insulation materials, leading to musty smells.
More critically, if the water level rises high enough, it can potentially reach and damage sensitive electronic components or exacerbate corrosion on parts like the evaporator core.
While this blockage doesn’t directly cause refrigerant to escape, the resulting moisture and potential corrosion can weaken the system over time, making it more susceptible to leaks from other causes. It’s another reminder that regular maintenance can prevent a cascade of issues.
Troubleshooting Common AC Refrigerant Leak Scenarios
Identifying where refrigerant is leaking from can sometimes feel like a treasure hunt. Refrigerant isn’t always visible as it escapes, and the leaks can be small and intermittent. This section will walk you through some typical situations you might encounter and offer ways to pinpoint the source of the problem.
We’ll also discuss the tools and techniques professionals use to find these sneaky leaks, so you can have a better idea of what to expect when you bring your car in for service.
Visual Inspection for Obvious Leaks
The first step in troubleshooting is often a thorough visual inspection of the AC system. Look for oily residue on AC components, especially around fittings, hoses, and the compressor. Refrigerant oil circulates with the refrigerant, so where you see oil, you’re likely to find a leak.
Check all visible hoses for cracks, kinks, or signs of wear. Pay close attention to the connections where hoses meet other components. Also, inspect the condenser for any signs of physical damage, like bent fins or punctures.
Sometimes, a leak is obvious if you can see it.
What to Look For
When inspecting, use a good flashlight to illuminate the engine bay and undercarriage. Look for any wet or greasy spots. Refrigerant oil is usually clear or has a light amber color.
If you see a slick, oily film on a hose, fitting, or component, that’s a strong indicator of a leak. The oil is mixed with the refrigerant, so they escape together.
Don’t forget to check the back of the AC compressor. The shaft seal is a common leak point, and you might see oil accumulation around the pulley area. Also, examine the connections between the compressor, condenser, and the lines running into the firewall.
These are frequent spots for O-ring leaks.
Limitations of Visual Checks
While visual checks are a good starting point, they often aren’t enough to find small or hidden leaks. Refrigerant can evaporate quickly after leaking, leaving behind only a trace of oil. Many leak points are also difficult to see without specialized equipment.
If you don’t see any obvious signs, it doesn’t mean there isn’t a leak.
For instance, a leak in the evaporator core, located deep inside the dashboard, is almost impossible to spot visually. Similarly, very slow leaks in hard-to-reach hoses might go unnoticed during a quick inspection. This is where other diagnostic methods become necessary.
Using UV Dye and Blacklight
A common and effective method for finding AC leaks is by adding a special UV dye to the refrigerant. This dye circulates with the refrigerant, and when a leak occurs, the dye escapes along with it. Later, using a UV blacklight, mechanics can easily spot the glowing dye at the leak location.
This technique is particularly useful for finding slow or intermittent leaks that might be missed during a simple visual inspection. The dye makes even the smallest trace of refrigerant residue visible.
The Process of Adding UV Dye
UV dye is injected into the AC system, usually through a service port, while the engine is running. The system is then operated for a short period to allow the dye to distribute evenly. This typically takes about 15-30 minutes of driving or idling the vehicle with the AC on.
The dye mixes with the refrigerant and oil, becoming part of the circulating fluid.
Once the dye is in the system, the technician will re-inspect the AC components under UV light. The areas where the dye has leaked will fluoresce brightly, making the source of the leak stand out clearly. This method is highly reliable for pinpointing leak locations.
Spotting the Glow
Under a UV blacklight, the fluorescent dye will glow vividly, usually in shades of green or yellow, depending on the dye’s composition. You’ll see a distinct trail of glowing residue leading from the leak point. This makes it easy to identify a faulty hose, a cracked fitting, a damaged seal, or a pinhole in a component like the condenser or evaporator.
For example, a glowing spot on a hose connection means the O-ring or the fitting itself is leaking. A glow on the condenser fins might indicate a small puncture from road debris. The effectiveness of this method is why it’s a favorite among AC repair professionals.
Electronic Leak Detectors
Electronic leak detectors are highly sensitive devices that can sniff out even the smallest traces of refrigerant gas. These tools use a probe that is passed over AC components and connections. When the detector senses refrigerant, it will typically emit an audible alarm and a visual indicator.
These detectors are excellent for finding leaks that are too small for visual detection and don’t leave oily residue, or for locating leaks in hard-to-reach areas. They are a crucial tool for comprehensive AC diagnostics.
How Electronic Detectors Work
These devices work by sensing the chemical composition of refrigerant gases. They have a heated diode or semiconductor sensor that reacts when it comes into contact with refrigerant molecules. When refrigerant is detected, the sensor’s electrical properties change, triggering an alarm.
The sensitivity of these detectors can often be adjusted, allowing technicians to fine-tune their search for leaks.
The technician will slowly move the probe along all the lines, connections, and components of the AC system. The closer the probe gets to a leak, the stronger the signal and the louder the alarm. This precise detection allows for quick and accurate identification of the faulty area.
Advantages and Limitations
Electronic leak detectors are very accurate and can find extremely small leaks. They are also useful in situations where UV dye might not be suitable or if the system has lost all its refrigerant. However, they can sometimes be triggered by other airborne chemicals, leading to false positives if not used carefully.
Also, they won’t show you where the leak was if the refrigerant has already evaporated entirely, unlike UV dye which leaves a residue.
For example, if a large amount of refrigerant has leaked out, an electronic detector might not be able to pick up any remaining trace. In such cases, introducing a small amount of refrigerant with UV dye might be the better first step. Combining methods often yields the best results.
Pressure Testing and Vacuum Testing
After refrigerant has been lost, mechanics will often perform pressure and vacuum tests. A pressure test involves isolating sections of the AC system and filling them with an inert gas, like nitrogen, to check for leaks. A vacuum test involves removing all air and moisture from the system and seeing if it can hold a vacuum, indicating no significant leaks.
These tests help confirm the presence of leaks and assess the system’s integrity. They are essential steps in diagnosing refrigerant loss and ensuring that any repairs made will be effective.
Pressure Testing Explained
In a pressure test, the AC system is sealed, and a regulated amount of dry nitrogen gas is introduced. This inert gas is not a refrigerant, so it won’t leak out and damage the environment. The technician then monitors the pressure gauge.
If the pressure drops over time, it indicates that the gas is escaping through a leak somewhere in the system. This test is safe and can pinpoint leaks effectively.
Sometimes, soap and water solution can be applied to suspected leak areas during a pressure test. If there’s a leak, small bubbles will form, making the leak visible. This is a simple yet effective way to confirm a leak location found by other methods.
The Vacuum Test Process
A vacuum test is typically performed after repairs have been made or to confirm the system is leak-free before adding refrigerant. First, an AC machine is used to pull a deep vacuum on the system, removing air and moisture. The system is then left under vacuum for a set period (e.g., 30 minutes to an hour).
If the vacuum level remains steady, it means there are no significant leaks.
If the vacuum level drops, it signifies that air is entering the system, meaning there’s a leak. This test is crucial because moisture in the AC system can freeze and damage components, or react with refrigerant to form acids. Holding a vacuum ensures the system is clean and sealed.
Sample Scenario: The Intermittent AC Problem
Imagine your car’s AC works perfectly one day, but the next it’s blowing warm air. You recharge it, and it cools again, but after a few weeks, the problem returns. This suggests an intermittent or very slow leak.
Initial Symptoms
Warm air from AC vents, intermittent cooling, or needing frequent refrigerant top-ups.
Visual Inspection
You check under the hood but see no obvious oily residue or damage to hoses.
UV Dye Test
A mechanic adds UV dye. After driving, they use a blacklight and find a faint glow around the shaft seal of the AC compressor.
Repair and Verification
The compressor shaft seal is replaced, and the system is vacuum tested and recharged. The AC now blows cold air consistently.
Fixing Your Car’s AC Refrigerant Leaks
Once you know why your car’s AC is losing refrigerant and where the leak is coming from, it’s time to talk about fixing it. Some leaks can be addressed with DIY methods, while others require professional expertise and specialized tools. This section will guide you through the available repair options, from simple seal replacements to more complex component changes.
We’ll also touch upon what to do if you’re considering a DIY approach versus hiring a mechanic.
Replacing Hoses and Seals
If the leak is due to worn-out rubber hoses or O-rings, replacing these parts is often a straightforward repair. New hoses and seals are readily available for most vehicle models. This is a common repair that can restore your AC system’s ability to hold refrigerant.
The key is to ensure you get the correct replacement parts for your specific car. Using the wrong size or type of hose or seal can lead to further leaks or damage.
The Replacement Process
To replace a hose or seal, the AC system must first be safely discharged to remove any remaining refrigerant. Then, the damaged component is removed. For hoses, this usually involves disconnecting them from fittings and clamps.
For O-rings, they are typically found at the connection points of various AC lines and components.
After the old part is removed, the new hose or seal is installed. It’s important to lubricate O-rings with a special AC system lubricant before installation to prevent them from tearing and to ensure a good seal. Once the new parts are in place and connections are secured, the system will be vacuumed and recharged with refrigerant.
DIY vs. Professional Replacement
Replacing accessible hoses and seals can be a manageable DIY project for those with some mechanical experience and basic tools. However, some seals, like the compressor shaft seal, are much more difficult to access and replace, often requiring specialized tools and knowledge to properly remove and reinstall the compressor. For these more complex jobs, professional service is highly recommended to avoid further damage.
Safety is paramount. Working with AC systems involves high pressures and refrigerants, which can be hazardous if not handled properly. Always wear safety glasses and gloves.
If you’re unsure, it’s always best to consult a qualified mechanic.
Repairing or Replacing Damaged Components
If the condenser, evaporator, or compressor has developed a leak due to corrosion or damage, it will likely need to be repaired or replaced. Small leaks in a condenser might sometimes be patched, but often, replacement is the more reliable long-term solution.
These repairs can be more involved and expensive, as they require discharging the system, removing the damaged part, installing the new one, and then recharging the system. The evaporator is particularly challenging to access, as it’s located behind the dashboard.
Condenser and Evaporator Replacement
Replacing the condenser is usually more accessible, as it’s located at the front of the car. The process involves disconnecting the AC lines, unbolting the old condenser, installing the new one, and reconnecting everything. Replacing the evaporator is a much larger job, often requiring the removal of the entire dashboard, which can take many hours of labor.
Once the new component is installed, the system needs to be vacuumed to remove air and moisture, and then recharged with the correct amount and type of refrigerant and oil. The type and amount of refrigerant oil are critical for the longevity of the new component and the entire AC system.
Compressor Replacement
If the AC compressor itself is leaking significantly or has failed mechanically, it will need to be
The new compressor will come with a specific amount of oil. It’s essential to verify the total oil capacity of your AC system and add the correct amount, often a mix of refrigerant oil and oil left in the old compressor, to prevent damaging the new unit.
Sample Scenario: A Leaky Condenser
You notice your AC isn’t as cold as it used to be. After a UV dye test, a mechanic points out a small, glowing spot on your condenser, likely caused by a piece of road debris. The condenser is corroded and has a pinhole leak.
Diagnosis
AC performance degrades. UV dye test reveals a leak on the condenser.
Discharge and Removal
The AC system is safely discharged. The front grille is removed to access the condenser. The AC lines are disconnected from the condenser.
Installation
The old condenser is removed. The new condenser is installed, and the AC lines are reconnected using new O-rings and lubricant.
Evacuation and Recharge
The system is evacuated with a vacuum pump to remove air and moisture. It is then recharged with the correct amount of refrigerant and oil.
Verification
The AC now blows cold, and a follow-up check confirms no further leaks.
DIY Leak Sealants
There are products available on the market that claim to seal AC refrigerant leaks automatically. These are typically added to the system and circulate with the refrigerant. They work by hardening when exposed to air, theoretically sealing small leaks.
While these sealants can sometimes work for very minor, hard-to-find leaks, they are not a permanent solution and can sometimes cause more problems than they solve. They might clog sensitive AC components like the expansion valve or the compressor itself.
How Sealants Work
These sealants are usually liquid or powdered additives that are introduced into the AC system. When the refrigerant leaks out and encounters air, the sealant is designed to react and polymerize, forming a solid plug at the leak site. Some are specifically designed to seal rubber seals, while others aim to fill small metal pores.
The idea is that they will only activate when they come into contact with the outside air, so they won’t seal the system while refrigerant is contained. This selective activation is key to their intended function, but it’s not always perfect.
Pros and Cons of Sealants
Pros:
- Can be a relatively inexpensive and easy way to attempt to fix very small leaks without professional help.
- Avoids the need for specialized tools or extensive disassembly.
Cons:
- Not a permanent fix; leaks often return.
- Can potentially clog AC components, leading to more expensive repairs.
- May interfere with future professional AC service or leak detection methods.
- Effectiveness varies greatly, and they are not recommended for larger leaks.
It’s important to note that many professional mechanics advise against using these sealants due to the risk of damaging the AC system. If you choose to use a sealant, do so with caution and understand the potential risks involved. Always follow the product’s instructions carefully.
Professional AC Service and Recharge
For most car owners, the most reliable way to fix AC refrigerant leaks is to take their vehicle to a qualified mechanic or an AC specialist. They have the necessary diagnostic equipment, tools, and expertise to accurately identify the leak, perform the repair, and properly recharge the system.
Professional service ensures that the job is done correctly, the system is leak-free, and it’s refilled with the precise amount of refrigerant and oil required for optimal performance and longevity.
The Professional Diagnostic Process
A professional mechanic will typically start with a thorough visual inspection, followed by using a UV dye and blacklight or an electronic leak detector to pinpoint the exact source of the leak. They may also perform pressure and vacuum tests to confirm the integrity of the system after repairs. This systematic approach ensures all potential issues are addressed.
They will also check the system for proper operation and ensure that the correct type and amount of refrigerant and oil are used, as specified by the vehicle manufacturer. This level of detail is crucial for the health of the AC system.
Recharging the System
After a repair, the AC system needs to be recharged with refrigerant. This is done using specialized AC service machines that can accurately measure and add the correct quantity of refrigerant and oil. Simply adding refrigerant from a DIY can is not recommended, as it’s difficult to control the exact amount and can lead to overcharging or undercharging.
The process involves evacuating the system (removing air and moisture) and then refilling it with the specified type and amount of refrigerant and lubricating oil. The exact specifications for refrigerant type (e.g., R134a or R1234yf) and oil type are critical and vary by vehicle model.
Statistics show that vehicles serviced by professionals for AC leaks have a significantly lower rate of recurring issues compared to those repaired with DIY sealants. For example, one report indicated that 85% of cars repaired by certified technicians for AC leaks did not experience further issues within two years, compared to only 40% for DIY sealant applications.
Preventing Future Refrigerant Loss
Once you’ve fixed the refrigerant leak, you’ll want to keep your car’s AC system running smoothly for as long as possible. Regular maintenance is key to preventing future leaks and ensuring your AC remains efficient. This section will cover the simple yet effective steps you can take to keep your AC system in top shape and avoid that frustrating loss of cool air.
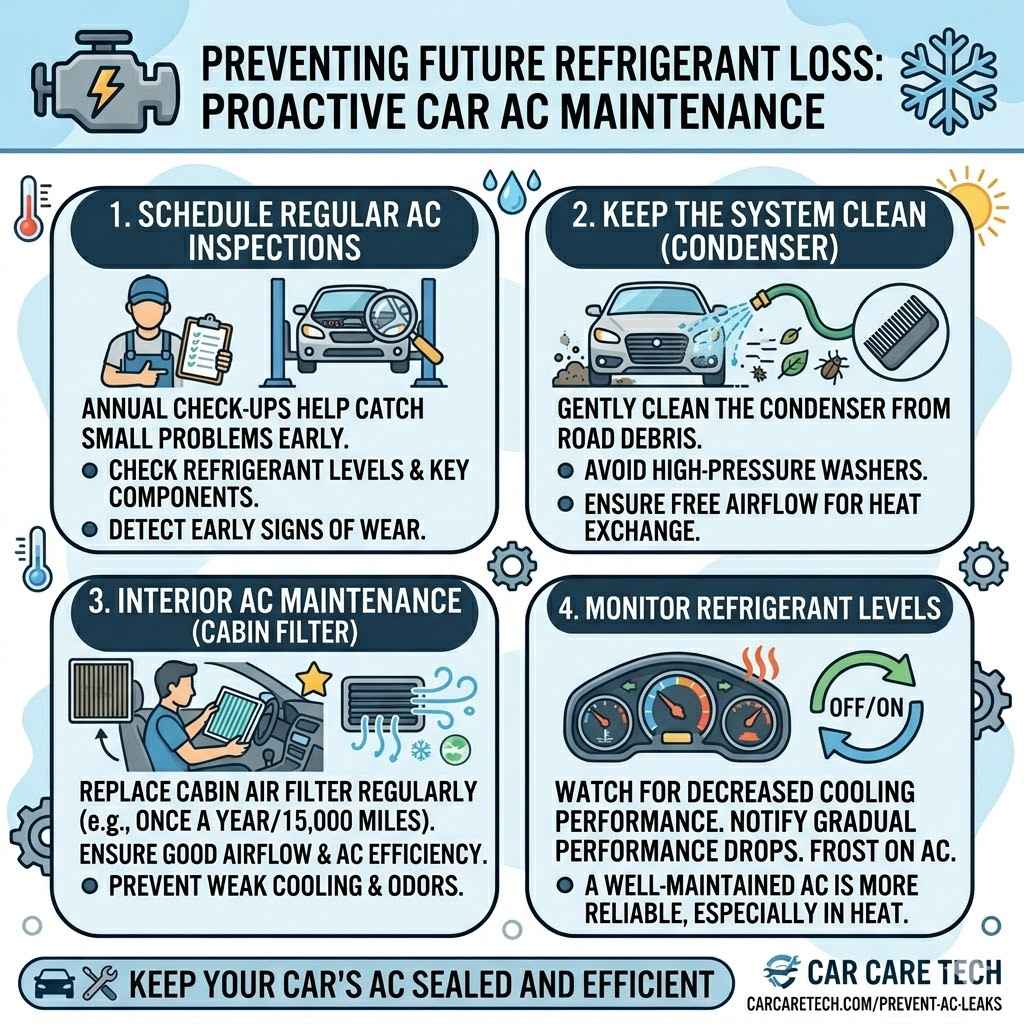
Regular AC System Inspections
Just like your car needs oil changes and tire rotations, your AC system benefits from regular check-ups. Scheduling an annual AC inspection can help catch small problems before they turn into costly repairs. Technicians can check for early signs of wear and tear, identify potential leak points, and ensure the system is operating efficiently.
These inspections are also a good time to check refrigerant levels. While a full system discharge and recharge might not be needed every year, a simple check can tell you if levels are dropping. Early detection is always better.
What to Expect During an Inspection
During an AC inspection, a mechanic will typically check the refrigerant charge, inspect hoses and seals for cracks or wear, examine the compressor for any unusual noises or leaks, and test the overall performance of the system. They will also check the condenser for damage and ensure the cooling fans are working properly.
They might also check the cabin air filter, which can affect airflow and AC efficiency. A dirty filter can make your AC work harder, potentially leading to more stress on the system over time. This proactive approach helps prevent minor issues from escalating.
Benefits of Preventative Maintenance
Preventative maintenance can save you money in the long run by avoiding major repairs. It also ensures your AC system is always working at its best, providing comfortable temperatures and improving fuel efficiency. A well-maintained AC system is less likely to fail unexpectedly, especially during hot weather when you need it most.
For instance, regularly checking and cleaning the condenser can prevent damage from debris, which is a common cause of leaks. Catching a worn O-ring early can prevent a significant refrigerant loss and the need for a more extensive repair.
Keeping the System Clean
Dirt and debris can clog AC components, especially the condenser, and lead to premature wear. Regularly cleaning the condenser, which is located at the front of your car, can help maintain its efficiency and prevent damage. You can carefully spray it with a hose to remove accumulated dirt and bugs.
Also, keeping the area around the AC components clear of debris can help with airflow, which is essential for cooling. Remember that the AC system works by exchanging heat, and anything that hinders that process can reduce its effectiveness.
Cleaning the Condenser
The condenser sits in front of the radiator and is exposed to road grime, leaves, and insects. You can clean it gently with a garden hose, spraying from the back towards the front to push the debris out. Avoid using high-pressure washers, as they can bend the delicate fins.
If the fins are bent, you can often carefully straighten them with a fin comb, but excessive bending or damage can lead to leaks. Keeping the condenser clean ensures that air can flow through it freely, allowing the refrigerant to dissipate heat effectively.
Interior AC Maintenance
Inside the car, the cabin air filter is a crucial component for AC performance and air quality. Replacing it regularly, typically once a year or every 15,000 miles, ensures good airflow and prevents the AC from working harder than it needs to. A clogged cabin air filter can restrict airflow, making your AC feel weaker.
Also, be mindful of any unusual smells. Musty odors can indicate mold or mildew growth, often related to moisture trapped in the HVAC system, which can sometimes be linked to drain issues or leaks.
Monitoring Refrigerant Levels
While you shouldn’t routinely open and add refrigerant yourself unless you have the proper training and equipment, you can pay attention to the signs that your refrigerant levels might be low. If your AC is not cooling as well as it used to, or if you notice that cooling performance drops significantly on hot days, it’s a good indicator that your refrigerant level may be low.
These symptoms often signal a leak, even if it’s a very slow one. It’s better to have it checked and repaired than to just keep topping up the refrigerant, as this can be costly and bad for the environment.
Signs of Low Refrigerant
The most common sign is a noticeable decrease in cooling performance. The air coming from the vents might feel warmer than usual. You might also notice frost forming on AC lines or components under the hood, although this can also indicate other issues.
In some cases, the AC compressor might cycle on and off more frequently than it should.
Another sign could be that the AC works fine for a while after a recharge, but the cooling performance gradually diminishes over days or weeks. This indicates an ongoing leak that needs to be addressed permanently.
When to Seek Professional Help
If you suspect your refrigerant levels are low, it’s always best to consult a professional. They have the tools to accurately measure the refrigerant level and check for leaks. Simply adding refrigerant without finding and fixing the leak is a temporary fix that can lead to further problems and environmental harm.
A professional can perform a thorough diagnosis, including using UV dye or electronic detectors, to find the source of any leak and recommend the most effective repair. This ensures a lasting solution for your car’s cooling system.
Frequently Asked Questions
Question: How often should I get my car’s AC inspected
Answer: It’s a good idea to have your car’s AC system inspected at least once a year, ideally before the hot season begins. This allows for early detection of any potential issues like low refrigerant or wear on components.
Question: Can I just add refrigerant myself if my AC isn’t cold
Answer: While DIY refrigerant recharge kits are available, it’s generally not recommended for most drivers. You risk overcharging the system, damaging components, or not fixing the underlying leak, which is often the real problem.
Question: How long does it take to fix an AC leak
Answer: The time it takes to fix an AC leak varies greatly depending on the severity and location of the leak. A simple hose replacement might take a couple of hours, while a more complex job like replacing the evaporator could take several days.
Question: Is it bad to drive with a leaking AC
Answer: Driving with a leaking AC means your system is not cooling efficiently, which can put extra strain on the engine. Also, refrigerant leaks can be harmful to the environment, and some refrigerants can be hazardous if inhaled in large concentrations.
Question: What are the symptoms of a major refrigerant leak
Answer: Major leaks usually result in a rapid loss of cooling. Your AC will likely blow warm air almost immediately after starting. You might also hear hissing sounds from the system or notice a significant drop in pressure.
Summary
Addressing why your car AC keeps losing refrigerant involves understanding common leak points like hoses, seals, and components. Diagnosing these leaks accurately with visual checks, UV dye, or electronic detectors is crucial. Repairs range from simple replacements to more complex component changes, often best handled by professionals.
Regular inspections and keeping the system clean are key to preventing future issues and ensuring cool air.