Car AC Compressor Short Cycling Fix: Diagnose It in 20 Minutes
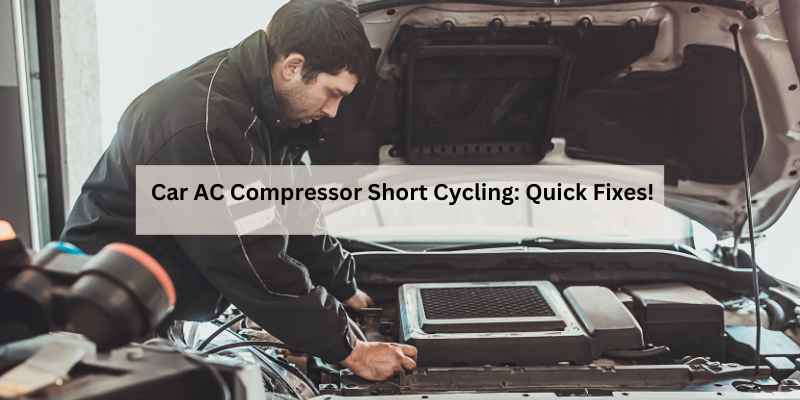
You are driving home on a 95-degree afternoon. The air from the vents feels cool for about four seconds, then turns warm and humid. Then it gets cold again. Then warm. The engine idle dips and surges with each cycle. That rhythmic on-off-on-off is compressor short cycling, and it is not just annoying. It is a warning sign.
Short cycling means the compressor clutch is engaging and disengaging far too often. A healthy system cycles maybe three or four times per minute on a hot day. A short-cycling system will click on and off every five to ten seconds. That rapid engagement grinds the clutch and can spike pressure in the lines. If you let it run, you will eventually replace a compressor that might have been fine.
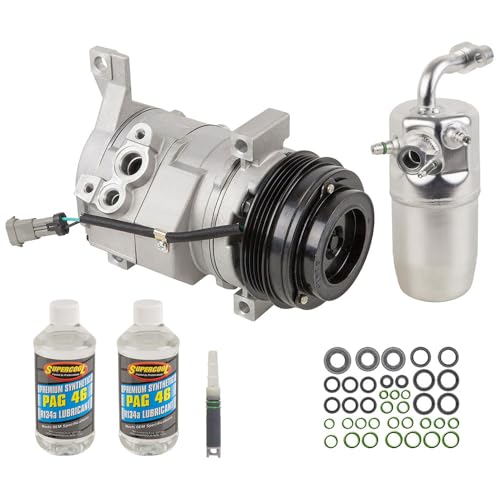
BUYAUTOPARTS!
AC Compressor & A/C Repair Kit For…
- ***THIS IS A REPLACEMENT FOR THE Denso-style 10S COMPRESSOR ONLY! Some GM Trucks and SUVs used a Delphi HU6 compressor as opposed…
- Guaranteed Exact Fit for easy installation. Don’t just buy the cheapest compressor. Buy the correct A/C repair solution, complete…
- Included in this KIT: 100% BRAND NEW premium quality A/C compressor with clutch ; New accumulator / receiver drier / desiccant ; N…
This guide walks you through the exact car AC compressor short cycling fix, from reading the symptoms to testing with a manifold gauge set. You will learn what to check first, what parts cost, and when to stop DIY and call a shop. No guesswork. Just a logical order of operations that finds the fault fast.
If the diagnosis leads to a failed compressor, consider a complete replacement kit rather than a bare unit. A kit like the BuyAutoParts 60-80479RK for GM trucks and SUVs with rear AC bundles the compressor, clutch, accumulator, expansion device, and o-rings in one box. That saves you from hunting down each part separately and ensures the new compressor gets a clean, dry system to run in.
What Is AC Compressor Short Cycling? (And Why 5 Seconds Is the Danger Zone)
Short cycling is when the compressor clutch turns on, runs briefly, then shuts off. The cycle repeats constantly. The on-time might be three seconds, the off-time two seconds. That is the danger zone.
Every engagement sends a jolt of torque through the belt and the clutch hub. The clutch friction material wears every time it snaps together. Normal cycling might engage the clutch 20 times per hour. Short cycling can hit 300 engagements per hour. The math is brutal on the system.
Short cycling also prevents the system from reaching proper operating pressures. The compressor never runs long enough to pull the low side down and push the high side up. That means the evaporator stays warm and the vent temperature never drops below 60 degrees. The cabin feels clammy, not cold.
Normal Cycling vs. Short Cycling: How to Tell the Difference
Every AC system cycles. The compressor does not run continuously except on the coldest settings with maximum load. Normal cycling is a slow rhythm. On an 85-degree day with the blower on medium, expect the clutch to engage for 15 to 25 seconds, then rest for 10 to 20 seconds. That is roughly three cycles per minute.
Short cycling is faster and more erratic. Watch the clutch hub at the front of the compressor. If it clicks on and off more than six times per minute, or if the on-time is under eight seconds, you have a problem.
Ambient temperature changes the math. On a 70-degree day, the high-side pressure stays low, so the compressor naturally cycles more often. On a 95-degree day, the system needs more cooling, so the compressor runs longer. If you see rapid cycling on a hot day, that is abnormal. If you see it on a cool evening, it might still be normal. Judge the frequency against the outside air temperature.
Using Vent Temperature and Gauge Readings to Confirm
Stick a thermometer in the center vent. A healthy R134a system blows between 38 and 48 degrees at idle with the blower on high. If the vent temperature swings more than 10 degrees during a single cycle, the system is struggling.
Gauge readings tell the real story. Connect a manifold gauge set to the low and high service ports. At idle, with the AC on max, a properly charged system reads about 25 to 35 psi on the low side and 180 to 250 psi on the high side, depending on ambient temp. If the low side drops below 20 psi and the compressor shuts off, you are likely low on refrigerant. If the high side spikes above 350 psi and the compressor kicks off, you are overcharged or have a blocked condenser.
The 6 Root Causes of Short Cycling (Ranked by Frequency)
Work through these in order. Nine times out of ten, the problem is the first one.
Low Refrigerant & Leaks (The #1 Culprit)
Low refrigerant is the most common cause. The low-pressure switch sits on the accumulator or the line and monitors the suction pressure. When the refrigerant level drops, the low-side pressure drops below the switch threshold. The switch opens and kills the compressor to protect it from running dry. The pressure climbs back up as refrigerant migrates, the switch closes, and the compressor runs again. That cycle repeats every few seconds.
Low refrigerant almost always means a leak. Systems lose about 10% of their charge per year through normal seepage. A sudden drop points to a leak at a fitting, the condenser, or the evaporator core. Find the leak before you add refrigerant. Otherwise, you will be back here in two weeks.
Faulty Low-Pressure Switch
The low-pressure switch can fail internally. The diaphragm gets weak, or the electrical contacts corrode. It might open at 30 psi instead of the factory spec of 22 psi. That makes the compressor shut off while the system still has a proper charge.
Test the switch with a multimeter. Disconnect the electrical connector and check for continuity across the switch terminals. If the switch is open with the system at rest and the gauges show over 40 psi on the low side, the switch is bad. Replace it. They cost between $15 and $40 and take ten minutes to swap.
Overcharged System
Too much refrigerant is just as bad as too little. An overcharged system builds excessive high-side pressure. The high-pressure switch or the pressure relief valve trips, shutting the compressor down. The pressure drops, the switch resets, and the compressor starts again. Short cycling follows.
This happens when someone tops off the system with a can from the auto parts store without checking the gauges. The can says it adds 12 ounces, but the system was already partially charged. Now you have 140% of the correct charge. The fix is to recover the refrigerant and recharge to the exact spec on the under-hood sticker. That requires a recovery machine, so it is a shop job unless you own the equipment.
Poor Airflow (Evaporator/Condenser Blockage)
Restricted airflow over the evaporator or condenser causes pressure spikes. A clogged cabin air filter starves the evaporator of warm cabin air. The coil gets too cold, frost forms, and the low-side pressure drops. The low-pressure switch shuts the compressor down until the frost melts. That is a classic short-cycle pattern.
Check the cabin air filter first. It costs $15 and takes five minutes to replace. Then inspect the condenser at the front of the car. Bugs, leaves, and road debris clog the fins and reduce heat rejection. High-side pressure climbs, the compressor overheats, and the thermal limiter or high-pressure switch cuts it off. Spray the condenser with a hose from the back side to clear debris.
Electrical Failures (Relay, Clutch Gap, Wiring)
The clutch needs a solid 12 volts to stay engaged. A failing compressor relay can drop out under load, killing the clutch. The relay cools, resets, and engages again. Same symptom, different cause.
Check the clutch air gap. The gap between the clutch plate and the pulley should be 0.015 to 0.025 inches. If the gap is too wide, the clutch cannot fully engage. It slips, heats up, and the thermal fuse opens the circuit. The clutch cools and re-engages. That looks like short cycling but is actually a mechanical slip. Use a feeler gauge to measure the gap and add or remove shims as needed.
Corroded wiring at the compressor connector also causes intermittent engagement. A poor ground or a high-resistance connection drops voltage under load. Check for voltage drop across the clutch connector while the compressor is running. Anything over 0.5 volts is too much.
Engine Overheating & High-Side Pressure
An engine running hot raises the condenser inlet temperature. That drives high-side pressure through the roof. The pressure switch trips to protect the compressor. If your temperature gauge runs high, fix the cooling system first. A stuck cooling fan clutch, a clogged radiator, or a low coolant level will all cause the AC to short cycle.
This is a secondary cause. The AC is a symptom, not the problem. Fix the engine cooling issue and the AC cycling usually returns to normal.
The Exact Diagnostic Process (Step-by-Step with a Manifold Gauge)
You need a manifold gauge set, a thermometer, and a multimeter. You do not need a recovery machine for the diagnosis phase. Follow these steps in order. Stop when you find the fault.
- Visual inspection. Look at the compressor clutch. Is the gap even? Is the clutch plate wobbling? Check the serpentine belt for cracks or glazing. A slipping belt causes intermittent clutch engagement that mimics short cycling. Press on the belt between pulleys. It should deflect no more than half an inch. If it is loose, check the tensioner.
- Check the fuse and relay. Locate the AC compressor relay in the under-hood fuse box. Swap it with an identical relay from another circuit, like the horn. If the AC works, the relay was bad. Also check the AC fuse with a test light.
- Connect the manifold gauges. Attach the low-side (blue) hose to the low service port on the accumulator or suction line. Attach the high-side (red) hose to the high service port on the discharge line. Open both valves. Read the static pressure with the engine off. On an 80-degree day, static pressure should be about 70 to 90 psi on both sides. If the static pressure is below 50 psi, the system is severely low.
- Start the engine and turn the AC to max. Watch the low-side gauge. As the compressor engages, the low side should drop from static to about 25 to 35 psi. The high side should climb to 180 to 250 psi. If the low side drops below 20 psi and the compressor shuts off, you are low on refrigerant. If the high side exceeds 350 psi and the compressor shuts off, you are overcharged or have a blocked condenser.
- Watch the clutch cycle timing. Use a stopwatch. Note how long the clutch stays engaged and how long it stays off. If the on-time is under eight seconds, continue to the next step.
- Bypass the low-pressure switch for a test. Disconnect the electrical connector from the low-pressure switch. Use a jumper wire to complete the circuit. Turn the AC on. If the compressor runs continuously and the gauges normalize, the switch is faulty. If the compressor still cycles, the problem is elsewhere. Do not run the compressor long with the switch bypassed. The switch is your safety net.
- Measure vent temperature. Place a thermometer in the center vent. With the compressor running, the temperature should drop steadily. If it stalls above 55 degrees, the expansion valve or orifice tube may be stuck, or the evaporator is blocked.
Pro tip: Write down your gauge readings. They are your baseline. If you fix one thing and the readings do not change, you have not found the root cause yet.
DIY Fixes vs. When to Call a Mechanic (With Cost Estimates)
Some short cycling causes are simple DIY fixes. Others require specialized equipment. Here is a realistic breakdown of cost and effort.
| Root Cause | DIY Cost | Shop Cost | DIY Difficulty | Time |
|---|---|---|---|---|
| Low refrigerant (minor leak) | $50–$100 (gauges + refrigerant) | $150–$300 (leak test + recharge) | Moderate | 1–2 hours |
| Low-pressure switch | $15–$40 (part only) | $100–$200 | Easy | 30 minutes |
| Overcharged system | Not DIY (needs recovery) | $100–$200 | Not DIY | 1 hour |
| Cabin air filter | $15–$25 | $50–$80 | Easy | 10 minutes |
| Condenser blockage | $0 (hose it out) | $50 (cleaning service) | Easy | 15 minutes |
| Clutch gap adjustment | $20 (shim kit) | $150–$250 | Moderate | 1 hour |
| Compressor replacement | $300–$600 (kit) | $800–$1,400 | Hard | 4–6 hours |
| Belt/tensioner | $30–$80 | $150–$250 | Easy | 30 minutes |
The DIY costs assume you already own basic hand tools. A manifold gauge set runs about $50 for a decent set. A refrigerant scale is another $30 if you want to charge by weight. You will also need a thermometer, which costs $10.
Call a mechanic if you find a large leak, if the compressor itself is seized or noisy, or if the system has been empty for a long time. A completely empty system means air and moisture have entered. The accumulator must be replaced, and the system must be vacuumed down to pull out moisture. That requires a vacuum pump and a recovery machine. Most DIYers do not own those.
Safety Warning: Never Jump the Pressure Switch
Jumping the low-pressure switch is a valid diagnostic test, but it is not a fix. Running the compressor with the switch bypassed removes the protection against low oil return. The compressor relies on refrigerant to carry oil back to the crankcase. With low refrigerant, the compressor runs dry and can seize within minutes.
There is also a physical danger. If the system is overcharged and you bypass the high-pressure switch, the pressure relief valve may vent refrigerant into the engine bay. That refrigerant is cold enough to cause frostbite on contact. In a worst-case scenario, the high-side line can burst. The pressure in an AC system can exceed 400 psi. That is enough to cause serious injury.
Only bypass the switch for a 10-second test. Watch the gauges. If the low side stays below 20 psi, shut it down immediately. If the high side climbs past 350 psi, shut it down. Do not leave the jumper in place while you drive.
Frequently Asked Questions (FAQs)
Why does my AC compressor turn on and off every 5 seconds?
That is the classic short-cycle pattern. The most likely cause is low refrigerant. The low-pressure switch detects the drop, opens the circuit, and kills the compressor. The pressure recovers, the switch closes, and the compressor restarts. Check the static pressure with a gauge. If it is below 50 psi on an 80-degree day, you have a leak and need a recharge.
Can a bad AC compressor clutch cause short cycling?
Yes. A worn clutch with an excessive air gap will slip under load. The slipping generates heat, which trips a thermal fuse or the clutch coil loses magnetic grip. The clutch disengages, cools, and re-engages. Measure the air gap with a feeler gauge. The spec is 0.015 to 0.025 inches. If it is wider, add shims or replace the clutch.
Is it safe to drive with a short-cycling AC compressor?
You can drive, but you risk damage. Each rapid engagement wears the clutch and the pulley bearing. The constant load changes also strain the serpentine belt and the engine idle control. If the root cause is low refrigerant, the compressor may run dry and seize. Seizing the compressor can throw the belt and leave you stranded. Fix it sooner rather than later.
How much does it cost to fix AC compressor short cycling?
It depends on the cause. A low-pressure switch is a $40 part and a half-hour of your time. A refrigerant recharge runs $150 to $300 at a shop. A full compressor replacement runs $800 to $1,400 at a shop, or about $300 to $600 in parts if you do it yourself. The diagnostic process in this article will tell you which repair you need before you spend any money.
Why does my AC work fine at highway speed but short cycle at idle?
At highway speed, the condenser gets plenty of airflow, so high-side pressure stays reasonable. At idle, airflow drops, high-side pressure climbs, and the pressure switch trips. This points to a condenser airflow problem, a weak cooling fan, or an overcharged system. Check the condenser fins for blockage and verify the cooling fan is spinning at full speed when the AC is on.
Final Verdict: Stop the Cycle Before You Burn the Clutch
Short cycling is never normal. It is a signal from a system that cannot maintain balance. The good news is that most causes are cheap and easy to fix. Start with the simplest checks: the belt, the fuse, the cabin air filter. Then move to the gauges. The numbers do not lie.
Here is the short version of what to do:
- Measure the clutch cycle time. Under 8 seconds on-time means you have a problem.
- Connect a manifold gauge set and read the static and running pressures. Low side under 20 psi means low refrigerant.
- Check the low-pressure switch with a multimeter before replacing it.
- Clean the condenser and replace the cabin air filter. Blocked airflow mimics low refrigerant.
- Measure the clutch air gap. Adjust or shim if it exceeds 0.025 inches.
- Never bypass the pressure switch for more than a 10-second test.
- If the compressor is seized or the system has been empty for months, replace the compressor and the accumulator together. A compressor that runs but does not cool points to a different set of faults, but a failed unit needs the full kit treatment.
If you are replacing the compressor, do not reuse the old accumulator. The desiccant bag inside it is saturated with moisture. A new compressor with an old accumulator will fail within a year. Replace both, plus the expansion valve, and flush the lines. That is the only way to guarantee the repair lasts. The proven fix for a failed AC compressor always includes replacing the filter drier and pulling a deep vacuum before recharging.
Take your time, follow the diagnostic order, and you will stop the short cycle without throwing parts at the car. Your compressor, your wallet, and your passengers will thank you.
Products related to this article
Sponsored / affiliate links. As an Amazon Associate I earn from qualifying purchases. I may earn additional commission from eligible campaigns.