Honda P1457 Code Fix: Diagnose the Real Problem Before Replacing Parts
Your Honda’s check engine light pops on, and the scan tool reads P1457. You’re looking at a problem with the evaporative emission control system, specifically a leak in the area of the canister vent valve. Most people immediately buy a new valve, install it, and the light comes right back. That’s because P1457 doesn’t always mean the valve itself is dead. It means the system detected a leak somewhere it didn’t expect one.
This guide walks you through the diagnostic process in the right order. You’ll learn how to test each component with simple tools, what the freeze frame data tells you, and exactly when to replace the canister shut-off valve versus something else entirely. The goal is to fix it once, not three times.

YGQ
YGQ Gas Tank Cap For Honda GX160…
- Replaces Part#: 17620-Z4H-920 17620-Z4H-912 17620-Z4H-911 17620-Z4H-910 17620-Z4H-900 17620-Z4H-030 17620-Z4H-020 17620-Z4H-010.
- Gas Lid for Honda & Clone GX120 GX160 GX200 GX240 GX270 GX340 GX390 4hp 5.5hp 6.5hp 7hp 8hp 11hp 13hp 163cc 196cc 270cc 389cc 168F…
- For Coleman BT200X CT200U CT200U-EX Baja Warrior Heat MB165 MB200 Massimo Doodlebug TrailMaster mini bike go kart. For Predator He…
If your diagnosis does point to a faulty gas cap, a simple replacement often solves the problem. The YGQ gas tank cap is a solid metal option that replaces Honda part numbers 17620-Z4H-900 through 17620-Z4H-920, and it comes with a gasket designed to hold pressure. It’s a low-cost part worth trying before you tear into the EVAP system, especially on older Honda GX-series engines or small equipment where the cap gets beaten up.
What Does the Honda P1457 Code Mean?
P1457 is a manufacturer-specific code for Honda vehicles. It translates to “EVAP system leak detected (canister area).” The engine control module runs a self-test on the evaporative emission control system, which captures fuel vapors from the tank and stores them in a charcoal canister until the engine can burn them. During the test, the system pressurizes the fuel tank and watches for pressure decay.
The “canister area” part is critical. This code points to a leak between the fuel tank and the canister vent shut valve, not a loose gas cap on the filler neck. While a loose gas cap can trigger a generic EVAP leak code (P0455 or P0456), P1457 specifically implicates the components under the car near the charcoal canister.
The system uses a few key parts: the fuel tank pressure sensor, the canister vent shut valve, the canister itself, and the purge valve. The vent valve lets fresh air into the canister during the test, and it closes to seal the system. When the computer sees pressure drop faster than expected, it logs P1457. Understanding this helps you diagnose rather than guess.
Top Causes of P1457 (Ranked by Likelihood)
Based on real-world failure data from Honda forums and repair shops, here’s what actually fails, in order of frequency. The list isn’t exhaustive, but it covers roughly 95% of P1457 cases on Accord, CR-V, Civic, and Odyssey models.
The Vent Valve and Shut-Off Valve
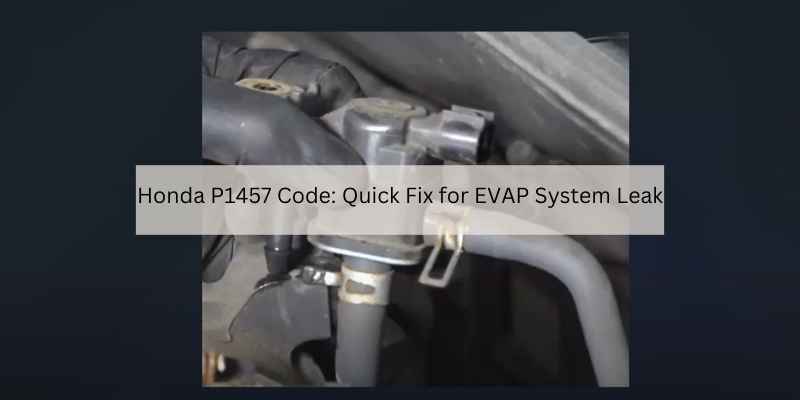
The canister vent shut valve is the most common culprit. It’s a normally open valve that sits on top of the charcoal canister, usually near the rear of the car under the bumper or spare tire well. Its job is to close during the EVAP test to seal the system. Over time, the internal diaphragm cracks or the valve sticks open. When that happens, the system can’t hold pressure, and the computer sees a large leak.
You’ll often find the valve itself is fine, but the rubber gasket between the valve and the canister has rotted. Replacing the gasket costs a few dollars and takes five minutes. Check that before you buy a new valve.
Wiring and Connector Issues
The vent valve gets power and ground through a two-wire connector. Corrosion on the pins, a broken wire near the connector, or a chafed harness rubbing against the body can cause the valve to not receive power when commanded to close. This is especially common in northern states where road salt attacks connectors. Use a multimeter to check for 12V at the connector with the key on and the scan tool commanding the valve to close. A voltage drop test is worth doing if you suspect a wiring issue.
The Gas Cap (and Why It’s Rarely the Problem)
Here’s the part where many people waste money. A loose or damaged gas cap usually triggers P0455 or P0456, not P1457. The P1457 code points to the canister area, which is physically separate from the filler neck. Replacing the gas cap because you have P1457 is like changing your oil because your brake pads are worn. It’s the wrong tool for the job.
That said, if you have a small engine like a GX160 or GX390 on a generator or water pump, and you’re seeing a related EVAP code, a metal cap with a fresh gasket like the YGQ replacement cap is a cheap insurance policy. But for P1457 on a car, test the vent valve first.
Symptoms You Might Notice (and What You Won’t)
Here’s the honest truth: P1457 rarely causes drivability problems. Your car will start, run, and drive normally. You won’t feel a misfire, a stumble, or a loss of power. The only symptom is the check engine light. In some cases, you might notice a faint fuel smell after parking in a hot garage, but that’s not guaranteed.
The lack of symptoms makes it easy to ignore. Don’t. The code will fail an emissions inspection in most states, and the longer you drive with it, the more the charcoal canister can become saturated with fuel vapors. A saturated canister is a much more expensive repair because it means replacing the entire canister assembly.
One thing you might notice on certain Honda models is a rough idle right after refueling. That happens when the purge valve opens and pulls vapor into the intake, but it’s not a direct symptom of P1457. It’s just an indicator that the EVAP system isn’t working correctly.
How to Diagnose P1457 Like a Pro (No Guesswork)
Skip the parts cannon. A $5 multimeter and a little time will tell you exactly what’s broken. Here’s the process, step by step.
The Free Scan and Freeze Frame Data
Start with an OBD-II scanner. You don’t need a $500 professional tool, but you do need one that can read freeze frame data and command the EVAP system. A basic $30 scanner reads the code, but it won’t let you run the active test. If you don’t have a bidirectional scanner, you can still check the freeze frame data, which records the engine conditions when the code was set. Look at the fuel tank pressure reading. If it’s showing a large negative pressure (vacuum) when the code set, the system was trying to seal and couldn’t. That points to a leak.
If the fuel tank pressure sensor reads a constant value regardless of what the system does, the sensor itself might be faulty. That’s a separate code usually, but it’s worth checking. Also note the ambient temperature and altitude in the freeze frame data. Extreme cold can cause condensation in the vent line to freeze, which temporarily blocks airflow and triggers a false P1457.
The DIY Smoke Test Method
You can build a smoke machine for under $20. The principle is simple: pressurize the EVAP system with smoke and watch where it escapes. A commercial smoke machine costs $300 or more. A DIY version works just as well for this specific test.
You’ll need a small cigar or a vape pen, a length of rubber hose, and a way to seal the system. Disconnect the vent valve hose from the canister. Connect your hose to the canister side. Light the cigar or vape, let the smoke fill the hose, and use a hand pump or a bicycle pump to push the smoke into the canister. Watch for smoke escaping around the canister, the vent valve, or any of the rubber lines. If you see smoke, you’ve found your leak.
Be careful with this method. Cigar smoke leaves a residue, so don’t blow it directly into the fuel tank. Stick to the canister area. Also, don’t use a torch or open flame anywhere near the system. Fuel vapors are present, and you don’t want to learn why that’s a bad idea the hard way.
Testing the Vent Valve with a 12V Source
This is the definitive test. Remove the vent valve from the canister. It’s usually held in with a single screw or a clip. Connect a 12V battery source directly to the valve’s two pins. You’ll hear a distinct click when the valve opens and another click when it closes. If you don’t hear a click, the solenoid is dead, and the valve needs replacement.
If the valve clicks, check the resistance across the pins with your multimeter. A good valve reads between 15 and 30 ohms. If you read infinite resistance, the coil is open, and the valve is dead. If you read near zero, the coil is shorted. Either way, replacement is the fix.
Before you reinstall the valve, blow through it with the power off. It should be open. Apply power and try to blow through it again. It should be closed. If it doesn’t seal when powered, the internal diaphragm is shot, even if the coil clicks.
Step-by-Step Fix: Replacing the Canister Shut-Off Valve
Once you’ve confirmed the vent valve is dead, the replacement is straightforward. Here’s the process for most Honda models. The location varies slightly, but the procedure is the same.
- Disconnect the battery. Wait five minutes for the airbag system to power down.
- Jack up the rear of the car and support it on jack stands. You need clearance to reach the canister.
- Locate the charcoal canister. It’s usually under the rear bumper, behind the spare tire well, or above the rear axle on CR-Vs.
- Disconnect the electrical connector from the vent valve. Squeeze the tab and pull straight off.
- Remove the vent valve. It typically has one or two 10mm bolts or a single Phillips screw. Keep the bolts safe.
- Clean the mounting surface on the canister. Old gasket material needs to be scraped off.
- Install the new valve with a fresh gasket. Do not overtighten the bolts. Most valves use a 10mm bolt torqued to 8-10 ft-lbs. Overtightening cracks the plastic housing.
- Reconnect the electrical connector until it clicks.
- Lower the car and reconnect the battery.
Before you clear the code, double-check the wiring. The connector pins should be clean and free of corrosion. If they’re green or crusty, clean them with electrical contact cleaner and a small wire brush. A poor connection will cause the same code to return within a week.
Cost Breakdown: DIY vs. Mechanic vs. Dealer
Here’s what you can expect to pay, based on current market rates. Parts prices vary, so check the current price on Amazon or your local parts store before you buy.
| Repair Option | Parts Cost | Labor Cost | Total Estimate | Notes |
|---|---|---|---|---|
| DIY (Vent Valve) | $40 – $90 | $0 (your time) | $40 – $90 | Requires basic hand tools and 1-2 hours |
| DIY (Full Canister) | $150 – $300 | $0 | $150 – $300 | More labor, but still doable at home |
| Independent Mechanic | $40 – $90 | $80 – $150 | $120 – $240 | They’ll usually charge 1-2 hours of labor |
| Dealership | $60 – $120 | $150 – $250 | $210 – $370 | Dealer labor rates run $100-$150/hour |
The OEM part number for the canister vent shut valve is 17310-5R0-305 on many Accord and CR-V models. Aftermarket equivalents from Denso or Standard Motor Products run about 30% less than the Honda-branded part. If you’re handy with a wrench, the DIY route saves you at least $150 in labor. The downside is access. On some Odyssey models, the canister is buried behind the rear suspension, and you’ll spend an hour just getting to it.
Preventing P1457 from Coming Back
Once you’ve fixed the leak, you want it to stay fixed. The EVAP system is sensitive, but you can avoid future issues with a few habits.
Don’t top off your gas tank after the pump clicks off. Overfilling forces liquid fuel into the charcoal canister, which destroys it. That’s a $300 mistake that starts with a $3 habit. Stop at the first click and put the nozzle away.
Keep your gas cap tight. It’s not the cause of P1457, but a loose cap stresses the entire system during the pressure test. Turn it until it clicks three times.
Check the rubber hoses in the EVAP system every couple of years. They’re made of a special fuel-resistant rubber that gets hard and brittle after about eight years. A cracked hose is just as bad as a bad valve.
If you live in a cold climate, be aware that ice can form in the vent line during extreme cold snaps. If P1457 appears after a night below -20°F and disappears when it warms up, it was a frozen vent line, not a failed valve. Let the car warm up and clear the code before you spend any money.
For small engine owners using the YGQ metal gas cap, the same logic applies. Keep the gasket clean and the vent clear. A clogged vent on a generator can cause fuel starvation, which is a different problem, but it starts with the same cap.
Frequently Asked Questions
Can I drive with a P1457 code?
Yes, you can drive for a while. The car will run normally, and you won’t damage the engine. The risk is long-term. If the leak is letting fuel vapors escape, the charcoal canister will eventually become saturated, and you’ll need to replace it. That’s a much bigger job. Plan to fix it within a few weeks, not months.
Will P1457 fail an emissions test?
In most states, yes. The OBD-II system will report the EVAP system as “not ready” or “failed,” and you’ll get a rejection sticker. Some states allow one monitor to be “not ready” on older vehicles, but P1457 is a hard failure in California, New York, and most other states with testing programs.
Why does P1457 return after replacing the valve?
The most common reason is that the valve wasn’t the problem. The leak could be in a rubber hose, the canister itself, or the purge valve. The second most common reason is a wiring issue that prevents the new valve from getting power. Test the new valve with a 12V source before you install it, and verify the connector has voltage with the key on.
How long does the EVAP test take to run?
The test runs once per drive cycle under specific conditions: fuel level between 15% and 85%, engine coolant above a certain temperature, and the car at a steady speed. It can take a week of normal driving for the test to complete. If you clear the code and want to verify the fix, drive on the highway for 20 minutes at 55 mph, then let the car sit overnight. That usually triggers the test.
Can a bad fuel tank pressure sensor cause P1457?
Rarely, but it’s possible. If the sensor reads a fixed value like 0.0 volts regardless of pressure changes, the computer can misinterpret the data and log a leak code. The freeze frame data will show a fuel tank pressure reading that doesn’t change during the test. Replacing the sensor is a $60 part and a 20-minute job on most models.
What to Remember Before You Start
- P1457 points to the canister area, not the gas cap. Test the vent valve first.
- A $5 multimeter will confirm a dead solenoid in under a minute. No guesswork needed.
- DIY smoke testing with a cigar or vape pen works, but keep smoke out of the fuel tank.
- Check the wiring connector for corrosion before you buy any parts. It’s a common failure point.
- Don’t top off the gas tank. It destroys the charcoal canister over time.
- Clear the code with a scanner, not by disconnecting the battery. You’ll lose the freeze frame data you need for diagnosis.
- If the code returns after replacing the valve, look for a cracked rubber hose or a saturated canister, not another valve.
Products related to this article
Sponsored / affiliate links. As an Amazon Associate I earn from qualifying purchases. I may earn additional commission from eligible campaigns.