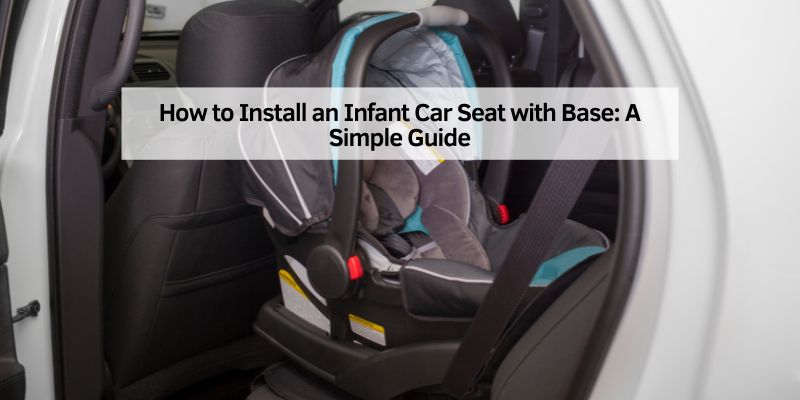
How to Install an Infant Car Seat with Base: A Simple Guide
An infant car seat with base is a bucket-like seat that keeps babies safe in cars. The base stays fixed in the car, and the seat clicks in and out. It’s designed for newborns up to about a year old, or until they hit the seat’s weight or height limit (usually 30-35 pounds or 32 inches). The base makes it easy to move the seat without reinstalling. Keeping your baby rear-facing is key—it protects their head and neck in a crash. I learned this the hard way when I thought forward-facing was okay too soon!
Why Installing It Right Matters
A properly installed car seat can cut the risk of injury by over 70%, according to the American Academy of Pediatrics (AAP). A wobbly base or loose straps can fail in an accident. My first install was too loose, and I had to redo it after a quick tug showed it moved too much. Getting it right gives you peace of mind and keeps your little one safe.
Tools and Materials You Need
You don’t need fancy tools to install an infant car seat with base. Here’s what you’ll need:
- Infant car seat and base: Check the manual for your model (e.g., Graco SnugRide or Chicco KeyFit).
- Vehicle owner’s manual: This shows where your car’s anchors or seat belts are.
- Optional: A rolled towel or pool noodle (if allowed by the manufacturer) to adjust the angle.
I recommend brands like Graco or Chicco for beginners—they’re user-friendly and have clear instructions. Always check the car seat’s expiration date (usually 6-10 years from manufacture) to ensure it’s safe.
Step-by-Step Guide to Install an Infant Car Seat with Base
Here’s how to install your car seat base like a pro. I’ve broken it into simple steps based on my own trial and error. You can use either the LATCH system or a seat belt—both are safe if done right.
Step 1: Pick the Safest Spot
Place the base in the back seat, ideally in the middle. Kids are 43% safer in the middle, says the National Highway Traffic Safety Administration (NHTSA). If the middle doesn’t work (some cars lack LATCH anchors there), use the passenger or driver side. I put my daughter’s seat in the middle of our sedan, but the passenger side worked better in our SUV for easier access.
Step 2: Check the Angle
Babies need a semi-reclined position (30-45 degrees) to breathe easily. Most bases have a built-in angle indicator. My Graco base had a little bubble level that made this step a breeze. If the angle’s off, check your manual. Some seats allow a rolled towel under the base to adjust it—just don’t overdo it!
Step 3: Use the LATCH System or Seat Belt
You can secure the base with either LATCH (Lower Anchors and Tethers for Children) or a seat belt. Never use both unless your manual says it’s okay (like some Nuna models). Here’s how to do each:
Installing with LATCH
- Find the LATCH anchors in your car’s seat crease (check your vehicle manual).
- Click the base’s LATCH connectors onto the anchors. You’ll hear a snap.
- Push down on the base and pull the straps tight. I used my knee to press down hard—it really helps!
- Tug the base. It shouldn’t move more than 1 inch side to side.
Installing with a Seat Belt
- Thread the car’s seat belt through the base’s belt path (check the manual).
- Pull the seat belt all the way out to lock it, then let it retract slowly.
- Push down on the base and tighten the belt. My first try was too loose until I learned to lock the belt properly.
- Check for movement—less than 1 inch is the goal.
Step 4: Click the Car Seat into the Base
Line up the car seat with the base and push until it clicks. Give it a tug to make sure it’s secure. My seat made a loud click, which was super reassuring. Practice taking it in and out a few times—it’s easier than it looks!
Step 5: Secure Your Baby
Place your baby in the seat with their back flat against it. Thread the harness straps over their shoulders, through slots at or below shoulder level. Buckle the harness and chest clip, tightening until you can’t pinch extra strap at the shoulder. I made the mistake of leaving