How to Jump My Car: Genius Effortless Guide
Jump-starting your car is a straightforward process when you have the right knowledge and safety precautions. This guide provides simple, step-by-step instructions, essential safety tips, and answers to common questions, empowering you to get back on the road quickly and confidently.
We’ve all been there: you turn the key, and instead of a healthy engine roar, you hear a sad clicking sound or nothing at all. Your car battery is dead, leaving you stranded and frustrated. It’s an incredibly common issue, especially during extreme weather or if your car sits for a while. But don’t worry! Jump-starting your car is a surprisingly simple process, and with this guide, you’ll feel confident tackling it yourself. We’ll break down everything you need to know, from gathering your supplies to safely getting your engine running again.
What Does It Mean to Jump-Start a Car?
Jump-starting a car is essentially borrowing a temporary electrical charge from another vehicle’s battery to start your own. Your car’s battery might be dead for several reasons, such as leaving lights on, a faulty alternator, or simply an old battery reaching the end of its life. When a battery is drained, it can’t provide enough power to crank the engine. A jump-start uses a good battery from another car, connected through jumper cables, to supply that missing power, allowing your engine to start. Once your engine is running, your alternator will begin to recharge your battery.
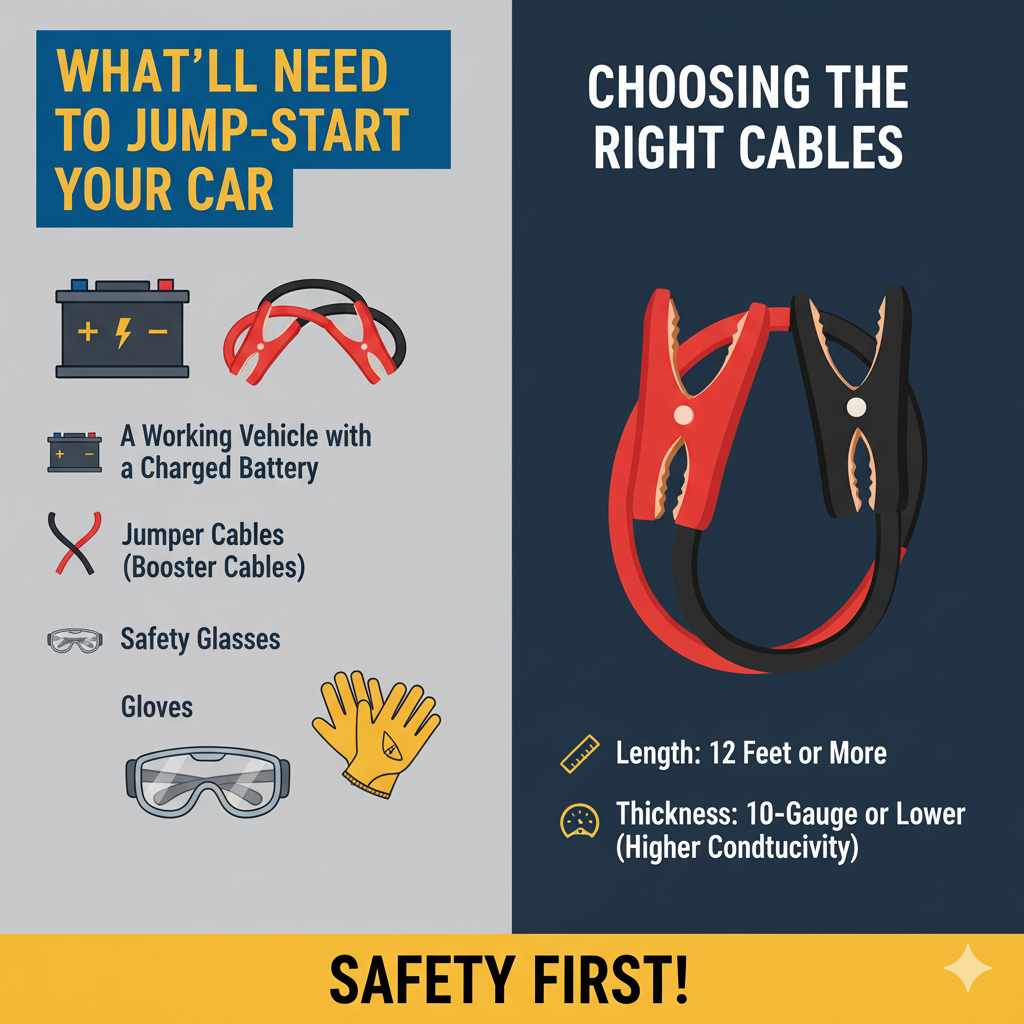
What You’ll Need to Jump-Start Your Car
Gathering the right tools is crucial for a safe and effective jump-start. Fortunately, you only need a few essential items:
- A working vehicle with a charged battery.
- A set of jumper cables (also called booster cables). Ensure they are in good condition, with no frayed wires or damaged clamps.
- Safety glasses to protect your eyes from any potential sparks.
- Gloves can offer a bit of protection and grip.
Choosing the right jumper cables is important. Look for cables that are at least 10-gauge thickness for better conductivity, especially for larger vehicles. Longer cables (12 feet or more) offer more flexibility in positioning the cars.
Safety First! Essential Precautions Before You Start
Safety is paramount when jump-starting a car. Batteries contain corrosive acid and can produce flammable hydrogen gas. Following these precautions will significantly reduce any risks:
- Consult Your Car’s Manual: Always check your vehicle’s owner’s manual first. Some cars have specific jump-starting ports or procedures you need to follow to avoid damaging sensitive electronics. A quick look online for “[Your Car Make/Model] jump start procedure” can also be very helpful.
- Turn Off Both Cars: Ensure both vehicles are turned off before connecting the cables.
- Engage Parking Brakes: Apply the parking brake firmly on both vehicles to prevent them from rolling.
- Remove Ignition Key: Take the key out of the ignition in both cars.
- Wear Safety Glasses: Protect your eyes from potential sparks or battery acid.
- Inspect Batteries: Do not attempt to jump-start a battery that is cracked, leaking, or appears damaged.
- Avoid Smoking: Keep open flames and smoking materials far away from the car batteries.
- Keep Metal Away: Ensure that the metal clamps of the jumper cables do not touch each other or any other connected metal surfaces once they are attached to a battery.
- Ventilation: If possible, ensure good ventilation. Batteries can release hydrogen gas, which is flammable.
Step-by-Step Guide: How to Jump-Start Your Car
Follow these steps carefully to jump-start your car safely and effectively. Remember to keep the red clamps separate from the black clamps once they are attached to a battery.
Step 1: Position the Cars
Park the working car close enough to the car with the dead battery so that the jumper cables can reach both batteries comfortably. Ideally, you want the cars nose-to-nose or side-by-side. Avoid letting the vehicles touch each other.
Step 2: Open the Hoods and Locate Batteries
Open the hoods of both cars and locate the batteries. In some cars, the battery might be in the trunk or under a seat, so check your owner’s manual if you can’t find it under the hood. Identify the positive (+) and negative (-) terminals on each battery. The positive terminal is usually marked with a “+” symbol or covered with a red cap, while the negative terminal is marked with a “-” symbol or a black cap.
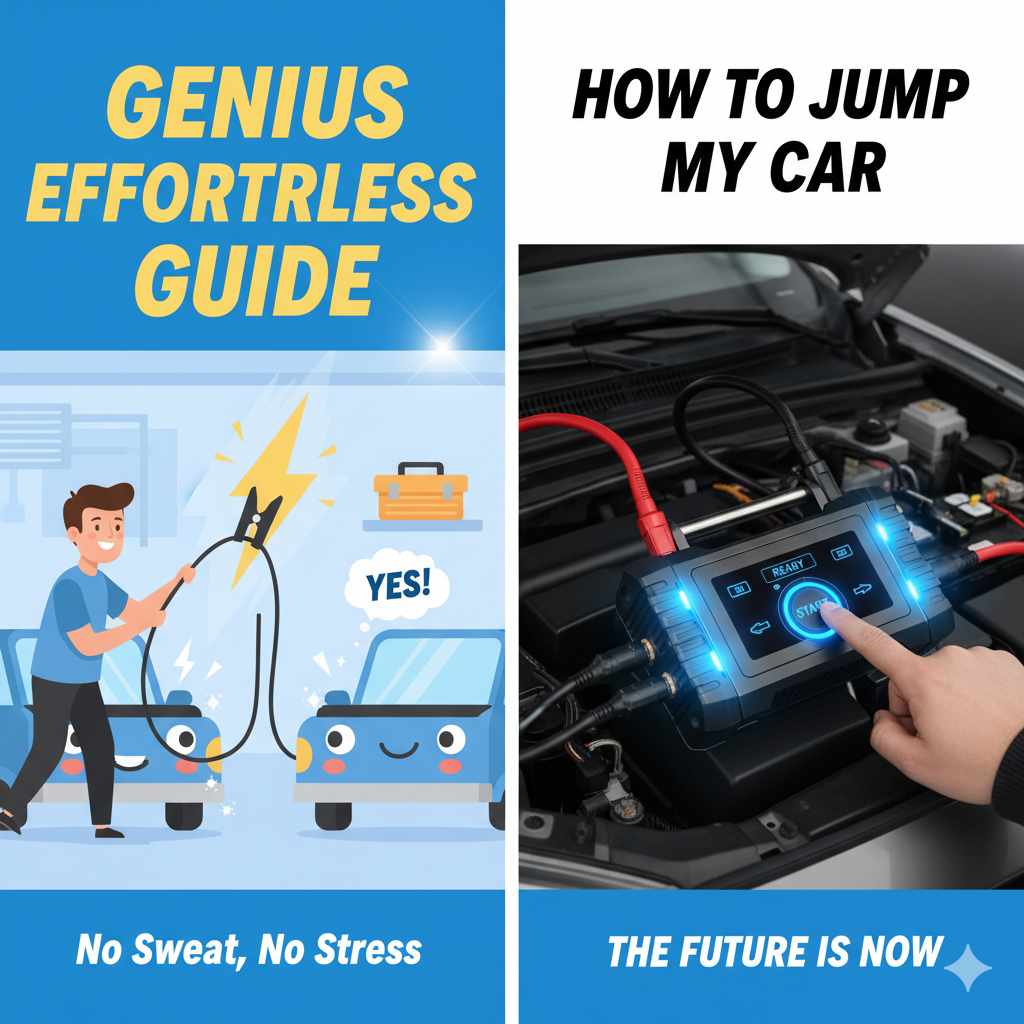
Step 3: Connect the Jumper Cables (The Crucial Part!)
This is the most critical step. Connecting the cables in the wrong order can cause sparks, damage the electrical systems, or even cause an explosion. Pay close attention to the color of the clamps (red for positive, black for negative) and follow this precise sequence:
- Connect RED to DEAD Positive: Attach one of the red (positive) clamps to the positive (+) terminal of the dead battery.
- Connect RED to GOOD Positive: Attach the other red (positive) clamp to the positive (+) terminal of the good battery.
- Connect BLACK to GOOD Negative: Attach one of the black (negative) clamps to the negative (-) terminal of the good battery.
- Connect BLACK to GROUND on DEAD Car: This is the most important part of ensuring safety. Attach the final black (negative) clamp to an unpainted, metal surface on the engine block or chassis of the car with the dead battery. This acts as a ground connection and is generally safer than connecting directly to the dead battery’s negative terminal, as it minimizes the risk of sparks near the battery itself. Look for a sturdy, unpainted metal bolt or bracket away from moving parts and the battery.
Tip: If you are unsure about a good grounding point on your dead car, consult your owner’s manual or a professional. Connecting to a ground point is a critical safety measure to prevent sparks from igniting hydrogen gas that may be escaping from the dead battery.
Step 4: Start the Working Car
Start the engine of the working car and let it run for a few minutes. This allows its battery to send some charge to the dead battery. You can also gently rev the engine of the working car to about 1500-2000 RPM for a minute or two. This helps the alternator produce more power to charge the dead battery.
Step 5: Attempt to Start the Dead Car
After the working car has run for a few minutes, try to start the car with the dead battery.
If it starts, great! If it doesn’t start immediately, let the working car run for another few minutes and try again. Do not crank the engine for more than a few seconds at a time to avoid overheating the starter motor.
If your car still won’t start after several attempts, there might be a more significant issue with the battery, alternator, or starter, and you may need to call for professional assistance.
Step 6: Disconnect the Jumper Cables (Reverse Order!)
Once your car has successfully started, it’s time to disconnect the jumper cables. It’s crucial to disconnect them in the REVERSE order of how you connected them. This is another safety step to prevent sparks and potential damage. Keep the clamps from touching each other or any metal parts of the car.
- Disconnect BLACK from GROUND on DEAD Car: Remove the black clamp from the metal ground point on the car you just started.
- Disconnect BLACK from GOOD Negative: Remove the black clamp from the negative terminal of the good battery.
- Disconnect RED from GOOD Positive: Remove the red clamp from the positive terminal of the good battery.
- Disconnect RED from DEAD Positive: Remove the red clamp from the positive terminal of the dead battery.
Step 7: Keep the Jump-Started Car Running
After disconnecting the cables, do not turn off the engine of the car you just jump-started. Let it run for at least 15-30 minutes to allow the alternator to recharge the battery. Driving the car for a good distance is the best way to ensure a sufficient recharge. If the battery dies again shortly after, it might be time for a new battery or there could be an issue with your alternator.
For long-term battery health, it’s a good idea to get your battery and charging system checked by a mechanic. You can find more information on car maintenance from government resources like the National Highway Traffic Safety Administration (NHTSA), which offers valuable safety guidelines for vehicle operations.
Why Did My Car Battery Die? Common Causes
Understanding why your battery died can help you prevent it from happening again. Here are some frequent culprits:
- Leaving Lights or Accessories On: The most common reason for a dead battery is accidentally leaving headlights, interior lights, radio, or other accessories on after turning off the engine.
- Old Age: Car batteries typically last 3-5 years. After this period, they are more prone to failure, especially in extreme temperatures.
- Cold Weather: Cold temperatures significantly reduce a battery’s cranking power, making it harder for your car to start. A weaker battery might fail entirely in the cold.
- Hot Weather: Extreme heat can also damage a battery over time, leading to a shorter lifespan and premature failure. Heat can cause the battery fluid to evaporate and internal corrosion.
- Faulty Alternator: The alternator is responsible for recharging the battery while the engine is running. If it’s not working correctly, the battery won’t get the charge it needs and will eventually die.
- Parasitic Drain: This is when a component in your car continues to draw power even after the engine is off. It could be a faulty switch, a short circuit, or a malfunctioning electronic module.
- Corroded or Loose Terminals: Dirty or loose connections on the battery terminals can prevent proper electrical flow, hindering both charging and starting.
Jump-Starting vs. Portable Jump Starters
While jumper cables and another vehicle are the classic way to jump-start, portable jump starters (also called battery jump boxes or boosters) offer a convenient alternative:
| Feature | Jumper Cables (with another car) | Portable Jump Starter |
|---|---|---|
| Convenience | Requires another vehicle and careful cable connection. | Self-contained unit, no second car needed. Easy to store. |
| Power Source | Relies on the battery of another vehicle. | Built-in battery pack, needs to be recharged periodically. |
| Ease of Use | Can be tricky to connect correctly, especially the final ground wire. | Generally very simple: connect clamps, turn on, start car. |
| Cost | Jumper cables are relatively inexpensive. | Portable jump starters can range from $50 to $200+, depending on the brand and power output. |
| Safety Features | Requires careful adherence to connection order. | Often include built-in safety features like reverse polarity protection and spark-proof technology. |
Portable jump starters are an excellent option for anyone who frequently travels alone or wants a reliable backup solution readily available. For more information on choosing the right jump starter, resources like Consumer Reports often provide unbiased reviews and recommendations.
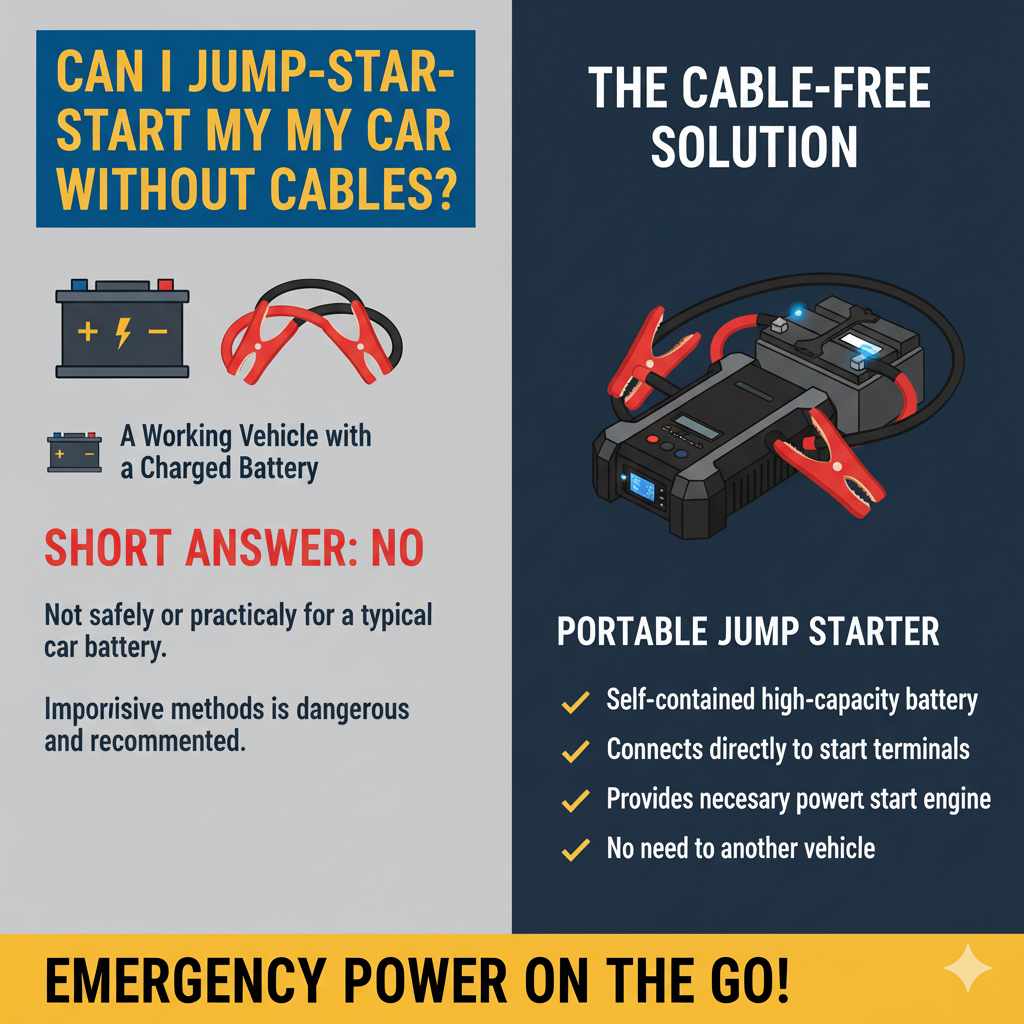
Can I Jump-Start My Car Without Cables? (How to Jump My Car Without Cables)
The short answer is: no, not safely or practically for a typical car battery. The keyword “how to jump my car without cables” often refers to using a portable jump starter. These devices are designed precisely for this purpose. They contain a high-capacity battery and internal wiring that allow you to connect directly to your car’s battery terminals, providing the necessary power to start your engine without another vehicle. They are essentially a self-contained jump-start system. Trying to improvise other methods without proper equipment would be dangerous and is not recommended.
Frequently Asked Questions (FAQ)
Q1: How long should I let the dead car run after starting it with a jump?
A1: You should let the car run for at least 15-30 minutes. Driving it for this duration will best ensure the battery gets a solid charge from the alternator. If possible, a longer drive of 30-60 minutes is even better.
Q2: What if the jumper cables touch each other after I connect them?
A2: If the red and black clamps touch each other after they have been connected to the batteries (or other metal parts), it can cause a shower of sparks and potentially damage the electrical systems of both cars. This is why it’s critical to ensure the clamps are secure and don’t touch each other or any other metal components unnecessarily.
Q3: My car has a hybrid system. Can I jump it?
A3: Yes, most hybrid vehicles can be jump-started, but they often have a secondary 12-volt battery that powers the accessories and computers, in addition to the main hybrid battery. You’ll typically jump this 12-volt battery. However, it’s crucial to consult your owner’s manual for the specific procedure for your hybrid model, as there might be unique jump points or cautionary steps.
Q4: Can I jump-start a car if the battery is completely dead?
A4: Yes, that’s the primary purpose of jump-starting. Even if a battery shows no signs of life (no lights, no sounds), it can still be jump-started if it’s not internally damaged or physically broken. The jump-start provides the necessary juice to get the engine running so the alternator can begin recharging.
Q5: What should I do if one of the cars is a diesel engine?
A5: Jump-starting a diesel can be done using the same process, but diesel engines generally require more power to start due to their higher compression ratios. This means you’ll likely need a larger vehicle with a robust battery and thicker jumper cables (8-gauge or 4-gauge is often recommended for diesels) to provide sufficient power. Always ensure the working car’s battery is strong enough to handle the higher power demand.
Q6: Is it possible to damage my car by jump-starting it incorrectly?
A6: Absolutely. Connecting the cables in the wrong order (especially putting the final black clamp on the dead battery’s negative terminal instead of a ground point) can cause sparks, damage delicate electronic components like the car’s computer, or even damage the batteries themselves. Always double-check the order and connections.
Q7: How do I know if my car battery is beyond jump-starting and needs replacing?
A7: If your car consistently needs jump-starting, even after holding a charge for a short period, it’s a strong indicator that the battery is failing. Other signs include a swollen or misshapen battery case, a sulfurous or rotten egg smell coming from the battery, or if the battery is more than 3-5 years old. A mechanic can perform a battery load test to determine if replacement is necessary.
Conclusion
Dealing with a dead car battery can be a stressful experience, but knowing how to jump-start your car is a valuable skill that can save you time and money. By following these clear, step-by-step instructions and prioritizing safety, you can confidently get yourself (or someone else) back on the road. Remember to use the correct cable connections, allow sufficient running time for recharging, and if problems persist, don’t hesitate to seek professional help. Staying prepared with a good set of jumper cables or a portable jump starter can turn a roadside emergency into a minor inconvenience.