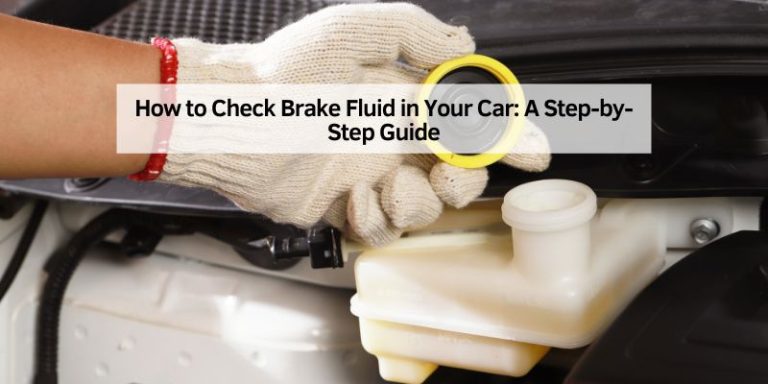
How to Remove Refrigerant from Car AC Without a Recovery Machine
Hey there! If you’re reading this, you’re probably wondering how to tackle the tricky task of removing refrigerant from your car’s air conditioning system without a fancy recovery machine. I get it—AC issues can be a real headache, especially when it’s swelteringly unbearable outside, and you’re trying to save a few bucks. I’ve been down this road myself, tinkering with my car’s AC to keep it running smoothly without breaking the bank. Over the years, I’ve learned a thing or two about handling refrigerants safely and effectively, even without professional-grade equipment. Today, I’m excited to share my experience with you, breaking it down into simple, actionable steps.
Whether you’re a DIY enthusiast or just someone looking to fix their car’s AC on a budget, this guide will walk you through the process of removing refrigerant from your car’s AC system without a recovery machine. Let’s dive in and get that cool air flowing again!
Why You Might Need to Remove Refrigerant
Let’s start with the basics. Your car’s AC system relies on refrigerant—a special chemical that absorbs heat from inside your car and releases it outside, keeping you cool. Over time, you might need to remove this refrigerant for several reasons. Maybe your AC isn’t cooling properly, and you suspect a leak. Or perhaps you’re replacing a component like the compressor or condenser, which requires draining the system first. Sometimes, you just need to flush out old refrigerant to recharge the system with fresh stuff.
In my case, I once had an old sedan where the AC was blowing warm air. After some troubleshooting, I found out the system was over-pressurized, and I needed to remove some refrigerant to get it working right. A recovery machine is the professional way to go, but those machines are expensive, and not everyone has access to one. That’s when I started exploring ways to do it myself safely and legally. Speaking of legal, let’s address the elephant in the room.
The Legal Side of Handling Refrigerant
Before we get our hands dirty, I need to stress something important: handling refrigerant isn’t just a technical task—it’s also a legal one, especially in the USA. Refrigerants like R-134a or R-1234yf, commonly used in car AC systems, are regulated by the Environmental Protection Agency (EPA) under Section 608 of the Clean Air Act. Releasing these chemicals into the atmosphere is illegal because they can harm the ozone layer and contribute to global warming.
When I first started working on my car’s AC, I didn’t fully grasp the environmental impact. I learned the hard way that venting refrigerant into the air could get me in trouble—not to mention it’s bad for the planet. The EPA requires that refrigerants be recovered and recycled properly. While we’re exploring ways to remove refrigerant without a recovery machine, I’ll make sure to guide you toward methods that are as compliant as possible. This means capturing the refrigerant instead of letting it escape. Don’t worry—I’ll show you how to do this responsibly.

Tools and Materials You’ll Need
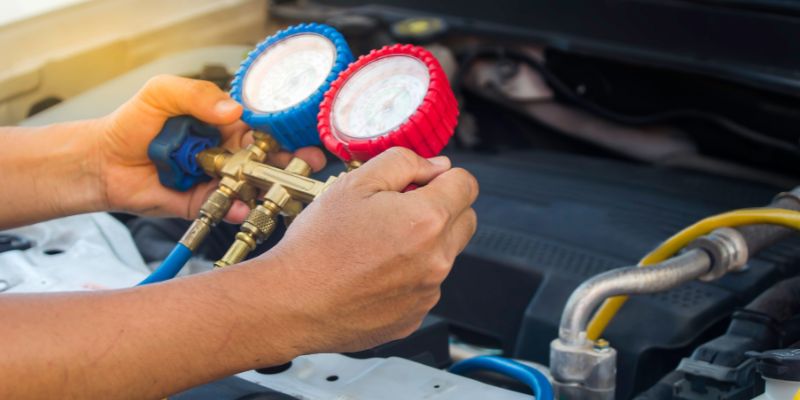
Alright, let’s talk about what you need to get started. When I tackled this job, I gathered a few simple tools and materials to make the process smooth. You don’t need a garage full of equipment, but having the right stuff is crucial for safety and efficiency. Here’s what I recommend:
| Tool/Material | Purpose |
|---|---|
| Manifold gauge set | To monitor pressure in the AC system and control the flow of refrigerant. |
| Empty refrigerant canister | To capture and store the refrigerant safely. |
| Safety gloves | To protect your hands from frostbite or chemical exposure. |
| Safety goggles | To shield your eyes from potential refrigerant spray. |
| Wrench or socket set | To loosen or tighten fittings on the AC system. |
| Vacuum pump (optional) | To evacuate any remaining refrigerant or air from the system. |
| Container for waste | To catch any oil or debris that might come out with the refrigerant. |
| Shop rags | For cleaning up spills or wiping down components. |
I found my manifold gauge set at a local auto parts store for about $50, and it’s been a lifesaver for AC work. The empty canister is key—you can often get one from an auto shop or recycle center. Make sure it’s rated for the type of refrigerant in your car (usually R-134a for older models or R-1234yf for newer ones). Safety gear is non-negotiable. Refrigerant can cause frostbite if it touches your skin, and you don’t want it in your eyes.
Understanding Your Car’s AC System
Before you start messing with the refrigerant, it’s helpful to understand how your car’s AC system works. I remember feeling overwhelmed the first time I popped the hood and stared at all those lines and components. But once you break it down, it’s not so scary.
Your car’s AC system has a few key parts: the compressor, condenser, evaporator, expansion valve, and the lines that connect them. The refrigerant flows through this closed loop, changing from a gas to a liquid and back again as it absorbs and releases heat. The high-pressure side (from the compressor to the condenser) and the low-pressure side (from the evaporator back to the compressor) are where you’ll be working.
The low-pressure port, usually marked with an “L” or a blue cap, is where you’ll connect your manifold gauge to remove refrigerant. The high-pressure port, marked with an “H” or a red cap, is typically used for recharging, but we’ll focus on the low-pressure side for now. Knowing this helped me avoid rookie mistakes, like connecting to the wrong port and causing a mess.
Step-by-Step Process to Remove Refrigerant
Now, let’s get to the main event—removing the refrigerant. I’ll walk you through the process I used, step by step, so you can follow along. This method assumes you’re capturing the refrigerant in an empty canister to stay EPA-compliant.
Step 1: Prepare Your Workspace
First things first, park your car in a well-ventilated area, preferably outdoors. I did this in my driveway on a calm day to avoid breathing in any fumes. Make sure the engine is off and the keys are out of the ignition. Pop the hood and locate the AC system’s service ports. They’re usually near the firewall or along the AC lines. Put on your safety gloves and goggles—trust me, you don’t want to skip this.
Step 2: Connect the Manifold Gauge Set
Take your manifold gauge set and connect the blue hose to the low-pressure port on your car’s AC system. The low-pressure port is usually larger and has a blue or black cap. Make sure the connection is tight but don’t overtighten—you don’t want to damage the valve. Next, connect the yellow hose (the service hose) to your empty refrigerant canister. Double-check that the canister is compatible with your car’s refrigerant type.
When I did this, I made sure all the valves on the manifold gauge were closed before connecting anything. This prevents any accidental release of refrigerant. Once everything’s hooked up, open the valve on the empty canister to prepare it for capturing the refrigerant.
Step 3: Release the Refrigerant
Now comes the delicate part. Slowly open the low-pressure valve on the manifold gauge set. You’ll hear a hissing sound as the refrigerant starts flowing from the car’s AC system into the empty canister. Keep an eye on the gauge to monitor the pressure. You want to go slow to avoid over-pressurizing the canister or causing a leak.
I found it helpful to do this in short bursts, opening the valve for a few seconds, then closing it to check the pressure. If the gauge shows the pressure dropping to near zero, you’ve likely removed most of the refrigerant. This took me about 10-15 minutes, depending on how much refrigerant was in the system.
Step 4: Check for Residual Refrigerant
Even after you think you’re done, there might be some refrigerant left in the system. I learned this the hard way when I thought I’d emptied the system but still heard a faint hiss. If you have a vacuum pump, you can connect it to the low-pressure port and run it for 10-15 minutes to pull out any remaining refrigerant or air. This step isn’t mandatory, but it’s a good way to ensure the system is completely empty before you move on to repairs or recharging.
Step 5: Disconnect and Store Safely
Once you’re sure the refrigerant is out, close all the valves on the manifold gauge set and disconnect the hoses. Cap the service ports on your car to keep dirt and moisture out. Store the filled canister in a cool, dry place, and label it clearly with the type of refrigerant it contains. I took mine to a local auto shop that recycles refrigerants—they were happy to take it off my hands.
Safety Tips to Keep in Mind
Working with refrigerants can be risky if you’re not careful. Here are some safety tips I wish someone had told me when I started:
- Always wear protective gear. Refrigerant can cause frostbite or chemical burns if it touches your skin or eyes.
- Work in a well-ventilated area. Breathing in refrigerant fumes is bad for your health.
- Never vent refrigerant into the air. It’s illegal and harmful to the environment.
- Check for leaks before starting. If your system has a major leak, you might not have much refrigerant to remove, but you’ll need to fix the leak first.
- Don’t mix refrigerants. Make sure your canister is empty or contains the same type of refrigerant as your car’s AC system.
I had a close call once when I didn’t secure a hose properly, and a small amount of refrigerant sprayed out. It was a wake-up call to double-check every connection.
What to Do with the Removed Refrigerant
Once you’ve captured the refrigerant, you can’t just toss the canister in the trash. In the USA, you’re required to recycle it properly. Most auto parts stores or repair shops have recycling programs for refrigerants. When I did this, I called around and found a shop that accepted my canister for free. Some places might charge a small fee, but it’s worth it to stay compliant and protect the environment.
If you’re planning to reuse the refrigerant later, make sure it’s stored properly and isn’t contaminated. I’ve heard of folks filtering and reusing refrigerant, but that’s a job for professionals with the right equipment. For most of us DIYers, recycling is the way to go.
Troubleshooting Common Issues
Sometimes, things don’t go as planned. Here are a few issues I ran into and how I dealt with them:
- The gauge shows no pressure. This could mean your system is already empty, possibly due to a leak. Check for leaks using a soapy water solution on the AC lines and fittings.
- The canister fills up too quickly. You might be opening the valve too fast. Slow down and release the refrigerant in small bursts.
- The system won’t release refrigerant. Make sure you’re connected to the low-pressure port and that the valve is open. If it’s still not working, the system might be clogged or damaged.
When I hit a snag, I took a step back, double-checked my setup, and sometimes just walked away for a few minutes to clear my head. Patience is key!
Why You Should Consider Professional Help
I’ll be honest—removing refrigerant without a recovery machine is doable, but it’s not the easiest or most efficient way to go. If you’re not confident in your skills or don’t have the right tools, it might be worth taking your car to a professional. Auto shops have recovery machines that make the process faster and ensure the refrigerant is handled legally.
When I was working on my second car, I decided to let a pro handle the AC repair. It cost me about $100, but it saved me time and gave me peace of mind knowing it was done right. If you’re on the fence, weigh the cost of tools and your time against the price of professional service.
Maintaining Your Car’s AC System
Once you’ve removed the refrigerant and fixed whatever issue you were tackling, keeping your AC system in good shape is key. I make it a habit to check my AC every spring before the hot weather hits. Run the AC for a few minutes to make sure it’s cooling properly. If it’s not, you might need to recharge the system or check for leaks.
Regular maintenance can prevent the need for major repairs down the road. I also recommend keeping the cabin air filter clean—it’s an easy swap that can improve airflow and cooling efficiency.
Conclusion
Removing refrigerant from your car’s AC system without a recovery machine is a task that requires care, patience, and the right tools. I’ve been there, sweating in my driveway, trying to figure out how to get my AC blowing cold again. By following the steps I’ve shared—preparing your workspace, using a manifold gauge set, capturing the refrigerant safely, and recycling it properly—you can tackle this job while staying on the right side of the law and protecting the environment. It’s not the simplest DIY project, but with the right approach, it’s absolutely doable. Plus, there’s something satisfying about fixing your car yourself and feeling that blast of cool air when you’re done. So, grab your tools, stay safe, and get that AC back in action. You’ve got this!
FAQs
Can I legally remove refrigerant from my car’s AC without a recovery machine?
You can remove refrigerant yourself if you capture it in an approved canister and recycle it properly, as I did with my manifold gauge set and empty canister. However, releasing refrigerant into the air is illegal in the USA under EPA regulations. Always aim to stay compliant by capturing and recycling the refrigerant.
What happens if I accidentally release refrigerant into the air?
Accidentally venting refrigerant can harm the environment and violate EPA rules, which could lead to fines. When I had a small leak due to a loose hose, I stopped immediately and fixed the connection to prevent further release. Always work carefully and recycle the refrigerant at a certified facility.
Can I reuse the refrigerant I remove from my car?
Technically, you can reuse refrigerant if it’s not contaminated, but it’s tricky without professional equipment to filter and purify it. I always take my removed refrigerant to a shop for recycling, as it’s safer and ensures compliance with regulations.
How do I know if my car’s AC system is empty?
You’ll know the system is empty when the manifold gauge shows near-zero pressure on the low-pressure side. When I did this, I also used a vacuum pump to confirm no refrigerant was left. If you’re unsure, a professional can verify it for you.
Is it worth buying a manifold gauge set for this job?
If you plan to do AC work regularly, a manifold gauge set is a great investment. I bought mine for $50, and it’s paid for itself over time. For a one-time job, though, you might consider borrowing one or going to a professional to save on costs.