How to Restore Old Car Paint: Oxidation Severity Guide + 6-Step Process
I’ll never forget the first time I saw my ’67 Chevy Impala. The body was solid, but the paint was dull, chalky, and scratched — like the car had been through a sandstorm. Restoring old car paint isn’t just cosmetic: it protects the metal underneath, stops rust from taking hold, and preserves your car’s value.
After spending countless hours restoring paint on my Impala and a Ford Falcon before it, I’ve learned what actually works — including the mistake most guides make when they skip the finishing polish after compounding. Here’s the complete process.
Step 1: Assess Your Paint’s Condition
Before grabbing any tools, walk around the car in bright light. The condition of your paint determines exactly which steps you need — and whether DIY is even an option.
| Condition | What It Looks Like | DIY Fix? | Estimated DIY Cost |
|---|---|---|---|
| Surface oxidation | Slightly dull, powdery residue wipes off on cloth | Yes — polish only | $30–$60 |
| Moderate oxidation | Chalky coating, faded color, swirl marks visible | Yes — compound + polish + DA polisher | $100–$150 |
| Severe oxidation | Deep chalky fade, rough texture, dull even after wiping | Yes — wet sand first, then compound + polish | $150–$250 |
| Clear coat failure | Peeling, flaking, or cloudy patches that feel rough to touch | No — professional respray required | $800–$2,500 pro |
Quick test: rub a damp microfiber cloth on a small section. If it picks up a chalky white residue and the paint underneath looks better, you have oxidation that can be polished out. If the clear coat is peeling or has cloudy patches that don’t improve with rubbing, polishing won’t help.
What You’ll Need: Tools and Supplies
| Tool/Supply | Purpose | Approximate Cost |
|---|---|---|
| Car wash soap (pH-balanced) | Clean without stripping wax | $10–$20 |
| Clay bar kit | Remove bonded surface contaminants | $15–$30 |
| Cutting compound | Abrasively removes oxidation layer | $15–$30 |
| Finishing polish | Removes compound haze, adds gloss | $15–$25 |
| Dual-action (DA) polisher | Safe for beginners; oscillates rather than spins | $50–$120 |
| Foam polishing pads (cutting + finishing) | Different pads for compound vs. polish | $15–$30 |
| Wax, sealant, or ceramic coating | Protect restored paint from re-oxidizing | $15–$100+ |
| Microfiber cloths (10+) | Apply and remove each product | $15–$25 for a pack |
Compound vs. Polish: Understanding the Difference
This is the step most DIY guides get wrong. Compound (also called cutting compound or rubbing compound) is abrasive — it cuts through the oxidized layer. Polish is a finer abrasive that removes the micro-scratches left by the compound and adds gloss.
Recommended Paint Restoration Products
Dual-Action (DA) Orbital Polisher
Safest tool for beginners — oscillates rather than spinning, making clear coat burn-through much harder
View on Amazon
Heavy-Cut Polishing Compound
Cuts through moderate to severe oxidation — use with a cutting pad before finishing polish
View on Amazon
Finishing Polish
Removes compound scratches and adds gloss — the step most guides skip that makes the biggest visual difference
View on Amazon
DIY Spray Ceramic Coating
Lasts 12–24 months vs. 2–3 months for wax — best long-term protection after a full restoration
View on AmazonIf you stop after compounding, your car will look better in direct sunlight but hazy in the shade — those compound scratches are still there, just finer than the original oxidation. Always follow compound with a finishing polish. My Impala’s hood was the worst — I compounded it first, then polished, and the difference between the two steps was like going from 80% done to 100%.
Step-by-Step: Restoring Old Car Paint
Step 1: Wash the Car Thoroughly
Use the two-bucket method: one with pH-balanced car wash soap and water, one with plain water to rinse your mitt. Wash from top to bottom. Never use dish soap — it strips wax and can dry out rubber seals. Dry with microfiber towels immediately; water spots left to dry make the subsequent polishing steps harder. I skipped proper drying once on my Falcon and spent an extra hour dealing with dried water spots before I could start polishing.
Step 2: Clay Bar Treatment
Spray clay lubricant (included in most clay bar kits) onto a small section of paint. Glide the clay bar in straight overlapping passes — you’ll hear a slight scratching sound as it pulls out bonded contaminants. Fold the clay as it gets dirty to expose a clean surface. After claying, the paint should feel slick like glass. This step isn’t optional — polishing over bonded contaminants grinds them into the paint, causing deeper scratches.
Step 3: Compound (Cut Oxidation)
Attach a cutting foam pad to your DA polisher. Apply a dime-sized amount of compound directly to the pad (not the paint). Set the polisher to a medium speed (3–4 on a 6-speed machine). Work in 2×2 foot sections, first spreading at low speed, then making overlapping horizontal and vertical passes at medium speed. Keep the polisher moving — holding it stationary can burn through clear coat.
Check your progress after each section by wiping the compound residue with a clean microfiber. The paint should look noticeably brighter and more even. For my Impala, the heavy hood oxidation needed two compound passes before the color came back to life.
Step 4: Wet Sand for Severe Oxidation (Optional)
If compound alone doesn’t remove the oxidation after two passes, wet sanding is the next step. Soak 2000-grit sandpaper in water for 10 minutes. Keep the surface wet and sand in straight lines with minimal pressure — you’re only removing a very thin layer of damaged clear coat. Check progress constantly. Follow immediately with compound and then polish to restore gloss. Wet sanding is high-risk; practice on a junkyard panel first if you’ve never done it.
Step 5: Finishing Polish
Switch to a clean finishing (softer) foam pad. Apply a smaller amount of finishing polish. Work in the same 2×2 sections at a slightly lower speed than for compound. The finishing polish removes the micro-scratches left by the compound and builds the final gloss. This step takes about the same time as compounding but transforms the result from “good” to “showroom.” Don’t skip it.
Step 6: Protect with Wax, Sealant, or Ceramic Coating
Polishing removes any remaining protection, so you must seal the paint immediately or UV rays will re-oxidize it within weeks. Your options:
- Carnauba wax — Warm, deep shine, lasts 2–3 months. Apply with foam applicator, let haze, buff off with microfiber. Best for classic/show cars.
- Synthetic sealant — Easier to apply, lasts 4–6 months, holds up better in rain and UV. Good choice for daily drivers.
- Ceramic coating (spray-on) — DIY spray ceramic lasts 1–2 years and costs $30–$80; professional ceramic coating lasts 2–5 years and costs $500–$2,000. Best long-term protection for a car you’ve spent time restoring.
I prefer a synthetic sealant for my daily driver Impala because it holds up in the rain and doesn’t need reapplication as often. I keep a spray detailer in the trunk for quick top-ups after rain.
Common Mistakes to Avoid
Polishing in direct sunlight causes compound to dry prematurely and makes it harder to remove — always work in shade or a garage. Using a rotary polisher (not a DA) without experience is a fast way to burn through clear coat — DA polishers are far safer for beginners. Skipping the clay bar step means you’re polishing over bonded contaminants, which causes the swirl marks you’re trying to remove. And don’t rush compound into finishing polish — the compound residue needs to be fully wiped off before switching pads or you’ll contaminate your finishing polish.
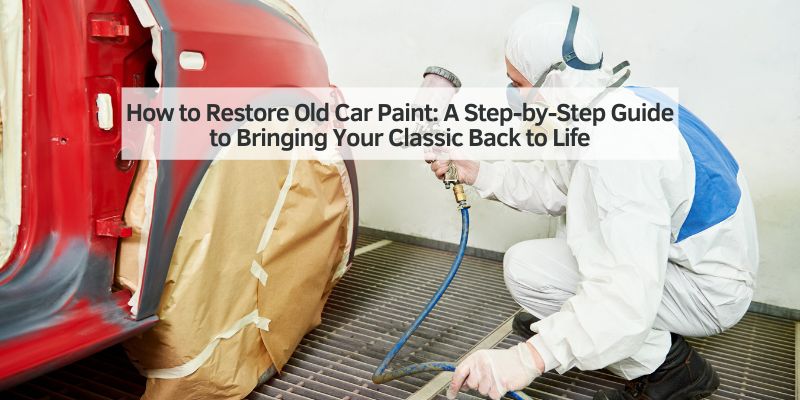
When to Call a Professional
If the clear coat is peeling or has developed opaque, milky patches, no amount of polishing will fix it — the clear coat layer has failed due to UV penetration, and the only solution is professional respray. Expect $800–$2,500 per panel for quality work. The same applies to deep rust — I tried fixing surface rust on my old truck myself, and it kept coming back. A pro with proper rust-encapsulating primer is the right call once rust has penetrated the metal.
Maintaining Your Restored Paint
Wash every two weeks using the two-bucket method — automated car washes cause swirl marks. Reapply wax or sealant every 2–3 months. Remove bird droppings and tree sap immediately — both are acidic and etch into clear coat quickly. I keep a quick-detailer in my trunk for emergencies. Park in a garage when possible; UV rays are the main cause of oxidation and re-applying protection is far cheaper than another full polish correction.
Frequently Asked Questions
How long does it take to restore old car paint?
For a full vehicle with moderate oxidation, expect 12–15 hours spread over two days. Wash and clay takes 2–3 hours; compounding and polishing takes 6–8 hours; sealing adds 1–2 hours. Severe oxidation requiring wet sanding adds another 2–4 hours. Spread the work over a weekend — rushing leads to uneven results.
Can I restore car paint without a polisher?
Yes, for light surface oxidation. Hand polishing with a microfiber cloth and light compound works, but it’s labor-intensive — my arms were sore for days after hand-polishing my first car. For moderate or severe oxidation, a DA polisher produces far better results with less effort and no risk of uneven pressure causing burn-through. A basic DA polisher costs $50–$80 and is worth it for anything beyond minor touch-ups.
Can you restore peeling clear coat yourself?
No. Peeling or flaking clear coat cannot be repaired by polishing — the clear coat layer has physically failed and is separating from the base coat. Some products claim to “restore” peeling clear coat, but these are temporary disguisers that typically last a few weeks before peeling again. The correct fix is professional respray, which strips the panel, applies fresh base coat and clear coat, and costs $800–$2,500 depending on panel size and shop rates.
How often should I wax after restoration?
Carnauba wax: every 2–3 months. Synthetic sealant: every 4–6 months. DIY spray ceramic coating: once or twice per year. If you live in a high-UV climate like Arizona or Florida, reapply on the shorter end of those ranges — UV degradation is the primary cause of oxidation re-occurring after restoration.
Is dish soap safe for washing a restored car?
No. Dish soap is formulated to strip grease and oils, which means it strips wax and sealant from paint. It can also dry out rubber seals over time. Always use a pH-balanced car wash soap — the $12 difference compared to dish soap is worth it.
For related paint care, see our guides on removing oxidation on car paint, how to cut and buff a car, and how to fix rock chips on car paint.