How to Set Clock on Jvc Car Radio: Easy Guide
You’re cruising down the road, enjoying your favorite tunes on your JVC car radio, when suddenly you realize the clock is showing the wrong time. It’s a small inconvenience that can throw off your entire day.
Luckily, setting the clock on your JVC car radio is a straightforward task that you can tackle in just a few minutes. Imagine the satisfaction of knowing that every glance at your car’s dashboard reflects the correct time. This guide will walk you through the process, ensuring you never miss a beat or an appointment again.
Let’s dive in and make sure your car’s clock is perfectly synced with your life!

Credit: www.reddit.com
Preparing For Clock Setup
Start by having the right tools nearby. You’ll need a flathead screwdriver to remove certain panels. Check if you have the user manual. This helps in understanding the steps better. Grab a pen and paper to note down important steps.
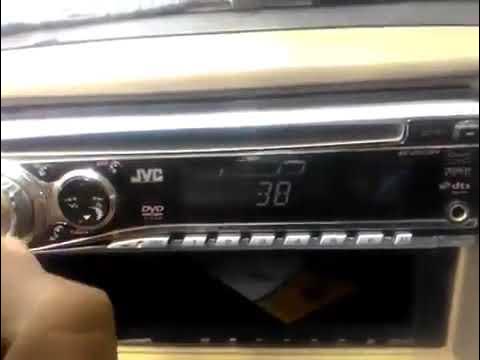
Make sure the radio is on. If the radio is off, the clock won’t change. Turn the car key to the ACC position. This lets the radio get power. Check the display for any signs of power. Ensure it’s working before moving forward.

Credit: www.reddit.com
Accessing Clock Settings
First, press the Menu buttonon your JVC car radio. This will show you different options on the screen. Use the control dialto move through these options. Look for the Clock or Time setting. Once you find it, press the Select buttonto enter the clock settings.
After entering the clock settings, find the Clock Adjustmentoption. Turn the control dialto set the correct hour. Press the Select buttonto save the hour. Then, turn the dial again to set the minutes. Press Selectagain to save. Your clock is now set!
Adjusting Time
Press the menu buttonon your JVC radio. Use the knob to find the clock settings. Turn the knob to select the hours. Press the knob to set the hour. Make sure it shows the correct hour on the display. Always check if it’s AM or PM.
After setting the hours, move to the minute setting. Turn the knob to choose the right minutes. Press the knob to confirm. Look at the display to check the minutes. Your clock is now set correctly. Enjoy your drive with the correct time!
Saving Changes
Press the save button on the radio. This keeps the new time. Make sure to press firmly. The screen should show the saved time. If not, press again. Check if the time is correct. Adjust if needed. This step is important. Saves your effort.
Confirming Time Settings
Look at the radio screen. It should show the correct time. If wrong, adjust again. Press save once more. The time must match your watch or phone. This confirms the settings are right. Double-check for accuracy.
Finalizing Adjustments
Turn off the radio. Turn it back on. Check the time again. It should stay correct. If it changes, repeat the steps. Make sure it is stable. Now, the clock is set. Enjoy your drive with the correct time.
Troubleshooting Common Issues
Setting the clock on a JVC car radio can be tricky for many users. First, press and hold the “Menu” button. Then, use the volume knob to select the “Clock Set” option. Adjust the hour and minute settings accordingly.
Resolving Incorrect Time
Setting the clock on a JVC car radio can be tricky. Incorrect time is a common issue. First, check the manual for instructions. Press the menu button on the radio. Navigate to the clock settings. Use the up and down buttons to change the time. Ensure the AM/PM setting is correct. If the time is still wrong, check the battery connection. A weak battery might cause time errors. Regularly update the time to keep it accurate.
Handling Unresponsive Controls
Unresponsive controls can be frustrating. First, turn off the car radio. Wait for a few seconds. Turn it back on. If the controls still don’t work, check the power connection. Sometimes, a loose wire causes problems. Ensure all wires are tight and secure. If issues persist, try a factory reset. This can fix many glitches. Always consult the user manual for guidance. Contact support if problems continue.

Credit: www.youtube.com
Frequently Asked Questions
How Do I Set The Clock On My JVC Radio?
To set the clock on your JVC car radio, press the “Menu” button. Then select “Clock Set” using the tuner knob. Adjust the hours and minutes using the knob, then press the “Enter” button to save. This ensures the correct time is displayed on your device.
Why Is My JVC Radio Clock Wrong?
Your JVC radio clock might be wrong due to power loss or incorrect settings. Check if your battery is functioning well. Also, review the clock settings to ensure accuracy. Regularly updating the clock settings can prevent discrepancies and ensure your time is accurate.
Can I Change Clock Format On JVC Radio?
Yes, you can change the clock format on your JVC radio. Access the “Menu” and select “Clock Format. ” Choose between 12-hour and 24-hour formats. Confirm your selection by pressing “Enter. ” This adjustment allows you to view the time in your preferred format.
What If My JVC Clock Doesn’t Save Changes?
If your JVC clock doesn’t save changes, check for software updates or reset the device. Ensure your battery connection is stable. Persistent issues might require professional help. Regular maintenance can prevent such problems and ensure smooth functioning of your device.
Conclusion
Setting the clock on your JVC car radio is simple. Follow the steps carefully. Adjusting the time ensures accurate information. No more guesswork about the correct time. Enjoy uninterrupted music and timely updates. A properly set clock enhances your driving experience.
It keeps you informed without distractions. Regularly check the time settings for accuracy. This small task can make a big difference. Now, you are ready to hit the road with confidence. Always arrive on time. Enjoy the journey with a well-tuned radio.
Happy driving!