
How to Fit a Car Radio: Step-by-Step Guide
Fit a car radio by matching the dash opening, wiring standard, antenna, and any CAN-bus or amplifier interfaces before you buy. If the vehicle uses factory controls or an amplifier, expect adapter modules, not a direct swap. Get those wrong and you can end up with no power, no sound, warning lights, or a radio that fits physically but does not work as intended. This guide covers the compatibility checks, required adapters, and the install sequence that avoids those failures.
What fits your dash?
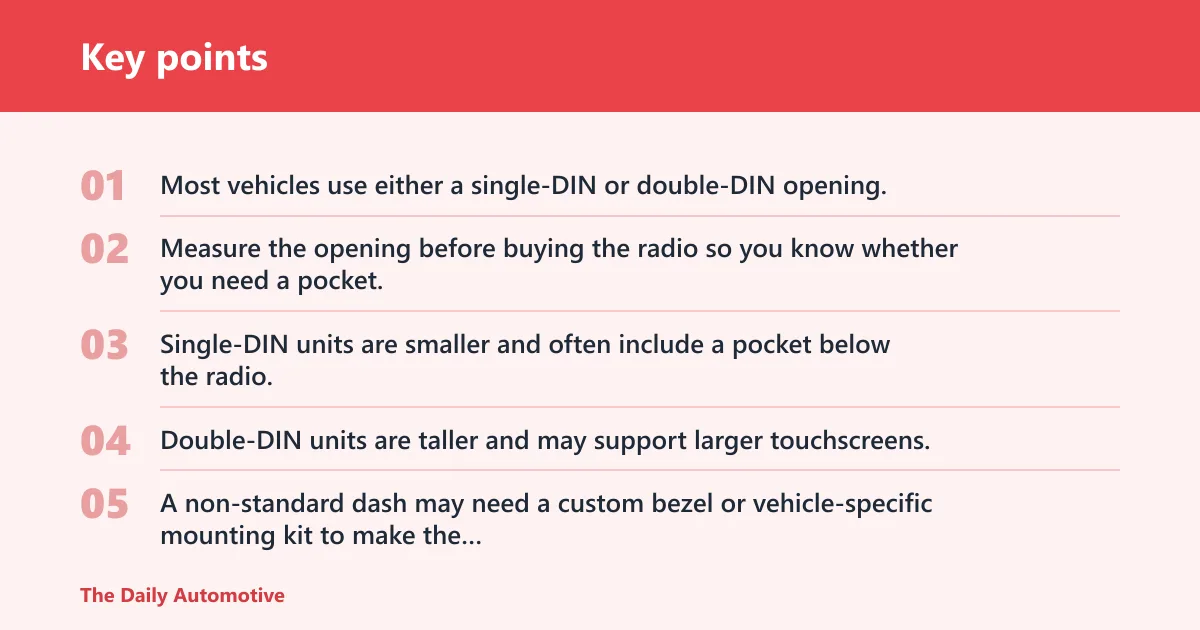
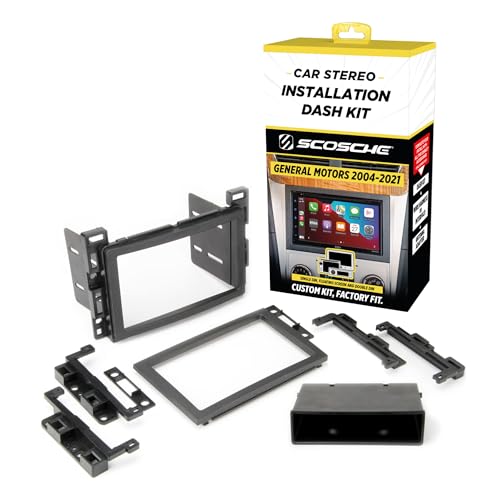

The first decision is fitment, not wiring. Most vehicles use either a single-DIN or double-DIN opening, but some dashboards need a vehicle-specific trim kit because the opening is non-standard or part of a larger climate or display panel. Measure the opening before buying the radio so you know whether you need a pocket, a double-DIN chassis, or extra brackets.
Single-DIN, double-DIN, and non-standard openings
Single-DIN units are smaller and often include a pocket below the radio. Double-DIN units are taller and may support larger touchscreens. A non-standard dash may need a custom bezel or vehicle-specific mounting kit to make the new unit sit square and flush.
Picture a car with a factory radio opening that measures for a single-DIN unit, but the buyer orders a double-DIN touchscreen without checking the fascia depth. The radio may power up on the bench, then stop short of the trim once the brackets and connectors are added. That is a fitment problem, not a wiring problem.
Measure before you buy
Check the visible opening, the depth behind it, and whether the dash slopes or narrows near the HVAC panel. Also confirm whether the radio mounts to side brackets or to a separate dash kit. Those details decide whether the new head unit will align with the trim instead of sitting recessed or proud of the bezel.
Car radio fitment checklist
Use this checklist before you remove a screw. It covers the parts that decide whether the radio installs cleanly and keeps factory functions working. For late-model vehicles, the interface items often matter as much as the head unit itself.
| Fitment item | Check | Yes/No decision path |
|---|---|---|
| Vehicle dash size | Single-DIN, double-DIN, or non-standard opening | Yes: choose the matching head unit and dash kit. No: stop and measure before buying parts. |
| Factory amplifier | Factory amp present or absent | Yes: plan for an amp interface or amp-compatible adapter. No: standard speaker wiring may be enough. |
| Steering-wheel controls | Controls on the wheel need retention | Yes: add a data interface module. No: a basic adapter may be enough. |
| Backup camera retention | Factory camera must display on the new radio | Yes: confirm camera retention support. No: camera integration may not be needed. |
| Antenna adapter | Factory antenna plug matches the new radio | Yes: use the correct adapter. No: reception may be poor or the plug may not fit. |
| Required interface module | Late-model vehicle, retained features, or amplified system | Yes: install the required module. No: a direct connection may be possible. |
What tools and parts do you need?
Keep the tool list tight. The core items are usually trim removal tools, wire strippers, a crimping tool, a digital multimeter, and basic hand tools for the brackets and radio screws. Also have the battery negative terminal accessible so you can disconnect it before work starts and reconnect it only after test fitting.
Core tools
- Trim removal tools: Non-marring pry tools for dashboard bezel removal and clip-safe disassembly.
- Wire strippers and a crimping tool: Needed when the adapter is not plug-and-play.
- Digital multimeter: Used for voltage verification, continuity testing, and troubleshooting.
- Basic hand tools: Screwdrivers, a socket set, and panel removal tools.
- Electrical tape: Useful for securing and insulating splices.
- Battery negative terminal access: Disconnect before work begins.
Parts to confirm before installation
Have the head unit, a vehicle-specific wiring harness adapter, the correct dash kit, and the antenna adapter on hand. The antenna adapter is often separate from the main adapter, so do not assume it comes in the same box. If the car uses factory controls or an amplifier, add the data interface module too.
Do you need a wiring harness adapter for your car radio?
In many late-model vehicles, yes. A vehicle-specific adapter is recommended to preserve factory functionality and avoid cutting the original wiring. It gives you the correct plug match for power, ground, accessory, and speaker connections, and it reduces the chance of a no-start, no-sound, or no-accessory issue after installation.
Why the adapter matters
Modern vehicles often use the factory radio as the vehicle’s main control center. That means the radio connector may carry more than audio. An adapter helps match the vehicle plug to the aftermarket radio without guessing at pinouts or splicing into the wrong circuit.
Match the wires, not just the colors
Color-code matching helps, but the wiring diagram is the final check. Standard connections include power, ground, accessory, speakers, illumination, and antenna or amplifier triggers. Use the radio manual and vehicle adapter chart together so constant power does not get swapped with accessory power.
Say your truck powers the screen but the speakers stay silent after install. That can happen when the adapter matched physically, but the amplifier trigger or speaker outputs were not connected correctly. A multimeter can confirm whether the radio is supplying the expected power and whether the speaker circuit is actually complete.
When a late-model car needs more than a basic adapter
Some late-model vehicles need a data interface module because the radio feed also handles steering-wheel audio controls, warning chimes, backup camera display, or factory amplifier integration. In those cases, a direct wire swap may leave features dead even if the radio powers on. That is common in vehicles from brands such as Toyota, Ford, Chevrolet, Honda, BMW, Mercedes-Benz, and Chrysler.
How do you keep factory features?
Factory features stay working only if the new system supports them or the correct interface module translates the signals. Steering-wheel controls, backup camera display, warning chimes, and factory amplifier integration are the main items to verify before purchase. If the radio fits but the module is missing, the install may still fail in daily use.
Steering-wheel controls
Steering-wheel audio controls usually need a data interface module unless the head unit has a direct compatibility input and the right vehicle interface. Do not assume the controls will work after a basic plug-in install. Check whether the module supports your vehicle and the specific radio brand.
Backup camera and warning chimes
If the factory camera must display on the new radio, confirm camera retention support before installation. The same goes for warning chimes on vehicles that route them through the factory audio system. Without the right module, the camera feed or chime output can disappear.
Factory amplifier integration
An amplified system often needs a specific adapter so the new radio talks to the factory amp at the right level. If you bypass the amp without planning for it, the radio may power on and still produce weak or distorted sound. That is a wiring and interface issue, not a speaker problem by default.
How do I fit a car radio step by step?
Fit the radio in this order: disconnect the battery, remove the trim, confirm the opening and brackets, connect the adapter or adapters, test power and sound, then reinstall the dash only after everything checks out. Do not rush to final assembly. A loose fit or missing adapter is easier to fix before the bezel goes back on.
- Disconnect the negative battery terminal.
- Remove the dashboard bezel with trim removal tools.
- Unbolt the factory radio and slide it out carefully.
- Check the depth, bracket style, and cable clearance behind the dash.
- Connect the adapter, antenna adapter, and any interface module.
- Test fit the head unit and dash kit before tightening screws.
- Reconnect the battery for a function check.
- Confirm sound, reception, phone pairing, and touchscreen response.
- Shut the system down, disconnect the battery again if needed, and finish assembly.
Remove the old radio and prep the opening
Use non-marring pry tools so you do not crack the bezel or break clips. Once the trim is off, remove the factory unit and inspect the cavity for sharp edges, crushed connectors, or metal brackets that could block the new chassis. Keep screws and brackets organized by location.
Mounting fit and flush alignment
The dash kit should hold the radio at the correct angle and depth so the face sits flush with the surrounding trim. If the radio sits too deep, the buttons may be harder to reach. If it sits too far out, the bezel may not clip in cleanly.
How do I wire and test the new radio?
Wire the radio by connecting power, ground, accessory, and speaker leads according to the adapter diagram, then verify the result with a multimeter before final assembly. Use the meter to check for voltage, continuity, and a proper ground path. After that, test sound, radio reception, Bluetooth pairing, and USB playback.
How to wire power, ground, and speaker wires correctly
Strip insulation cleanly, crimp secure splices, and keep each circuit in its own connection. Match constant power, accessory power, ground, and speaker wires according to the vehicle-specific adapter and the radio diagram. Illumination and antenna or amplifier trigger wires should be connected only if the system calls for them.
Use the multimeter before final assembly
Check for battery voltage on the constant power line, switched voltage on the accessory line, and continuity on the ground path. If a circuit reads wrong, fix it now. A meter check takes less time than tearing the dash back apart after the trim is installed.
Test the functions that usually fail first
Confirm radio reception, Bluetooth pairing, USB playback, and touchscreen response before you close the dash. Those are the common checks that reveal a bad antenna adapter, a missing accessory feed, or a unit that powers on but will not wake its audio output.
A common first-timer mistake is to see the screen light up and assume everything is done. Then the car goes back together, the radio has no sound, and the dash must come apart again to fix a missing amp trigger or speaker connection. Test every function while the trim is still off.
Troubleshoot no power, no sound, and weak reception
If the new radio has power but no sound, check the speaker connections, the amplifier trigger, and any required interface module. If FM reception is weak, inspect the antenna adapter first. If the unit fits but will not sit flush, recheck the dash kit, bracket orientation, and cable clearance behind the chassis.
Frequently asked questions
What tools do I need to fit a car stereo?
Use trim removal tools, wire strippers, a crimping tool, a digital multimeter, screwdrivers, and a socket set. Those cover the dash removal, wire preparation, and electrical checks needed for a clean install. Keep electrical tape nearby for insulation and adapter finishing.
Do I need a wiring harness adapter for my car radio?
Usually yes, especially in late-model vehicles. A vehicle-specific adapter helps preserve factory functionality and avoids cutting into the original wiring. It also gives you the right plug match for power, ground, accessory, and speaker connections, which reduces the chance of wiring errors.
How do I tell if my car uses single-DIN or double-DIN?
Measure the visible opening in the dash. Most vehicles use either a single-DIN or double-DIN opening, with single-DIN units smaller and often paired with a pocket below the radio. Double-DIN openings are taller and usually fit larger touchscreens. Non-standard dashes may need extra trim parts.
How do I keep steering wheel controls and factory features working after fitting a new radio?
Check whether your vehicle needs a data interface module before you buy the radio. That module may retain steering-wheel audio controls, backup camera display, warning chimes, and factory amplifier integration. Without it, the radio may power on but lose factory features that run through the original system.
Why does my new car stereo power on but produce no sound?
Start with the speaker wiring, the amplifier trigger, and the vehicle interface module if the car has one. Power alone does not mean the audio path is complete. A multimeter can help confirm voltage and continuity, while a missing amp connection or bad adapter match can leave the system silent.
Products related to this article
Sponsored / affiliate links. As an Amazon Associate I earn from qualifying purchases. I may earn additional commission from eligible campaigns.