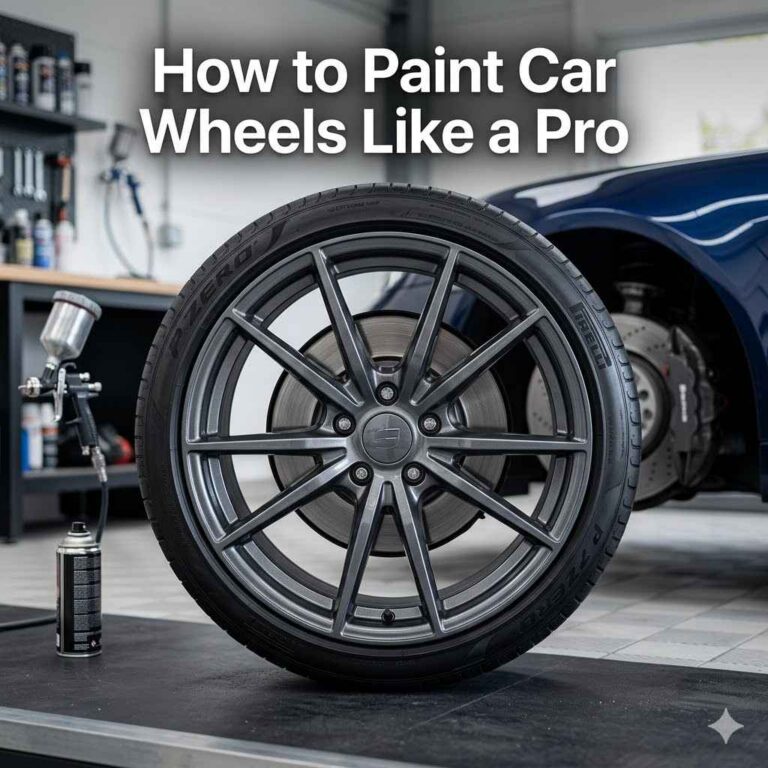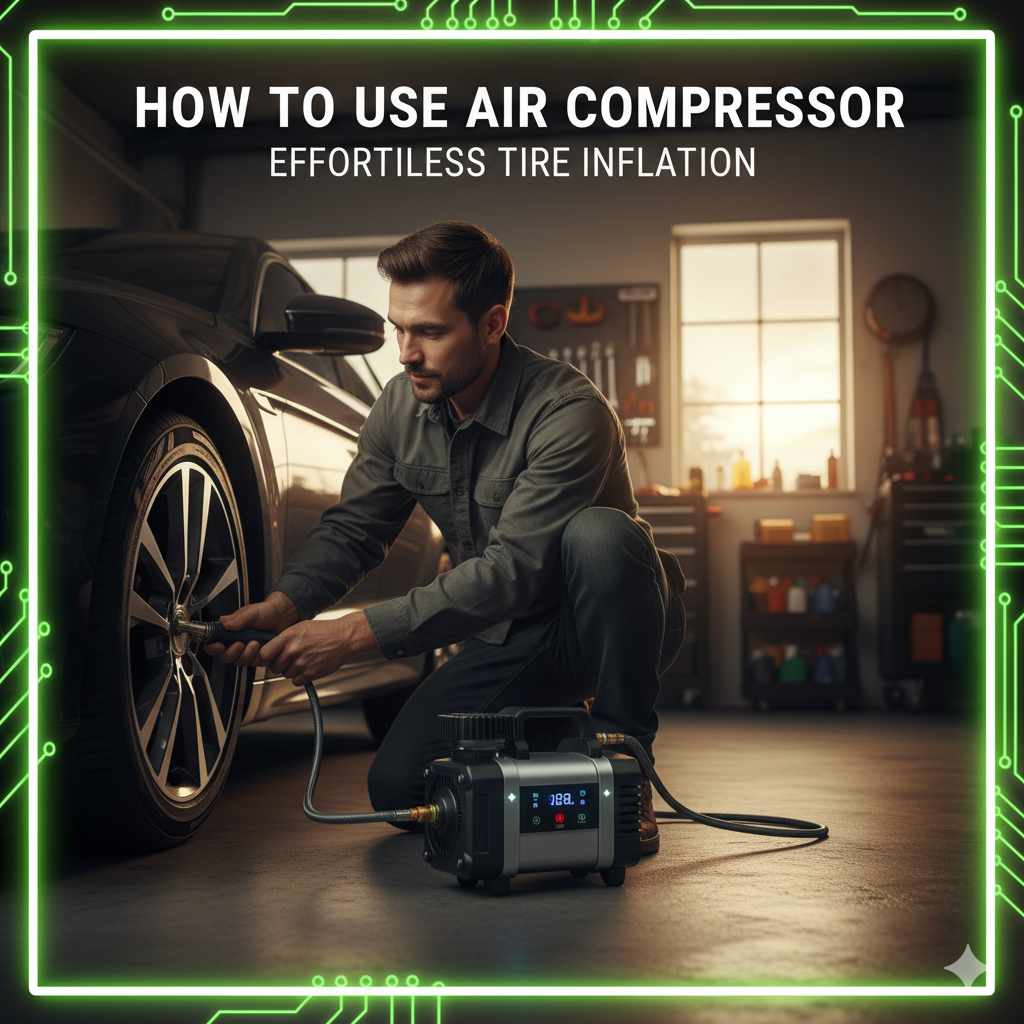
How To Use Air Compressor: Effortless Tire Inflation
Using an air compressor for tire inflation is simple! Connect the hose, set your desired PSI using the gauge, attach the nozzle to your valve stem, and let the compressor fill the tire. Check the pressure regularly to keep your tires safe and efficiently inflated.
Flat tires or low tire pressure can be a real headache, right? It always seems to happen at the most inconvenient times. Finding a gas station with a working air pump can be tough, and sometimes you just don’t have the time to deal with it. But what if you could easily inflate your car tires yourself, anytime and anywhere? It’s more straightforward than you might think! With a portable air compressor, you can take charge of your tire maintenance with confidence. This guide will walk you through every step, making tire inflation effortless and stress-free. Let’s get your tires back to their perfect pressure!
Why Inflate Your Tires Properly?
Keeping your car tires at the correct air pressure isn’t just about comfort; it’s crucial for several reasons. Properly inflated tires contribute directly to your car’s safety, improve fuel efficiency, and extend the life of your tires. When tires are underinflated, they can overheat and potentially lead to a blowout. They also interact poorly with the road, affecting handling and braking. Overinflated tires, on the other hand, can make your ride too bumpy, reduce traction, and cause uneven wear on the tire tread. Finding that sweet spot with the right PSI is key to a safe and smooth driving experience.
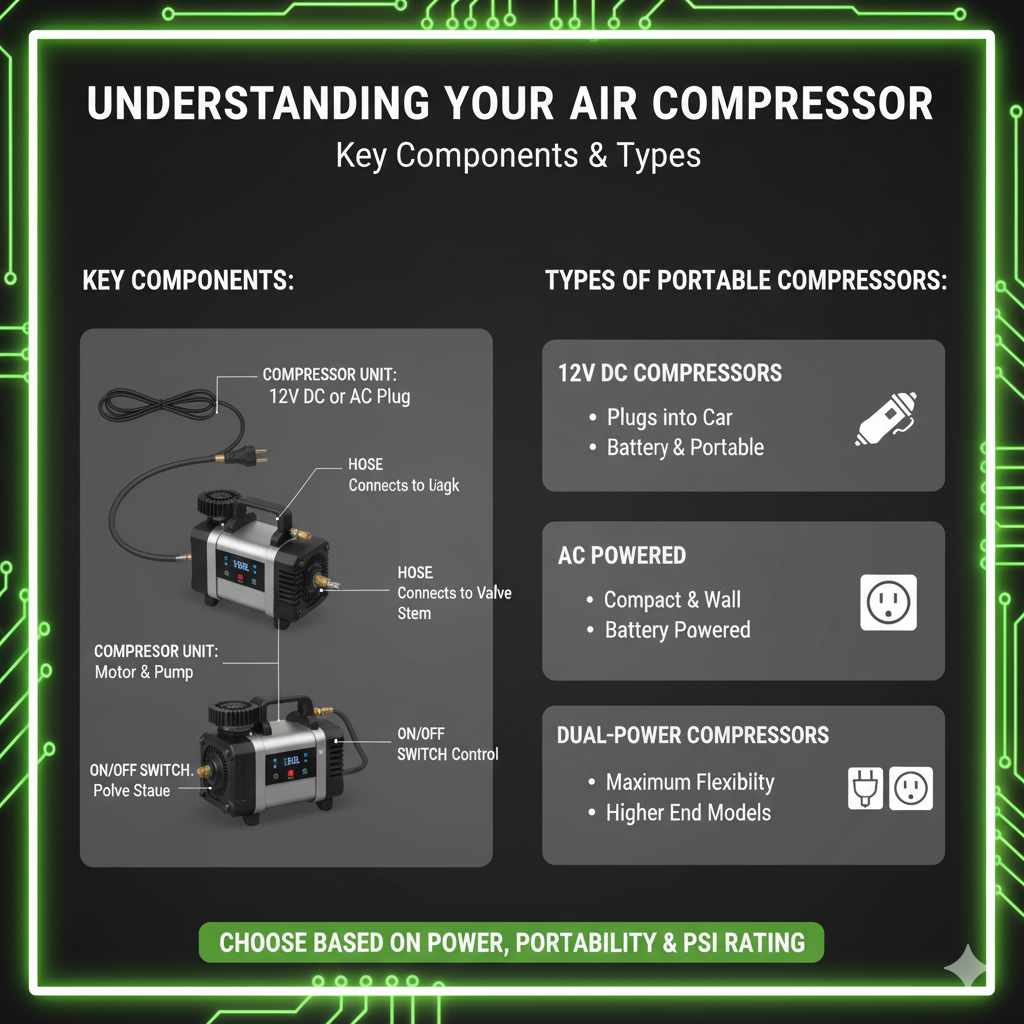
Understanding Your Air Compressor
Air compressors come in various shapes and sizes, but most portable models used for car tires work on a similar principle. They take ambient air, compress it, and store it in a small tank or release it directly as needed. The key components you’ll interact with are:
- The Compressor Unit: This is the main body, often containing the motor and the pump.
- Power Cord: This will either plug into your car’s 12V outlet (cigarette lighter) or a standard household AC outlet, depending on the model.
- Hose: A flexible tube that connects the compressor to your tire valve.
- Chuck/Nozzle: The end of the hose that attaches securely to the tire’s valve stem.
- Pressure Gauge: This is super important! It shows you the current air pressure in the tire and will help you reach your target PSI. Some gauges are built into the compressor, while others are on the hose itself.
- On/Off Switch: Simple enough – turns the compressor on and off.
- PSI/Bar Selector (on some models): Allows you to set your desired pressure.
Types of Portable Air Compressors
For most car owners, portable air compressors are the way to go. They are designed for convenience and can easily be stored in your trunk or garage. Here are the most common types:
- 12V DC Compressors: These are the most popular for automotive use. They plug directly into your car’s 12V accessory socket (cigarette lighter). They are compact, easy to use, and powered by your car’s battery.
- AC Powered Compressors: These plug into a standard household electrical outlet. They often offer more power and faster inflation times but require access to a stationary power source, making them less portable for roadside use unless you have an inverter in your car.
- Dual-Power Compressors: Some high-end models offer the flexibility of both 12V DC and 110V AC power sources, giving you options wherever you need to inflate.
When choosing a compressor, consider its CFM (Cubic Feet per Minute) rating, which indicates how quickly it can deliver air, and its maximum PSI output. For car tires, a unit that can reach at least 100 PSI is usually sufficient.
Finding Your Car’s Recommended Tire Pressure (PSI)
Before you can properly inflate your tires, you need to know what “properly” means for your specific vehicle. This information is key!
Where to Find the Recommended PSI:
- Driver’s Side Doorjamb: This is the most common location. Look for a sticker on the inside of the driver’s door, door frame, or the edge of the door itself.
- Owner’s Manual: Your car’s manual will have a section dedicated to tire information, including the recommended pressures.
- Glove Box Door: Some car manufacturers place this sticker on the inside of the glove box door.
- Fuel Filler Door: Less common, but some vehicles might have it here.
Important Note: The PSI listed on the tire’s sidewall (e.g., “MAX. 51 PSI”) is the maximum pressure the tire can safely hold, not the recommended driving pressure for your car. Always use the pressure recommended by your car’s manufacturer, found on the doorjamb sticker or in your owner’s manual.
Best Practices for Tire Inflation
To ensure you get the most accurate and safe tire inflation, follow these best practices:
- Check Pressure When Tires Are Cold: This is perhaps the most critical tip. Tires heat up as you drive, and the air inside expands, increasing the pressure. For the most accurate reading and to inflate to the manufacturer’s recommendation, check your tires first thing in the morning or after the car has sat for at least three hours.
- Use a Reliable Gauge: While many compressors have built-in gauges, they can sometimes be inaccurate. It’s a good idea to also have a separate, reliable digital or dial tire pressure gauge. You can cross-reference the readings to ensure accuracy. Reputable brands like Accutire or AstroAI offer good quality gauges.
- Don’t Overlook the Spare Tire: Most cars come with a spare tire, and it needs to be inflated correctly too! Check its pressure periodically. A flat spare won’t help you if you get a flat tire.
- Inflate in Stages if Necessary: For very flat tires or when using a powerful compressor, it’s sometimes better to inflate in short bursts, checking the pressure frequently to avoid overinflation.
- Replace Valve Caps: Always put the valve caps back on after inflating. They help keep dirt and moisture out of the valve stem, which can prevent leaks.
Tools You’ll Need
Fortunately, using an air compressor to inflate your tires requires minimal tools. For most DIYers, you’ll just need:
- Portable Air Compressor: The main tool for the job. Ensure it’s compatible with your car’s power source (12V or AC).
- Tire Pressure Gauge: Either the one built into your compressor or a separate, reliable one.
- Your Car’s Owner’s Manual or Doorjamb Sticker: To know the correct PSI.
Some compressors come with a set of adapters for different types of valves, but most standard car tire nozzles (Schrader valves) will work directly with the attached chuck.
Step-by-Step Guide: How to Use an Air Compressor to Inflate Car Tires
Here’s a simple, step-by-step breakdown of how to use your air compressor to bring your tire pressure up to the perfect level. We’ll assume you’re using a common 12V portable compressor for this guide.
Step 1: Prepare Your Compressor and Car
- Park on a Level Surface: Find a safe, flat spot to park your car. This helps ensure accurate pressure readings.
- Ensure Tires Are Cold: As mentioned, check your tires when they haven’t been driven for at least a few hours.
- Locate Your Car’s Recommended PSI: Find the sticker on your driver’s side doorjamb or in your owner’s manual. Note the correct PSI for your front and rear tires (they might be different).
- Get the Compressor Ready: Unpack your portable air compressor and ensure it’s easily accessible.
Step 2: Connect Power
- Plug In the Compressor: If you have a 12V compressor, plug the power adapter into your car’s 12V accessory socket (cigarette lighter). Some cars may require the ignition to be turned to the ‘accessory’ or ‘on’ position for this socket to have power. If you have an AC compressor, plug it into a power outlet.
Step 3: Connect to the Tire Valve
- Remove the Valve Cap: Unscrew the small plastic or metal cap from the tire’s valve stem. Place it somewhere safe, like your pocket, so you don’t lose it.
-
Attach the Air Hose Chuck: This is the part that can be a little tricky for beginners. The chuck at the end of the air compressor hose is designed to fit over the valve stem.
- Locking Lever Type: Many chucks have a small lever on the side. You place the chuck firmly over the valve stem and then flip the lever up to lock it in place. This creates a good seal.
- Screw-On Type: Some older or simpler models might require you to screw the chuck onto the valve stem. Ensure it’s tightened securely.
- Listen for Leaks: Once attached, listen closely. You shouldn’t hear any air hissing out. If you do, the chuck may not be on straight or might be faulty. Detach and reattach, ensuring a snug fit.
Step 4: Inflate the Tire
- Check Current Pressure (Optional but Recommended): If your compressor has a gauge that can read current pressure, or if you’re using a separate gauge, check what the pressure is now.
- Turn On the Compressor: Flip the power switch on your air compressor. You’ll hear the motor start pumping air.
- Monitor the Gauge: Watch the pressure gauge on your compressor or your separate gauge. The numbers will start to climb as the tire fills.
- Stop at the Target PSI: As the pressure approaches your car’s recommended PSI (e.g., 32 PSI), be ready to turn off the compressor. Most compressors will automatically shut off if you’ve set a target PSI, but it’s always good to supervise. If not, turn it off manually and check the gauge.
- If You Overinflate: Don’t panic! Most chucks have a button or mechanism to release air. Press this button briefly to let out a little air, then re-check the pressure. Repeat until you reach the correct PSI.
Step 5: Finish Up
- Detach the Chuck: Carefully release the lever or unscrew the chuck from the valve stem. You might hear a quick hiss of air escaping, which is normal.
- Re-check Pressure: Use your gauge (compressor’s or separate) to confirm the tire is at the correct PSI.
- Replace the Valve Cap: Screw the valve cap back onto the valve stem securely.
- Repeat for Other Tires: Move to the next tire and repeat steps 6 through 13. Don’t forget the spare!
- Turn Off and Unplug: Once all tires are at the correct pressure, turn off the compressor, unplug it from the power source, and stow it away neatly in your car.
Understanding Tire Pressure Monitoring Systems (TPMS)
Many modern cars are equipped with a Tire Pressure Monitoring System (TPMS). This system uses sensors in each wheel to detect low tire pressure and will illuminate a warning light on your dashboard – usually an icon that looks like a flat tire with an exclamation mark inside. While TPMS is a great safety feature, it’s important to remember that the warning light often activates when tire pressure drops about 25% below the recommended level. By regularly inflating your tires to the correct PSI using an air compressor, you’ll help prevent the TPMS light from coming on unnecessarily and ensure optimal performance and safety.
To ensure your TPMS is functioning correctly, it’s still essential to check your tire pressure manually with a gauge at least once a month and before long trips. You can learn more about how TPMS works and its maintenance on resources like the National Highway Traffic Safety Administration (NHTSA) website, a leading authority on vehicle safety standards.
Troubleshooting Common Issues
Even with the best guidance, you might run into a few hiccups. Here are some common problems and how to solve them:
Air Leaking from the Chuck
Problem: You hear hissing air even after attaching the chuck.
Solution: Ensure the chuck is pushed on straight and firmly onto the valve stem. For locking lever types, make sure the lever is fully engaged. If it’s a screw-on type, try tightening it a bit more. If the problem persists, the chuck might be damaged or the rubber seal may be worn out. Some compressors allow you to replace the chuck.
Compressor Not Turning On
Problem: The compressor doesn’t power up.
Solution:
- Check that the power cord is securely plugged into both the compressor and the car’s 12V socket (or wall outlet).
- Ensure your car’s ignition is in the correct position (if using a 12V outlet).
- The fuse in the power plug might have blown. Check your compressor’s manual for instructions on fuse replacement.
- The 12V outlet or the compressor itself might be faulty.
Pressure Gauge Seems Inaccurate
Problem: The gauge shows a much higher or lower PSI than you expect, or it fluctuates wildly.
Solution: Use a separate, reliable tire pressure gauge to verify the reading. Built-in compressor gauges can sometimes be less precise than dedicated gauges. If both read incorrectly, the compressor’s gauge might need recalibration or replacement, or the sensor could be damaged.
Slow Inflation Time
Problem: The compressor takes a very long time to add even a few PSI.
Solution:
- Check the air intake filter (if your compressor has one); a clogged filter can reduce airflow.
- Ensure the hose and chuck are not kinked or obstructed.
- Some smaller compressors are simply not designed for rapid inflation. If you frequently need to inflate tires, consider a compressor with a higher CFM rating.
- The compressor motor might be overheating or aging. Allow it to cool down before using it again.
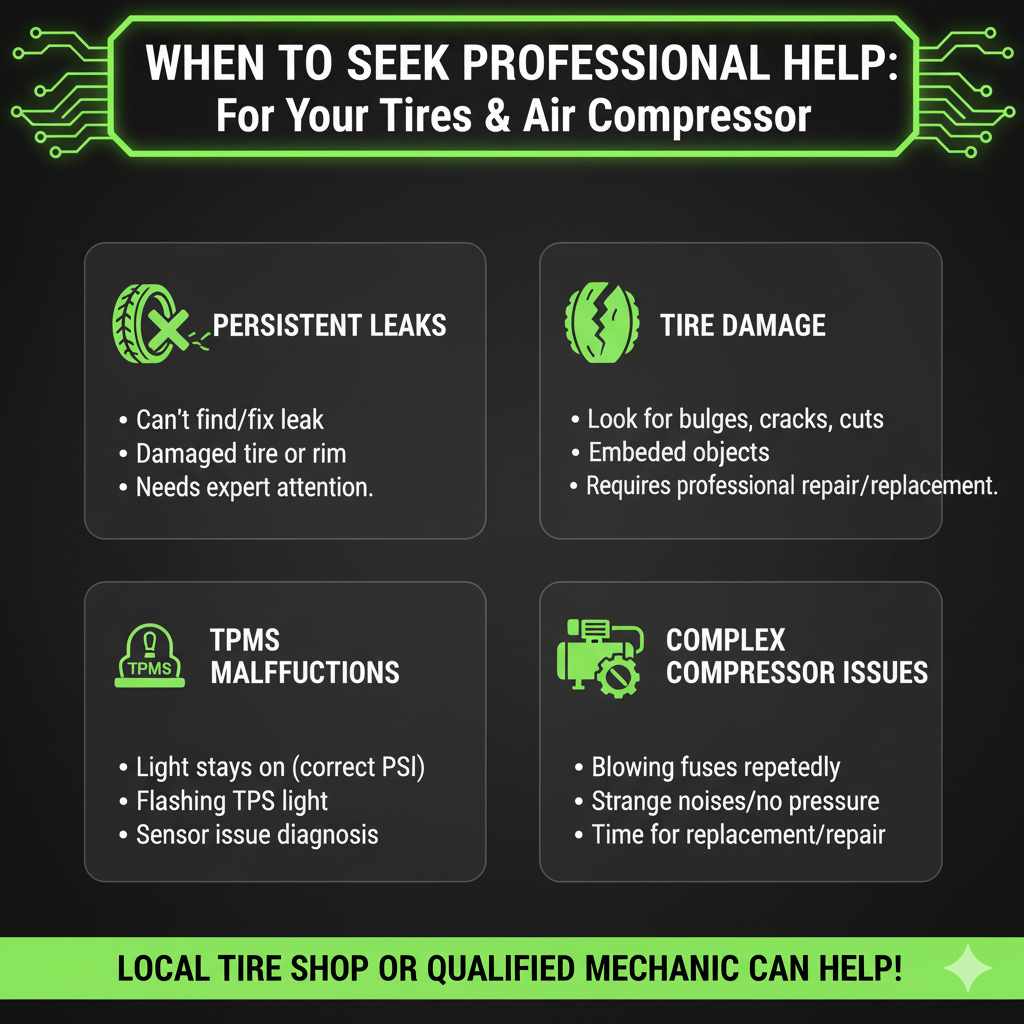
When to Seek Professional Help
While using an air compressor is a straightforward DIY task, there are times when it’s best to consult a professional:
- Persistent Leaks: If you can’t find or fix a tire leak, it might be a sign of a damaged tire or rim that needs expert attention.
- Tire Damage: Look for bulges, cracks, cuts, or embedded objects in your tires. These require professional repair or replacement.
- TPMS Malfunctions: If your TPMS light stays on even after confirming correct tire pressure, or if it flashes, there could be a sensor issue that a mechanic needs to diagnose.
- Complex Compressor Issues: If your compressor is blowing fuses repeatedly, making strange noises, or not building pressure at all, and you’ve followed troubleshooting steps, it might be time for a replacement or professional repair.
Your local tire shop or a qualified mechanic can help diagnose and fix issues that are beyond basic DIY maintenance.
Frequently Asked Questions (FAQ)
Q1: How often should I check my tire pressure?
It’s a good practice to check your tire pressure at least once a month and always before a long trip. Also, check them if you notice a significant change in temperature outside, as this affects tire pressure.
Q2: Can I just inflate my tires to the maximum PSI listed on the sidewall?
No, absolutely not. The number on the sidewall is the maximum pressure the tire can safely hold, not the recommended pressure for your car. Always use the PSI recommended by your vehicle manufacturer, found on the doorjamb sticker or in your owner’s manual.
Q3: My car has TPMS. Do I still need to check my tires manually?
Yes, you do. TPMS is a warning system that alerts you when pressure is significantly low. Regular manual checks with a gauge ensure your tires are always at the optimal pressure for safety, fuel efficiency, and tire wear, rather than just waiting for a warning light.
Q4: How long does it take to inflate a car tire with a portable compressor?
This varies greatly depending on the compressor’s power and how low the tire is. A typical 12V compressor might take anywhere from 5 to 15 minutes to inflate a severely underinflated tire to the correct pressure.