P0446 Chevy Silverado Fix: Year-by-Year Diagnosis and Repair Guide
You’re driving your Silverado, the check engine light pops on, and the code reads P0446. Your first thought is probably the gas cap. You tighten it, clear the code, and it comes back within a week. That’s the pattern most owners hit, and it’s why this code gets misdiagnosed so often. The truth is P0446 rarely has anything to do with the gas cap, and throwing parts at it without a proper test wastes money.
This guide walks through the P0446 Chevy Silverado fix the way a shop would, but without the shop markup. You’ll learn what the code actually means, how to confirm the failing part in under ten minutes with no special tools, and exactly which vent valve or solenoid your specific year needs. I’ll cover the differences between the older mechanical valves and the newer electronic solenoids, because the repair is not the same across generations.

PANNUOSCS
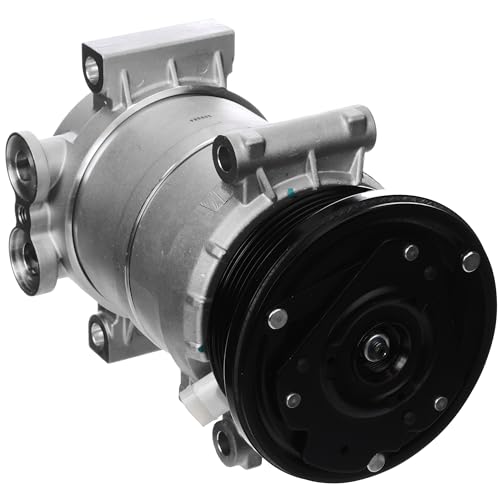
Vapor Canister Vent Valve 911-099 for 2008-2019…
- 【Fits Chevy Vehicles】Compatible with Chevy Silverado 1500 / 2500HD / 3500HD (2008-2019).
- 【Fits GMC Vehicles】Compatible with GMC Sierra 1500 / 2500HD / 3500HD (2008-2019).
- 【Replacement OE Part Numbers】911-099, 23103351, CPV149, CVS191, PV896. Please carefully compare the product images and OE numbers…
If your diagnosis points to the vent valve, the PANNUOSCS Vapor Canister Vent Valve (911-099) covers Silverado and Sierra models from 2026 through 2026. It’s a direct replacement for the factory part, and it comes with a 12-month replacement warranty. Check the current price on Amazon before ordering, and confirm the connector size matches your truck (more on that below).
What Does P0446 Mean on a Chevy Silverado?
P0446 is a diagnostic trouble code that points to the EVAP system’s vent control circuit. The EVAP system captures fuel vapors from the tank and stores them in a charcoal canister. When the engine is running, a purge solenoid opens and pulls those vapors into the intake to burn them. The vent valve sits on the other side of the canister, letting fresh air in so the fuel tank doesn’t collapse under vacuum.
The code sets when the powertrain control module (PCM) detects a problem with the vent valve’s electrical circuit or its ability to open and close properly. On some models it’s a wiring issue, on others it’s a stuck valve. The PCM runs a self-test during certain driving conditions, and if the vent doesn’t respond as expected, P0446 gets stored.
Here’s the key distinction: P0446 is NOT the same as P0442 (small leak) or P0455 (large leak). Those codes indicate the system can’t hold pressure. P0446 is specifically about the vent valve circuit or the valve’s mechanical function. That means the fix is usually the valve itself, a wiring repair, or a corroded connector. Not a fuel cap.
Symptoms You’ll Notice (Beyond the Check Engine Light)
The check engine light is the obvious one, but many Silverado owners report other symptoms that point to the same root cause:
- A strong fuel smell around the rear of the truck, especially after filling the tank
- A hissing sound near the fuel tank when you remove the gas cap, which means the system can’t vent properly
- Difficulty filling the tank — the pump keeps clicking off even though it’s not full
- Failed emissions test, since the EVAP monitor won’t complete its readiness check
- In rare cases, a rough idle or slight hesitation right after refueling
None of these symptoms will leave you stranded. The truck will still drive normally. But if you live in a state with emissions testing, this code will fail you every time. And ignoring it for long stretches can eventually damage the charcoal canister, which is a much more expensive repair.
Root Causes: Why the Vent Valve Fails
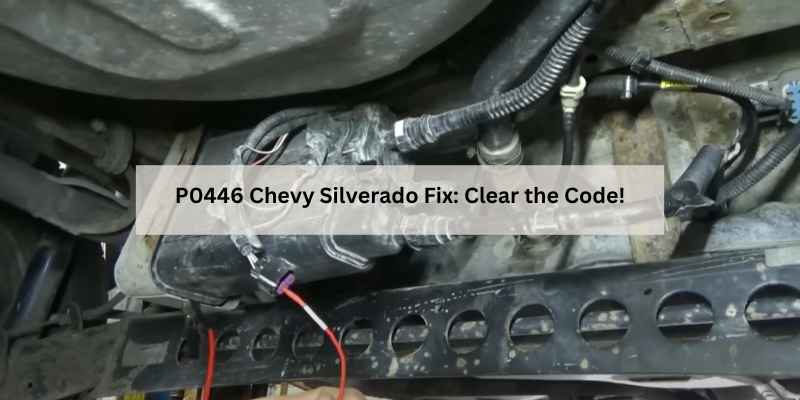
The vent valve sits low on the frame, right next to the charcoal canister. That location exposes it to road salt, mud, water spray, and heat from the exhaust. Over time, the internal plunger sticks. The valve gets stuck closed, which prevents the tank from venting, or stuck open, which lets vapors escape when they shouldn’t. Either way, the PCM sees the wrong response and sets P0446.
Corrosion at the electrical connector is the second most common cause. The connector is unsealed on many models, so moisture gets in and attacks the pins. The valve might work fine, but the signal never reaches it. This is why a multimeter test matters before you buy anything.
Year matters a lot here. On 1999-2026 Silverados, the vent valve is a simple two-wire mechanical device. On 2026 and newer trucks, it’s an electronic solenoid with a different connector and pinout. The 2026+ models changed the connector again. If you order a part without checking your year, you’ll end up with the wrong piece.
Tools and Parts You’ll Need (With Part Numbers)
Before you start, gather these:
- OBD-II scanner (any basic model that reads and clears codes)
- Digital multimeter
- 10mm socket, ratchet, and extension
- Flathead screwdriver (for the connector release tab)
- Dielectric grease for the new connector
- New vent valve or solenoid (part numbers below)
For 1999-2026 Silverado 1500/2500/3500, the factory vent valve part number is 15071317. Aftermarket equivalents include the Standard Motor Products VAP-5 and Dorman 911-237. For 2026-2026 models, the OEM number is 25868641. The Dorman 911-099 and AC Delco 214-1910 both fit this range. For 2026-2026 trucks, you need the later solenoid, OEM number 22966531, which is also covered by the PANNUOSCS 911-099.
One critical fitment note: the vacuum connector diameter changed between generations. The 911-237 (for P0449) uses a 15mm connector. The 911-099 (for P0446) uses a 16mm connector. Measure yours before ordering. Installing the wrong size will cause a vacuum leak and the code will come right back.
Step-by-Step Diagnosis: From Code to Confirmed Fix
You have the code, you have the tools. Now confirm the part is actually bad before you spend money. These three tests take about fifteen minutes total.
Test 1: The Tap Test (Free 2-Minute Check)
This is the trick most shops won’t tell you. A stuck vent valve often responds to a sharp tap. Locate the valve on the frame rail near the fuel tank. With the engine running, have a helper listen near the canister while you tap the valve gently with the handle of a screwdriver. If the idle changes or you hear the valve click, it’s sticking. That’s a strong signal the valve is the problem, not the wiring.
This isn’t a permanent fix. It’s a diagnostic confirmation. If the tap makes a difference, replace the valve. If nothing changes, move to Test 2.
Test 2: Using a Multimeter on the Vent Valve
Disconnect the electrical connector from the vent valve. Set your multimeter to ohms and touch the probes to the two pins on the valve. A good valve reads between 20 and 40 ohms. If you get an open circuit (no reading) or a dead short (zero), the internal coil is burned out and the valve needs replacing.
If the resistance is in range, the valve’s coil is fine, but the plunger could still be mechanically stuck. Apply 12V directly from the battery to the two pins. You should hear a distinct click as the plunger moves. No click means the plunger is seized, even with good resistance. Replace it.
Test 3: Checking the Wiring Harness and Connector
If the valve passes both tests, the problem is upstream. Check the connector pins for green corrosion or bent terminals. Look at the wiring where it rubs against the frame — chafed wires are common on trucks that see off-road use.
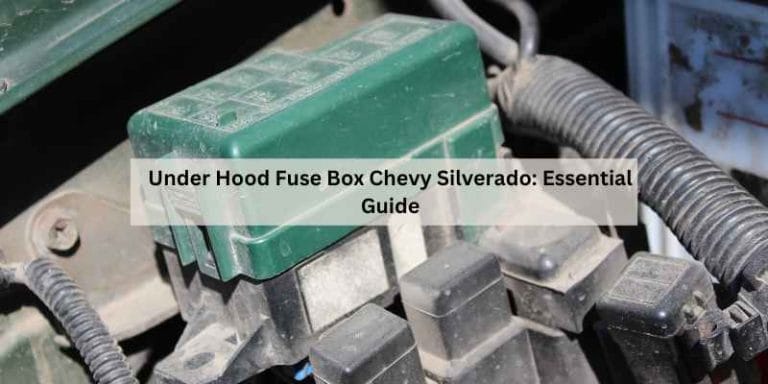
With the connector unplugged and the key on, probe the harness side. You should see battery voltage on one pin with the engine running. The other pin is the ground side, controlled by the PCM. If you have voltage but the valve doesn’t click, the ground circuit is broken. Trace the wire back to the PCM connector and check for damage. This is also a good time to inspect the fuse for the EVAP system, usually a 10A fuse in the under-hood fuse box. A blown fuse will cause the same code.
The Fix: Replacing the Vent Control Valve (Silverado 1999-2026)
Once you’ve confirmed the valve is bad, the replacement is straightforward. On these years, the valve mounts directly to the charcoal canister with a bracket and a single hose clamp. You don’t need to drop the fuel tank.
- Disconnect the negative battery cable.
- Unplug the electrical connector. Press the release tab and pull straight off.
- Loosen the hose clamp with a flathead screwdriver and pull the rubber hose off the valve.
- Remove the two 10mm bolts holding the bracket to the frame.
- Pull the valve and bracket assembly out. The valve usually twists off the bracket.
- Install the new valve in reverse order. Coat the hose connection with a thin layer of dielectric grease to help it seat.
- Torque the bracket bolts to 18 ft-lbs. Do not overtighten — the frame rail threads strip easily.
- Reconnect the battery and clear the code with your scanner.
On 2026-2026 models, the valve is held by a single Torx screw and a push-on connector. The process is the same, but you’ll need a T25 Torx bit instead of a socket. The torque spec is lower, around 8 ft-lbs.
The Fix: Replacing the Vent Solenoid (Silverado 2026+)
The newer trucks use a solenoid mounted on a bracket above the spare tire, not directly on the canister. It’s still accessible without dropping anything, but you’ll be working over the exhaust, so let the truck cool down first.
- Disconnect the negative battery cable.
- Remove the spare tire if it’s in the way. On some models, the solenoid sits right behind it.
- Unplug the electrical connector. These connectors are fragile — squeeze the release tab, don’t pry.
- Remove the two 10mm bolts from the bracket.
- Pull the solenoid off the rubber hose. It’s a tight fit, so twist it gently.
- Install the new solenoid, making sure the hose seats fully. Use a new hose clamp if the old one is rusted.
- Torque the bracket bolts to 18 ft-lbs.
- Reconnect the battery and clear the code.
One thing to watch: the hose on these models cracks at the solenoid end. If the hose is hard or brittle, replace it while you’re in there. A cracked hose will pull the code right back, and you’ll be doing the job twice.
How to Clear the Code and Complete the Drive Cycle
Clearing the code with a scanner is the easy part. The hard part is getting the EVAP monitor to run its self-test so the code doesn’t return. If you just clear it and drive normally, the monitor may not complete, and the light will come back on even with a good valve.
Here’s the drive cycle that works for most Silverados:
- Start with a cold engine and a fuel level between 15% and 85%.
- Drive at steady highway speed (55-65 mph) for 10 minutes. Keep the throttle steady.
- Slow to a stop and idle for 2 minutes.
- Accelerate smoothly to 45 mph and hold it for 5 minutes.
- Park and let the truck idle for another 2 minutes.
- Turn the ignition off and wait 10 minutes.
- Restart and check the readiness monitors with your scanner. The EVAP monitor should show “Complete.”
If the monitor doesn’t complete after one cycle, drive another 20 minutes at highway speed. Cold weather slows the EVAP self-test down, so be patient. The code will not return if the repair is solid and the monitor passes.
Repair Costs: DIY vs. Shop
Here’s where the savings add up. A dealership will charge you a diagnostic fee ($120-$150), then quote the vent valve at $180-$250 plus 1.5 hours of labor at $150/hour. You’re looking at $400-$500 out the door. An independent shop is cheaper, usually $250-$350 total, but they’ll often replace the valve without testing the wiring first.
Doing it yourself, the part costs between $30 (aftermarket) and $90 (OEM), plus a $20 tube of dielectric grease you’ll use once. Total investment: under $120 and about an hour of your time. The PANNUOSCS 911-099 sits at the lower end of that range and includes the 12-month replacement coverage. For a part that takes an hour to swap, that’s a solid deal.
The only time I’d recommend a shop is if the wiring test shows a broken circuit. Tracing a short in the harness is miserable work, and a shop with a wiring diagram and a scope will find it faster. But for a stuck valve or a bad solenoid, DIY is the right call.
Frequently Asked Questions
Can I drive my Silverado with a P0446 code?
Yes, in most cases. The truck will run normally, and you won’t damage anything by driving short distances. The risk is long-term: a stuck-closed vent valve creates vacuum in the fuel tank, which can deform the tank or damage the fuel pump over time. If you need to drive while waiting for a part, loosen the gas cap slightly to relieve pressure, but don’t leave it loose on the highway.
Will a new gas cap fix P0446?
Almost never. P0446 is a vent valve circuit code, not a leak code. A loose or faulty gas cap triggers P0442 or P0455. If your code is specifically P0446, the gas cap is a red herring. Save your $15.
What’s the difference between P0446 and P0449?
P0446 is the vent valve’s control circuit or stuck valve. P0449 is the purge solenoid circuit. They’re related but separate parts. The purge solenoid sits near the engine, and the vent valve sits near the fuel tank. If you have P0449, you need the 15mm connector version. If you have P0446, you need the 16mm version. That’s why the fitment note matters.
How do I bypass the vent valve temporarily for an emissions test?
You shouldn’t bypass it. The EVAP system is part of the vehicle’s emissions controls, and disabling it is illegal in most states. A bypass might let you pass a tailpipe test, but the OBD-II plug-in test will still show the monitor as incomplete, and you’ll fail. Fix the valve properly and run the drive cycle. It’s faster than fighting the system.
Why does my P0446 code come back after clearing it?
Three reasons. The valve is still stuck and you didn’t actually fix it. The wiring connector has corrosion you missed. Or the drive cycle never completed, so the monitor didn’t run. Go back through the diagnostic tests, check the connector pins with a flashlight, and run the full drive cycle. One of those will find the problem.
When to Call a Professional
You’ve done the tests, replaced the valve, and the code still comes back. At this point, you need a professional. The issue could be a failed PCM, a short in the main harness, or a damaged charcoal canister that’s clogging the vent path. These are rare, but they happen. A shop with a smoke machine can pressurize the EVAP system and find leaks in minutes. That tool costs thousands, so renting one isn’t practical.
Before you hand over the keys, make sure you’ve done your homework. Confirm the part number matches your year, check the connector size, and verify the wiring with a multimeter. Most P0446 cases are a $50 part and an hour of work. Don’t let a lazy diagnosis turn that into a $500 repair bill.
If you run into other Silverado trouble codes, the fix is often just as straightforward. A P0327 Chevy Silverado diagnosis follows the same logic: test the sensor, check the wiring, replace the part. And if your truck ever throws a transmission code, this P0700 Chevy Silverado guide covers what that means before you panic.
What you should take from this:
- P0446 is a vent valve circuit code, not a gas cap issue. Stop wasting time on the cap.
- Run the tap test first. It’s free, takes two minutes, and confirms a stuck valve.
- Use a multimeter to check resistance (20-40 ohms) and apply 12V to hear the click.
- Match the part to your year: 1999-2026 uses a mechanical valve, 2026+ uses an electronic solenoid, 2026+ has a different connector.
- Check the connector diameter before ordering: 16mm for P0446, 15mm for P0449.
- Torque the bracket bolts to 18 ft-lbs and use dielectric grease on the connector.
- Clear the code and run the full drive cycle, or the EVAP monitor won’t complete and the light returns.
Products related to this article
Sponsored / affiliate links. As an Amazon Associate I earn from qualifying purchases. I may earn additional commission from eligible campaigns.