Top Rust Removers That Eat Rust Off Car Metal
Dealing with rust on your car can seem tricky, especially when you first start. You might wonder where to find the Best Rust Removers That Eat Rust Off Car Metal. It’s a common problem, and finding the right solution can feel overwhelming.
But don’t worry! This guide will walk you through simple steps to get rid of rust. We’ll look at different ways to tackle it so your car looks great again.
Get ready to learn how easy it can be!
Choosing Best Rust Removers That Eat Rust Off Car Metal
Finding the right rust remover is key to getting rid of that unwanted orange on your car. This section will help you understand what makes a rust remover effective. We’ll explore different types and how they work on car metal.
You’ll learn to pick the best one for your needs. This will make sure you tackle rust the right way the first time. Get ready to discover what works best for cleaning up your ride.
Understanding Rust and How Removers Work
Rust, or iron oxide, forms when iron or steel is exposed to moisture and oxygen. It’s like a slow eating away of the metal. This process weakens the metal and looks bad.
Rust removers work in different ways to stop or reverse this. Some are acidic and dissolve the rust. Others use chemicals to convert the rust into a different, paintable surface.
Knowing this helps you choose the right product.
Acidic rust removers use things like phosphoric acid or hydrochloric acid. These acids react with the iron oxide, breaking it down. They work fast but can be harsh.
You need to be careful not to let them sit too long. They also might etch or discolor the metal if not used correctly. Always follow the instructions on the bottle.
Proper ventilation and safety gear are a must when using these.
Another type is a rust converter. These don’t actually remove the rust. Instead, they chemically change the rust into a stable black coating.
This coating can then be painted over. It’s a good option if you plan to repaint the area anyway. It’s also simpler as it requires less scrubbing.
The conversion process usually takes a few hours. It’s important to clean the area well before applying a converter.
There are also non-acidic or neutral pH rust removers. These are often based on chelating agents. Chelating agents bind to the iron in the rust, lifting it away from the metal surface.
They are much safer to use. They don’t harm paint or surrounding materials. They work a bit slower than acidic removers.
But for light to moderate rust, they are an excellent choice for home use.
Effectiveness also depends on the concentration of the active ingredients. Higher concentrations usually mean faster action. But they can also be more aggressive.
Always check the product label for information. Some removers are gels, which cling to vertical surfaces. Others are liquids you can spray or brush on.
The form factor can make application easier depending on the rusted area.
Chemical Reactions of Rust Removal
The chemical reactions involved in rust removal are fascinating. For acidic removers, the acid reacts with iron (Fe) and oxygen (O) atoms in the rust (Fe2O3 or Fe3O4). A common reaction with phosphoric acid (H3PO4) might look something like this simplified equation: Fe2O3 + 2H3PO4 → 2FePO4 + 3H2O.
This reaction breaks down the rust into iron phosphate and water. Iron phosphate is a stable compound that can be washed away.
Rust converters often use tannic acid. When tannic acid encounters iron oxide, it reacts to form iron tannate. This compound is a stable, black polymer.
This polymer seals the metal from further rust. It also provides a primer-like surface for painting. The reaction is complex and involves cross-linking of molecules.
It essentially creates a barrier that prevents oxygen and moisture from reaching the bare metal underneath.
Chelating agents, used in many milder removers, work by forming complex molecules with metal ions. For rust removal, the chelating agent grabs the iron ions from the rust particles. This process effectively pulls the rust off the surface.
It’s like a gentle magnet that attracts and holds onto the rust. The bound iron is then easily rinsed away. This method is often preferred for its safety and environmental friendliness.
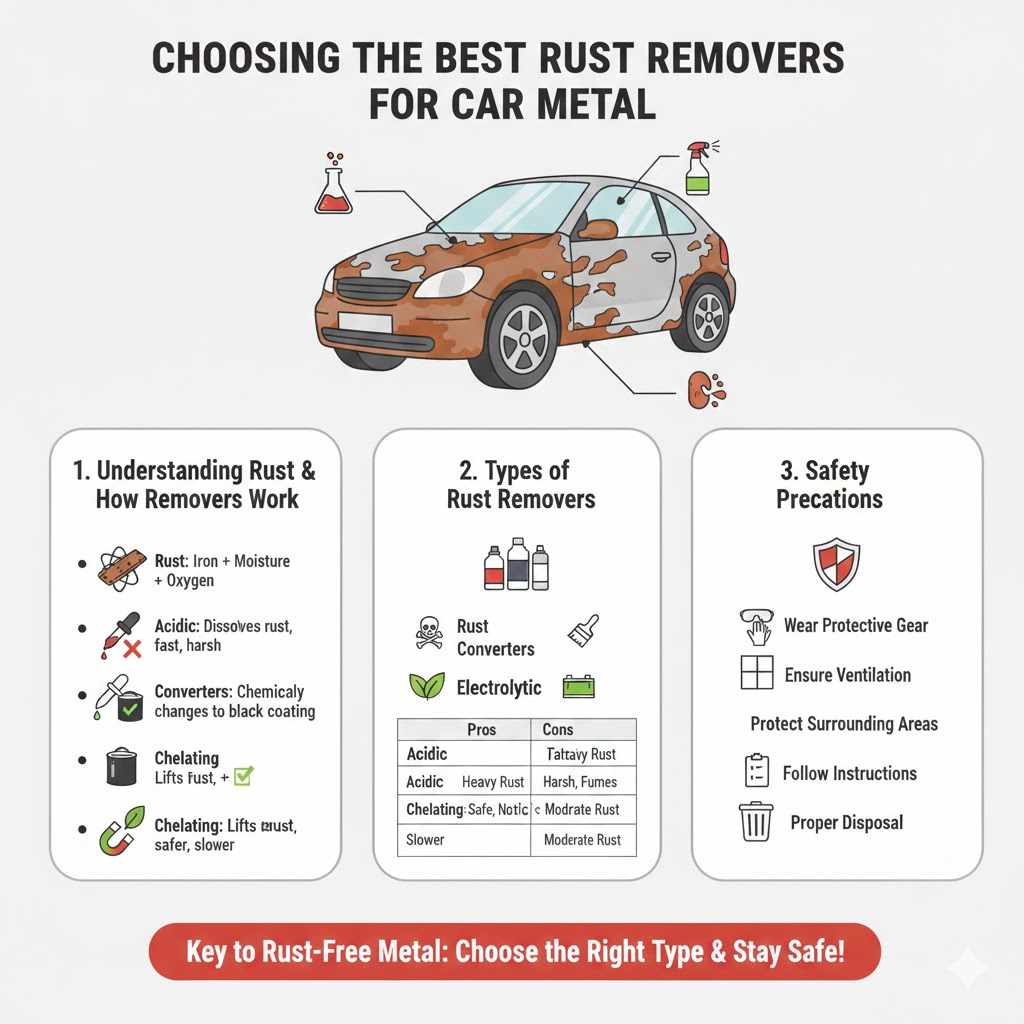
Types of Rust Removers
There are several main types of rust removers available on the market. Each has its pros and cons. The best choice for you depends on the severity of the rust and your personal preference for application and safety.
- Acidic Rust Removers: These are typically the strongest and fastest. They use acids like phosphoric, hydrochloric, or citric acid. They chemically dissolve rust. Good for heavy rust but require careful handling and protective gear.
- Rust Converters: These don’t remove rust but turn it into a black, paintable surface. They are excellent for preparing metal for painting. They are easier to use than acidic removers for many DIYers.
- Electrolytic Rust Removal: This method uses electricity and a water-based solution (like washing soda) to remove rust. It’s very effective and non-damaging to good metal. It takes longer and requires a power supply.
- Chelating Rust Removers: These use compounds that bond with iron to lift rust away. They are generally safer and less harsh than acidic removers. They are good for moderate rust and are often biodegradable.
When you’re looking for the Best Rust Removers That Eat Rust Off Car Metal, consider the type of rust you’re dealing with. Light surface rust might only need a chelating cleaner. Deep, pitted rust might require an acidic remover or even sanding.
Always read product descriptions carefully. They will tell you what kind of rust the product is best suited for.
Popular and Effective Rust Remover Products
Many brands offer excellent rust removers. Some are more well-known for their effectiveness on automotive applications. It’s helpful to know what some of the top contenders are.
This can guide your purchase and give you confidence in your choice.
WD-40 Rust Remover Soak is a popular choice for soaking smaller parts. It’s a powerful formula that can break down even stubborn rust. For larger areas, a spray-on option might be better.
Evapo-Rust is another highly-rated product. It’s a non-toxic, biodegradable rust remover. Many users praise its effectiveness and ease of use.
It works by chelation.
Krud Kutter is known for its strong cleaning products. Their rust remover is often praised for its ability to tackle tough rust. Some automotive-specific brands like POR-15 also offer rust removers as part of their system.
These are designed to work with their other rust-prevention products. They are a good choice if you plan on a full rust repair and prevention project.
When comparing products, look at reviews from other car owners. They often share real-world experiences. Pay attention to how long the product takes to work and what safety precautions are needed.
The best product for you might also depend on whether you need to soak parts or treat a large surface on your car. Always consider the size of the rusted area and the type of metal.
Comparison of Top Rust Remover Brands
Here’s a quick look at some leading brands and what makes them stand out. This table can help you quickly see the differences.
| Brand | Type | Pros | Cons | Best For |
|---|---|---|---|---|
| Evapo-Rust | Chelating | Non-toxic, biodegradable, no fumes, no acid. | Slower acting than acids, may require longer soaking. | All rust types, parts soaking, safety-conscious users. |
| WD-40 Rust Remover Soak | Acidic/Chemical | Fast-acting, effective on heavy rust. | Requires ventilation, can etch some surfaces if left too long. | Heavily rusted parts, quick treatment. |
| Krud Kutter | Acidic/Chemical | Strong formula, works on tough rust, good value. | Strong fumes, requires protective gear. | Heavy rust on larger areas, automotive parts. |
| CLR (Calcium Lime Rust Remover) | Acidic | Readily available, effective on rust and other stains. | Can be harsh on painted surfaces, needs rinsing. | Surface rust, general cleaning. |
These brands represent some of the most reliable options for taking care of rust. Each offers a different approach, so pick the one that best fits your project. Remember that even the best removers need proper application to work perfectly.
Always test on an inconspicuous area first if you are unsure.
Safety Precautions When Using Rust Removers
Using rust removers, especially acidic ones, requires attention to safety. It’s crucial to protect yourself and your surroundings. This ensures a smooth and safe rust removal process.
Safety is just as important as choosing the right product.
- Wear Protective Gear: Always wear safety glasses or goggles to protect your eyes from splashes. Nitrile or rubber gloves are essential to prevent skin contact, as some removers can irritate or burn the skin. If using strong acidic removers, wear a respirator to avoid inhaling fumes.
- Ensure Ventilation: Work in a well-ventilated area, preferably outdoors. This is especially important for acidic removers that produce strong fumes. Good airflow helps dissipate these fumes and reduces the risk of respiratory irritation.
- Protect Surrounding Areas: Cover nearby car parts, tires, and paintwork with plastic sheeting or old rags. Some removers can damage paint or other materials. This step prevents accidental contact and potential damage.
- Follow Instructions Carefully: Each rust remover has specific instructions for use, dilution, and dwell time. Read and follow these instructions precisely. Over-application or leaving the product on too long can lead to damage to the metal itself.
- Proper Disposal: Dispose of used rust removers and contaminated materials responsibly. Check local regulations for hazardous waste disposal. Many biodegradable options are easier to dispose of safely.
By taking these simple precautions, you can effectively use the Best Rust Removers That Eat Rust Off Car Metal without incident. Safety ensures that your car restoration project stays on track and remains a positive experience.
How To Apply Rust Removers To Car Metal
Once you’ve picked out the perfect rust remover, the next step is applying it correctly. The method of application can greatly affect how well the remover works. It also impacts the safety of the process.
We’ll cover different application techniques for various situations. This will help you get the best results for your car.
Surface Preparation Is Key
Before you even open the rust remover, you need to prepare the surface. This step is critical for the remover to work its best. It’s like getting a clean canvas before you paint a masterpiece.
Without proper preparation, the remover might not reach the rust effectively, or it might spread unnecessarily.
First, clean the rusted area with soap and water. This removes dirt, grime, and any loose debris. A stiff brush can help dislodge surface dirt.
Rinse thoroughly and let the area dry completely. Moisture can interfere with some rust removers. You want a dry surface for the product to work on.
If there’s any flaking rust, you should remove as much of it as possible. A wire brush, sandpaper, or a grinding wheel can be used for this. The goal is to expose as much of the actual rusted metal as possible to the remover.
This allows the chemicals to penetrate and break down the rust more efficiently. Be careful not to remove good metal.
For larger areas of rust, you might want to mask off the surrounding areas. This protects good paint and metal from the remover. Use painter’s tape and plastic sheeting.
This step is especially important when using strong acidic removers. It prevents accidental damage to your car’s finish.
Inspect the area for any grease or oil. These can create a barrier that prevents the rust remover from penetrating. Use a degreaser if necessary.
Once the surface is clean, dry, and free of loose rust, it’s ready for the rust remover application. This preparation ensures that the Best Rust Removers That Eat Rust Off Car Metal can do their job.
Cleaning and Degreasing the Rusted Area
Cleaning and degreasing are the first steps in preparing your car’s metal for rust removal. Think of it as clearing the path for the rust remover to work. Any dirt or oil left behind will act as a shield, preventing the remover from reaching the rust.
Start with a good wash. Use a mild car soap and water. A sponge or soft brush will help you get into crevices.
Rinse the area completely. Then, dry it thoroughly with a clean cloth or microfiber towel. You want to get rid of all surface moisture.
Next, tackle any grease or oil. Car parts, especially around the engine or wheel wells, can accumulate greasy residues. A dedicated automotive degreaser is your best bet here.
Apply the degreaser according to its instructions, usually letting it sit for a few minutes. Then, scrub the area with a brush and rinse again. Make sure all degreaser residue is gone.
Some people use isopropyl alcohol for a final wipe-down after degreasing. This helps remove any remaining film and ensures the surface is truly clean and dry. This level of preparation makes a big difference in how effectively the rust remover will perform.
Removing Loose Rust and Scale
After cleaning and degreasing, it’s time to deal with the loose rust. This is the flaky, powdery stuff that’s already detached from the main metal. You don’t want this hindering your rust remover’s progress.
A wire brush is an excellent tool for this job. You can use a hand-held wire brush for smaller areas. For larger spots, a wire wheel attachment for a drill or angle grinder can speed things up significantly.
As you brush, you’ll see the loose rust particles flake away.
Sandpaper is another option. Start with a coarser grit (like 80 or 120) to remove thicker rust. You can then move to finer grits to smooth the surface.
If you use sandpaper, wear a dust mask to avoid inhaling rust particles. Always try to brush or sand in the direction of the metal grain if possible.
After brushing or sanding, wipe the area down with a clean cloth to remove all dust and debris. This ensures that the rust remover can get to the solid, rusted metal underneath. This step is crucial for the Best Rust Removers That Eat Rust Off Car Metal to perform optimally.
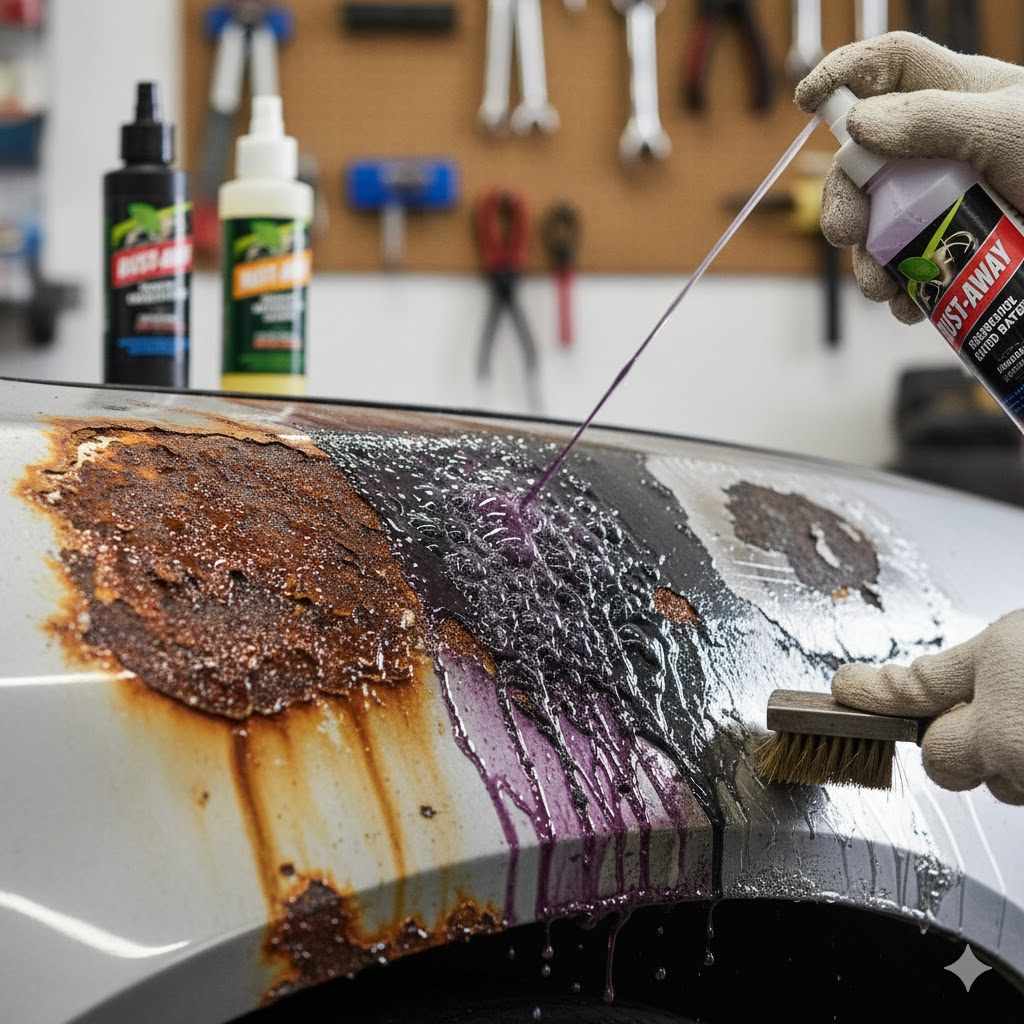
Application Methods for Different Rust Situations
How you apply a rust remover depends on the size and location of the rusted area. Different methods work best for different scenarios. Choosing the right method ensures the remover stays where it needs to be and does its job.
For small, removable parts like nuts, bolts, or brackets, soaking is the easiest method. You’ll need a container large enough for the part. Fill the container with the rust remover.
Then, immerse the rusted part completely. Let it soak for the time recommended by the product manufacturer. After soaking, remove the part and scrub off any remaining rust.
Rinse and dry thoroughly.
For larger areas on the car body, like a fender or door panel, spray or brush-on application is more practical. If using a spray, ensure you have good coverage. If using a brush, apply a thick, even layer.
For vertical surfaces, a gel-type rust remover is ideal. Gels cling to the metal and won’t drip off easily. This allows them to work for longer periods without needing reapplication.
In some cases, you might need to create a barrier to keep the remover in place. For example, on a very rusty spot, you could build a dam around the area with putty or tape. Then, fill this dam with the rust remover.
This ensures the product stays concentrated on the rust for maximum effect.
Remember that some products, like rust converters, might be applied differently. They often need to be spread thinly and evenly. Always read the specific instructions for the product you are using.
This will guide you on the best way to achieve the desired results with the Best Rust Removers That Eat Rust Off Car Metal.
Soaking Small Parts
Soaking is a highly effective method for rust removal when dealing with smaller, detachable car components. This includes items like bolts, nuts, brackets, exhaust clamps, and even larger parts like brake rotors if they fit. The key benefit is that the entire part is submerged, ensuring all surfaces are treated equally.
You will need a container made of compatible material. Most plastic tubs, buckets, or trays will work, but avoid reactive metals. Fill the container with enough rust remover to fully cover the rusted item.
Ensure the part rests at the bottom and is not floating or partially exposed.
The soak time varies significantly by product and rust severity. Evapo-Rust, for example, can take from 30 minutes for light rust to 12-24 hours for heavily rusted items. Always refer to the product’s instructions.
You can check the progress periodically. Once the rust has been dissolved or loosened, remove the part from the solution.
After soaking, you’ll often need to lightly scrub the part with a brush. This helps remove any loosened rust particles. A brass brush is gentle enough not to damage the metal.
Then, rinse the part thoroughly with clean water. Some recommend a final rinse with a mild degreaser or alcohol to ensure no residue remains. Dry the part immediately to prevent new rust formation.
Spraying or Brushing Larger Areas
Applying rust removers to larger, fixed areas of your car requires a different approach. You cannot easily immerse a car door or a frame rail. Here, spray or brush applications are the go-to methods.
These allow you to treat specific areas directly on the vehicle.
For spray-on removers, ensure you have a good quality spray bottle or aerosol can. Apply a generous, even coat over the entire rusted surface. It’s best to work in sections if you have a very large area.
Overlap your passes to ensure full coverage. If the area is vertical, you might need to reapply the spray a few times as it can drip.
Brush-on removers offer more control. Use a chemical-resistant brush to apply a thick layer of the product onto the rust. Again, work in manageable sections.
For heavily pitted areas, use the brush to push the remover into the pits. This ensures that the rust inside the pits is targeted.
After application, let the product work for the recommended time. For vertical surfaces or areas where the remover might drip, you can often use plastic wrap to cover the treated area. This helps to keep the remover in contact with the rust for longer, increasing its effectiveness.
This is particularly useful for products that have a shorter working time.
Once the treatment time is up, follow the product’s instructions for removal. This might involve rinsing, wiping, or neutralizing the area. Proper application ensures the Best Rust Removers That Eat Rust Off Car Metal can work efficiently on your car’s body.
Post-Treatment Steps and Rust Prevention
Removing rust is only half the battle. What you do immediately after treatment and how you protect the metal going forward are just as important. This phase prevents the rust from returning and keeps your car looking good.
After using the rust remover, thoroughly rinse the treated area with clean water. This removes all traces of the chemical. For acidic removers, a neutralizing rinse might be necessary.
Some products recommend a specific neutralizing solution, while others can be neutralized with a baking soda and water mixture. Check your product’s instructions.
After rinsing, dry the metal completely. Any residual moisture can start the rusting process again almost immediately. Use clean towels or a leaf blower to ensure the area is bone dry.
This is a critical step.
Once the metal is clean and dry, it’s vulnerable. You need to protect it. The best way to do this is to apply a rust inhibitor or a primer.
For areas that will be painted, a good quality automotive primer is essential. It seals the metal and provides a base for paint.
If you plan to paint, follow proper painting procedures. This includes applying multiple thin coats of primer, sanding between coats, and then applying your base coat and clear coat. For areas that won’t be painted, consider applying a rust inhibitor spray or a protective coating like chassis wax or undercoating.
Regular inspection of your car for any signs of new rust is also part of good prevention. Addressing small rust spots early is much easier than dealing with large areas later. By following these steps, you ensure your efforts with the Best Rust Removers That Eat Rust Off Car Metal last.
Rinsing and Neutralizing
Rinsing is a crucial step after applying most rust removers. It removes the spent chemicals and any loosened rust particles. For acidic removers, a specific neutralizing step is often required.
This stops the acid from continuing to react with the metal.
When rinsing, use plenty of clean water. If you used a spray or brush-on product, you might need to rinse multiple times. For soaked parts, a thorough rinse under running water is best.
Ensure all residue is washed away.
Neutralizing an acidic rust remover is important to prevent long-term damage. A common and effective neutralizer is a solution of baking soda and water. Mix a few tablespoons of baking soda into a gallon of water.
Apply this solution to the treated area after rinsing. Let it sit for a few minutes, then rinse again with clean water.
Some rust removers are self-neutralizing or require no rinsing, especially the non-acidic or chelating types. Always read the product instructions carefully. Knowing whether to neutralize or just rinse will save you time and potential damage.
This ensures the Best Rust Removers That Eat Rust Off Car Metal leave your metal in prime condition.
Applying Protective Coatings and Primers
The moment the metal is clean and dry, it becomes susceptible to flash rust. This is a thin layer of rust that can form very quickly, especially in humid conditions. To prevent this, you must apply a protective coating or primer immediately.
If you plan to paint the area, a high-quality automotive primer is your best choice. Primers create a barrier between the metal and the environment. They also provide a surface that paint can adhere to effectively.
Apply the primer in thin, even coats. Allow each coat to dry according to the manufacturer’s instructions. Lightly sanding between primer coats can create a smoother finish.
For areas that will not be painted, such as the underside of the car or inside wheel wells, other protective coatings are available. These include rust-inhibiting sprays, clear coatings, or even undercoating materials. These products seal the metal and provide long-term protection against moisture and oxygen.
When choosing a protective coating, consider the environment the car will be in. If the car is exposed to salt from winter roads, a more robust coating might be necessary. The goal is to create a barrier that the elements cannot penetrate.
This maintains the hard work you put in with the rust removers.
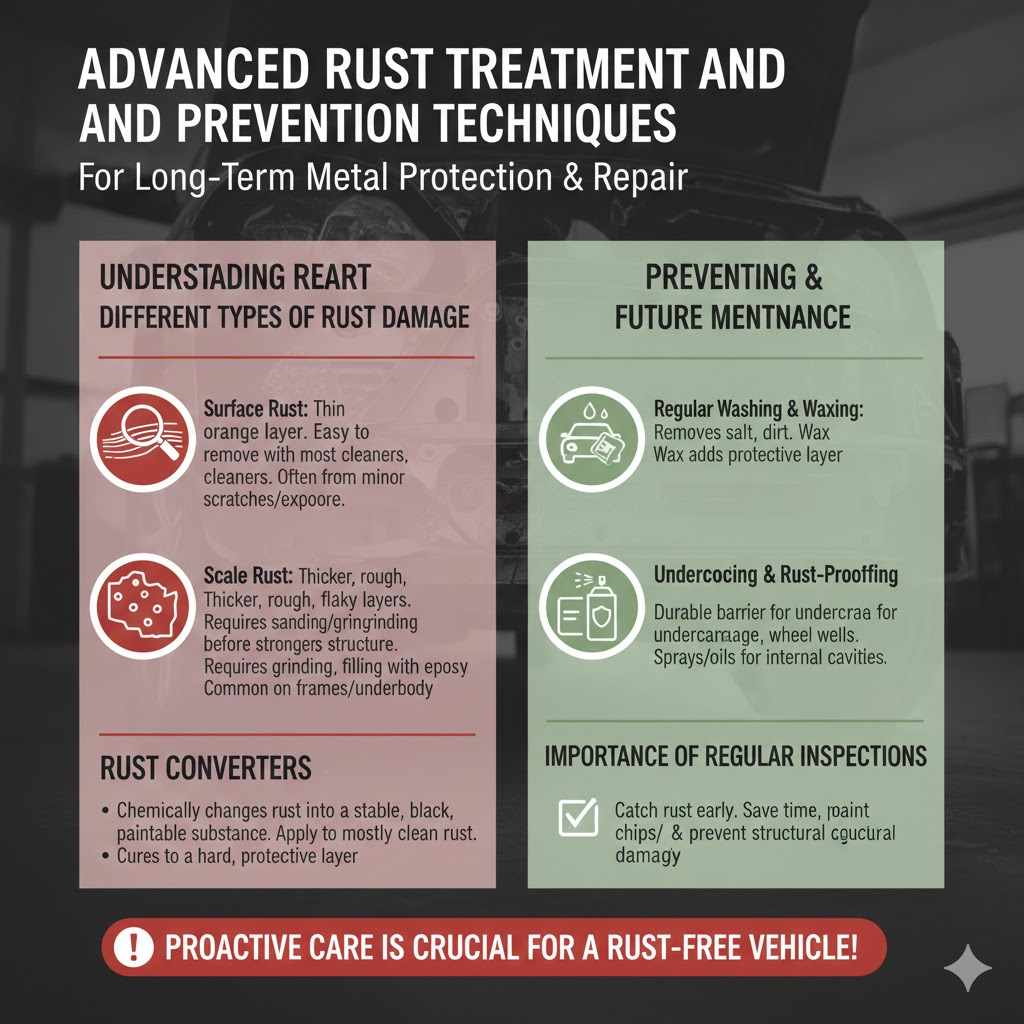
Advanced Rust Treatment and Prevention Techniques
Beyond basic removal, there are advanced methods for dealing with stubborn rust and ensuring long-term protection. These techniques often involve more specialized products or processes. They are for those who want the best possible results or are tackling severe rust issues.
We’ll explore these methods to give you a complete picture.
Understanding Different Types of Rust Damage
Rust isn’t always the same. The way it forms and damages metal can vary. Knowing these differences helps you choose the right approach.
It’s like a doctor needing to know if you have a cold or the flu to prescribe the right medicine.
Surface rust is the most common type. It looks like a thin, orange layer on the metal. It hasn’t penetrated deep.
It’s usually easy to remove with most rust removers. This is the kind of rust you see on tools left outside or on a car fender after a light scrape.
Scale rust is thicker and rougher. It forms when rust builds up over time. It can be flaky and might cover a larger area.
This type requires more aggressive removal, like sanding or grinding, along with a strong rust remover. It’s often found on older car frames or underbody components.
Pitting rust is the most damaging. It forms small holes or pits in the metal. These pits can weaken the metal structure significantly.
They are hard to reach and treat completely. You might need to grind out the pits and then use rust converters or specialized repair epoxies. This is often the most challenging type of rust to fix on a car.
The depth and spread of the rust determine the difficulty of repair. Light surface rust is a DIY job for most. Deep pitting or rust that has eaten through the metal requires professional attention or advanced repair skills.
Always assess the damage honestly to choose the right method and product from the Best Rust Removers That Eat Rust Off Car Metal.
Surface Rust
Surface rust is characterized by a reddish-orange discoloration that typically sits on the very top layer of the metal. It forms when iron is exposed to oxygen and moisture for a short period. This type of rust is usually superficial and does not compromise the structural integrity of the metal.
It’s often caused by minor scratches in paint that allow moisture to reach the bare metal. Another common cause is dew or rain left to sit on an unprotected surface. The good news is that surface rust is the easiest to deal with.
Most common rust removers, even mild ones like chelating agents, can effectively tackle surface rust. Sometimes, a good scrubbing with a wire brush or even a polishing compound can remove it. The key is to address it promptly before it has a chance to develop into deeper rust.
For example, if you notice a small orange bloom on your car door handle after a rainy spell, a quick application of a spray rust remover followed by a wipe-down can solve the problem. This prevents it from becoming a bigger issue later.
Scale Rust
Scale rust is a more advanced form of rust that appears as thicker, flaky layers of iron oxide. It develops when rust has been present for a longer time, allowing it to build up. You’ll often see it on older vehicles, especially on the undercarriage, exhaust systems, or in wheel wells.
This type of rust can obscure the underlying metal, making it difficult for removers to penetrate effectively. Before applying a rust remover, it’s essential to mechanically remove as much of the scale as possible. This might involve using a wire brush, scraper, or even a grinder with a wire wheel attachment.
Once the loose scale is removed, you’ll expose a more substantial layer of rust beneath. At this point, a stronger rust remover, perhaps an acidic one, or a rust converter will be needed. The goal is to break down this thicker rust layer.
It’s crucial to ensure the entire rusted area is treated, not just the surface scale.
For instance, on an old truck bed, you might find large patches of scale rust. Aggressively brushing these down to expose the solid, but still rusted, metal is the first step. Then, a good rust converter can be applied to stabilize the remaining rust before painting.
Pitting Rust
Pitting rust is arguably the most problematic type of rust damage. It creates small holes or cavities within the metal surface. These pits can be shallow or deeply penetrate the metal, significantly compromising its strength and integrity.
Pitting rust is often the result of prolonged exposure to moisture and corrosive substances.
The challenge with pitting rust is that the rust can hide deep within these cavities. Standard surface treatments may not reach it effectively. For mild pitting, an acidic rust remover that can penetrate the pits might work.
However, for deeper pitting, mechanical removal is usually required.
This often involves grinding out the pits until you reach clean, solid metal. Once the pits are excavated, they need to be filled. Specialized automotive body fillers or epoxies designed for metal repair are used.
After filling and sanding, the area is then primed and painted to match the surrounding surface.
Consider a classic car with rust bubbles on its quarter panel. These bubbles often hide deep pitting underneath. Simply treating the surface won’t fix the underlying damage.
A mechanic would cut out the rusted metal, grind down the pits, and then use a filler or patch panel to restore the area.
Using Rust Converters Effectively
Rust converters are a bit different from removers. Instead of dissolving rust, they chemically change it into a stable, inert substance. This substance is typically black and can be painted over.
This makes them ideal for preparing rusted areas for painting.
The key to using a rust converter is to apply it to a surface that is mostly cleaned of loose rust. You don’t need to remove every last speck of rust, but you do need to remove the flaky scale. The converter needs to adhere to a solid rust layer to react.
Think of it as needing something to hold onto.
Apply the converter in a thin, even coat. It’s usually a liquid that can be brushed or sprayed on. Avoid applying it too thickly, as this can lead to a brittle finish.
Once applied, let it cure completely. This usually takes several hours, during which the color will change to black.
After curing, the converted surface is ready for priming and painting. It creates a hard, stable base. It’s important to note that rust converters don’t add strength to the metal itself.
They simply stabilize the existing rust. If the metal is significantly weakened, it may still need structural repair.
For example, if you have a slightly rusted toolbox, cleaning off loose rust and applying a rust converter can give it a new lease on life. Once black and dry, you can paint over it. This prevents further rust and gives it a clean look.
Chemical Transformation Process
The chemical transformation process of rust converters is quite ingenious. Most commonly, they utilize ingredients like tannic acid or phosphoric acid. These acids react with iron oxide (rust) to form metal tannates or phosphates.
These compounds are much more stable than iron oxide.
For instance, tannic acid reacts with iron (III) oxide to create iron tannate. This creates a tough, black, polymer-like coating. This coating acts as a barrier, preventing oxygen and moisture from reaching the underlying metal and causing further corrosion.
It essentially seals the rust in place.
Phosphoric acid, on the other hand, reacts with iron oxide to form iron phosphate. This is also a stable, non-corrosive compound. It adheres well to the metal and provides a good base for paint.
The reaction converts the powdery rust into a hard, paintable surface.
The color change to black is a visual indicator that the chemical reaction has taken place. This makes it easy to see which areas have been treated. It’s a simple yet effective way to stabilize rust without requiring complete removal of the rusted material.
Preparing for Top Coats
Once the rust converter has fully cured and turned black, the surface is ready for its top coats. This preparation is crucial for the longevity of your repair. A properly prepared surface ensures that paint adheres well and lasts for a long time.
The converted rust surface is usually matte black and somewhat porous. It’s essential to clean this surface again before applying primer. A light wipe-down with a tack cloth is often recommended.
This removes any fine dust particles that may have settled on the surface during the curing process.
Next, apply a high-quality automotive primer. The primer will adhere to the converted rust layer and provide a smooth, uniform base for your paint. Use multiple thin coats of primer for the best results.
Allow each coat to dry thoroughly.
Lightly sanding the primer between coats can help achieve a perfectly smooth finish. Once the primer is ready, you can then apply your base coat and clear coat. This entire process ensures that the rust is sealed, and the repaired area blends seamlessly with the rest of your car.
Rust Prevention Beyond Removal
Once you’ve removed rust and protected the treated area, ongoing prevention is vital. Rust is a persistent enemy of metal. Taking proactive steps can save you a lot of trouble down the line.
Think of it as ongoing maintenance for your car’s health.
Regular washing and waxing of your car are fundamental. They remove corrosive elements like salt, dirt, and road grime. Wax adds a protective layer to your paint.
This helps prevent moisture from reaching bare metal if the paint gets scratched.
Undercarriage protection is also important, especially if you live in an area with harsh winters. Applying an undercoating or rust-proofing spray to the chassis and wheel wells can create a strong barrier against corrosion. These products are designed to withstand road debris and moisture.
Checking for and repairing minor paint chips or scratches promptly is another key step. These are entry points for rust. A quick touch-up can prevent a small problem from becoming a big one.
Regularly inspecting common rust areas like door bottoms, fender liners, and the trunk floor can help you catch rust early.
Using rust inhibitors in critical areas can also provide an extra layer of protection. These sprays release a protective vapor that creeps into nooks and crannies, offering ongoing rust prevention. Consistent attention to these details ensures that your efforts with the Best Rust Removers That Eat Rust Off Car Metal pay off in the long run.
Importance of Regular Washing and Waxing
Regular washing and waxing are the first lines of defense against rust, even after removal. Washing removes corrosive contaminants that settle on your car’s surfaces. These contaminants include road salt, mud, bird droppings, and acidic pollution.
If left unchecked, they can break down paint and expose metal.
Waxing adds a sacrificial layer of protection to your car’s paintwork. This layer repels water and dirt, making cleaning easier. It also provides a barrier against minor abrasions.
When the wax wears off, it can be reapplied, protecting the paint underneath. A well-maintained wax coat can significantly reduce the risk of new rust forming.
For example, a car that is regularly washed and waxed, especially one driven in areas with road salt, will likely develop rust much slower than a neglected vehicle. The protection is not just aesthetic; it’s a critical part of maintaining the car’s metal integrity.
Undercoating and Rust Proofing Sprays
Undercoating and rust-proofing sprays are designed for more intensive protection, particularly for the undercarriage and enclosed metal sections of your vehicle. The undercarriage is constantly exposed to moisture, road salt, rocks, and other debris, making it a prime target for rust.
These sprays typically form a durable, flexible barrier. They can be applied to chassis components, frame rails, wheel wells, and rocker panels. Some are rubberized, providing a tough, abrasion-resistant coating.
Others are oil-based and create a self-healing barrier that creeps into seams and crevices.
Many professional rust-proofing services use specialized equipment to inject these treatments into body cavities like door panels and frame rails. This prevents rust from forming on the inside, where it’s often unseen and harder to treat.
For DIY application, aerosol cans of undercoating are readily available. Clean the undercarriage thoroughly, remove any existing loose rust, and apply the product evenly. This proactive measure can significantly extend the life of your car’s metal components.
Frequently Asked Questions
Question: What is the fastest way to remove rust from car metal?
Answer: For speed, acidic rust removers are generally the fastest. Products containing phosphoric or hydrochloric acid can dissolve rust quickly. However, they require careful handling and prompt rinsing to avoid damaging the metal.
Always follow safety precautions and product instructions.
Question: Can I use a wire brush alone to remove rust?
Answer: A wire brush is good for removing loose, flaky rust. But it usually won’t remove all the rust, especially pitted or embedded rust. It’s often used as a preparatory step before applying a rust remover or converter for best results.
Question: Will rust removers damage my car’s paint?
Answer: Some strong acidic rust removers can damage or etch car paint if they come into contact with it. It’s essential to mask off surrounding painted areas with tape and plastic sheeting before applying these removers. Milder removers or rust converters are less likely to harm paint.
Question: How often should I apply rustproofing to my car?
Answer: The frequency of rustproofing depends on your climate and driving conditions. In areas with heavy road salt use, an annual application to the undercarriage might be beneficial. For most other conditions, a rustproofing treatment every 2-3 years is often sufficient.
Question: Can I paint over rust converter without primer?
Answer: While some rust converters create a paintable surface, it is always recommended to apply a primer over the converted rust layer. Primer provides a uniform base, improves paint adhesion, and offers an extra layer of protection, ensuring a more durable and aesthetically pleasing finish.
Summary
Choosing the Best Rust Removers That Eat Rust Off Car Metal involves understanding rust types and product actions. Preparation, proper application, and post-treatment protection are key to success. From simple cleaning to advanced prevention, taking care of rust safeguards your car’s metal.
Address rust early and consistently for lasting results.