Buffer for Car Scratches: How to Choose and Use One
A buffer (an orbital or rotary polisher) removes light scratches, swirl marks, and oxidation by leveling a thin layer of clear coat around the damage rather than filling it in. It only works on scratches that do not go past the clear coat — deeper gouges into the base coat or primer need touch-up paint or a body shop instead.
If you have ever run a fingernail over a scratch and wondered whether a buffer can fix it, the honest answer depends on depth, not how bad it looks. Below is what a buffer actually does, which type to buy, the exact steps to use one without burning your paint, and when to stop and use a different fix.
What Is a Buffer for Car Scratches?
Complete Beginner Buffing Kit
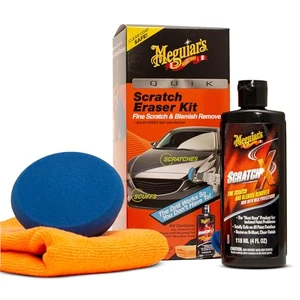 |
Meguiar’s Quik Scratch Eraser Kit – $15.49 A drill-mounted buffing pad plus scratch remover in one kit, built for exactly the light clear-coat scratches this guide covers.
|
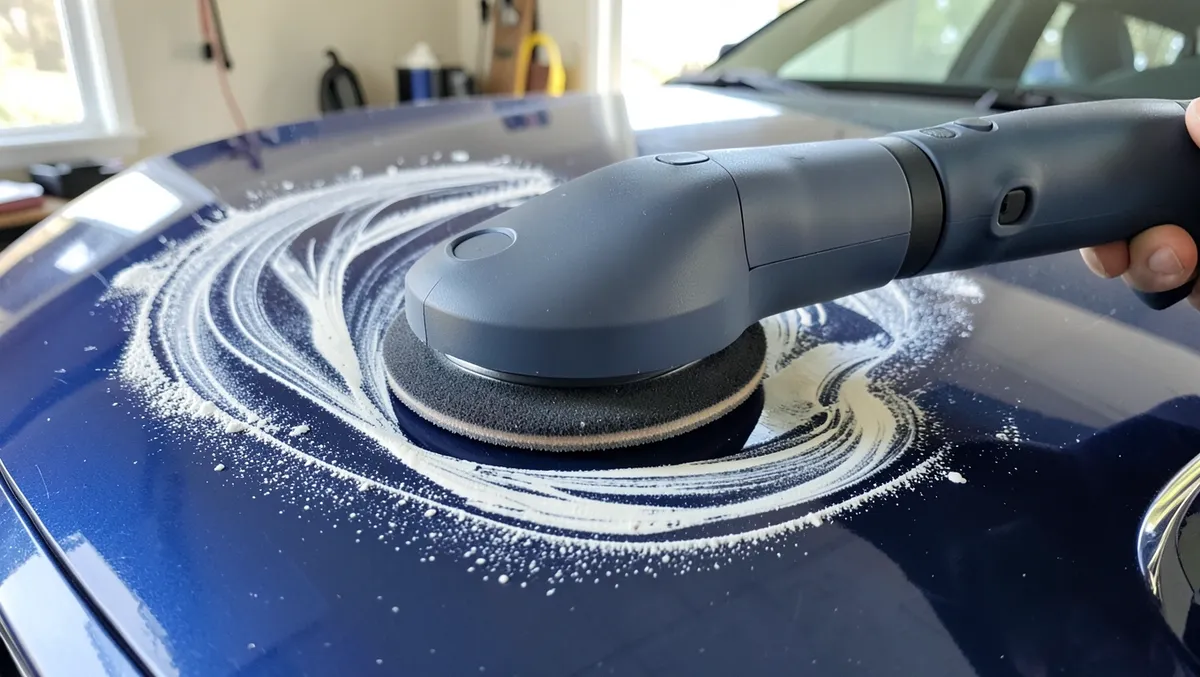
A buffer is a power tool — either a handheld polisher or a buffing pad chucked into a drill — that spins or oscillates a foam or wool pad against the paint, usually with a compound or polish on it. The pad and compound together remove a tiny amount of clear coat from around the scratch, so the surface around it is level again and the scratch stops catching light. It is not filling the scratch in; it is sanding the rest of the surface down to match it, which is why it only works while the scratch is shallow.
There are two basic kinds of buffer. A random orbital (also called dual-action, or DA) polisher moves the pad in small, randomized circles, similar to an orbital sander. A rotary polisher spins the pad in one direction around a single fixed axis, like a drill.
Dual-Action vs. Rotary Buffers: Which Should You Use?
For anyone doing this at home for the first time, a dual-action (DA) polisher is the safer choice. Because the pad oscillates instead of spinning around a fixed point, it spreads heat over a wider area, which makes it far harder to burn through the clear coat by lingering in one spot too long. DA polishers typically run at lower effective speeds, and most models let you dial the speed down for control while you learn.
Rotary polishers cut faster and more aggressively — professional detailers use them to correct heavy oxidation and deep swirl networks in less time — but that same aggressiveness is what causes clear-coat burn-through in inexperienced hands. Rotary buffers commonly run in the 600–3,000 RPM range, and most detailers work at the lower end of that (roughly 600–1,000 RPM) rather than full speed. If you are fixing a handful of scratches on your own car rather than correcting an entire vehicle professionally, start with a DA polisher or a drill-mounted buffing pad kit.
How to Use a Buffer to Remove Car Scratches
- Wash and dry the panel. Any dirt or grit left on the paint gets ground into the surface by the pad and adds new scratches.
- Run the fingernail test. Glide a clean fingernail across the scratch. If it glides smoothly, a buffer can likely fix it. If your nail catches on the edge, skip ahead to the section below on when a buffer will not work.
- Apply a small amount of scratch remover or cutting compound to the pad, not directly to the paint.
- Work one small section at a time (roughly 2×2 feet), keeping the buffer moving in overlapping passes. Never let the spinning pad rest in one spot.
- Use light to moderate pressure. Let the pad and compound do the work; pressing harder mainly generates heat, which is what causes burn marks.
- Wipe the section with a clean microfiber towel and check your progress in direct light before moving to the next section.
- Finish with polish and wax or sealant once the scratch is gone, to restore gloss and protect the freshly buffed clear coat.
Always work in the shade. Direct sun dries compound too fast to work it properly and makes it harder to judge your progress.
When a Buffer Will Not Fix the Scratch
Modern clear coats are thin — typically only a few mils (a fraction of a millimeter) thick — and a buffer can safely remove only a small fraction of that before it starts thinning the clear coat too much. That is why the fingernail test matters: if your nail catches on the scratch, it has almost certainly gone through the clear coat and into the base coat, primer, or bare metal underneath. Buffing over that kind of damage will not remove it and can make the edges of the scratch worse.
At that point, a buffer is the wrong tool. You are looking at either a touch-up paint repair or a full panel respray, depending on depth and how large the area is. Our guide on fixing deep scratches on a car covers wet-sanding and paint-depth options in more detail, and how to repair a scratched car walks through the touch-up paint process step by step.
What to Look for When Buying a Buffer
Type: Rotary vs. Dual-Action
As covered above, dual-action buffers are more forgiving for beginners; rotary buffers cut faster but carry a real risk of burning paint if you are not experienced. If this is your first buffer, buy a DA model or a drill-mounted pad kit.
Variable Speed Settings
A buffer with adjustable speed gives you more control: lower speeds for spreading compound and polishing, higher speeds for cutting through more stubborn defects. A single fixed speed makes it harder to avoid overworking one spot.
Pad Compatibility
Foam pads are gentler and better suited to polishing and light scratch removal; wool pads are more abrasive and better for cutting through heavier defects. Check that your buffer accepts a range of pad types and sizes, since you will likely want both a cutting pad and a softer finishing pad.
Corded vs. Cordless
Corded buffers deliver consistent power for as long as you need it; cordless models trade some runtime for the freedom to move around the car without a cable in the way. For a single car with occasional touch-ups, either works fine.
Weight and Grip
Buffing a full panel takes several minutes of continuous, even pressure. A lighter buffer with a comfortable, balanced grip is noticeably less fatiguing than a heavy one, especially if you are doing more than one panel in a session.
Common Buffing Mistakes That Cause Swirls or Burn Marks
- Leaving the pad in one spot too long. Heat builds up fast and can burn through the clear coat, especially with a rotary buffer.
- Pressing too hard. The compound and pad do the cutting — extra pressure mostly adds heat and friction, not effectiveness.
- Reusing a dirty pad between compound and polish stages. Leftover cutting compound on a finishing pad reintroduces the fine swirls you are trying to remove.
- Working in direct sunlight. Compound dries out too quickly to spread evenly, and it is harder to see your actual progress.
- Skipping the fingernail test. Buffing over a scratch that already goes through the clear coat wastes compound and can widen the damaged edges.
Frequently Asked Questions
What Is a Buffer for Car Scratches?
A buffer is a power tool, either a handheld polisher or a pad chucked into a drill, that spins or oscillates a foam or wool pad against the paint with a compound or polish to level out and smooth away light scratches and swirl marks.
Can a Buffer Remove Deep Scratches?
No. A buffer only fixes scratches that stay within the clear coat. If a scratch catches your fingernail, it has likely gone through the clear coat into the base coat or primer, and it needs touch-up paint or a repaint instead of buffing.
Is Using a Buffer Safe for My Car’s Paint?
Yes, if used correctly. Keep the pad moving, use light to moderate pressure, match the pad and compound to the defect, and test a small hidden area first. Rushing or holding the pad still in one spot is what causes burned or thinned clear coat.
Should I Use a Rotary or Dual-Action Buffer?
For most DIY use, a dual-action (DA) polisher or a drill-mounted buffing pad kit is the safer choice, since the oscillating motion spreads heat over a wider area and is much harder to burn paint with. Rotary buffers cut faster but are better suited to experienced users correcting heavier defects.
How Long Does It Take to Buff Out a Scratch?
A single light scratch on one panel usually takes just a few minutes of buffing once you include compound application, working the area, and wiping it clean. Correcting swirl marks across an entire car takes considerably longer, often several hours, since each section needs individual attention.
Do I Need a Buffer, or Will Rubbing Compound by Hand Work?
Rubbing compound applied by hand can remove very light scratches and haze, but it takes far more time and effort than a machine buffer, and it is harder to apply evenly across a larger area. For occasional light touch-ups on a small area, hand application can work; for swirl marks or scratches across a panel, a buffer gets a more consistent result. See our guide to buffing a car by hand for the hand-application technique.
Conclusion
A buffer is one of the most useful tools for keeping a car looking new, but it only works within its limits: light, clear-coat-level scratches and swirl marks. Run the fingernail test first, start with a dual-action polisher or a drill-mounted kit if you are new to this, keep the pad moving, and use light pressure. If the scratch is deeper than clear coat, stop buffing and follow a paint-repair guide instead.
For the complete step-by-step paint correction process using a buffer, see our guide on how to cut and buff a car.
Products related to this article
Sponsored / affiliate links. As an Amazon Associate I earn from qualifying purchases. I may earn additional commission from eligible campaigns.
 Car Scratch Remover,Car Paint Scratch Repair-Erase Car Scratches Scratch Repair Wax with Wipe and Sponge for Deep Scratches (5PC)
 Car Scratch Remover for Vehicles, Car Paint Scratch Repair Kit for Light Scratches, Swirl Marks, Scuffs & Water Spots, Comes with Sponge, Safe for All Paint Colors, 100g, 1 Pack