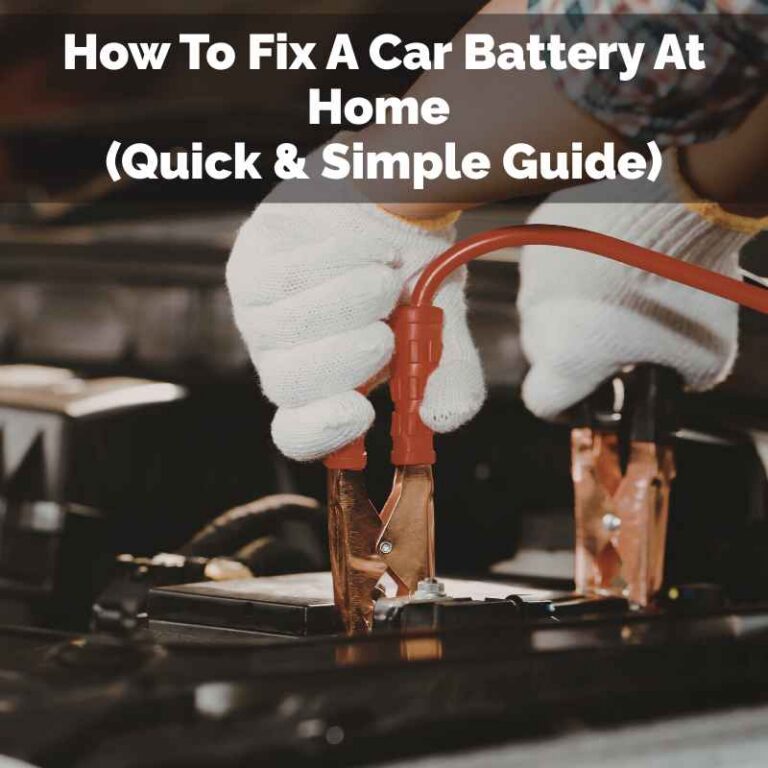
How to Cut and Buff a Car: Step-by-Step Paint Correction Guide
Cutting and buffing removes scratches, swirl marks, and oxidation from a car’s clear coat to restore a glossy, mirror-like finish. Cutting uses an abrasive compound to level paint defects; buffing (polishing) refines the surface to maximum gloss. Most cars need both stages for a complete correction. This guide covers the full process in 5 steps — the right tools, pad and compound selection, how to avoid burning paint, and when to call a professional detailer instead.
Quick Answer
To cut and buff a car: wash and dry the car, mask off trim with tape, apply cutting compound with a foam cutting pad on an orbital polisher (speed 4–5, working in 2×2-ft sections), wipe clean, then apply polish with a softer foam pad for gloss. Finish with wax or paint sealant. Always work in shade — direct sun dries compounds too quickly and causes streaking. Expect 4–6 hours for a complete correction on a full-size sedan.
What Is Cutting and Buffing a Car?
Cutting and buffing is a paint correction process that removes defects from a car’s clear coat — the transparent protective layer over the color coat — to restore gloss and depth. Cutting uses an abrasive compound to physically level the clear coat surface, smoothing out scratches, swirl marks, and oxidation. Buffing (polishing) follows with a finer abrasive to remove the micro-haze left by compounding and bring out maximum gloss. A final wax or sealant protects the corrected car’s paint from UV exposure and environmental contamination.
Why You Should Try Cutting and Buffing
- Saves money: A professional paint correction costs $300–$800+. DIY with the right tools costs under $150 in supplies.
- Removes swirls and scratches: Light-to-moderate scratches and swirl marks in the clear coat are correctable — they will not return if you follow up with paint protection.
- Protects paint long-term: A corrected, sealed paint surface resists UV oxidation, water spots, and minor abrasion better than neglected paint.
The process takes 4–6 hours for beginners on a full-size vehicle. Rushing is the most common cause of paint damage — burning clear coat with a stationary polisher or using too aggressive a compound for the defects present. Starting on a small test section before doing the whole car prevents most first-time mistakes.

Tools and Materials You’ll Need
- Orbital polisher: A random orbital like the Turtle Wax Hybrid Solutions Polisher (~$80) is beginner-friendly — the oscillating action prevents burning paint if you pause in one spot
- Cutting compound: Meguiar’s Ultimate Compound or Chemical Guys V36 ($15–$20) — removes scratches, swirls, and light oxidation
- Polishing compound: Chemical Guys V36 or Meguiar’s M205 ($18–$25) — removes compound haze and maximizes gloss
- Foam pad set: Get a variety pack including cutting (orange/yellow), polishing (white/blue), and finishing pads (~$20)
- Microfiber towels: 6–12 towels — use separate ones for compound wipeoff and final inspection ($10–$20)
- Car wash soap and wash mitt: Pre-buffing wash removes contamination that would scratch during correction
- Masking tape: Protects plastic trim, rubber moldings, and painted badges from compound staining ($3)
- Spray bottle with water: Mist the pad to keep it cool during compounding ($2)
| Item | Brand Example | Approx. Cost |
|---|---|---|
| Orbital polisher | Turtle Wax Hybrid / PORTER-CABLE 7424XP | $80–$150 |
| Cutting compound | Meguiar’s M105 / Chemical Guys V36 | $15–$25 |
| Polishing compound | Meguiar’s M205 / Chemical Guys V38 | $18–$25 |
| Foam pad set (3-pack) | Lake Country / Chemical Guys | $20–$35 |
| Microfiber towels | The Rag Company / Chemical Guys | $15–$25 |
Cutting Compound vs Polish — Which Do You Need?
Choosing the right product for the defects you have determines the result. Using a compound on paint that only needs polish removes more clear coat than necessary. Using polish on defects that need compound wastes time without fixing the problem.
| Defect Type | What to Use | Abrasive Level |
|---|---|---|
| Heavy scratches, deep swirls, wet sanding marks, oxidation | Cutting compound (e.g., Meguiar’s M105) | Heavy cut |
| Light swirls, buffer trails, light water spots | Light compound or all-in-one polish (e.g., Chemical Guys V36) | Medium cut |
| Compound haze, micro-marring, minor dullness | Finishing polish (e.g., Meguiar’s M205) | Fine cut / refine only |
| No defects — just want more gloss | Glaze or finishing polish only | Ultra-fine / no cut |
The test for scratch depth: drag your fingernail across the scratch. If your nail catches in it, the scratch penetrates through the clear coat into the color coat — compounding will not fix it. If your nail slides across without catching, the scratch is in the clear coat only and is correctable with compounding.
★ Best for beginners
Random Orbital Polisher + Compound Kit
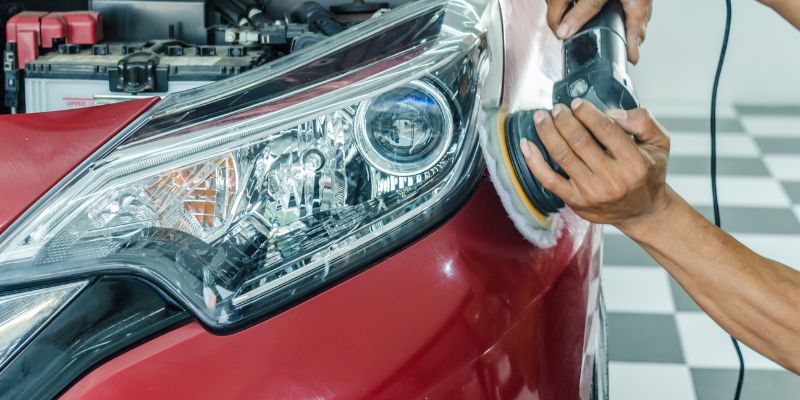
A random orbital polisher with a foam cutting pad and compound is the safest and most effective DIY paint correction setup for beginners. Unlike rotary polishers, the oscillating action makes it nearly impossible to burn clear coat if you keep moving.
- Removes swirl marks, light scratches, and oxidation in one pass
- Variable speed dial for compound (low speed) and polish (medium speed)
- Pairs with cutting, polishing, and finishing pads for a full 3-stage correction
As an Amazon Associate we earn from qualifying purchases.
Step-by-Step Guide to Cut and Buff Your Car
Step 1: Wash Your Car
Wash and dry the car thoroughly before touching a polisher. Dirt, dust, or grit on the paint surface will be pressed into the clear coat by the polishing pad, creating new scratches. Use car wash soap and a proper wash mitt — not a household sponge, which traps dirt against the paint. Rinse completely and dry with a clean microfiber towel. After washing, mask off all rubber trim, plastic moldings, and emblems with masking tape — compound residue stains porous plastic and is difficult to remove.
Step 2: Inspect the Paint
Inspect the paint under direct sunlight or a shop light held at a low angle — this reveals swirls, scratches, and haze that are invisible in flat lighting. Note which areas need heavy cutting (deeper scratches, oxidation) and which need only polishing (light swirls, haze). Use masking tape to mark sections with heavier defects so you know where to make extra passes with the cutting compound.
Step 3: Apply Cutting Compound
Apply 4 small dots (dime-sized) of cutting compound to a foam cutting pad. Set the orbital polisher to a low speed (3–4 on most machines). Place the pad flat on the paint and spread the compound across a 2×2-foot section before turning on the machine — spreading it prevents compound from flinging off at startup. Make 4–6 overlapping passes across the section horizontally, then 4–6 passes vertically. Keep the polisher moving at all times — pausing in one spot generates heat that can burn clear coat. Mist the pad lightly with water if it begins to dry out or drag.
After each section, wipe the residue with a clean microfiber towel and inspect under a light. If swirls remain, make another pass with compound before moving to polish. If the section looks hazy (a light white film) — that is normal compound residue that polishing will remove.
Step 4: Polish for Shine
Switch to a clean polishing pad and apply finishing polish. Increase the polisher speed slightly (4–5). Work the same 2×2-foot sections in the same overlapping pattern. The polishing stage removes the micro-haze and micro-marring left by the cutting compound and brings out the depth and gloss of the clear coat. Wipe clean after each section and check in sunlight — the paint should now look wet and deeply glossy. If swirls are still visible after polishing, repeat the compound stage before re-polishing.
Step 5: Clean and Protect
Wash off any compound or polish residue with a final rinse. Apply a paint wax or sealant — paste wax, liquid wax, or a spray ceramic coating — to protect the corrected surface. Apply with a clean foam applicator pad, let it haze, and buff off with a fresh microfiber towel. This step seals the clear coat against UV oxidation, water spots, and minor abrasion, and determines how long your correction work lasts. Skipping protection means the paint will oxidize and swirl again within a few months.
- Wash and dry the car — remove all dirt before touching a polisher
- Mask rubber trim and emblems with masking tape
- Apply cutting compound with foam cutting pad on low speed (3–4), 2×2-ft sections
- Polish with finishing polish on medium speed (4–5) to remove haze and maximize gloss
- Protect with wax or paint sealant applied by foam applicator, buffed off with microfiber
Common Mistakes to Avoid
- Working in direct sunlight: Sunlight heats the paint and dries compounds before you can work them — always work in shade or in a garage with the car cool to the touch
- Too much pressure: Orbital polishers work by oscillating motion, not pressure. Pressing hard does not remove defects faster — it generates heat and can burn clear coat
- Skipping the wash: Any dirt on the paint surface will be pressed into the clear coat by the polishing pad, adding scratches rather than removing them
- Wrong pad for the job: Using a cutting pad for the polishing stage leaves micro-marring. Using a soft polishing pad for heavy scratch removal wastes time without correcting the defects
- Stopping the polisher in one spot: A stationary spinning pad concentrates heat on one point and burns through clear coat — always keep the machine moving
Benefits and Drawbacks of Cutting and Buffing
Cutting and buffing removes light-to-moderate scratches, swirl marks, and oxidation, restores gloss, and extends paint life by removing defects before they worsen. It’s significantly cheaper than professional paint correction and produces comparable results when done correctly. The main drawback is that compounding removes a small amount of clear coat with each correction — most new cars have 100–200 microns of clear coat, so the process can be repeated 8–15 times in a car’s lifetime before the clear coat is too thin to correct safely. Overdoing it thins the clear coat to the point where it cannot be polished further. For deep scratches that penetrate the color coat, compounding will not help — a touch-up pen or professional respray is required.
If cutting and buffing feels too involved for light defects, a clay bar treatment removes surface contamination and improves gloss without removing any clear coat — a good starting point before deciding whether full compounding is necessary.
Tips for a Perfect Finish
- Work in shade: Sunlight dries compounds too fast and makes it impossible to work the product properly
- Start with a test section: Practice on a 1-square-foot area of the hood to confirm your compound and pad selection before working the whole car
- Use overlapping passes: Work horizontally first across a 2×2-ft section, then vertically — this ensures complete coverage and avoids “skip” marks
- Keep pads clean: Compound-saturated pads leave excess residue that streaks. Prime a new pad with 2–3 dots of compound before use, and clean pads between sections with a pad conditioning brush
- Inspect under good lighting: Check your work with a shop light at a low angle or in direct shade — defects that look gone in overhead lighting often reappear under angled light
| Stage | Purpose | Pad | Compound/Polish | Time per Section |
|---|---|---|---|---|
| Cutting | Remove scratches, swirls, oxidation | Orange/yellow foam cutting pad | Heavy compound (M105, V36) | 5–7 minutes |
| Polishing | Remove compound haze, add gloss | White/blue foam polishing pad | Finishing polish (M205, V38) | 3–5 minutes |
| Protection | Seal cleared coat from UV and contamination | Soft foam applicator or microfiber | Wax, sealant, or ceramic spray | 2–3 minutes |

Frequently Asked Questions
What’s the Difference Between Cutting and Buffing?
Cutting uses an abrasive compound to physically remove a thin layer of clear coat, leveling the surface to eliminate scratches and swirls. Buffing (polishing) follows with a finer abrasive that removes the micro-haze left by compounding and brings the paint surface to maximum gloss. Cutting fixes defects; polishing adds shine.
Can I Cut and Buff by Hand?
Yes, for small areas. Apply cutting compound to a foam applicator pad and work it by hand in circular motions. Hand application requires significantly more effort and produces less consistent results than a machine polisher, but it works well for spot corrections on small scratches. For full-panel or whole-car correction, a machine polisher is recommended.
How Often Should I Cut and Buff My Car?
No more than once or twice per year for maintenance correction. Compounding removes a small amount of clear coat each time — over-doing it thins the clear coat to the point where it can no longer be polished. Apply a quality paint sealant or ceramic coating after each correction to extend the time between sessions.
Will Cutting and Buffing Remove Deep Scratches?
Only if the scratch is confined to the clear coat. Test by dragging your fingernail across the scratch — if your nail catches, the scratch penetrates the color coat and compounding will not remove it. Scratches that don’t catch a fingernail are in the clear coat only and can be corrected with cutting compound. Color coat scratches require a touch-up paint application or professional respray.
What’s the Best Polisher for Beginners?
A random orbital (dual-action) polisher is the best choice for beginners. The oscillating motion makes it nearly impossible to burn clear coat compared to a rotary polisher. The PORTER-CABLE 7424XP and Turtle Wax Hybrid Solutions polisher are popular entry-level options in the $80–$150 range. Avoid rotary polishers until you have experience — they can remove clear coat very quickly if you pause in one spot.
How Do I Avoid Swirl Marks?
Swirl marks from polishing are caused by dirty pads, excessive pad speed, wrong compound-to-pad pairing, or not keeping the pad flat on the surface. Use clean pads for each stage, match the compound aggressiveness to the defect level, keep the polisher moving, and finish with a fine polishing stage to remove any micro-marring left by cutting. Inspect your work under angled light after each section.
Is Cutting and Buffing Safe for All Cars?
It is safe for standard gloss paint finishes. Matte, satin, and textured finishes must not be machine polished — compounds and polishes designed for gloss paint will fill in the micro-texture of matte finishes and permanently alter their appearance. Wrapped vehicles should also not be machine polished. Check your owner’s manual or consult a professional before compounding any non-standard paint finish.