How to Fix Deep Scratches on a Car: Depth Guide, Wet Sanding & Costs
To fix deep scratches on a car, clean the area, sand with 400-grit wet sandpaper (clear coat scratches) or apply Bondo Glazing Putty (base coat or primer exposed), then prime, paint with a color-matched spray, and clear coat.
A keying scratch that reaches bare metal will begin to rust within weeks in humid conditions. The repair method depends entirely on how deep the scratch goes — using polish on a metal-deep scratch won’t help, and wet sanding a primer-exposed scratch will make it worse. This guide covers the scratch depth triage system, wet sanding technique, body filler steps, and exact DIY vs professional cost breakdown.
Wet the scratch — if it disappears temporarily, it’s clear coat only (use 1500-grit wet sandpaper + polish). If you see white/grey primer or bare metal, you need: clean area → 400-grit sand edges → Bondo putty → prime → color-matched paint (2–3 coats) → clear coat. DIY cost: $50–$150. Pro cost: $150–$600 per panel.

Identifying Scratch Severity
Scratches vary by depth — and the repair method changes completely depending on which paint layer is affected. Use your fingernail to check: if your nail catches in the scratch, it’s deep. If it glides over smoothly, it’s surface-level. Then try the wet test: pour water over the scratch. If it temporarily disappears, it’s in the clear coat only and wet sanding will fix it. If it stays visible, paint layers are exposed.
| Scratch Depth | What You See | Repair Method | DIY Cost |
|---|---|---|---|
| Clear coat only | Scratch vanishes when wet | 1500-grit wet sand + polish + wax | $15–$30 |
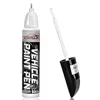
| Color/base coat | Scratch stays white in sunlight | Touch-up paint pen + clear coat | $20–$50 |
| Primer exposed | Grey/white powder visible | Body filler + primer + paint + clear coat | $80–$150 |
| Bare metal | Silver/shiny metal showing | Full repair kit or body shop | $150–$300+ |

How to Remove Deep Scratches from a Car: Wet Sanding & Filler Guide
The method you use depends on scratch depth. Two main approaches: wet sanding (for clear coat and light base coat scratches) and body filler (for primer-deep and metal-deep scratches). Using the wrong method — wet sanding a metal-deep scratch — removes more paint and widens the damage.
Wet Sanding Method (Clear Coat Scratches Only)
⚠️ Never wet sand if you see bare metal — you’ll remove the last remaining paint and create a rust entry point. Wet sanding is only for scratches where the clear coat is the deepest affected layer.
- Soak 1500-grit wet/dry sandpaper in water for 5 minutes
- Sand the scratch lightly with back-and-forth strokes (not circles) — the goal is to level the clear coat around the scratch, not grind it away
- Switch to 2000-grit to refine, then 3000-grit to polish the sanded area
- Apply polishing compound with a microfiber pad to restore gloss
- Finish with carnauba wax or spray sealant to protect
Body Filler Method (Primer or Metal-Deep Scratches)
- Clean the scratch with isopropyl alcohol, then lightly sand with 220-grit to rough up the edges
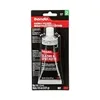
- Apply Bondo Glazing Putty or body filler with a plastic spreader — fill slightly proud of the surface
- Let cure per label (15–30 min for glazing putty), then sand flush with 320-grit, feathering into surrounding paint
- Spray 2 coats of self-etching primer, allowing 20 min between coats
- Sand primer with 400-grit, then apply color-matched paint in 3 thin coats (10–15 min between each)
- Apply 2 coats of clear coat, let cure 24–48 hours, then buff with finishing polish
Top Deep Scratch Repair Products
Essential Tools And Materials
Many repair kits are available for fixing scratches. Look for a kit with sandpaper (multiple grits), polishing compound, and touch-up paint. Some kits include microfiber cloths. Kits are great for beginners — they save time and ensure you have the right tools together. Check that the kit includes wet/dry sandpaper in 1500-grit and 2000-grit for clear coat repairs.
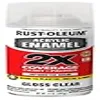
Polishing compounds remove scratches at the clear coat level. Choose a compound rated for scratch removal, not just paint gloss (e.g., Meguiar’s Ultimate Compound vs Ultimate Polish — the Compound is more aggressive). Test on a hidden spot first. Body filler (Bondo Glazing Putty) is needed for anything deeper than the base coat.
Preparing Your Vehicle
Gather your cleaning supplies — a bucket of water, car soap, and a clean microfiber cloth. Wash and dry the scratched area thoroughly. Any remaining dirt or grit will be dragged across the scratch during sanding, turning a fixable scratch into a wider one.
Use masking tape to protect areas within 2 inches of the scratch on both sides. This prevents primer or paint from overspaying onto intact paint. Apply carefully around edges and corners — removing overspray later is much harder than taping off now.
Repairing Deep Scratches
For deep scratches, first clean the area with isopropyl alcohol to remove wax and grease. Apply a thin layer of body filler to the scratch using a plastic scraper. Spread it evenly and slightly proud of the surface — it will be sanded flush once cured. Let it dry completely (15–30 minutes for glazing putty). Sand the filled area with 320-grit first, then 400-grit to smooth and feather the edges into surrounding paint. Wipe clean between grits.
After sanding, apply primer in 2 thin coats with 20-minute intervals. Let the final coat cure 30–60 minutes before painting. Apply color-matched paint in thin layers — 3 coats minimum for full opacity, allowing 10–15 minutes between coats. Find your car’s exact paint code on the door jamb sticker. Finish with 2 coats of protective clear coat.
Polishing And Finishing Touches
Once the clear coat has cured 24–48 hours, buff the repaired area to blend it with surrounding paint. Apply polishing compound on a microfiber pad and work in overlapping passes. The clear coat creates a slight orange-peel texture when sprayed — light wet sanding with 2000-grit paper followed by polishing compound removes this and creates a factory-smooth finish.
A clear coat is non-negotiable on a deep scratch repair — it seals the color coats from UV damage and moisture. Apply 2 thin coats held 8–10 inches from the panel. Let each coat flash dry 5–10 minutes before the next. Never skip this step — an unprotected color coat will fade, peel, and chalk within a season.
DIY Vs Professional Help
Deciding between DIY and professional repair comes down to scratch depth and your comfort with bodywork. DIY works well for clear coat and base coat scratches. Professional repair is the better choice for through-to-metal scratches on visible panels, or any scratch on a luxury vehicle where an imperfect color match is unacceptable.
When To Consider Experts
Take it to a professional when the scratch exposes bare metal across a large area, when the scratch is on a body line (harder to blend), or when the car has a complex metallic or pearl paint finish (color matching requires professional equipment). Professionals carry a guarantee — if the repair doesn’t match, they redo it.
Cost Comparison
| Repair Type | DIY Cost | Professional Cost |
|---|---|---|
| Clear coat scratch (polish only) | $15–$30 | $75–$150 |
| Base coat scratch (touch-up + clear coat) | $30–$60 | $150–$300 |
| Primer-deep scratch (filler + primer + paint) | $80–$150 | $300–$600 |
| Bare metal scratch (full repair kit) | $150–$300 | $500–$1,500+ |
Preventive Measures
Wash your car every week — dirt and grit are the most common cause of swirl marks and fine scratches. Use a soft microfiber sponge, never hard brushes. Wax or buff the car monthly — wax provides a sacrificial layer that absorbs minor impacts before they reach the paint. Park away from trees, shopping carts, and tight spaces. Use a fitted car cover for storage.
Apply a ceramic coating for long-term protection — it forms a 9H-hardness layer over the paint that deflects minor scratches and makes washing easier. Try paint protection film (PPF) on high-impact areas like the front bumper, hood, and door edges. Minor scratches are far easier to treat than deep ones.

Common Mistakes To Avoid
Many people rush the sanding process and apply too much pressure, making the scratch wider. Others apply touch-up paint too thickly — a blob of paint over a scratch is more visible than the scratch itself. Never skip cleaning the area first; even a fingerprint’s oil residue prevents primer and paint from bonding correctly.
Incorrect Tool Usage
Using too-coarse sandpaper (anything below 400-grit on paint) creates new scratches around your repair. Never use a random orbital sander on a scratch spot — the heat can melt the clear coat. Avoid circular polishing motions on the final pass — they leave swirl marks. Use back-and-forth, overlapping straight strokes for sanding, and work outward from the scratch to blend edges.
Skipping Steps In Process
The most common DIY failure is skipping primer. Paint applied directly over body filler peels within months — the filler expands and contracts at a different rate than the bare metal, and only a bonding primer bridges this gap. Take your time between steps: rushed clear coat over tacky paint traps solvents and causes cloudiness (blushing) that only wet sanding can fix.
Frequently Asked Questions
How Much Does It Cost To Fix A Deep Scratch On A Car?
DIY costs range from $15–$30 (clear coat polish) to $150–$300 (full bare-metal repair kit). Professional repair costs $150–$600 per panel for most passenger cars; luxury vehicles or multiple-panel resprays can reach $1,500–$2,500. Get quotes from at least two body shops — prices vary significantly by region and shop overhead.
Can Deep Scratches Be Buffed Out?
Buffing works on clear coat scratches — a polishing compound removes enough material to level the scratch with the surrounding surface. It won’t work on scratches that have cut through the base coat or primer. To test: wet the scratch. If it temporarily disappears, buffing will remove it. If it stays visible, buffing alone won’t work — you’ll need touch-up paint or body filler first.
Do Car Scratch Repair Kits Really Work?
Yes, for clear coat and light base coat scratches. Kits like Meguiar’s Scratch X or Chemical Guys VSS work well on surface-level damage. They’re cost-effective and beginner-friendly. For deeper scratches exposing primer or metal, a kit won’t provide a lasting repair — you’ll need individual products: body filler, primer, color-matched paint, and clear coat.
Can Car Detailing Remove Deep Scratches?
Detailing (machine polishing) can remove clear coat scratches and reduce the appearance of light base coat scratches. It cannot fill or hide scratches that expose primer or metal. A detailer’s paint correction service — using a DA polisher with cutting compound — achieves results beyond DIY hand polishing but still has limits. For through-to-paint damage, you need bodywork, not detailing.
Does Toothpaste Remove Deep Scratches From A Car?
No. Toothpaste is a very mild abrasive (RDA 70–80) that can temporarily reduce the appearance of clear coat hazing — it won’t remove scratches that have cut through the base coat or deeper. It may slightly dull the finish around the scratch if overused. Use a purpose-built polishing compound (like Meguiar’s Ultimate Compound) for actual scratch removal.
How Do You Fix Deep Scratches At Home Step By Step?
1. Clean the scratch with isopropyl alcohol. 2. Do the wet test — if scratch vanishes when wet, use 1500-grit wet sand + polish. If it stays visible, continue. 3. Apply Bondo Glazing Putty, let cure, sand flush with 320→400 grit. 4. Spray 2 coats self-etching primer. 5. Apply color-matched paint (3 thin coats). 6. Apply 2 coats clear coat. 7. After 24 hours, buff with finishing polish. See our full guide on fixing rock chips and paint damage for related repairs.
Conclusion
Fixing deep scratches on your car comes down to matching the repair method to the scratch depth. Clear coat scratches need wet sanding and polish — a $20 fix. Base coat or primer damage needs filler, primer, and matched paint — $80–$150 in supplies. Metal-deep scratches need the full process or a body shop quote. Use the wet test to triage first, tape off surrounding paint before starting, and never skip primer or clear coat. Your car will look significantly better — and the scratch won’t rust.