Car AC Trouble: Why Won’t It Take Freon? Common Issues
Having trouble getting your car’s air conditioning to cool down? You might be dealing with a situation where your Car Won’t Take Freon? Common Causes Explained. This can be a bit frustrating if you’re not used to working on cars, but don’t worry. We’ll break down the common reasons why this happens, making it simple to grasp. We’ll go step-by-step to help you find the problem and get your AC blowing cold air again. Let’s get started!
Why Your AC Might Be Resistant to Freon
When you try to charge your car’s AC system with freon, and it won’t take it, there are a few usual suspects. These problems often stem from issues within the system’s components, like leaks, blockages, or electrical failures. Think of your AC as a closed loop. If there’s a break in that loop, the freon can’t circulate correctly. This section is all about why this might be happening and how you can identify some of the most common issues. These are things most car owners can check and fix with the right tools and guidance.
Leaks in the Air Conditioning System
One of the most frequent reasons why a car won’t accept freon is a leak. Freon, also known as refrigerant, is the cooling agent that the AC system uses. The system is designed to be a closed, airtight circuit. If there’s a leak, the freon escapes, and the system can’t function properly. Leaks can happen at various points, from the compressor to the hoses and the condenser. Over time, components can degrade and crack, especially due to wear and tear or impacts from road debris. Finding the exact location of a leak can involve visual inspection, using leak detection dyes, or employing specialized tools.
- Hoses and Lines: The rubber hoses and metal lines that carry refrigerant throughout the system are prone to leaks. They can crack, become brittle, or get damaged from external factors.
- Compressor Seals: The compressor is a vital component. Seals within the compressor can deteriorate. These seals are essential for containing the refrigerant.
- Condenser: The condenser, which is usually at the front of the vehicle, can develop leaks due to corrosion or physical damage.
- Evaporator: The evaporator sits inside the dashboard and can be difficult to access. Leakage here can result in a loss of freon and poor cooling performance.
To give you an idea of the problem’s scope, around 85% of AC system failures are directly linked to refrigerant leaks, according to recent automotive industry data.
Blockages in the Air Conditioning System
A blockage in your car’s AC system can prevent freon from entering and working correctly. These blockages prevent the freon from flowing smoothly, which stops the cooling process. A clogged orifice tube or expansion valve can restrict freon flow, leading to poor cooling. Sometimes, these obstructions are caused by debris. Other times, the blockages may be caused by deteriorated components.
- Orifice Tube: The orifice tube is a small part in the AC system that helps regulate refrigerant flow. It is prone to clogging due to debris or breakdown of system components.
- Expansion Valve: The expansion valve controls the flow of refrigerant. If it malfunctions, it might restrict the flow, which prevents freon from entering the system.
- Debris: Over time, dirt, rust, and other particles can accumulate in the system and cause blockages, especially if the system hasn’t been properly maintained.
- Failed Compressor: A failing compressor can release metal fragments into the system, which can cause severe blockages throughout the lines.
One common scenario involves a damaged compressor. This can shed metal fragments throughout the AC system, plugging up crucial components and preventing freon from flowing.
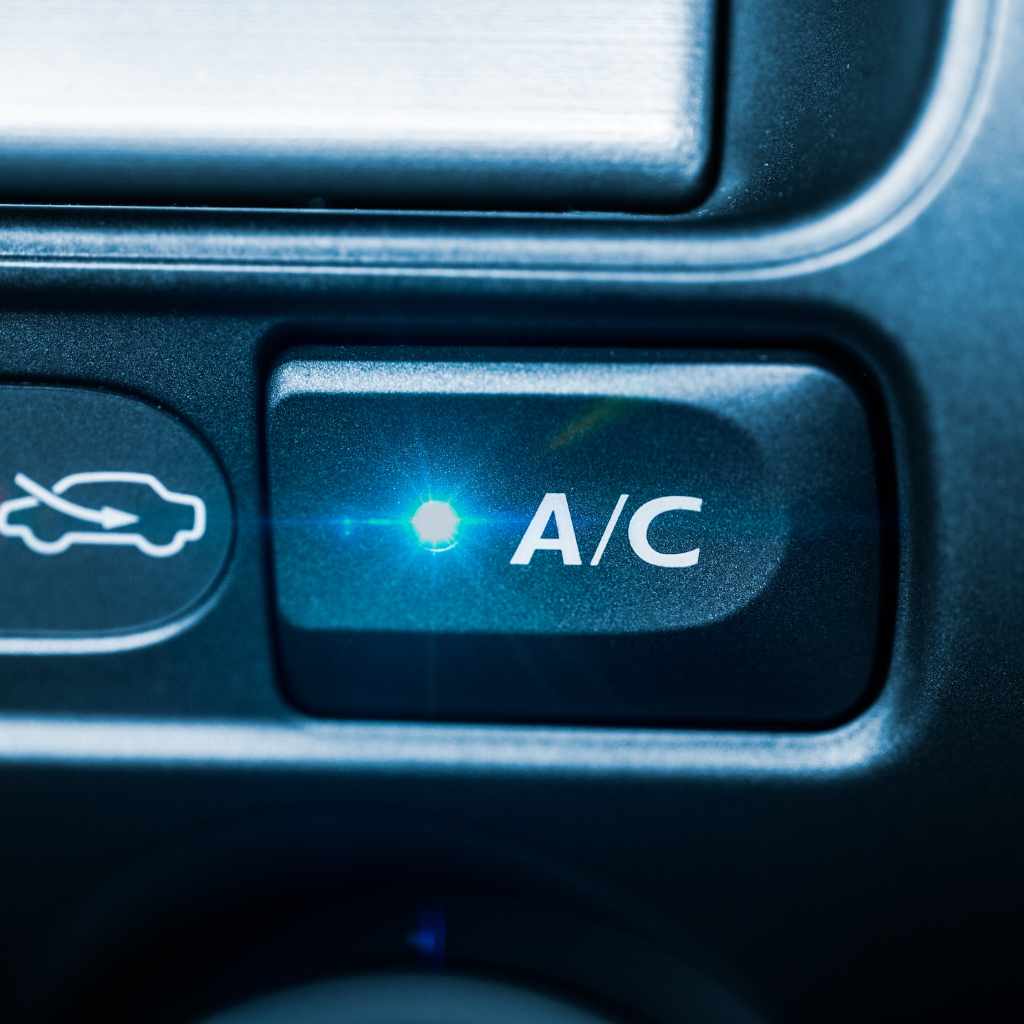
Electrical Issues Affecting Freon Charging
Electrical problems can interfere with freon charging because the AC system relies on electrical components to function. These parts control the compressor, the fans, and other vital functions. If these components don’t work correctly, the system will not be able to accept freon. Issues with the pressure sensors, the compressor clutch, or the control module can all lead to problems.
- Pressure Sensors: These sensors detect the pressure within the AC system. If a pressure sensor fails, it might prevent the compressor from engaging. This could stop you from adding freon.
- Compressor Clutch: The compressor clutch connects the compressor to the engine. If the clutch is not engaging due to electrical issues, the compressor won’t run, and freon can’t be drawn into the system.
- Fuses and Relays: Blown fuses or malfunctioning relays can interrupt the power supply to the AC components, which will cause them to not work.
- Control Module: Modern vehicles have control modules that manage the AC system. If this module malfunctions, it can prevent the compressor from activating or properly regulating the system.
Here’s an example: A car owner had their AC system charged, but the compressor did not engage. After checking, they discovered a blown fuse that powered the AC clutch. Replacing the fuse solved the problem, allowing the system to accept freon and start cooling.
Steps to Troubleshoot Your Car AC
When your Car Won’t Take Freon? Common Causes Explained, it can be useful to troubleshoot the problem. This means identifying the root cause by checking different parts of the system. Starting with the basics and moving to more complex areas can help you find the problem without spending a lot of money on repairs. This process involves some visual checks, using diagnostic tools, and knowing what to look for to ensure your AC system is functioning correctly.
Visual Inspection and Basic Checks
Before you get into more detailed diagnostics, a visual inspection can often reveal obvious issues. Examine the system for any visible damage. Look for signs of leaks, damaged components, or loose connections. This basic inspection will provide clues about what is causing the AC system’s problems. It also will help prevent you from missing easy fixes before moving on to more complex troubleshooting methods.
- Hoses and Lines: Inspect all hoses and lines for cracks, wear, or leaks. Pay attention to connections and fittings, as these are common leak points.
- Compressor: Check the compressor for oil stains, which could indicate a refrigerant leak. Also, verify that the compressor clutch is engaging when the AC is turned on.
- Condenser: Examine the condenser for any physical damage, such as bent fins or corrosion, which could impair its function or cause leaks.
- Fuses and Relays: Verify the fuses and relays related to the AC system. A blown fuse is a simple fix that might be preventing the system from working.
The first thing to do is a visual check. Sometimes, a loose wire connection is all that’s keeping the AC from working.
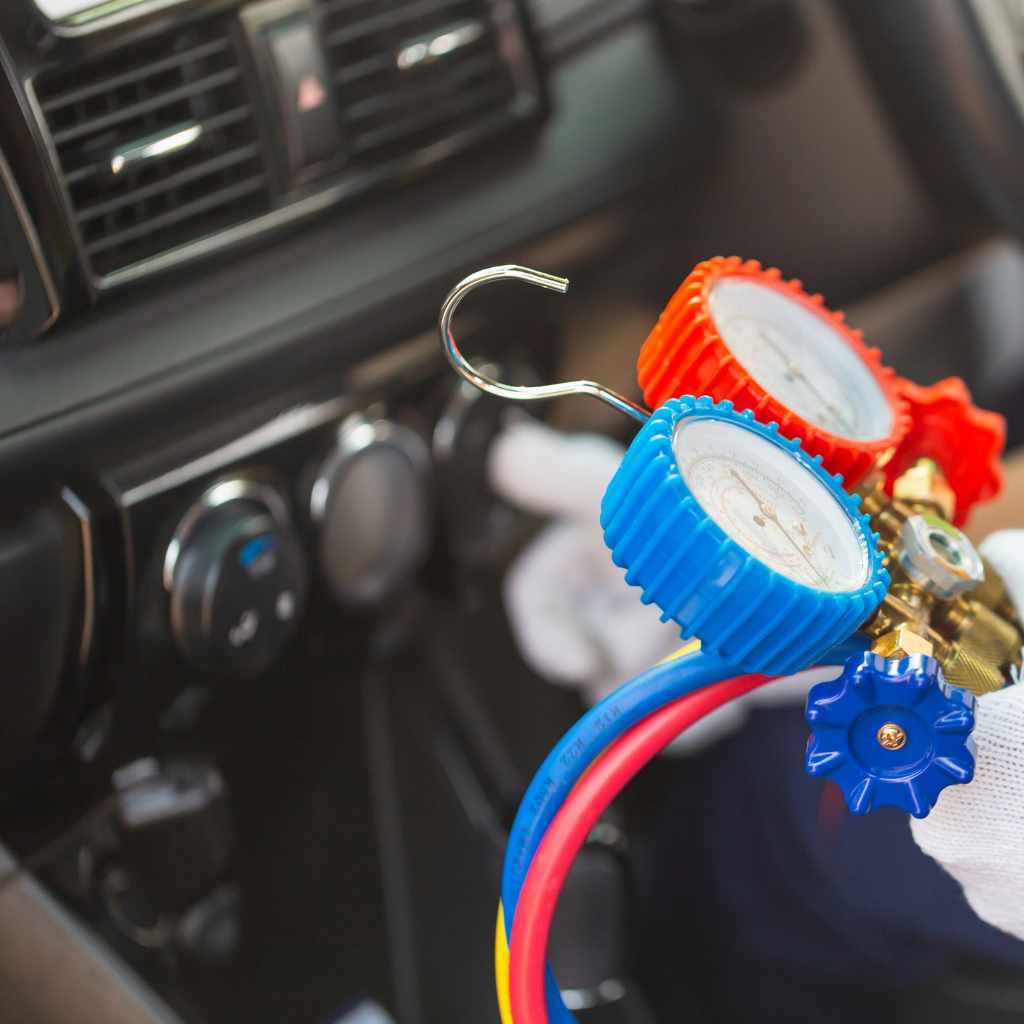
Using a Manifold Gauge Set
A manifold gauge set is a tool that lets you check the pressure in your AC system. The set has two gauges: one for the low-pressure side and one for the high-pressure side. These gauges give you a picture of how the refrigerant is flowing through your system. Checking the pressure readings will help you pinpoint problems like leaks, blockages, or compressor failures. If the pressures are outside of normal ranges, this indicates that something is wrong. Understanding how to use a manifold gauge set is a useful skill for anyone working on car AC systems.
- Connecting the Gauges: Attach the low-pressure gauge to the low-side service port (usually a larger fitting) and the high-pressure gauge to the high-side port (a smaller fitting) on your AC system.
- Checking Pressures with the Engine Off: With the AC off, the gauges should display the same pressure, showing the system’s static pressure.
- Checking Pressures with the AC On: Start the engine and turn on the AC. Observe the pressure readings. The low-side pressure should be low, and the high-side pressure should be high, indicating proper function.
- Interpreting the Readings: If pressures are too high or too low, this might indicate a leak, blockage, or compressor failure. Consult a reference chart for the normal pressure ranges for your car.
For example, if the low-side pressure is very low, and the high-side pressure is near zero, it indicates a significant leak or a completely empty system.
Checking for Leaks with a Leak Detector
If you suspect a leak, a leak detector can help you find its location. There are several types of leak detectors. These tools make it much easier to find the exact spot of the leak. By detecting escaping refrigerant, they save time and effort. Leak detection is a key step in any AC repair process. This way, you can properly fix the source of the problem before adding more refrigerant.
- Electronic Leak Detectors: Electronic leak detectors use a sensor to detect refrigerant leaks. Pass the sensor along hoses, fittings, the compressor, and other AC components. The sensor will beep or change its display when it detects freon.
- Dye-Based Leak Detection: Add a special dye to the refrigerant system. The dye will leak out with the freon. Use a UV light to find the leak. The dye glows when the UV light hits it.
- Soap and Water Test: This method is most effective for larger leaks. Mix soapy water in a spray bottle and spray it on potential leak spots. Bubbles will form at the leak location.
- Nitrogen Pressure Test: This involves using nitrogen gas to pressurize the AC system. This helps you to find leaks because nitrogen is an inert gas that is safe to use.
Let’s say you used a dye-based leak detection. After adding the dye and running the AC, you spot a bright green glow on one of the hoses. This confirms a leak at that location.
Repairing the AC System
After you have identified the source of the problem, the next step is to make the necessary repairs. The required repairs will depend on the problem you’re dealing with. It could involve replacing a component, sealing a leak, or clearing a blockage. Each repair requires specific tools and a clear understanding of the AC system. Proper repairs are crucial for your AC system to function correctly and for keeping you comfortable during hot weather. It is important to know which fixes you can handle and when it is best to get professional help.
Replacing Faulty Components
When a component fails, the only solution is to
- Compressor Replacement: This requires removing the old compressor and installing a new one. This also involves draining the old oil and adding new oil to the replacement compressor.
- Hose Replacement: Detach the old hose and attach the new one, making sure the connections are secure. Replace the o-rings, and make sure that everything is sealed properly.
- Expansion Valve Replacement: The expansion valve is usually located in the evaporator. Accessing this requires some disassembly. Replace the valve, and reassemble the parts.
- Condenser Replacement: This involves removing the old condenser. Install the new one. This often involves removing the front bumper or grille of the vehicle for access.
As an example, imagine that the AC compressor is seized. The repair will involve replacing the compressor, as well as the receiver/drier, because it traps moisture. It might be necessary to flush the AC system to remove any contaminants.
Sealing Leaks and Addressing Blockages
Once you’ve identified the leak or blockage, you’ll need to repair it. For leaks, the repair process depends on where the leak is. For blockages, it might involve cleaning or replacing blocked components. It is essential to ensure that the repair eliminates the problem. This will require proper techniques, tools, and materials. Improper repairs can lead to further issues. Always make sure to comply with environmental regulations when handling refrigerants and AC components. Always refer to your car’s service manual.
- Sealing Leaks: For hose leaks, replace the hose. For fitting leaks, replace the o-rings or tighten the fittings. In the case of a compressor leak, replace the compressor.
- Clearing Blockages: Use compressed air to blow out the blockage. You might have to remove the blocked component and clean it. In some cases, replacing the component is necessary.
- Orifice Tube/Expansion Valve: If the orifice tube or expansion valve is clogged, replace them. These are relatively inexpensive parts, and replacing them is usually the best approach.
- Flushing the System: After clearing a major blockage or replacing a compressor, flushing the system is often needed to remove contaminants or metal shavings.
In this case, imagine a hose has a small leak. The fix is to replace the hose and the o-rings at each connection. This will seal the system, and allow the AC to work correctly again.
Recharging the AC System with Freon
After any repairs, you must recharge the AC system with freon. Proper charging is crucial for the AC to operate at peak efficiency. It is important to follow the correct procedure to avoid overcharging or undercharging the system. It’s also crucial to comply with EPA regulations. You will require tools like a manifold gauge set and a freon charging kit to charge your car’s AC. The steps usually involve evacuating the system to remove any air or moisture, then adding the freon to the specified capacity. The correct freon level ensures that your AC will work correctly.
- Evacuating the System: Use a vacuum pump to evacuate the system. This removes air and moisture, which can interfere with the system’s performance.
- Checking for Leaks After Repair: After fixing leaks, it is wise to run the vacuum for a while to ensure that the repairs are leak-free.
- Adding Freon: Add the freon. Use a manifold gauge set to monitor the pressure and charge the system correctly. Follow the manufacturer’s recommended freon capacity.
- Checking System Performance: After charging, start the car and turn on the AC. Make sure the system is cooling properly, and check the pressure readings with your gauges to verify that everything is working.
Let’s say you’ve replaced a leaky hose and then evacuated the system. Now, you attach the freon can to the system. You add the freon to the appropriate level using the gauges to monitor pressure. You can then check to see if the system is working, blowing cold air.
| Component | Symptoms | Common Solutions |
|---|---|---|
| Compressor | No cooling, noisy operation, leaks | Replace the compressor |
| Hoses | Leaks, low cooling, hissing sounds | Replace the hose or o-rings |
| Condenser | Inefficient cooling, leaks | Replace the condenser |
| Expansion Valve | Poor cooling, erratic cooling | Replace the expansion valve |

Frequently Asked Questions
Question: Why does my car need freon?
Answer: Freon, or refrigerant, is the cooling agent that enables the air conditioning system to remove heat from inside your car, making it cooler.
Question: Can I add freon to my AC system myself?
Answer: Yes, you can add freon. However, you should check to make sure there are no leaks and follow all instructions and safety procedures.
Question: What’s the difference between R-12 and R-134a freon?
Answer: R-12 was an older refrigerant. R-134a is the current refrigerant used in most vehicles, because R-12 is not environmentally friendly.
Question: How much does it cost to get my AC system repaired?
Answer: Repair costs vary. It depends on the issue and what needs to be
Question: How often should I recharge my car’s AC system?
Answer: You shouldn’t have to recharge your AC often. If you frequently need to add freon, it suggests a leak in the system that needs to be repaired.
Final Thoughts
So, we’ve walked through the reasons why your Car Won’t Take Freon? Common Causes Explained. We’ve explored common culprits like leaks, blockages, and electrical issues. We’ve also shown how to troubleshoot these problems, from simple visual checks to more detailed tests with tools like a manifold gauge set. Repairing an AC system can seem like a lot, but by following a step-by-step approach, you can narrow down the problem and find a solution. Take the time to identify the problem and then follow the recommended steps. Understanding these basic troubleshooting steps will let you confidently handle many AC issues. You don’t have to be a car expert to tackle this. With a little work, you can get your car’s AC back in top shape!