Honda P2P ECU Tuning: A Practical Buyer’s and Installer’s Guide
You’ve bolted on a turbo kit, upgraded your injectors, or swapped a K-series into a chassis that never came with one. The engine runs, but it stumbles at idle, backfires on decel, and the check engine light is a permanent fixture. A piggyback fuel controller might get you by, but it’s a band-aid. What you actually need is direct control over the factory ECU’s maps, and that’s where the P2P ECU platform comes in.
This guide covers the practical side of honda p2p ecu tuning. We’ll walk through what makes it different from Hondata, which ECUs it works with, the physical installation process, and how to handle the tuning basics without blowing up your motor. You’ll also learn how to troubleshoot the common issues that scare people away from this platform.
Before you start pulling your ECU out, you need a way to read what the computer is doing. A dedicated diagnostic tool like the QPKING M3-A helps you pull codes and monitor live data before and after flashing. It’s not a tuning tool, but it saves you from guessing why the car won’t start after you’ve made changes.
What Is a P2P ECU and Who Is It For?
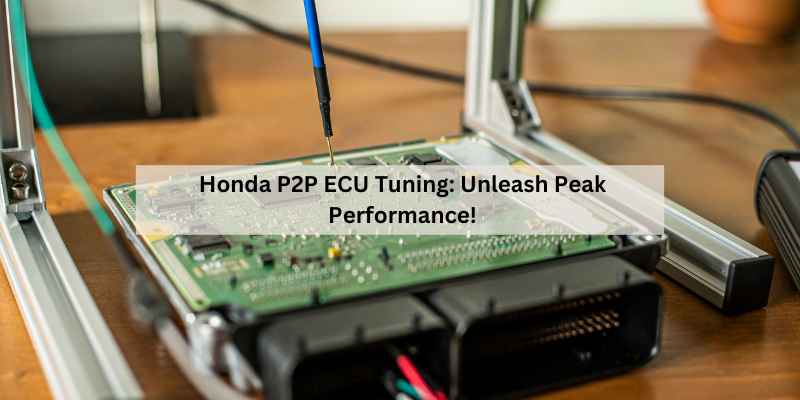
P2P (Prelude-to-Prelude or Plug-to-Play, depending on who you ask) is a standalone ECU system that uses a modified factory Honda computer. It’s popular in countries where Hondata is expensive or hard to source. The core idea is simple: you take an OEM ECU, socket it so the chip is replaceable, and load custom firmware that lets you edit fuel and ignition maps.
This platform is for the person who wants to tune their own car without paying $1,500 for a KPro setup. It’s also for the builder who has a specific setup—like a D16 with a GT25 turbo—and wants a basemap tailored to that exact combination. If you’re comfortable with a soldering iron and reading wiring diagrams, P2P is a viable path.
It’s not for someone who wants plug-and-play convenience. There’s no phone app, no Bluetooth dongle, and no cloud-based map sharing. You work in a desktop application, burn the chip, and test. That’s the trade-off for the lower cost.
P2P vs. Hondata vs. KPro: Key Differences
People often lump P2P into the same category as Hondata, but they’re not the same. Here’s the breakdown.
| Feature | P2P ECU | Hondata S300 | KPro (K-Series) |
|---|---|---|---|
| Target ECU | OBD1 (P28, P72) and some OBD2 | OBD1 (P28, P72, P30) | K-series OBD2 (PND, PRB) |
| Hardware installation | Socketing required, chip burning | Socketing, soldering the S300 board | Direct plug-in to ECU, no soldering |
| Software cost | Often free or low-cost | Included with unit | Included with unit |
| Real-time tuning | No, requires re-burn each change | Yes, live map changes | Yes, live map changes |
| Datalogging | Basic, requires external logger | Full datalogging built-in | Full datalogging built-in |
| Support community | Forum-based, fragmented | Large, professional support | Large, professional support |
The biggest difference is workflow. With a P2P unit, you edit a map, burn it to an EPROM chip, and swap the chip into the ECU. That takes ten minutes each iteration. Hondata S300 lets you change a fuel value and upload it via USB while the car is idling. For dyno tuning, that speed matters. For a budget street build, P2P works fine.
KPro is a different animal entirely. It’s specifically for K-series engines and includes features like launch control and full CAN bus integration. P2P doesn’t have that level of integration. If you’re building a K24 turbo car, spend the money on KPro. If you’re running a B18 or D16, P2P is a legitimate alternative.
Compatible Honda Models and ECU Generations (OBD1 vs. OBD2)
P2P tuning is mostly an OBD1 game. The most common target is the P28 ECU from the 1992-1995 Civic EX/Si. The P72 from the 1994-2026 Integra GS-R is also popular because it has VTEC and a knock sensor input. The P30 from the 1992-1995 Prelude Si VTEC works too.
OBD2 support is thinner. Some P2P systems work with the 1996-2026 OBD2a ECUs, but you run into immobilizer issues and more complex wiring. If you have a 1996 or newer Honda, you’ll likely need to convert to OBD1 or use a different platform. The conversion involves a jumper harness that adapts the OBD2 car-side plug to the OBD1 ECU. You also need to handle the knock sensor and secondary oxygen sensor wiring differently.
For the K-series and newer R-series engines, P2P doesn’t apply. Those require KPro or a standalone like Haltech or AEM. Stick with the older single-cam and dual-cam B/D/H series engines for P2P.
Before you buy anything, confirm your ECU’s exact model number and the OBD generation. Pull the passenger side carpet back, look at the ECU label, and cross-reference it with a P2P compatibility chart. Getting this wrong means wasted money and a car that won’t run.
Step-by-Step Installation and Flashing Guide
This is where most online guides drop the ball. Let’s get into the physical work.
Wiring and Jumper Harness Requirements
If your car is OBD1 already, the ECU plugs directly into the harness. No wiring changes needed. If your car is OBD2, you need a jumper harness. These are available from places like Rywire or Boomslang. The jumper converts the OBD2a or OBD2b connector to OBD1.
- Disconnect the battery and wait five minutes.
- Remove the passenger side kick panel and the ECU mounting bolts.
- Unplug the three or four harness connectors from the stock ECU.
- Plug the jumper harness into the car-side connectors.
- Plug the P2P ECU into the jumper harness. Secure it with a zip tie to prevent vibration.
That’s it for the harness. The harder part is the ECU itself. Most P2P units come pre-socketed, but if you’re building one from a stock ECU, you need to remove the factory chip and solder in a 28-pin or 32-pin socket. Use a quality soldering station and flux. A cold solder joint here will cause intermittent no-start issues.
Loading Your First Basemap
You need a chip burner. The Willem and TL866 are common choices. You also need the P2P tuning software, which is usually a modified version of freeware like TunerPro or a dedicated P2P program.
- Open the basemap file that matches your engine and injector size.
- Connect the chip burner to your PC via USB.
- Erase the EPROM chip with a UV eraser if it’s a windowed chip, or use a flash chip like the SST 27SF512.
- Write the basemap to the chip.
- Install the chip into the socket on the ECU. Be careful with pin 1 orientation.
- Reinstall the ECU in the car and attempt to start.
If the car starts and idles, you’re on the right track. If it doesn’t, double-check the chip orientation and the basemap’s injector settings. A basemap for 240cc injectors will run terribly with 550cc injectors.
Tuning Fundamentals: Fuel, Ignition, and VTEC
You don’t need a dyno to make progress, but you do need a wideband oxygen sensor. A narrowband from the factory won’t show you the air/fuel ratio under load. Get a wideband gauge with a sensor bung welded into the downpipe. This is non-negotiable.
Setting VTEC Engagement Points
VTEC crossover is the point where the cam profile switches. On a stock B16, that’s around 5,500 rpm. On a turbo build, you often want to lower it to 4,200 rpm to use the turbo’s midrange torque. On a naturally aspirated build with aggressive cams, you might raise it to 5,800 rpm to avoid a flat spot.
Here’s how to set it: datalog the engine speed and manifold pressure. Look for where the torque curve starts to flatten. Set the VTEC point just before that flattening. On a P2P system, this is a single value in the software. Change it, re-burn, and re-test.
Adjusting Fuel and Ignition Tables Safely
Fuel tuning starts with the low and high cam tables. The low cam table covers throttle response and light load. The high cam table handles wide-open throttle. Start by tuning the high cam table at wide-open throttle in third gear on a safe road.
Target an air/fuel ratio of 12.5:1 for naturally aspirated engines and 11.5:1 for forced induction. If the wideband shows leaner than 13:1 under boost, you’re risking detonation. Pull fuel out where it’s rich, add fuel where it’s lean, and always make small changes—three to five percent at a time.
Ignition timing is trickier. Too much advance causes knock, which you can’t hear under boost or at high rpm. Use the knock sensor input if your ECU supports it. Start with a conservative basemap and add timing in two-degree increments. Listen for a metallic rattle and watch the wideband. If you see timing being pulled or hear knock, back off two degrees.
Idle control is another area that frustrates people. The idle air control valve needs a clean signal. If your P2P basemap has incorrect idle setpoints, the car will hunt or stall. Adjust the idle target to match your engine’s stock idle speed—usually 750-850 rpm for B-series and 700-800 for D-series.
Real-World Results: Street, Track, and Turbo Builds
On a naturally aspirated B18C with intake, header, and exhaust, a P2P tune typically nets 10-15 wheel horsepower over the stock ECU with the same bolt-ons. That’s because the stock maps are conservative on ignition timing. A proper tune adds timing in the midrange where the engine is efficient.
On a turbo D16 at 8 psi, the gains are larger. A basemap might get the car running, but a P2P tune with a wideband usually smooths the idle, improves throttle response, and prevents the lean spikes that kill head gaskets. Users report a noticeable difference in drivability, not just peak power.
On the track, the main benefit is predictability. You can set a lower VTEC point for tight courses where you stay in the midrange. You can also adjust the fuel cut to prevent lean conditions on long straights. It’s not a replacement for a proper standalone, but it’s far better than a stock ECU.
One caveat: the P2P software’s datalogging is clunky. You’ll need a separate logger or a laptop with a serial interface. It took me a full day to get the logging working reliably. Once it works, it’s solid, but the initial setup is frustrating.
Common P2P Problems and How to Fix Them
Here are the issues that come up most often, and what actually fixes them.
No-start after flashing. Check the chip orientation first. Pin 1 on the chip goes to pin 1 on the socket. If that’s correct, verify the basemap matches your engine. A B16 basemap on a D16 will not start. Re-burn the correct map.
Code 4 (crank position sensor) and code 9 (cylinder position sensor). These usually mean the ECU isn’t seeing the distributor signal correctly. Check the wiring at the distributor plug. On OBD2-to-OBD1 conversions, the distributor wiring is often wrong. Use a multimeter to verify continuity from the distributor to the ECU pin.
Idle surging. This is almost always an idle air control valve issue. Clean the IACV with throttle body cleaner. If that doesn’t fix it, check the idle setpoint in the P2P software. Some basemaps have the idle target set too low.
Bricked ECU. If you corrupt the chip during burning, the ECU won’t respond. You can’t unbrick it without a new chip. Always keep a backup of the stock map and a spare chip. A blank chip costs a few dollars, so this is a cheap mistake to fix.
Knock sensor code (code 23). This code pops up when the knock sensor circuit is open or the sensor is faulty. On OBD1 conversions, the sensor wire is sometimes not connected. Verify the wire from the sensor to the ECU. If it’s connected and the code persists, replace the sensor—they crack with age.
Emissions, Legality, and Reverting to Stock
This part matters more than most tuners admit. A P2P ECU is not emissions-legal in any US state. It removes the factory readiness monitors and often disables the catalytic converter efficiency check. If you live in a state with smog testing, you will fail.
The fix is simple: keep your stock ECU. When you need a smog check, swap the stock ECU back in. That takes about 20 minutes with the harness setup described above. The P2P ECU is a direct swap, so there’s no permanent modification to the car’s wiring.
For OBD2 cars, this is trickier. The jumper harness makes the swap easy, but the stock OBD2 ECU will need to re-learn the idle and fuel trims after reinstallation. Drive the car for 20 minutes before the test to let it re-learn.
If you’re in a country with no emissions testing, this is a non-issue. Just be aware that a P2P ECU will throw a CEL for the secondary oxygen sensor if you disable it in the tune. You can leave the sensor plugged in but unplugged from the exhaust to keep the circuit alive.
Final Verdict: Is P2P Worth It for Your Honda?
P2P is a real tuning platform, not a toy. It gives you full control over fuel, ignition, and VTEC for a fraction of the cost of Hondata. The catch is the workflow. Re-burning a chip for every change is slow, and the software is not user-friendly. If you’re patient and methodical, you can get excellent results.
- P2P works best on OBD1 B-series and D-series engines with a wideband sensor.
- Budget for a chip burner, spare chips, and a wideband—they’re not optional.
- Start with a conservative basemap and make small changes to fuel and timing.
- Keep your stock ECU for smog checks and as a backup.
- If you’re building a K-series, skip P2P and get KPro—it’s worth the extra money.
- Always verify the chip orientation before installing it in the ECU.
- Use a diagnostic tool like the QPKING M3-A to confirm your work before you drive.
For the right person, a P2P setup is a satisfying way to learn tuning. For everyone else, the convenience of Hondata is worth the premium. Know your skill level and choose accordingly.
If you’re dealing with a no-start condition that isn’t tuning-related, check the Honda Accord won’t start guide for electrical diagnosis tips. And if you’re planning a build, read the 2026 Civic tuning article for newer platform considerations.
Products related to this article
Sponsored / affiliate links. As an Amazon Associate I earn from qualifying purchases. I may earn additional commission from eligible campaigns.