How to Bypass a Honda Main Relay Safely and Test It
Bypass a Honda main relay only with a fused jumper or a known-good relay for diagnosis. If the fuel pump primes and the engine starts, the relay or its control circuit is suspect. A bad bypass can damage wiring, hide the real fault, or send you after an intermittent no-start. This guide shows a short diagnostic bridge, then a pin-by-pin test to separate relay, pump, and upstream power-feed failures.
What you’ll need


- Digital multimeter set to 12V DC and continuity
- 12V test light
- Fused jumper wire with an in-line fuse, commonly 5A to 10A for diagnostic work
- Basic hand tools for lower-dash trim and relay access
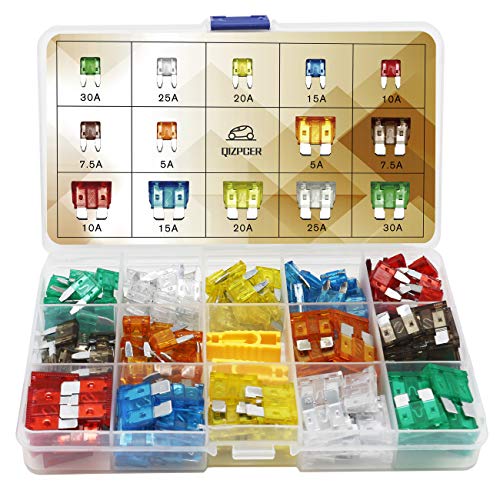
- Replacement fuses that match the vehicle’s existing fuse ratings
- Wire-piercing probes or back-probe pins, if available
- Service information for the exact chassis, if you need connector pin IDs
What a Honda main relay does
The Honda PGM-FI main relay supplies fuel-pump prime and engine-management power. Weak solder joints can open when hot, so the fault may come and go. That makes it easy to confuse with a bad fuel pump, worn ignition switch, or a wiring fault.
On many Honda models, key-on should trigger a brief pump prime, then the relay should keep the pump and EFI circuit powered during crank and run. If that sequence breaks, the engine may crank normally but never fire.
How a bad relay mimics a bad pump
A dead pump and a dead relay can both leave you with no prime. The difference is power delivery: a relay fault removes 12V before the pump ever gets it, while a pump fault leaves power present at the pump connector but no operation.
Where is the Honda main relay located?
The Honda PGM-FI main relay is usually mounted under the dash, near the driver-side fuse box or kick panel area. Access varies by chassis and model year, so do not assume the same bracket, clip, or connector orientation on every Honda.
Some relays are clipped to an under-dash support; others sit behind lower trim or near the steering column. Remove only enough trim to reach the relay safely.
Typical under-dash access checks
- Slide the seat back and lower the steering wheel for working room.
- Remove the lower trim panel only if it blocks relay access.
- Locate the relay by form factor, not by color alone.
- Look for heat discoloration, loose connectors, or a click that changes when tapped.
Start with the fuse box and power feed
Check ignition- and fuel-related fuses before you touch the relay. A blown fuse can look like a failed relay, and a weak ignition feed can mimic both. Confirm battery voltage first, then verify key-on power at the fuse box.
- Test battery voltage at the battery posts; around 12.4V or higher is a practical resting target.
- Check the ignition and fuel-related fuses with a meter, not just by eye.
- Turn the key to ON and confirm power on the relay feed circuit.
- If fuse power is missing, stop and repair that circuit before relay testing.
What to measure before you bypass anything
Use the multimeter to confirm a constant battery feed and a switched ignition feed. Use the test light for a quick presence check. If either feed is absent, the relay is not the first fault to chase.
How do you bypass a Honda main relay for testing?
Use a fused jumper only as a brief diagnostic bridge, not as a repair. If the pump primes and the engine starts, the relay, its trigger circuit, or the ignition switch feed is still on the suspect list. Stop if the jumper heats, the fuse blows, or the circuit behaves erratically.
- Key off and remove the relay connector if access is safe.
- Identify the power input, pump output, and ignition-trigger circuits with a service diagram or chassis-specific pinout.
- Install a fused jumper between the verified battery feed and the pump/output circuit only for a brief test.
- Turn the key to ON and watch for fuel-pump prime.
- Measure voltage at the pump feed and at the ECU/ECM power feed while cranking.
- Remove the jumper immediately after the test.
Stop conditions
Do not keep jumping the circuit if the fuse opens, the connector warms, or the pump runs but the engine still will not fire. That pattern points toward a fuel-pump, ignition, ECU power, or wiring issue rather than a simple relay fault.
Pin-by-pin diagnostic checklist
Work one circuit at a time. A pin-by-pin check proves whether the relay coil, relay contacts, pump feed, ignition trigger, or upstream power supply is missing. That is how you separate a relay failure from a pump failure on Hondas without guessing.
| Test point | Key ON | Cranking | Expected result | Likely fault if missing |
|---|---|---|---|---|
| Battery feed into relay | 12V present | 12V present | Stable supply | Fuse, battery cable, wiring |
| Ignition-trigger feed | 12V present on ON | 12V present on START | Relay coil energizes | Ignition switch, trigger wiring |
| Relay output to pump | Prime pulse at ON | 12V during crank/run | Power reaches pump | Relay contacts, wiring |
| Pump connector power | Brief prime voltage | 12V while cranking | Pump receives power | Relay, wiring, pump ground |
| ECU/ECM feed | 12V present | 12V present | Engine management powered | Relay, fuse, harness |
Decision table for the fault path
| Symptom | Likely cause | Next move |
|---|---|---|
| No prime, no relay click, trigger feed missing | Ignition switch or upstream trigger wiring | Test switch output at ON and START |
| No prime, relay clicks, no output | Relay contacts | Swap with known-good relay or replace |
| Power at pump connector, pump silent | Fuel pump or pump ground | Check pump ground and current draw |
| Prime present, crank-no-start, no ECU feed | Relay output or fuse feed to ECU/ECM | Trace output circuit and associated fuse |
| Fails hot, works cold | Relay solder crack or heat-sensitive connection | Tap-test, warm soak, then replace relay |
How do I tell if the fuel pump or main relay is failing?
Measure power at the pump connector during key-on and crank. If power reaches the pump connector but it stays silent, the pump or its ground is a likely suspect. If voltage never reaches the pump, the relay, ignition switch feed, or wiring upstream is more likely.
Heat-related clues
Suppose the car starts cold, stalls after a brief heat soak, then restarts after cooling. That pattern often points to a relay with cracked solder joints. A gentle tap on the relay case that changes the symptom is another clue, not proof by itself.
Common mistakes
Skipping the fuse box check wastes time. So does using an unfused jumper, which can turn a diagnostic step into a wiring repair. Do not assume the relay is bad until you prove power into it, power out of it, and power at the pump.
- Do not bypass a blown fuse; find the short first.
- Do not jump the relay without an in-line fuse.
- Do not replace the relay before checking the ignition switch feed.
- Do not ignore hot-soak failures or tap-test changes.
Picture a Civic that starts after sitting overnight, then dies at a gas stop and only restarts after 30 minutes. That pattern is classic relay territory. Another common first-timer mistake is chasing the pump first when the relay never delivered voltage to it in the first place.
If that didn’t work, try this next
- Swap in a known-good Honda PGM-FI relay that matches the chassis connector.
- Back-probe the ignition switch output in ON and START positions.
- Check ECU/ECM power at the relay-fed fuse with the key on and during crank.
- Measure pump current or test the pump ground if power is present at the connector.
Is it safe to drive with a bad main relay?
No. An intermittent relay can stall the engine without warning, and a failed relay can leave you stranded after a hot soak or at the next stop. If the fault is repeatable, tow the car instead of relying on a temporary bypass.
When not to bypass
Do not bypass if a fuse keeps blowing, the harness is damaged, or the relay area shows melted plastic or heat damage. Those are wiring-safety problems, not quick-start problems.
How much does a Honda main relay replacement cost?
Replacement cost varies by Honda generation and chassis family, because the relay design and access differ. The part itself is often modest; labor can rise if the relay is buried behind trim. Ask for the exact chassis repair part, not a generic guess.
A broad planning range is the price of the relay plus a short diagnostic and removal job. If access is tight, replacement still beats permanent bypassing.
Frequently asked questions
What are the symptoms of a bad Honda PGM-FI main relay?
Common signs are intermittent no-start, no fuel-pump prime at key-on, crank-no-start after heat soak, and a relay that responds to tapping. A relay may work cold and fail hot, which makes the problem seem random until you test voltage and output.
Can I jump the Honda main relay to start the car?
Only for a short diagnostic check, and only with an in-line fuse. If the car starts, that proves the relay path is involved, but it does not prove the relay is the only fault. A permanent jump can be unsafe and may hide wiring damage.
What tools do I need to test a Honda PGM-FI relay?
Use a digital multimeter, a 12V test light, a fused jumper wire, and basic trim tools. A back-probe pin helps you measure without damaging terminals. Exact fuse ratings should match the vehicle’s existing circuit rating.
Products related to this article
Sponsored / affiliate links. As an Amazon Associate I earn from qualifying purchases. I may earn additional commission from eligible campaigns.