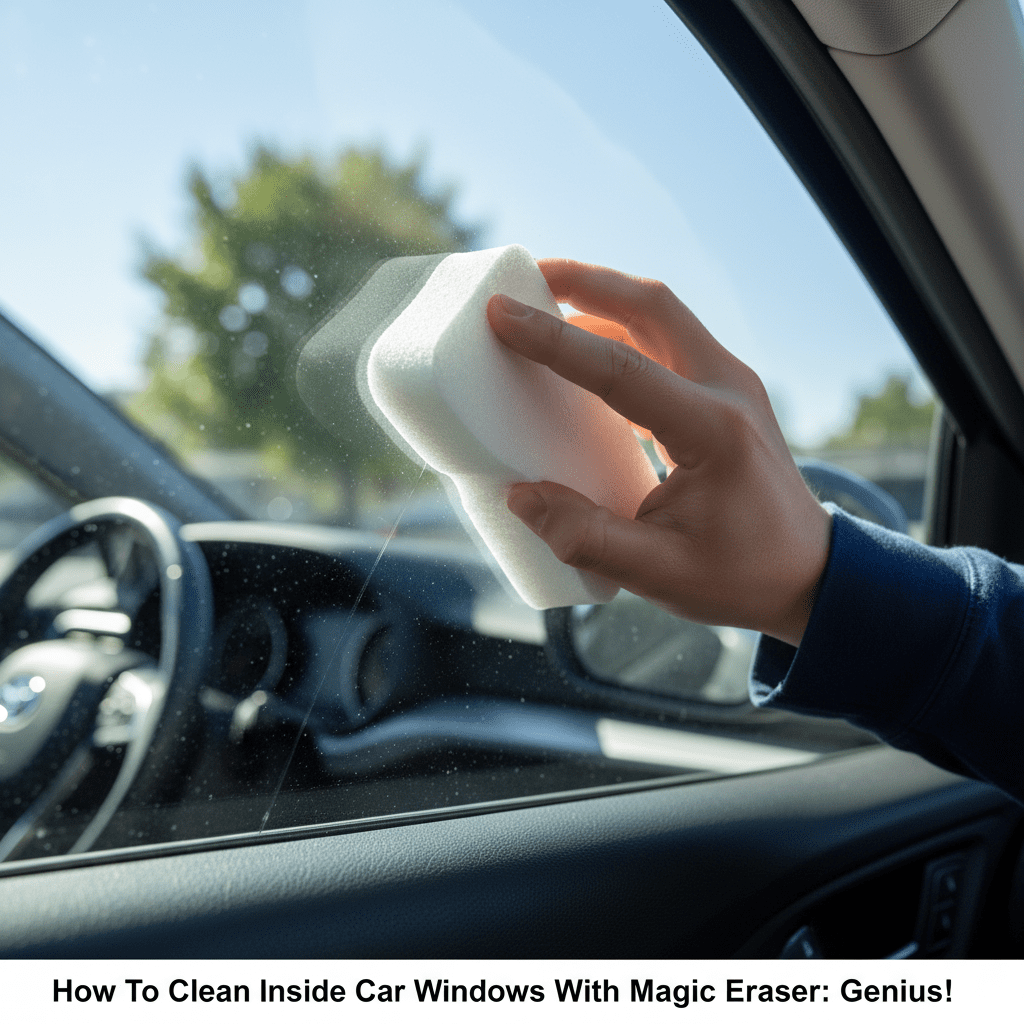
How To Clean Inside Car Windows With Magic Eraser: Genius!
Yes, you can effectively clean inside car windows with a Magic Eraser for a streak-free shine! This guide shows you how to safely use this surprising tool to tackle grime and haze, leaving your car’s interior glass crystal clear.
Driving can be a hassle when your car windows are cloudy or smudged on the inside. Whether it’s from daily dust, fingerprint build-up, or hazy residue from cabin air fresheners, obscured visibility is not just annoying – it’s a safety concern. You might have tried countless glass cleaners and microfiber cloths, only to end up with frustrating streaks. But what if I told you there’s a simple, genius solution hiding in your cleaning caddy? Get ready to discover how to clean the inside of your car windows with a Magic Eraser, transforming foggy glass into a perfectly clear view!
We’ll walk through a super easy, step-by-step process that requires minimal tools and effort. You’ll be amazed at how a humble Magic Eraser can cut through stubborn films and leave your car’s interior looking its best. Let’s get your windows sparkling!
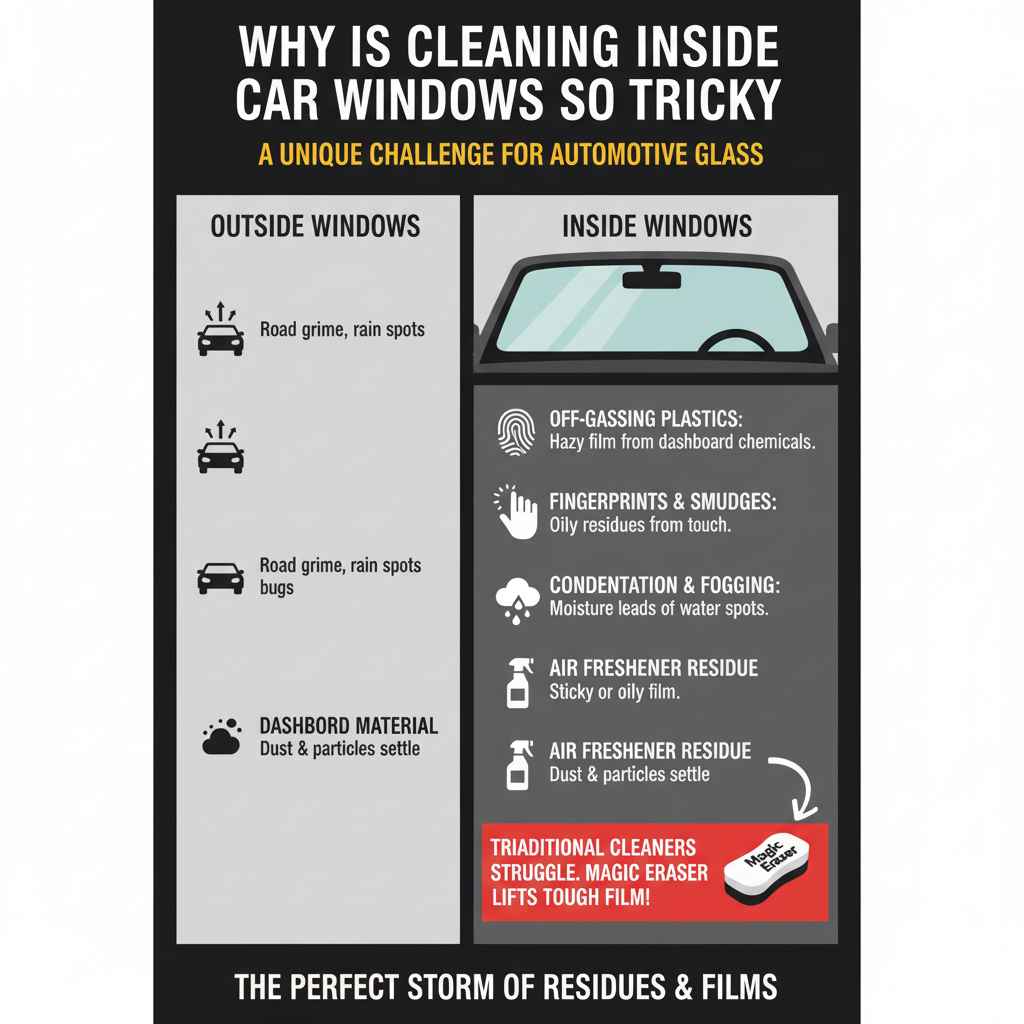
Why Is Cleaning Inside Car Windows So Tricky?
Ever wonder why cleaning the inside of your car windows feels like an uphill battle? It’s not just you! The inside of your car’s glass is exposed to a unique set of challenges that differ from your home windows. On the outside, you’re dealing with road grime, rain spots, and bugs. But inside, it’s a different story. Think about:
- Off-Gassing Plastics: New cars, and even older ones, continuously release plasticizers and chemicals that create a hazy film on the glass. This is known as “outgassing.”
- Fingerprints & Smudges: We touch our windows more than we realize, leaving oily prints that are hard to remove without leaving streaks.
- Condensation & Fogging: Temperature changes can cause moisture to build up, leading to water spots and a dull appearance once dried.
- Air Freshener Residue: Many popular air fresheners can leave a sticky or oily residue on the glass.
- Dashboard Material: Dust and particles from your dashboard and upholstery can easily settle on the interior glass.
Traditional glass cleaners can sometimes spread these oily residues around, especially if you’re not using the right technique or tools. This is where a little innovation comes in handy! The Magic Eraser, a product known for its incredible cleaning power on household surfaces, also works wonders on automotive glass when used correctly. Its unique micro-scrubbing technology can lift away difficult films without harsh chemicals, making that frustrating hazy build-up a thing of the past. Let’s dive into how you can harness its power.
What You’ll Need: The Simple Toolkit
The beauty of using a Magic Eraser for your car windows is that you don’t need a garage full of specialized supplies. Most of these items, you probably already have or can easily find at your local grocery or auto parts store. Let’s gather what you’ll need:
- Mr. Clean Magic Eraser (or similar melamine foam sponge): This is your star player. You might find variations, but the original works great. Ensure it’s the magic eraser, not a regular sponge.
- Clean Water: Just plain old tap water is perfect.
- A Spray Bottle (Optional but Recommended): For easily applying water and for rinsing.
- A High-Quality Microfiber Towel (at least two): These are crucial for drying and buffing to a streak-free finish. One for initial drying, one for a final buff.
- Bucket of Water (Optional): If you don’t have a spray bottle, a small bucket to keep your Magic Eraser damp works too.
- Gloves (Optional): If you have sensitive skin, wearing gloves can be a good idea.
That’s really it! The simplicity of these supplies is part of what makes this method so accessible and budget-friendly. You’re not buying expensive cleaners; you’re leveraging the remarkable properties of a common household tool.
Step-by-Step: How To Clean Inside Car Windows With Magic Eraser
Ready to tackle those foggy windows? Follow these simple steps. Remember, gentle is key. We’re not trying to scrub the paint off your car, just lift away film and grime. This method is designed to be easy and deliver a clear view without streaks.
Step 1: Prepare Your Workspace and Tools
First things first, choose a good spot. While you can do this in your driveway, it’s best to be in a shaded area. Direct sunlight can cause water and cleaning solutions to dry too quickly, leading to streaks. Make sure you have good lighting so you can see all the spots you need to clean.
Gather all your supplies: your Magic Eraser, water in a spray bottle (or a small bucket), and your microfiber towels. If you’re using a spray bottle, fill it with clean water. If you’re using a bucket, fill it with a few inches of water. Have your clean microfiber towels ready to go – one for initial drying and another for a final buff.
Step 2: Dampen the Magic Eraser
Take your Magic Eraser and dampen it with water. You don’t want it dripping wet, but it should be thoroughly wet. Squeeze out any excess water so it’s just damp and won’t oversaturate your car’s interior. If you’re using a spray bottle, you can lightly spray the Magic Eraser itself, or spray the window sparingly. If using a bucket, dip the Magic Eraser and then gently squeeze out the excess water.
The water acts as a lubricant and helps the melamine foam lift away the grime. Think of it like a very fine, effective scrubbing pad that relies on water to do its job, not aggressive force.
Step 3: Gently Wipe the Window Surface
Start working on a section of the window. Use gentle, overlapping strokes with the damp Magic Eraser. Don’t apply excessive pressure! The Magic Eraser works by creating microscopic ‘erosion’, so a light touch is all that’s needed. Focus on areas with visible haze, streaks, or smudges.
You should start to see the grime lifting onto the sponge. As the sponge gets dirty, rinse it out thoroughly in your bucket of water or spray it down again. You may need to rinse it multiple times, especially if your windows are particularly dirty. This is a critical step to avoid smearing the dirt around.
Step 4: Rinse and Wipe Away Residue
Once you’ve cleaned a section or the entire window with the Magic Eraser, it’s time to remove any loosened residue. Lightly mist that section of the window with clean water from your spray bottle, or use a lightly damp, clean section of your microfiber towel. Wipe the window down to remove any lingering particles or suds from the Magic Eraser.
This step ensures you’re not just moving dirt around, but actually getting it off the glass. You want a clean slate before you move on to drying. Don’t let the water drip down into areas where it might cause other issues, like on electronics or upholstery, if you can avoid it.
Step 5: Dry Thoroughly with a Microfiber Towel
This is where you achieve that streak-free shine! Take your first, dry microfiber towel and begin drying the window. Use firm, overlapping strokes, working from top to bottom or side to side. Make sure to cover the entire surface.
Don’t rub too hard, but provide enough pressure to absorb all the moisture. Check for any remaining moisture or tiny spots you might have missed. If you see any, a quick swipe with a dry section of the towel should take care of it.
Step 6: Buff for a Perfect Finish
For that extra sparkle and to ensure there are absolutely no streaks, grab your second, clean and dry microfiber towel. Use this towel to lightly buff the window surface. This final buffing action will pick up any last traces of moisture or residue and bring out a brilliant shine.
You should now have a crystal-clear view through your car windows! Take a moment to admire your work. It’s amazing what a difference clear windows make to the overall look and driving experience of your car.
Important Considerations and Safety Tips
While the Magic Eraser is fantastic, it’s important to use it correctly to avoid any potential issues. Remember, it’s a mild abrasive, so a little care goes a long way.
- Test in an Inconspicuous Area: While unlikely to cause damage to glass, if you’re very concerned or have tinted windows, it’s always wise to test the Magic Eraser in a small, hidden corner of the glass first.
- Avoid Over-Scrubbing: Using too much pressure can potentially scratch softer materials or damage delicate surfaces. Stick to gentle, consistent pressure.
- Don’t Use on Tinted Windows (with caution): If your car has aftermarket window tinting, be extremely cautious. A Magic Eraser might be too abrasive for some tints, potentially damaging the film and causing it to peel or scratch. If you have tint, stick to dedicated glass cleaners and high-quality microfiber towels. Consult your tint installer if you’re unsure.
- Keep Away from Sensitive Surfaces: Be mindful of surrounding interior surfaces like leather, vinyl dashboards, or delicate trim. Try to avoid getting the Magic Eraser directly on these areas to prevent accidental damage.
- Rinse Thoroughly: As mentioned in the steps, rinsing the Magic Eraser frequently is crucial. A dirty sponge will just spread grime.
- Protect Your Vehicle’s Interior: While cleaning, you can place a clean towel on the dashboard or seats to catch any drips and protect surfaces.
By following these precautions, you can confidently use the Magic Eraser method to achieve sparkling clean car windows.
Magic Eraser vs. Traditional Glass Cleaner: A Comparison
Let’s break down why the Magic Eraser method stands out, and when a traditional cleaner might still have its place.
The Magic Eraser is made from a melamine foam. Melamine foam is a type of thermosetting plastic foam that has a unique structure of very hard, glass-like microscopic fibers. When used with water, these fibers act like extremely fine sandpaper, which helps to lift and remove tough stains and scuff marks from surfaces. This micro-abrasive action is what makes it so effective on tougher films and residues that regular glass cleaners might struggle with.
Here’s a simple comparison:
| Feature | Magic Eraser Method | Traditional Glass Cleaner & Microfiber |
|---|---|---|
| Cleaning Power for Haze/Residue | Excellent. Breaks down stubborn films effectively. | Good for light dirt and fingerprints, but may struggle with heavy haze. |
| Streak Potential | Low, if rinsed and dried properly. Final buff is key. | Moderate to High. Depends heavily on product quality and technique. |
| Chemical Use | Water only. | Requires specific glass cleaning solutions (often alcohol or ammonia-based). |
| Effort/Scrubbing | Requires gentle, consistent pressure. | Typically light wiping. |
| Material Sensitivity | Can be too abrasive for aftermarket window tinting. | Generally safe for most surfaces, including tinted windows. |
| Cost-Effectiveness | Very high; uses inexpensive household item. | Moderate; depends on the price of specialized cleaners. |
External Link: For more information on the science behind cleaning abrasives and their applications, you can explore resources on materials science. For instance, the National Institute of Standards and Technology (NIST) provides extensive research on material properties and how they interact with cleaning agents, offering a deeper understanding of why certain tools work.
In summary, the Magic Eraser is a brilliant tool for tackling stubborn interior window haze that conventional cleaners might leave behind. However, if you have aftermarket tinting or are dealing with only light dust, a good glass cleaner and premium microfiber cloth will still serve you well. The key is to pick the right tool for the job and use it correctly.
When NOT to Use a Magic Eraser on Your Car Windows
While we’re celebrating the genius of the Magic Eraser for inside car windows, it’s crucial to know when to put it back in the box. Misusing any cleaning tool can lead to damage, and it’s better to be safe than sorry.
- Aftermarket Window Tint: This is the biggest red flag. Many aftermarket window films are delicate. The micro-abrasive nature of a Magic Eraser can easily scratch these films or even cause them to peel, especially if the tint is older or has been poorly applied. For tinted windows, always stick to products explicitly labeled as safe for window tint, and use soft, lint-free cloths. If you’re unsure about your tint type, it’s best to avoid the Magic Eraser entirely.
- Deep Scratches or Damaged Glass: A Magic Eraser is for cleaning, not repairing. If your windows have deeper scratches, chips, or cracks, this tool won’t fix them and could potentially make a small issue worse by catching on edges.
- On Interior Surfaces Other Than Glass: Unless the product packaging specifically states it’s safe for certain car interior surfaces (like plastic or vinyl), avoid using it. Melamine foam is designed for hard, non-porous surfaces. Using it on soft plastics, leather, or upholstery can cause damage.
- When You’re in a Rush (and can’t rinse or dry properly): The effectiveness of the Magic Eraser relies on proper technique, especially rinsing and drying. If you can’t commit to these steps thoroughly, you risk streaks or residue.
Always remember to err on the side of caution. If you have any doubts about your car’s window film or how a particular tool might interact with it, a quick search or a consultation with a professional can save you from costly repairs.

Frequently Asked Questions (FAQ)
Can I use a Magic Eraser on car exterior windows?
It’s generally not recommended for exterior car windows. The exterior glass is exposed to much harsher elements, and while a Magic Eraser might remove some grime, it can also potentially leave micro-scratches on the paint or clear coat of your car if used carelessly near those areas. For exterior glass, dedicated car wash soaps and glass cleaners are safer and more effective.
Will using a Magic Eraser damage my car’s interior?
When used correctly on the glass surfaces, it’s very unlikely to cause damage. However, be cautious around surrounding interior materials like dashboards, door panels, and upholstery, as prolonged contact or excessive scrubbing could alter their finish. Always use it gently and avoid contact with anything other than the glass.
How often should I clean my car’s interior windows?
Ideally, you should clean your interior car windows whenever you notice them becoming hazy or smudged. For most people, this can be anywhere from once a week to once a month, depending on driving habits, climate, and car usage. Regular cleaning prevents heavy build-up.
Can I use household cleaners with the Magic Eraser?
For cleaning interior car windows, it’s best to use the Magic Eraser with water only. Adding household cleaners can create chemical reactions, leave streaks, or damage sensitive materials. The melamine foam’s micro-abrasive action combined with water is usually sufficient for breaking down the haze.
What is the best way to dry interior car windows to avoid streaks?
The key is to use a high-quality, clean microfiber towel and dry the glass immediately after rinsing away the loosened grime. Use firm, overlapping strokes. For the ultimate streak-free finish, a final buff with a second dry microfiber towel is highly recommended. Avoid using paper towels, which can leave lint and streaks.
My windows are still streaky after using the Magic Eraser. What can I do?
Streaks usually happen if the residue wasn’t fully rinsed off before drying, or if the drying towel was dirty or saturated. Try rinsing the window again with clean water and a clean microfiber cloth, then dry thoroughly with a fresh, dry microfiber towel. Ensure you’re not using too much pressure with the Magic Eraser and that you’re rinsing the sponge regularly.
Conclusion: A Clearer Drive Awaits!
There you have it! Cleaning your car’s interior windows with a Magic Eraser is not just a hack; it’s a genuinely effective and simple solution to a common automotive frustration.