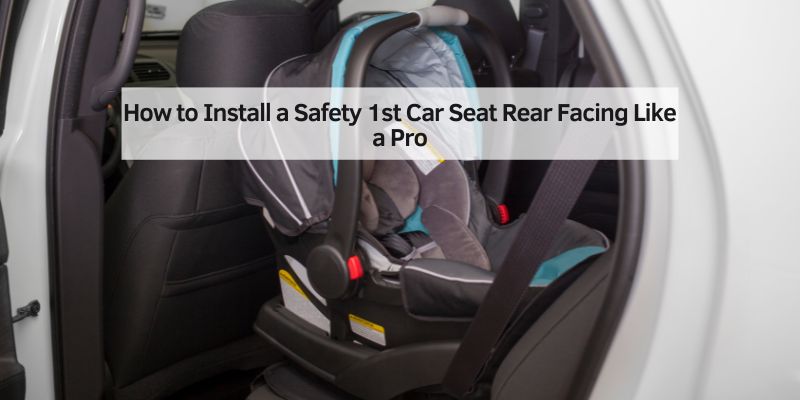
How to Install a Safety 1st Car Seat Rear Facing Like a Pro
When I became a new parent, I was thrilled to bring my baby home, but installing a Safety 1st car seat rear facing felt like solving a puzzle with missing pieces. My first try was a total flop—the seat wobbled, and I panicked! After some trial and error, I mastered it, and now I’m here to share a simple, step-by-step guide to help you install your Safety 1st car seat rear facing with confidence. Whether you’re a beginner or a pro, this article will walk you through the process, share handy tips, and answer common questions. Let’s make keeping your little one safe a piece of cake!
What Is Rear-Facing Car Seat Installation?
A rear-facing car seat faces the back of your car. It’s the safest way for babies and toddlers to ride because it protects their head, neck, and spine in a crash. Safety 1st car seats, like the Grow and Go or Guide 65, are designed to keep kids rear-facing from 5 to 40 pounds, sometimes up to 50 pounds. This setup cradles your child, spreading crash forces across their back. It’s a must for kids under 2, and experts like the American Academy of Pediatrics say to keep them rear-facing as long as possible.
Why Rear-Facing Matters
Rear-facing is a big deal for safety. In a crash, a baby’s head is heavy compared to their body. A rear-facing seat stops the head from snapping forward, which can prevent serious injuries. I learned this when I saw a video from Safety 1st showing how these seats work—it’s like a cozy shield for your kiddo! Plus, Safety 1st seats have clear instructions, making it easier to get it right.
Tools and Materials You’ll Need
Before you start, grab these items:
- Safety 1st car seat (check the manual for your model, like the Grow and Go or onBoard 35).
- Vehicle owner’s manual (to find seat belt or LATCH details).
- A towel or pool noodle (optional, for adjusting the recline angle if needed).
- A helper (optional, but nice for holding the seat while you tighten).
No fancy tools required—just your car and the seat!
Step-by-Step Guide to Install a Safety 1st Car Seat Rear Facing
Here’s how to install your Safety 1st car seat rear facing, broken into easy steps. I’ll cover both LATCH and seat belt methods, so you can choose what works best.
Step 1: Read the Manuals
Start with your car seat manual and vehicle manual. They’re like treasure maps! My first mistake was skipping this, and I missed key details about my car’s LATCH anchors. Look for the rear-facing belt path and recline instructions. Safety 1st manuals are clear, with pictures to help.
Step 2: Choose Your Installation Method
You can use the LATCH system (Lower Anchors and Tethers for Children) or the vehicle seat belt. Both are safe if done right. LATCH is often easier for beginners because it uses straps that clip to anchors in your car. Check your car manual to find LATCH anchors—usually marked with small symbols in the back seat. If your child is over 40 pounds, switch to the seat belt, as LATCH has weight limits.
Step 3: Position the Car Seat
Place the car seat in the back seat, facing the rear. The back seat is the safest spot for kids under 13. I put mine behind the passenger seat for easy access from the sidewalk. If your car has no back seat (like a pickup truck), ensure the front airbag is off—super important!
Step 4: Check the Recline Angle
Babies need to sit semi-reclined to keep their airways open. Safety 1st seats have a red level line or bubble indicator. Make sure it’s parallel to the ground. If it’s off, use a rolled towel or pool noodle under the seat’s base to adjust. My first install was too upright, and a towel fixed it in seconds!
Step 5: Secure with LATCH or Seat Belt
- LATCH Method: Thread the LATCH straps through the rear-facing belt path (check your manual for the exact path). Clip them to the car’s LATCH anchors. Push down on the seat and pull the straps tight. The seat shouldn’t move more than 1 inch side-to-side or front-to-back at the belt path.
- Seat Belt Method: Thread the vehicle seat belt through the rear-facing belt path. Buckle it and lock the seat belt (check your car manual for how to lock it). Push down firmly and tighten. Again, test for less than 1 inch of movement.
Step 6: Attach the Carrier (for Infant Seats)
If you’re using an infant seat like the Safety 1st onBoard 35, snap the carrier into the base. You’ll hear a click when it’s secure. Tug gently to double-check.
Step 7: Place Your Child in the Seat
Put your baby in the seat with their back flat against it. Place harness straps over their shoulders, through slots at or below their shoulders. Buckle the harness and chest clip, tightening until you can’t pinch any extra strap at the shoulder. The chest clip should sit at armpit level. I learned the hard way—bulky coats make the harness too loose, so dress your baby lightly and add a blanket over the harness.
Step 8: Double-Check Everything
Do the “inch test.” Grab the seat at the belt path and tug. If it moves more than an inch, tighten it again. Check the recline angle and harness fit one more time. My trick? I pretend I’m a crash test dummy and give it a good shake to be sure!

Benefits and Drawbacks of Rear-Facing Installation
Benefits
- Top Safety: Rear-facing is the safest position for young kids, reducing injury risk by up to 70% in crashes, per the National Highway Traffic Safety Administration.
- Easy to Learn: Safety 1st seats have clear labels and indicators, making installation a breeze once you get the hang of it.
- Flexible: Works in most cars, with LATCH or seat belt options.
Drawbacks
- Space Issues: Rear-facing seats take up more room, which can be tight in small cars.
- Learning Curve: First-timers might need a few tries to get it perfect.
- Cost: Safety 1st seats are affordable, but you might need extras like a towel for angle adjustments.
Common Mistakes to Avoid
Here are mistakes I made (so you don’t have to):
- Twisted Straps: Ensure LATCH or seat belt straps are flat, not twisted.
- Wrong Recline: Check the red level line to avoid a too-upright or too-flat seat.
- Loose Harness: Always do the pinch test to ensure a snug fit.
My Personal Tips for Success
- Practice at Home: Set up the seat in your living room first to get comfy with the process.
- Get Help: Visit a car seat check event (find one at safekids.org) for expert advice.
- Keep Manuals Handy: I store mine in the glovebox for quick reference.
- Use a Mirror: A baby mirror helps you see your child without turning around.
Comparison of Installation Methods
| Method | Pros | Cons | Best For |
|---|---|---|---|
| LATCH | Easy to clip, beginner-friendly | Weight limit (usually 40 lbs) | New parents, smaller kids |
| Seat Belt | No weight limit, universal | Trickier to lock in some cars | Bigger kids, older vehicles |
Table 1: Comparing LATCH and seat belt methods for Safety 1st car seat installation.
Cost-Saving Ideas
- Check for Sales: Safety 1st seats like the Grow and Go are often on sale at Amazon or Walmart (check amazon.com for deals).
- Borrow a Noodle: Instead of buying a recline adjuster, use a pool noodle from a dollar store.
- Free Checks: Local fire stations or Safe Kids events offer free installation checks.
Visual Ideas for Reference
To make this easier, imagine these visuals (not included):
- Diagram 1: A labeled picture of a Safety 1st seat showing the rear-facing belt path.
- Diagram 2: A side view of correct recline angles with the red level line.
- Photo: A baby in a properly installed seat with harness and chest clip in place.
Frequently Asked Questions
How Do I Know If My Safety 1st Car Seat Is Installed Correctly?
Test for movement. Tug the seat at the belt path. It shouldn’t move more than 1 inch side-to-side or front-to-back. Check the recline angle using the red level line or bubble indicator.
Can I Use Both LATCH and Seat Belt Together?
No, use one method. Using both can reduce safety. Choose LATCH for kids under 40 pounds or the seat belt for a universal fit, per Safety 1st guidelines.
What If My Car Seat Is Too Upright?
Adjust the angle. Use a rolled towel or pool noodle under the base to make the red level line parallel to the ground, ensuring your baby’s airway stays open.
How Long Should My Child Stay Rear-Facing?
As long as possible. Keep your child rear-facing until they reach the seat’s weight (40-50 lbs) or height limit (40 inches for most Safety 1st models), per the American Academy of Pediatrics.
Where’s the Best Spot for the Car Seat?
Back seat is safest. Place it behind the passenger or driver seat for easy access. Avoid the front seat unless airbags are off, as they can harm babies in a crash.
How Tight Should the Harness Be?
Snug fit is key. Tighten until you can’t pinch any strap at the shoulder. The chest clip should sit at armpit level for a secure fit.
Can I Reuse a Safety 1st Car Seat for Another Child?
Check expiration. Look for the expiration date on the seat (usually 6-10 years). Ensure it hasn’t been in a crash and still has all parts, per Safety 1st.
Conclusion
Installing a Safety 1st car seat rear facing is easier than it seems once you know the steps. From checking the manuals to securing the harness, you’re now ready to keep your little one safe. Try it out, and don’t be afraid to ask for help at a car seat check event. It’s a small effort for big peace of mind! Share your tips or questions in the comments—I’d love to hear how it went!
For more info, check these trusted sites: