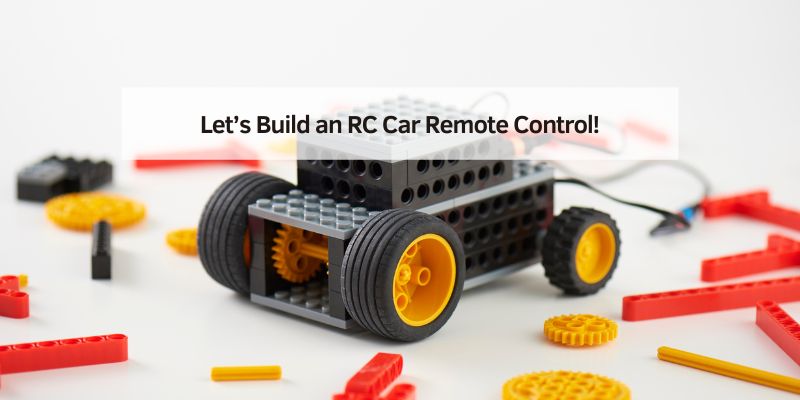
Let’s Build an RC Car Remote Control!
I still remember my first RC car race. My car zoomed across the driveway, but the remote control I built myself made it special. Today, I’ll show you how to make an RC car remote control that’s fun and easy to build. This guide is for beginners, hobbyists, and even advanced folks who want a simple project. You’ll learn what a remote control does, how to build one, and tips to make it awesome. Let’s get started!
What Is an RC Car Remote Control?
An RC car remote control sends signals to your car. It tells the car to move forward, turn, or stop. Think of it like a magic wand for your car. It uses radio waves to talk to a receiver inside the car. This receiver listens and makes the car move. Building your own remote is fun, cheap, and teaches you cool skills.
Why Make Your Own RC Car Remote Control?
Making your own remote control saves money. Store-bought ones can cost $20-$100. You can build one for under $15! Plus, it’s exciting to create something yourself. You can customize it to work exactly how you want. I once made a remote with extra buttons for fun tricks, like spinning my car. It’s a great project for beginners and pros alike.
Tools and Materials You Need
You don’t need fancy tools to start. Most items are easy to find at hobby stores or online. Here’s what you’ll need:
- Arduino Uno: A tiny computer to control your remote ($10-$15).
- RF Transmitter Module (433 MHz): Sends signals to the car ($2-$5).
- RF Receiver Module (433 MHz): Catches signals in the car ($2-$5).
- Joystick Module: Controls direction and speed ($3-$5).
- 9V Battery and Connector: Powers your remote ($2-$3).
- Breadboard and Jumper Wires: Connects everything ($5-$10).
- Basic Tools: Screwdriver, wire cutters, and tape.
Pro Tip: Check sites like Amazon or SparkFun for affordable parts. Always buy from trusted sellers to avoid faulty components.
Table 1: Cost Comparison of Tools and Materials
| Item | Estimated Cost | Where to Buy |
|---|---|---|
| Arduino Uno | $10-$15 | Amazon, SparkFun |
| RF Transmitter | $2-$5 | eBay, Adafruit |
| RF Receiver | $2-$5 | eBay, Adafruit |
| Joystick Module | $3-$5 | Amazon, Hobby Stores |
| 9V Battery | $2-$3 | Local Stores, Amazon |
Caption: This table shows affordable parts for your RC remote project.
Step-by-Step Guide to Build Your RC Car Remote Control
Building a remote control is easier than it sounds. Follow these steps, and you’ll have a working remote in a few hours. I’ve tested this method, and it’s perfect for beginners.
Step 1: Set Up Your Arduino
Plug your Arduino Uno into your computer. Download the free Arduino software from Arduino’s official site. This software lets you program your Arduino. It’s like giving your remote a brain. Install it and test your Arduino with a simple “blink” program to make sure it works.
Step 2: Connect the Joystick
Attach the joystick module to your breadboard. Use jumper wires to connect it to the Arduino. The joystick has pins for X-axis (left-right), Y-axis (up-down), and power. Check online for a joystick wiring guide. I suggest a simple diagram showing joystick-to-Arduino connections (not included here).
Step 3: Add the RF Transmitter
Connect the 433 MHz RF transmitter to your Arduino. It needs three wires: power, ground, and data. The transmitter sends joystick signals to the car’s receiver. Make sure the wires are secure. I once had a loose wire, and my car wouldn’t move!
Step 4: Program the Arduino
Write a simple program to read joystick movements and send them via the RF transmitter. You can find sample code on Instructables. Upload the code to your Arduino. Test it by moving the joystick. The transmitter should send signals.
Step 5: Power Your Remote
Connect the 9V battery to your Arduino. Use a battery connector for a secure fit. Tape the battery to the breadboard to keep it steady. Your remote is now ready to test!
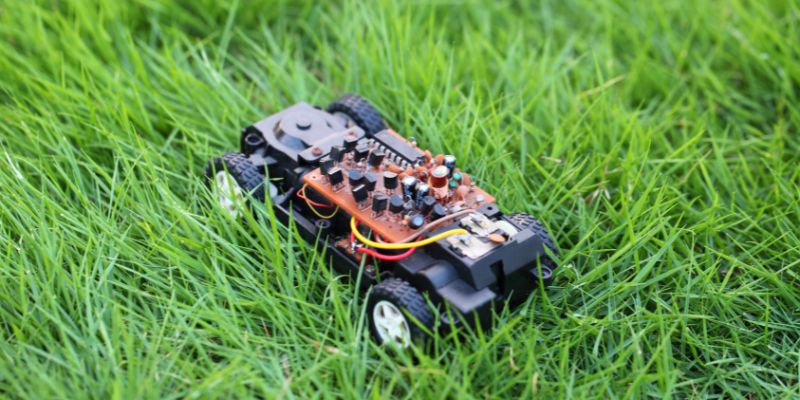
Step 6: Connect the Receiver to Your Car
Attach the RF receiver to your RC car’s circuit. It needs to connect to the car’s motor and steering servo. Follow your car’s manual for wiring. Test the remote by moving the joystick. Your car should respond!
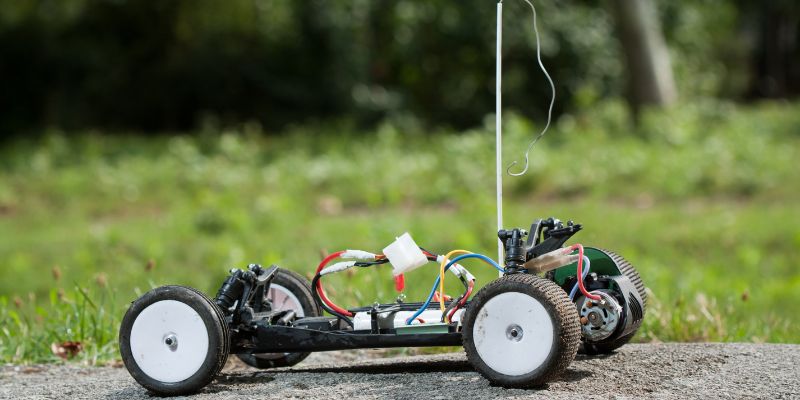
Visual Idea: A diagram of the Arduino, joystick, and transmitter wiring would help. Another idea is a labeled photo of the finished remote setup.
Table 2: Steps to Build Your Remote
| Step | Task | Time Needed |
|---|---|---|
| 1 | Set up Arduino | 15 minutes |
| 2 | Connect joystick | 10 minutes |
| 3 | Add RF transmitter | 10 minutes |
| 4 | Program Arduino | 20 minutes |
| 5 | Power with battery | 5 minutes |
| 6 | Connect receiver to car | 15 minutes |
Caption: This table breaks down the time for each step.
Benefits of Building Your Own Remote
Building your own remote is cheap and fun. You learn about electronics and coding. You can customize your remote for special features, like extra speed or tight turns. I added a button to my remote for quick stops, which saved my car from crashes. Plus, it feels amazing to control a car you built!
Challenges and How to Overcome Them
Sometimes, things don’t work right away. Here are common issues and fixes:
- Loose Wires: Double-check all connections. Use tape to secure them.
- No Signal: Ensure the transmitter and receiver are on the same frequency (433 MHz).
- Code Errors: Copy code from trusted sites like Adafruit. Test small parts first.
If building feels tough, you can buy a pre-made remote for $20-$30 from Horizon Hobby. But building is more rewarding!
My Top Tips for Success
Here are tips from my years of RC building:
- Start Small: Use a simple Arduino setup before adding fancy features.
- Test Often: Check each step to catch mistakes early.
- Have Fun: Experiment with colors or designs for your remote.
Safety Tip: Always unplug the battery when not in use. This prevents short circuits and saves battery life.
Table 3: Common Mistakes and Fixes
| Mistake | Fix |
|---|---|
| Loose wires | Secure with tape |
| Wrong frequency | Match transmitter/receiver |
| Code not working | Use trusted sample code |
Caption: This table helps you avoid common RC remote issues.
Other Ways to Get a Remote Control
You don’t have to build a remote. You can buy ready-to-run (RTR) RC cars with remotes included. Brands like Traxxas or Arrma offer great options for $30-$50. Or, you can pair an old remote with a new car using tips from Hackaday. Building is best for learning, but buying saves time.
My RC Building Story
When I was 12, I built my first RC remote with my dad. We used an old Arduino and spare parts. It wasn’t perfect—my car spun in circles at first! But fixing it taught me so much. Now, I love sharing this hobby with others. Try building your own remote, and you’ll feel the same thrill!
Conclusion
Building an RC car remote control is easy and exciting. You need a few cheap parts, some time, and a bit of patience. Follow the steps, use my tips, and avoid common mistakes. You’ll have a custom remote that makes your RC car zoom. Try this project today! Share your creation with friends or online. What cool features will you add to your remote?
Frequently Asked Questions
What Is an RC Car Remote Control?
An RC car remote control sends radio signals to move your car. It’s like a game controller but uses radio waves. The remote has buttons or a joystick to control speed and direction. It talks to a receiver in the car, which moves the motor or steering.
How Much Does It Cost to Build a Remote?
You can build a remote for $15-$30. Parts like an Arduino ($10-$15), RF modules ($4-$10), and a battery ($2-$3) are cheap. Shop online at Amazon or SparkFun to save money. Compare prices to find the best deals.
Do I Need Coding Skills to Make a Remote?
You don’t need to be a coding expert. Basic Arduino code is easy to copy from sites like Instructables. Follow tutorials, and test small parts first. I learned coding by trial and error, and you can too!
Can I Use My Remote with Any RC Car?
Your remote works if the car’s receiver matches the frequency (like 433 MHz). Check your car’s manual. Some cars need specific remotes, so test compatibility. Buying a matching receiver ensures it works.
How Long Does It Take to Build a Remote?
Building takes about 1-2 hours. Setting up the Arduino and wiring takes 30-40 minutes. Coding and testing need another 30-60 minutes. Go slow to avoid mistakes, and you’ll finish faster.
Is It Safe to Build an RC Remote?
Yes, it’s safe if you follow instructions. Use low-voltage parts (like a 9V battery) and secure wires. Unplug the battery when not working to avoid short circuits. Always work in a clean, dry space.
What If My Remote Doesn’t Work?
Check for loose wires or wrong frequencies. Test each part (joystick, transmitter) separately. Use sample code from trusted sites. If it still fails, ask for help on forums like Reddit’s r/rccars.