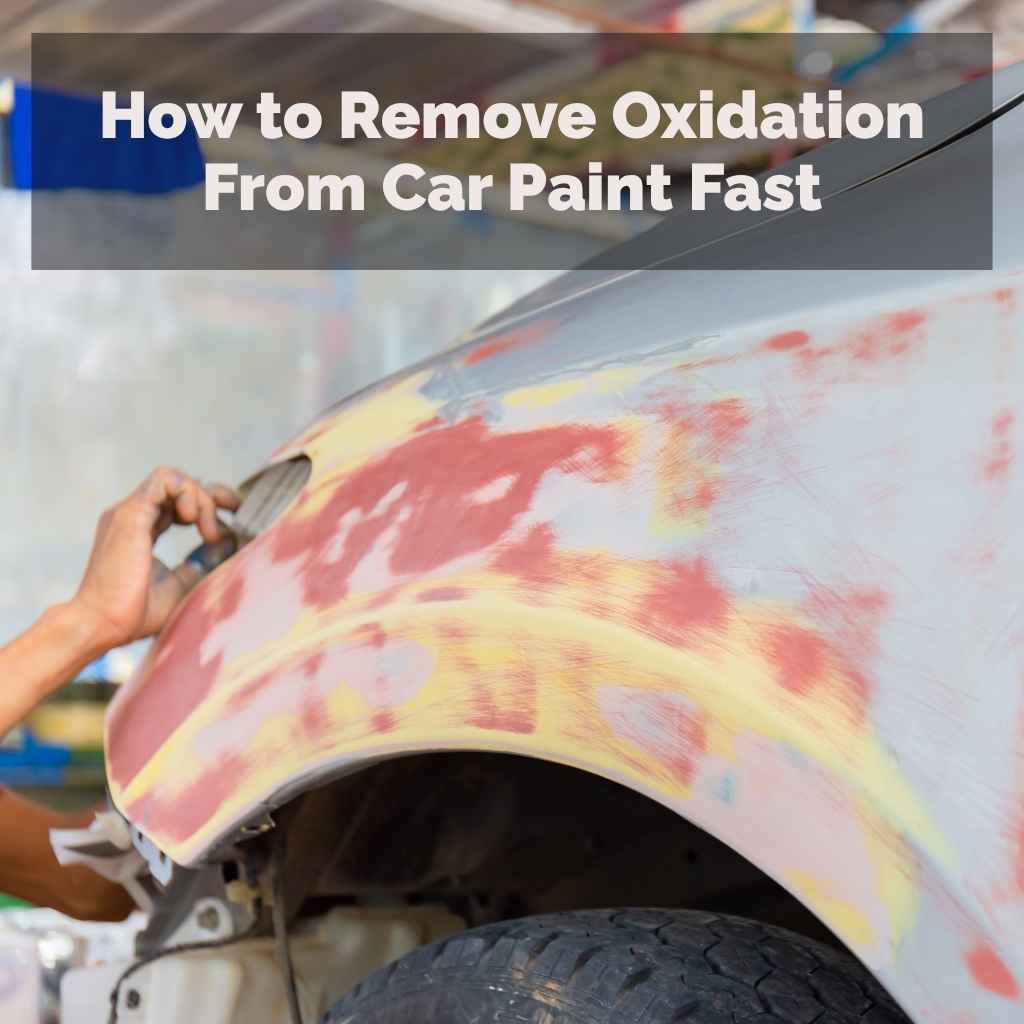
How to Remove Oxidation From Car Paint Fast
Seeing dull, chalky spots on your car’s paint can be frustrating. Many people wonder how to remove oxidation from car paint fast because it makes even a great car look old and neglected. It’s a common issue, especially for cars that spend a lot of time outdoors.
This might seem like a tough job for beginners, but don’t worry. We’ve got a simple, step-by-step guide to bring back your car’s shine. Get ready to learn how easy it can be to fix those faded spots and make your car look its best again.
Why Your Car Paint Gets Dull
Oxidation is a natural process that happens when your car’s paint is exposed to the elements over time. The clear coat, which is the protective outer layer of your paint, is the first to be affected. Sunlight, rain, pollution, and even bird droppings can break down the clear coat. This breakdown allows oxygen to reach the color layer beneath, causing it to fade and lose its shine.
The Science Behind Paint Oxidation
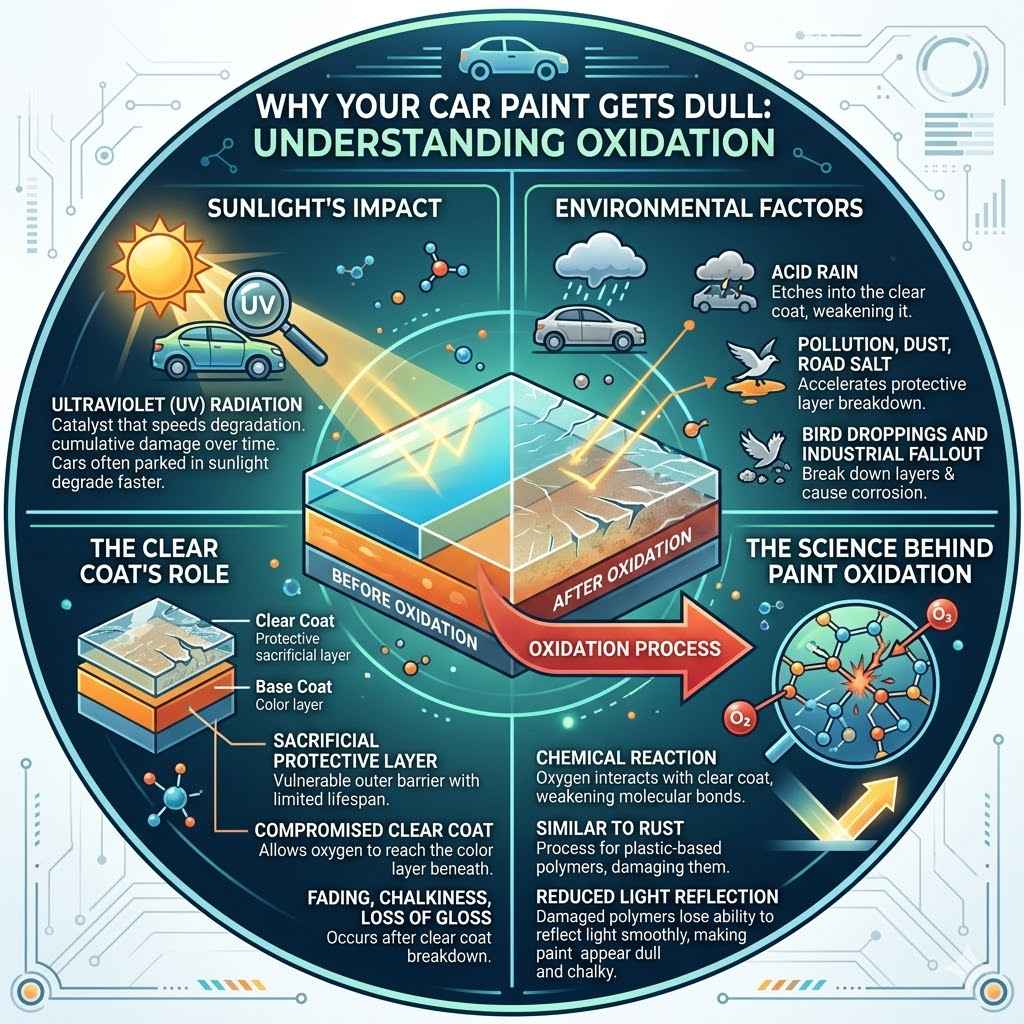
Oxidation is essentially a chemical reaction. When oxygen from the air interacts with the paint’s clear coat, it causes the molecular bonds within the coating to weaken and break down. This process is similar to how metal rusts, but it happens to the plastic-based polymers in automotive paint. Over time, these damaged polymers lose their ability to reflect light smoothly, which is why the paint appears dull and chalky. Factors like UV radiation from the sun act as catalysts, speeding up this degradation process. The longer a car is exposed without proper protection, the more severe the oxidation becomes.
- Sunlight’s Impact
- Environmental Factors
- The Clear Coat’s Role
Sunlight, particularly ultraviolet (UV) radiation, is a major culprit in paint oxidation. UV rays break down the chemical bonds in the clear coat, causing it to become brittle and chalky. This damage is cumulative, meaning the longer your car is exposed to direct sunlight, the more the clear coat degrades. This is why cars parked outside frequently, especially in sunny climates, tend to oxidize faster than those kept in garages.
Environmental factors beyond just sunlight play a significant role. Acid rain, caused by air pollution, can etch into the clear coat, weakening it. Industrial fallout, such as tiny metal particles from factories or trains, can land on the paint and cause corrosion, leading to oxidation. Even common things like road salt in winter can accelerate the breakdown of protective layers.
The clear coat is the most vulnerable layer of your car’s paint job. It’s designed to be a sacrificial layer, protecting the colored base coat from damage. However, it has a limited lifespan. Once the clear coat is significantly compromised, oxygen can reach the base coat, leading to visible signs of oxidation like fading, chalkiness, and a loss of gloss. Restoring a faded finish often involves removing the damaged clear coat or treating the oxidized layer.
Simple Steps for Removing Oxidation
Tackling oxidation doesn’t have to be complicated. The key is to use the right products and techniques. You’ll need a few supplies, but the process is straightforward and can be done in your driveway. We’ll walk you through each step so you can confidently restore your car’s paintwork.
Gathering Your Supplies
Before you start, make sure you have everything you need. This will make the process much smoother and ensure you achieve the best results. Having all your tools ready means you can focus on the task at hand without interruptions.
- Mild Car Wash Soap
- Two Buckets (for washing and rinsing)
- Microfiber Wash Mitt
- Drying Towels (microfiber)
- Rubbing Compound or Oxidation Remover
- Applicator Pads (foam or microfiber)
- Polishing Compound (optional, for extra shine)
- Car Wax or Sealant
Having a good quality car wash soap is essential. It should be pH-neutral to avoid stripping any existing protection or further damaging the paint. The two-bucket method is crucial for preventing scratches. One bucket holds soapy water, and the other holds clean rinse water for your wash mitt. This stops dirt and grit from being spread back onto the paint.
Microfiber wash mitts and drying towels are a must. They are soft and absorbent, significantly reducing the risk of scratching your car’s delicate paintwork. Avoid using old rags or sponges, which can be abrasive.
For removing oxidation, you’ll need a dedicated rubbing compound or an oxidation remover. These products contain fine abrasives that gently cut away the damaged, oxidized layer of the clear coat. Applicator pads help you spread the product evenly and work it into the paint. Foam pads offer a good balance of cutting and finishing, while microfiber pads can be gentler.
Finally, after removing oxidation, you’ll want to protect your freshly restored paint. Car wax or a synthetic sealant will add a layer of protection and enhance the shine. These products seal the paint surface, preventing future oxidation and making subsequent washes easier.
The Washing and Drying Process
Start by giving your car a thorough wash. This removes loose dirt and debris that could scratch the paint during the oxidation removal process. Use the two-bucket method to ensure you’re always using a clean mitt and clean water.
A proper wash is the foundational step. Begin by rinsing the entire vehicle to remove loose dirt and dust. Then, dip your microfiber wash mitt into the soapy water bucket.
Wash the car from top to bottom, working in straight lines, not circles, to minimize scratch potential. After washing a section, rinse your mitt thoroughly in the clean water bucket before dipping it back into the soap bucket. This prevents transferring grit back onto the paint.
Rinse the entire car thoroughly once you’ve finished washing.
Once washed, dry your car immediately with clean, soft microfiber drying towels. Blot the water rather than wiping, or use a large, plush drying towel to gently lift the water away. Ensure no water spots are left behind, as these can lead to new imperfections.
Applying The Oxidation Remover
This is where the magic happens. Apply a small amount of rubbing compound or oxidation remover to an applicator pad. Work in small sections, typically 2×2 feet at a time. Apply moderate pressure and move the pad in overlapping back-and-forth motions. You should see the chalky residue begin to disappear as you work.
When applying the oxidation remover, consistency is key. Start with a quarter-sized amount of product on your foam or microfiber applicator pad. Gently spread it over a small section of the oxidized paint.
Work the product in with moderate pressure using a back-and-forth motion, similar to how you might wax a car. As you work, you will notice the chalky residue lifting away, revealing a shinier surface underneath. Don’t apply too much pressure, as this can cause more damage.
After working a section for a minute or two, wipe away the residue with a clean microfiber towel. Inspect the area. If oxidation remains, apply a little more product and repeat the process. You might need a few passes on heavily oxidized areas.
Once a section is clean, move to the next. Continue this process until the entire car has been treated. Remember to work in the shade to prevent the product from drying too quickly on the surface.
Optional Polishing for Extra Shine
After removing the oxidation, your paint will look much better, but it might still be a bit dull. This is where polishing comes in. Polishing uses finer abrasives than rubbing compounds to remove very light scratches and swirl marks left from the oxidation removal process, further enhancing the gloss.
Polishing is an extra step that really makes your car’s paint pop. It uses much finer abrasives than oxidation removers. These tiny abrasives gently smooth out any microscopic scratches or imperfections that remain on the paint surface after oxidation removal.
This creates a more uniform surface that reflects light much better, giving your car a deeper, more brilliant shine. It’s like taking your paint from good to excellent.
Apply a small amount of polishing compound to a clean applicator pad. Work it into the paint using the same section-by-section method as with the oxidation remover, but with lighter pressure. Wipe away the residue with a separate clean microfiber towel. You’ll notice a significant increase in gloss and depth of color after this step.
Protecting Your Restored Paint
Protection is crucial after all your hard work. Applying a good quality car wax or sealant will seal the paint and protect it from future oxidation and environmental damage. This also makes future washes much easier.
Once your car’s paint is clean and polished, it needs protection. Wax or sealant acts as a barrier. It shields the paint from harsh UV rays, acid rain, and other contaminants.
This barrier not only preserves your hard-earned shine but also makes it much simpler to wash your car in the future. Dirt and grime will have a harder time sticking to the slick surface, meaning less scrubbing and less risk of new scratches.
Apply your chosen wax or sealant according to the product’s instructions. Typically, you’ll apply a thin, even layer with an applicator pad and then buff it off with a clean microfiber towel once it hazes over. This final step locks in the shine and keeps your car looking great for longer. Regular washing and waxing will help maintain the finish.
Choosing the Right Products
Selecting the correct products can make a huge difference in how effective your oxidation removal process is. Using the wrong type of abrasive or chemical can do more harm than good. It’s important to understand what each product does.
Understanding Abrasives and Compounds
Rubbing compounds and polishes are essentially liquids or creams that contain very fine abrasive particles. These particles are what do the actual work of removing the oxidized layer. The size and type of these abrasive particles determine how aggressive the product is.
Compounds and polishes are the stars of the show when it comes to fixing faded paint. They work by gently abrading the surface. Think of them as very fine sandpaper for your car’s paint.
The abrasive particles within them are microscopic. These particles work to lift off the dull, chalky, oxidized layer. Rubbing compounds are generally more aggressive, used for heavier oxidation.
Polishes are finer, used for lighter oxidation and to restore shine after compounding.
Rubbing compounds contain larger abrasive particles designed to quickly remove moderate to severe oxidation. They cut through the damaged clear coat effectively. However, they can also leave behind fine scratches, sometimes called swirl marks, if not used carefully or if the paint is too delicate.
Polishing compounds have much smaller abrasive particles. They are used to refine the finish after compounding, removing those fine scratches and swirl marks. They also enhance gloss and clarity, bringing out the deep shine of the paint. Some products are all-in-one, offering both oxidation removal and polishing capabilities, but they may not be as effective on severe oxidation as separate products.
Comparison of Compound Types
| Compound Type | Aggressiveness | Primary Use | Best For |
|---|---|---|---|
| Rubbing Compound | High | Removing heavy oxidation, deep scratches | Severely oxidized or neglected paint |
| Polishing Compound | Medium | Removing light oxidation, swirl marks | Moderately oxidized paint, paint prep |
| Finishing Polish | Low | Enhancing gloss, removing very fine marks | Light haze, post-compound refinement |
The Role of Polishers and Buffers
While you can remove oxidation by hand, using a power polisher can significantly speed up the process and provide more consistent results. Different types of polishers have different strengths and weaknesses.
Using an electric polisher can transform the task from a labor-intensive chore into a much quicker job. These machines spin or oscillate, making the application of compounds and polishes far more efficient. They also help in achieving a more uniform finish across the entire vehicle, reducing the risk of inconsistent results that can sometimes happen with hand application, especially on larger areas.
For beginners, dual-action polishers are often recommended.
A dual-action (DA) polisher, also known as an orbital polisher, is a great choice for DIYers. Its pad moves in an oscillating and rotating motion, which is safer than a rotary polisher. A rotary polisher spins at a single speed and can easily burn through paint if not used expertly. DA polishers are much more forgiving, making them ideal for removing oxidation without the high risk of damaging the paint.
When using a polisher, always start with the least aggressive product and pad combination. Test it on an inconspicuous area first. Use moderate pressure and keep the polisher moving constantly to avoid concentrating heat in one spot, which can damage the paint. Proper technique is crucial to leverage the power of a polisher safely and effectively.
Protectants and Sealants Explained
Once the oxidation is gone and the paint is looking great, you need to protect that shine. Protectants and sealants are key to maintaining the car’s appearance and preventing future damage.
After all the cleaning and polishing, your car’s paint is vulnerable. This is where protectants and sealants come into play. They are designed to create a barrier on top of the clear coat.
This barrier shields the paint from harmful UV rays, environmental pollutants, and water spots, which are common causes of future oxidation. They also enhance gloss and make the car easier to wash.
Car waxes, often made from natural carnauba, provide a warm glow and good protection. They typically last for a few weeks to a couple of months. Synthetic sealants, on the other hand, are engineered chemicals that usually offer longer-lasting protection, sometimes for six months or more. They tend to provide a sharper, more reflective shine. Ceramic coatings are another option, offering the most durable and longest-lasting protection, often lasting for years, but they usually require more preparation and professional application. For most DIY enthusiasts looking for a balance of ease of use and protection, a good quality wax or synthetic sealant is an excellent choice.
Preventing Future Oxidation
Prevention is always better than cure. By adopting a regular maintenance routine, you can significantly slow down the rate at which your car’s paint oxidizes. This means less work for you in the long run and a car that always looks its best.
Regular Washing and Waxing Schedule
The most effective way to prevent oxidation is through consistent care. Washing your car regularly removes contaminants before they have a chance to bond with the paint. Waxing or sealing adds a protective layer that shields the paint from the elements.
Making a habit of washing your car every couple of weeks is a smart move. This removes bird droppings, tree sap, dust, and road grime that can harm your paint. After washing, applying a coat of wax or sealant is the next important step.
This protective layer acts like a shield. It deflects UV rays and other damaging environmental factors that cause oxidation. A good waxing schedule, perhaps every 2-3 months, will keep your paint looking fresh and prevent that chalky look from returning too quickly.
For example, if you wash your car every two weeks and wax it every three months, you’re actively fighting oxidation. This routine helps maintain the integrity of the clear coat and the base color. Neglecting washing allows contaminants to sit and etch into the paint, while skipping wax leaves the paint unprotected and exposed.
Parking Strategies
Where you park your car can have a big impact on its paintwork. Minimizing exposure to harsh elements is a simple yet effective way to prevent oxidation.
Think about where you park your car. Leaving it under a tree might seem convenient, but falling sap and bird droppings can be damaging. Parking in direct sunlight for extended periods bakes the paint and accelerates oxidation.
If you have a garage, use it! It’s the best protection against sun, rain, and other environmental hazards. If a garage isn’t an option, try to park in shaded areas whenever possible, especially during the hottest parts of the day.
Even using a car cover when parked outdoors for long periods can provide a significant layer of defense.
Consider these parking scenarios:
- Parking under a large oak tree provides shade but exposes the car to sap and bird droppings, which can etch the paint if not cleaned off quickly.
- Parking in a sunny driveway for eight hours a day significantly increases UV exposure, leading to faster clear coat degradation and oxidation.
- Using a breathable car cover in an outdoor parking spot adds a protective barrier against UV rays and contaminants, slowing down the oxidation process considerably.
Paint Protection Films and Coatings
For the ultimate protection against oxidation and other damage, consider advanced paint protection options. These offer a more durable and longer-lasting defense than traditional waxes.
For those seeking the highest level of paint protection, advanced options are available. Paint Protection Film (PPF) is a clear, urethane-based film applied directly to the car’s paint. It acts like a shield, absorbing impacts from stones and road debris, and preventing scratches and swirl marks.
It’s especially effective at preventing oxidation caused by physical damage and contamination.
Ceramic coatings are another popular choice. These are liquid-applied coatings that chemically bond with the factory paint, creating a hard, durable layer of protection. They offer excellent resistance to UV rays, chemicals, and etching, making them highly effective at preventing oxidation. While more expensive and requiring professional application, they can last for years, providing long-term peace of mind and maintaining a flawless finish.
Dealing with Severe Oxidation
Sometimes, oxidation can become quite severe, making the paint look extremely chalky and dull. In these cases, a more aggressive approach might be necessary. Don’t be discouraged if your car’s paint looks bad; these steps can often bring it back to life.
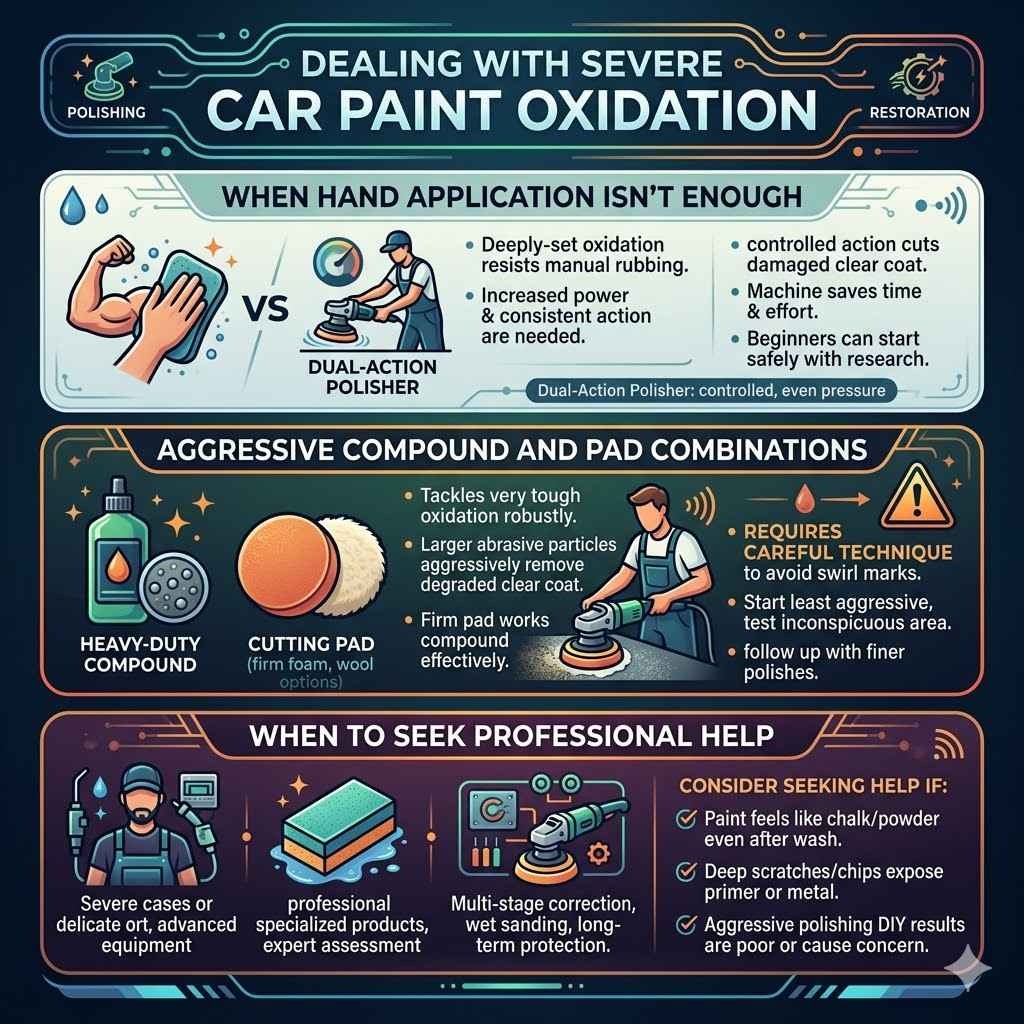
When Hand Application Isn’t Enough
If you’ve tried hand application with standard rubbing compounds and the oxidation is still stubbornly present, it’s time to consider using a machine polisher. The increased power and consistent action can tackle tougher oxidation levels.
When oxidation is deep-set, simply rubbing with a pad by hand might not have enough power to remove it effectively. This is where a machine polisher becomes invaluable. A dual-action polisher, in particular, can apply consistent pressure and speed across the surface.
This controlled action helps to cut through the damaged clear coat much more efficiently than manual labor. It allows for deeper oxidation removal and can save you significant time and effort, especially on larger vehicles.
If you’re hesitant about using a machine polisher, consider renting one or seeking help from a detailer. However, with proper research and careful practice on a test panel, a DA polisher can be used safely by beginners. Always start with the least abrasive pad and compound combination and increase aggressiveness only if necessary.
Aggressive Compound and Pad Combinations
For very severe oxidation, you might need to use a more aggressive rubbing compound paired with a cutting pad. This combination will remove the damaged layer faster, but it requires careful technique to avoid creating excessive swirl marks.
Tackling severe oxidation calls for a robust approach. This typically means pairing a heavy-duty rubbing compound with a firm, cutting-style foam or wool pad. Heavy-duty compounds contain larger abrasive particles designed to aggressively remove degraded clear coat and bring forth a smoother surface beneath.
A cutting pad provides the necessary surface area and firmness to work the compound effectively into the paint without excessive flexing, ensuring maximum abrasive contact.
It is critical to use these aggressive combinations with caution. Always start with the least aggressive compound and pad you think might work and test it in an inconspicuous area. If that doesn’t yield results, then gradually move to more aggressive options. After using aggressive products, you will almost certainly need to follow up with finer polishes to restore the gloss and remove any micro-marring created by the cutting process.
When to Seek Professional Help
There are times when the oxidation is so severe, or the paint is so delicate, that it’s best to leave it to the professionals. They have specialized equipment, products, and expertise to handle challenging situations without causing damage.
Sometimes, despite your best efforts, the paint might be too far gone or too fragile for DIY repair. If you see deep scratches that go through the clear coat, or if the paint feels extremely rough and chalky even after aggressive treatment, it might be time to call in the experts. Professional detailers have access to advanced tools and chemicals that can address issues beyond the scope of typical home detailing.
They can assess the damage accurately and determine the best course of action, whether it’s a more intensive paint correction or even a repaint.
Consider seeking professional help if:
- The paint feels like chalk or powder even after a thorough wash, indicating severe clear coat degradation.
- You notice deep scratches or chips that expose the primer or metal beneath, which requires more than just surface correction.
- You’ve attempted aggressive polishing with a machine polisher and are not achieving the desired results or are concerned about causing damage.
A professional detailer can often perform multi-stage paint correction, wet sanding, and advanced polishing techniques that are difficult for an average car owner to replicate. They can also advise on the best long-term protection options for your specific vehicle and its condition.
Frequently Asked Questions
Question: How long does it take to remove oxidation from a car?
Answer: Removing oxidation can take anywhere from 2-3 hours for a small to medium-sized car with moderate oxidation using hand application, to a full day or more for larger vehicles or those with severe oxidation, especially if you are also polishing and waxing.
Question: Can I remove oxidation with just car wax?
Answer: No, car wax alone cannot remove oxidation. Wax is a protectant and adds shine, but it doesn’t contain the abrasives needed to cut away the damaged, chalky layer of clear coat. You need a rubbing compound or oxidation remover first.
Question: Is rubbing compound bad for my car’s paint?
Answer: Rubbing compound is not inherently bad for your car’s paint when used correctly. It contains abrasives that remove a thin layer of clear coat. However, overusing it or using too much pressure can thin the clear coat excessively, potentially leading to premature wear.
Question: How often should I wash my car to prevent oxidation?
Answer: Washing your car every 1-2 weeks is generally recommended to prevent oxidation. This helps remove contaminants like dirt, dust, bird droppings, and acid rain before they can bond to the paint and damage the clear coat.
Question: What is the difference between a compound and a polish?
Answer: A compound is more aggressive and uses larger abrasives to remove heavier oxidation and scratches. A polish is finer, using smaller abrasives to remove lighter imperfections and enhance gloss after compounding, or on its own for lighter haze.
Wrap Up
You now know how to remove oxidation from car paint fast and effectively. You have the steps to wash, treat, and protect your car’s finish. Regular washing, waxing, and smart parking habits are your best defense against future dullness. With the right products and a little patience, you can restore your car’s shine and keep it looking great for years to come.