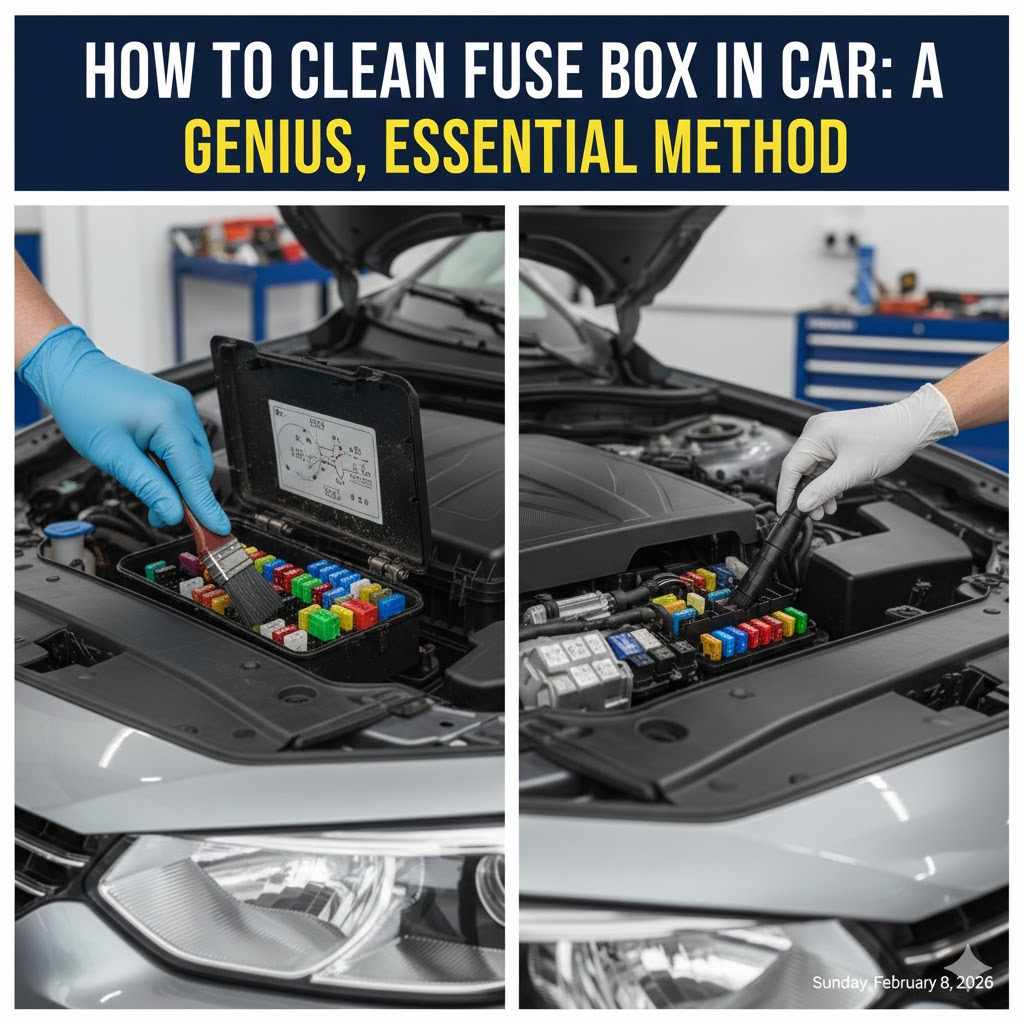
How to Clean a Car Fuse Box (Dust, Corrosion & Flood Damage)
A dirty or corroded car fuse box causes flickering lights, dead accessories, and false fuse failures — but a full clean takes under an hour with electrical contact cleaner, a wire brush, and dielectric grease, never water or WD-40. Skip the battery-disconnect step and you risk a short circuit. This guide covers the full cleaning process, what a flooded fuse box needs differently, and how to stop corrosion from coming back.
Quick Answer
Disconnect the negative battery terminal first, then clear loose dust and debris out of the fuse box with a soft brush and compressed air. For corrosion, spray electrical contact cleaner on the terminals and scrub gently with a small wire brush. Let everything dry fully, coat the contacts with dielectric grease, then reassemble and reconnect the battery.
Why Is Cleaning Your Fuse Box So Important?
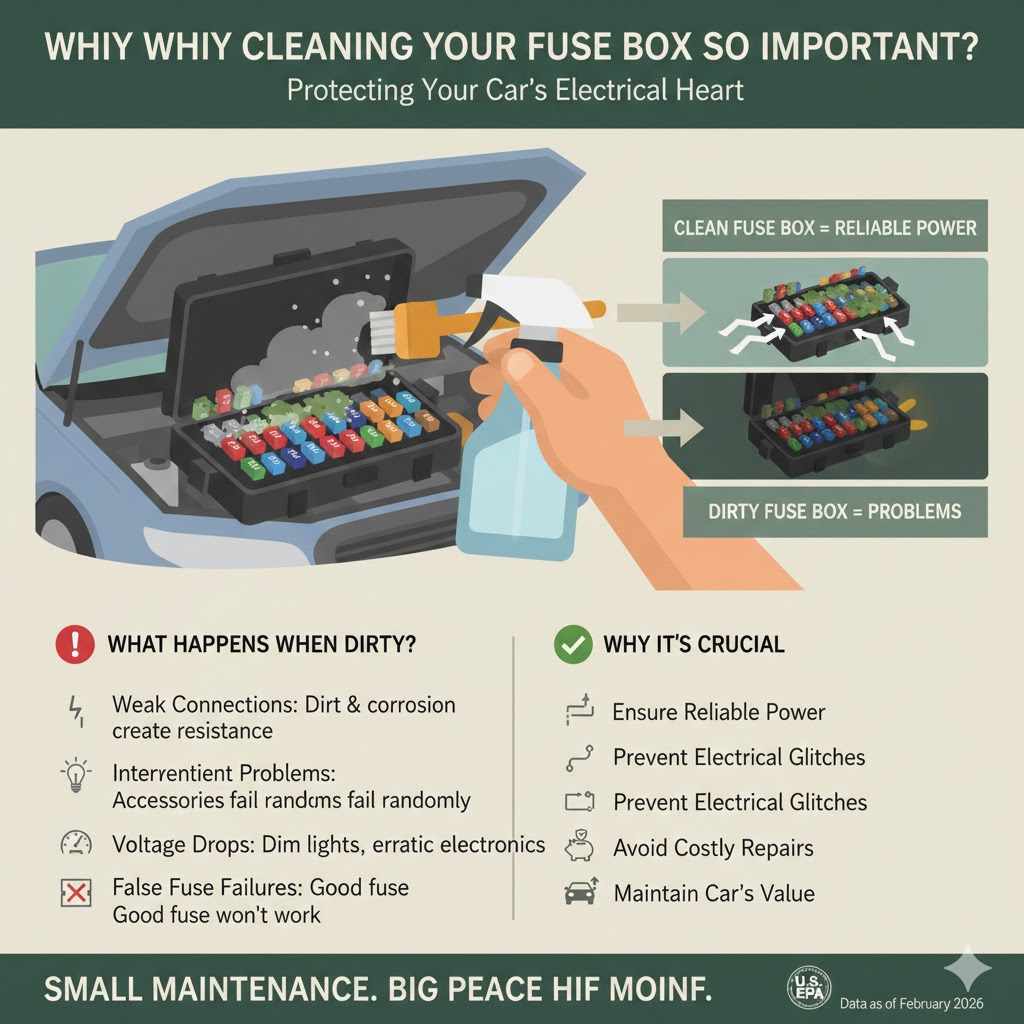
Think of your car’s fuse box as the main electrical hub in your home. It directs power to everything, from your headlights to your stereo. Fuses are the little safety guards that protect these systems from power surges. If a fuse blows, it’s easy to replace. But what happens when the box itself gets dirty?
Over time, dust, moisture, and grime can build up inside the fuse box. This buildup can lead to a bigger problem: corrosion. Corrosion is that crusty white, green, or bluish stuff you might see on metal parts. It acts like a roadblock for electricity, preventing it from flowing properly.
What Happens When a Fuse Box Is Dirty or Corroded?
- Weak Connections: Dirt and corrosion create resistance, weakening the electrical connection between the fuse and the terminal.
- Intermittent Problems: This weak connection can cause accessories to work one minute and fail the next. This is why your power windows might suddenly stop working on a rainy day.
- Voltage Drops: Poor connections can cause a drop in voltage, making lights dim or electronic modules behave erratically.
- False Fuse Failures: Sometimes, a perfectly good fuse might not work simply because the terminal it’s plugged into is too dirty to make a connection.
By keeping your fuse box clean, you ensure a reliable flow of electricity to all parts of your car. It’s a small bit of maintenance that prevents big headaches down the road and can save you a costly trip to the mechanic.
Corrosion can get bad enough that a connection fails outright, not just weakens. In an OnAllCylinders “Ask Away” column, automotive writer Jeff Smith described a mechanic’s crude workaround for a similarly corroded fuse box connection: giving the box a swift kick to jolt the contacts back together. It worked, but only temporarily — a proper cleaning fixes the actual problem instead of relying on a lucky bump.
Signs You Need to Clean Your Car’s Fuse Box
Your car will often give you clues that its electrical nerve center needs attention. If you notice any of the following symptoms, a dirty fuse box is a likely culprit.
Common Symptoms of a Dirty Fuse Box
- Flickering Lights: Your headlights, interior lights, or dashboard lights may flicker or seem dimmer than usual.
- Malfunctioning Accessories: The radio, power windows, windshield wipers, or air conditioning might work intermittently or not at all.
- Fuses Blowing Repeatedly: If you replace a fuse and it blows again quickly without an obvious cause, a poor connection could be generating excess heat.
- Engine Starting Issues: In some cases, a corroded connection to a critical component like the fuel pump relay can prevent the car from starting.
- Visible Corrosion: The most obvious sign is seeing a white, green, or blue powdery substance on the fuses or the metal terminals inside the box.
If you see any of these signs, don’t panic. A quick inspection and cleaning are all it takes to solve the problem most of the time.
Safety First: Your Pre-Cleaning Checklist
Before we touch anything, let’s talk about safety. We are working with your car’s electrical system, so taking a few simple precautions is non-negotiable. It’s easy, and it ensures you and your car stay safe.
- Work in a Safe Space: Park your car on a flat, level surface, preferably in a well-lit and well-ventilated area like an open garage or driveway. Turn the engine off and make sure the parking brake is engaged.
- Wear Protective Gear: Put on a pair of safety glasses to protect your eyes from dust or cleaning sprays. A pair of nitrile gloves will keep your hands clean and protect them from any chemicals.
- Disconnect the Battery: This is the most important step. You MUST disconnect the battery before you start working. Use a wrench (usually 10mm) to loosen the nut on the negative (-) terminal. Once loose, slide the cable off the terminal post and tuck it away so it cannot accidentally touch the post again. This cuts all power to the vehicle, preventing any risk of electric shock or short circuits.
- No Water or Household Cleaners: Never, ever use water, soap, Windex, or other household cleaners on your fuse box. They can cause short circuits and more corrosion. We will only use products designed specifically for electronics.
Tools and Materials You’ll Need
You don’t need a fancy mechanic’s toolbox for this job. The supplies are simple and can be found at any auto parts store or online. Having everything ready before you start makes the process smooth and quick.
| Tool / Material | Why You Need It |
|---|---|
| Safety Glasses & Nitrile Gloves | To protect your eyes and hands. |
| Socket Wrench or Wrench Set | To disconnect the negative battery terminal. A 10mm wrench is most common. |
| Soft Bristle Brush | A small paintbrush or a clean toothbrush works perfectly for dusting. |
| Can of Compressed Air | To blow out loose dust and debris from tight spots. |
| Electrical Contact Cleaner | This is a special spray that cleans electronics safely and evaporates without leaving residue. |
| Small Wire Brush or Terminal Cleaner Tool | For gently scrubbing away stubborn corrosion from metal terminals. |
| Clean, Lint-Free Cloths or Microfiber Towels | For wiping away grime and residue. |
| Fuse Puller | Often found clipped inside the fuse box cover, this tool makes removing fuses easy. If not, small needle-nose pliers will work. |
| Dielectric Grease (Optional but highly recommended) | A non-conductive grease that protects electrical connections from moisture and future corrosion. |
Best Fuse Box Cleaning Kit Pick
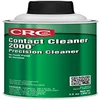
CRC Precision Contact Cleaner 2000 (13 oz)
A fast-evaporating, non-conductive spray that dissolves corrosion and grime on fuse and relay terminals without leaving residue behind.
- Best for: dissolving corrosion and grime on metal fuse box terminals
- Why we picked it: it’s the exact product type this guide’s Steps 5–7 call for — safe on plastic fuse box housings
- Main drawback: pricier than generic contact cleaner, and needs good ventilation to use
Compare more fuse box cleaning options
 Option 1 Dielectric Terminal Grease
|
 Option 2 5-Piece Automotive Fuse Puller Set
|
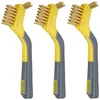 Option 3 Amazon Basics Brass Mini Wire Brush 3-Pack
|
As an Amazon Associate we earn from qualifying purchases.
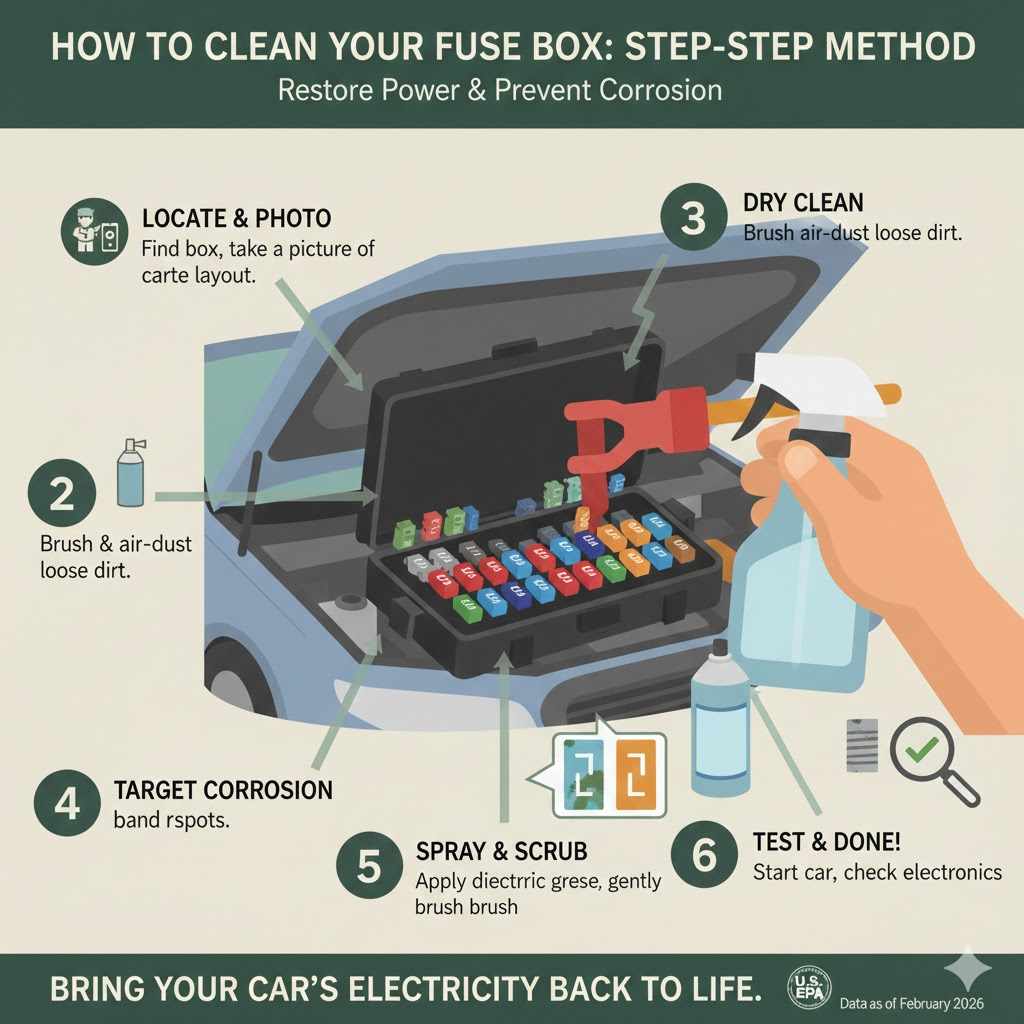
How to Clean Fuse Box in Car: The Step-by-Step Method
Alright, you’ve gathered your tools and your battery is safely disconnected. Now for the fun part! Follow these steps carefully, and your fuse box will be sparkling clean in no time.
Step 1: Locate Your Fuse Box(es)
Most modern cars have at least two fuse boxes.
- Engine Compartment Fuse Box: This is usually a black plastic box located in the engine bay, often near the battery. It controls high-power items like the cooling fans, headlights, and starter motor.
- Interior Fuse Box: This one is found inside the car, typically under the dashboard on the driver’s side, in the glove box, or in the side panel of the dash. It handles interior accessories like the radio, power outlets, and dome lights.
Check your car’s owner’s manual if you’re having trouble finding them. We’ll focus on cleaning the one that seems to be causing issues, but it’s a good idea to inspect both.
Step 2: Open the Fuse Box and Take a Picture
The fuse box cover usually has clips or tabs holding it in place. Gently release them and lift the cover off. Before you do anything else, grab your smartphone and take a clear picture of the fuse layout. This is your secret weapon! It ensures you know exactly where every fuse and relay goes when it’s time to put things back together. The inside of the cover often has a helpful diagram, but a real-life photo is foolproof.
Step 3: Perform a Dry Cleaning First
Let’s start by removing all the loose gunk.
- Use your soft bristle brush to gently sweep away any dust, dirt, cobwebs, or leaves from the surface of the fuses and the surrounding box.
- Grab your can of compressed air. Using short bursts, blow out any remaining debris from between the fuses and relays. This will clear the easy stuff without using any liquids yet.
Step 4: Inspect for and Target Corrosion
Now, look closely at the metal terminals where the fuse blades plug in. Do you see any crusty buildup? It can look different depending on the cause. Reference this table to understand what you’re seeing.
| Corrosion Color | Common Cause | Appearance |
|---|---|---|
| White Powder | Aluminum Oxidation | A dry, chalky white powder on aluminum terminals. |
| Green or Blue-Green Crust | Copper Oxidation | A fuzzy or crusty greenish substance, often caused by moisture reacting with copper terminals. |
| Brown or Reddish Rust | Iron/Steel Oxidation | Classic rust, usually found on steel components within or around the fuse box. |
For any corroded spots, we need to bring out the special cleaner. If the terminals are heavily built up or the corrosion returns quickly after cleaning, see our dedicated guide to cleaning a corroded fuse box, which also covers how to test the connection with a multimeter afterward.
Step 5: Apply Electrical Contact Cleaner
This is where the magic happens. Electrical contact cleaner is designed to dissolve corrosion, oil, and grime without harming plastics or leaving a residue.
- Remove the fuse from the corroded slot using your fuse puller.
- Spray a small amount of the electrical contact cleaner directly onto the corroded metal terminal inside the fuse box.
- Let it sit for a moment to work. You may see it fizz or bubble as it breaks down the corrosion.
Step 6: Gently Scrub the Terminals
For light corrosion, the spray may be enough. For tougher buildup, you’ll need a little elbow grease.
- Take your small wire brush or a dedicated terminal cleaning tool.
- Gently scrub the metal contact where you sprayed the cleaner. Be firm enough to remove the corrosion but gentle enough not to bend or damage the terminal.
- The goal is to reveal shiny, clean metal underneath.
After scrubbing, you can give it one more quick spray with the contact cleaner to flush out any remaining particles.
Step 7: Clean the Fuses Themselves
Don’t forget the fuses! The metal blades on the fuses can also get corroded.
- Spray a little contact cleaner on a clean, lint-free cloth.
- Wipe the metal blades of each fuse you removed until they are clean and shiny.
- Inspect the fuse to make sure the wire inside isn’t broken. If it is, you’ll need to replace it with a new fuse of the exact same amperage rating.
Step 8: Ensure Everything Is Completely Dry
This step is critical. Electricity and liquid do not mix. Even though electrical contact cleaner evaporates quickly, you must be certain the fuse box is 100% dry before you restore power. Let it sit and air dry for at least 10-15 minutes. For extra peace of mind, you can use your can of compressed air to gently blow into the sockets and speed up the drying process.
Step 9: Apply Dielectric Grease (The Prophylactic Step)
Want to prevent corrosion from coming back? Use dielectric grease. This special grease does not conduct electricity, but it creates a waterproof seal around connections, locking out the moisture that causes corrosion. It’s not a substitute for the contact cleaner — contact cleaner dissolves and removes what’s already there, while dielectric grease seals the connection afterward so corrosion has a harder time forming again.
- Apply a very small amount of dielectric grease to the metal blades of each fuse before you put it back in.
- A tiny dab, just enough to create a thin film, is all you need. Don’t goop it on!
- When you insert the fuse, the grease will spread and create a perfect seal.
Step 10: Reassemble and Reconnect
It’s time to put it all back together.
- Referring to the photo you took earlier, carefully place all the fuses and relays back into their correct slots. Press them in firmly until they are seated.
- Replace the fuse box cover and make sure it clips securely in place.
- Finally, re-attach the negative battery cable to the negative (-) terminal and tighten the nut. Make sure the connection is snug.
Step 11: Test Your Work!
The moment of truth! Get in your car, turn the key, and start the engine. Turn on the radio, test the headlights, try the power windows, and check any other accessories that were giving you trouble. If all goes well, everything should be working perfectly. Congratulations, you just performed a vital piece of car maintenance and saved yourself time and money!
For more information on vehicle electrical systems and safety, you can always refer to trusted sources like the National Highway Traffic Safety Administration (NHTSA).
What If Your Fuse Box Got Wet or Flooded? (Different From Everyday Dust or Corrosion)
A flooded fuse box is not the same job as the routine cleaning above. Do not start the engine or reconnect the battery until it’s fully dry. Disconnect the negative battery terminal, remove the fuse box cover, and let the box air dry completely — this takes far longer than the 10-15 minutes used for everyday dust or light corrosion. Relays are especially vulnerable to water intrusion and are often cheap enough to simply replace rather than clean, since a sealed relay housing can trap moisture you can’t see or dry out.
- Fresh water (rain, a car wash, a puddle): Dry everything thoroughly, then clean and inspect connections for corrosion using the same contact cleaner and wire brush method from Steps 5–7 above.
- Salt water or floodwater with debris: Salt is highly corrosive and conductive. Plan on replacing the wiring harness, relays, and power distribution boxes rather than trying to clean them — cleaning alone usually isn’t enough to stop ongoing corrosion.
📊 Corrosion problems from a flood can surface weeks or even months later if every connector inside and around the fuse box isn’t fully cleaned and dried, not just the parts that are easy to reach — Source: AAA Newsroom, flood-damaged vehicle guidance
Frequently Asked Questions (FAQ)
Can I use WD-40 to clean my car’s fuse box?
No, you should not use standard WD-40. While it can displace water, it leaves behind an oily residue that can attract dust and dirt over time, potentially making the problem worse. Always use a dedicated electrical contact cleaner that evaporates completely.
How often should I clean my car’s fuse box?
It’s a good practice to visually inspect your fuse boxes once a year, perhaps when you check your other fluid levels. You only need to perform a full cleaning if you see visible signs of dirt, moisture, or corrosion, or if you start experiencing electrical issues.
What is the white, crusty powder in my fuse box?
That white, chalky substance is typically aluminum oxide. It’s a form of corrosion that occurs when aluminum terminals are exposed to moisture and oxygen. It’s a poor conductor of electricity and should be cleaned off for a reliable connection.
Is it really safe to clean a fuse box myself?
Yes. As long as you follow the single most important safety rule, disconnecting the negative battery terminal, the entire process is very safe. This removes any risk of electric shock or causing a short circuit.
What happens if I put a fuse back in the wrong spot?
Putting a fuse in the wrong slot will cause the circuit it’s supposed to protect to stop working. More importantly, if you put a higher amperage fuse in a slot designed for a lower one, you could overload the circuit and cause serious damage to expensive electronic components. This is why taking a photo beforehand is so crucial.
Can I use baking soda or vinegar to clean the corrosion?
While baking soda and vinegar can be used to clean battery terminal corrosion, it is not recommended for the delicate terminals inside a fuse box. These substances are acidic or alkaline and can cause new corrosion if not perfectly neutralized and rinsed away, which is impossible to do safely inside a sealed fuse box. Stick to electrical contact cleaner.
What if cleaning the fuse box doesn’t fix my problem?
If you’ve thoroughly cleaned the fuse box and your electrical problems persist, the issue may lie elsewhere. The problem could be a faulty relay, a bad ground wire, or an issue with the specific component itself. At that point, it might be time to consult a trusted professional mechanic.
What should I do if my fuse box got wet or flooded?
Do not start the engine. Disconnect the negative battery terminal, remove the fuse box cover, and let it air dry completely before doing anything else. A flooded box needs longer drying and a full relay check, not the quick clean used for everyday dust or light corrosion — see the flood damage section above for the full process.
Can a dirty fuse box stop my car from starting?
Yes, in some cases. If corrosion or grime builds up on the terminal for a critical relay, such as the fuel pump relay, the resulting poor connection can be enough to prevent the engine from starting. Cleaning that specific terminal often restores a reliable connection.
Conclusion: You’ve Got the Power
There you have it: a simple, effective method for cleaning your car’s fuse box. It’s one of those maintenance tasks that sounds intimidating but is actually incredibly easy and rewarding. By taking an hour to clear out some dust and corrosion, you can solve frustrating electrical problems, improve your car’s reliability, and save yourself a significant amount of money on diagnostic fees and repairs.
More importantly, you’ve taken another step toward understanding and caring for your own vehicle. Building that confidence is priceless. So next time your car acts up, remember this guide. Pop the hood, disconnect that battery, and tackle the problem head-on. You’ve got this!
Products related to this article
Sponsored / affiliate links. As an Amazon Associate I earn from qualifying purchases. I may earn additional commission from eligible campaigns.