How to Remove Scratches from Interior Plastic
Many car owners notice small nicks and scuffs on their car’s interior plastic. It happens easily from daily use, like keys bumping against the dashboard or bags rubbing on door panels. For many people new to car care, learning How to Remove Scratches from Interior Plastic can seem a bit tricky at first.
Don’t worry, though. We have a simple plan that anyone can follow to make those annoying marks disappear. This guide will walk you through everything you need to know.
Understanding Interior Plastic Scratches
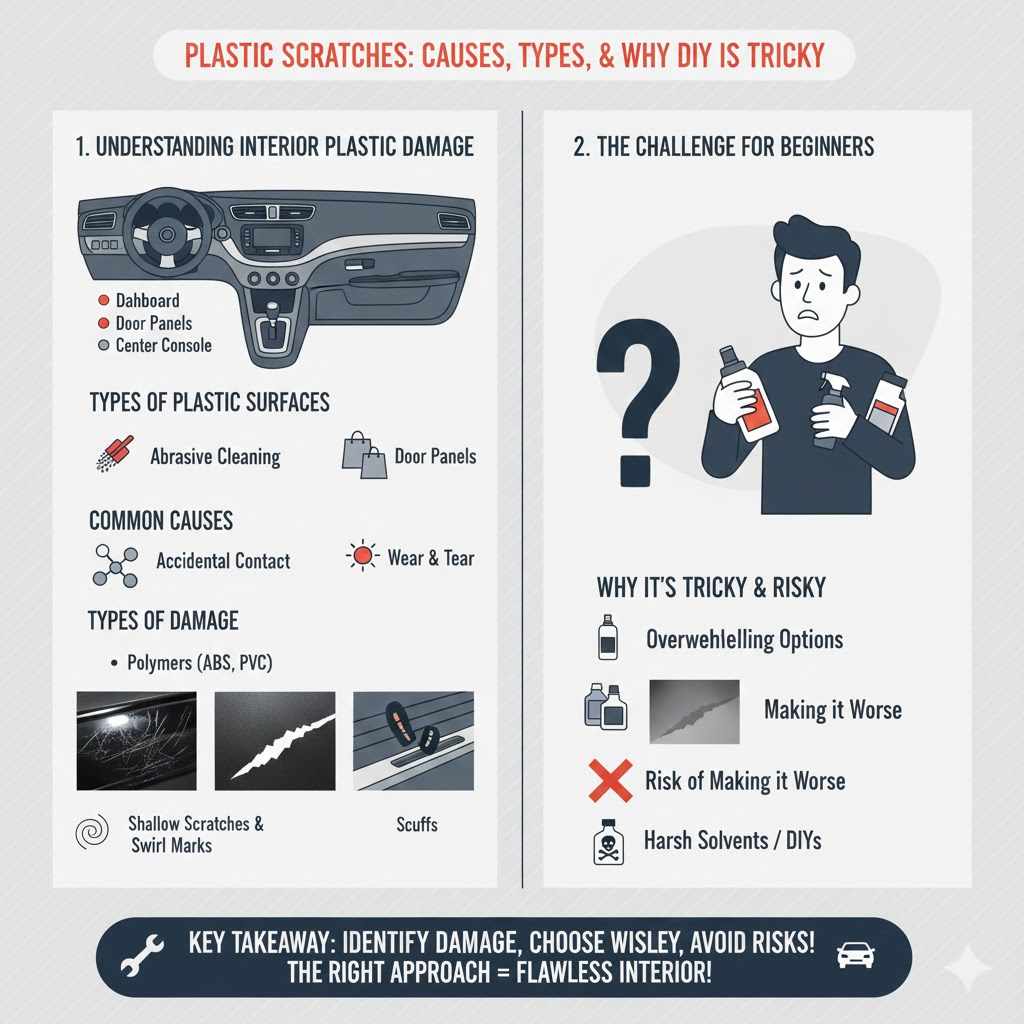
Interior plastic surfaces in vehicles are everywhere. They make up dashboards, door panels, center consoles, and even seat backs. These parts are often made from various types of polymers like ABS (Acrylonitrile Butadiene Styrene) or PVC (Polyvinyl Chloride).
These materials are chosen for their durability and cost-effectiveness, but they can be prone to surface damage. Scratches, scuffs, and swirl marks are common issues that detract from the car’s overall appearance. They can result from everyday wear and tear, cleaning with abrasive materials, or accidental contact with sharp objects.
The depth and type of scratch will influence the best removal method.
Types of Plastic Surface Damage
Surface damage on interior plastics isn’t just one thing. There are several common types car owners encounter. Knowing the difference helps in picking the right fix.
Shallow scratches, often called swirl marks, are light surface abrasions. They usually only affect the clear coat or top layer of the plastic. Deeper scratches go further into the material, sometimes showing the color of the plastic underneath or even a different layer.
Scuffs are a bit different. They are often transferred material from another object, like a shoe or a bag, leaving a discolored mark on the plastic surface. White marks on black plastic are a classic example of a scuff.
Understanding these variations is the first step to a successful repair.
Shallow Scratches and Swirl Marks
Shallow scratches and swirl marks are the most common type of damage you’ll find on your car’s interior plastic. These typically appear as fine lines or cloudy patterns, especially when light hits the surface at an angle. They are usually caused by improper cleaning techniques, such as using dirty rags or harsh cleaning chemicals that abrade the surface.
Even a quick wipe-down with a dry, dusty cloth can introduce these minor abrasions over time. The good news is that these types of marks are usually superficial, meaning they haven’t penetrated deeply into the plastic material. This makes them the easiest to address with simple methods.
Deeper Gouges and Scuffs
Deeper gouges are more serious than shallow scratches. They go beyond the surface layer and actually remove some of the plastic material. These can happen from sharp objects falling onto the dashboard or if something hard scrapes against a door panel.
Scuffs, on the other hand, are often the transfer of material from another object onto the plastic. Think about when your shoes rub against the lower door panel. The black rubber from the shoe leaves a mark on the plastic.
These types of damage require a more targeted approach to restore the plastic’s appearance.
The Challenge for Beginners
For those new to car detailing, figuring out How to Remove Scratches from Interior Plastic can be overwhelming. There are so many products and methods out there, and it’s easy to worry about making the problem worse. Using the wrong product or technique could lead to more damage, like dulling the finish or even removing color.
This is why having a clear, simple guide is so helpful. We aim to demystify the process and give you the confidence to tackle these common interior issues.
Risk of Making Damage Worse
A common fear for beginners is accidentally worsening the scratch or damaging the surrounding plastic. For example, using an abrasive cleaner not meant for automotive plastics can dull a shiny surface. Aggressive rubbing with a rough cloth can create more micro-scratches.
Some DIY solutions found online, like using toothpaste or harsh solvents, can cause discoloration or even melt certain types of plastic. It’s essential to use products specifically designed for car interiors and to follow instructions carefully to avoid these pitfalls and ensure a safe and effective repair.
Effective Methods for Scratch Removal
There are several effective methods to remove scratches from interior plastic. The best approach depends on the severity of the scratch. For light surface marks, a good quality plastic cleaner and a microfiber cloth can often do the trick.
For deeper imperfections, specialized plastic polishes or even heat can be employed. It’s always wise to start with the least aggressive method and only escalate if necessary. Testing any product on an inconspicuous area first is also a smart practice to ensure compatibility with your car’s interior materials.
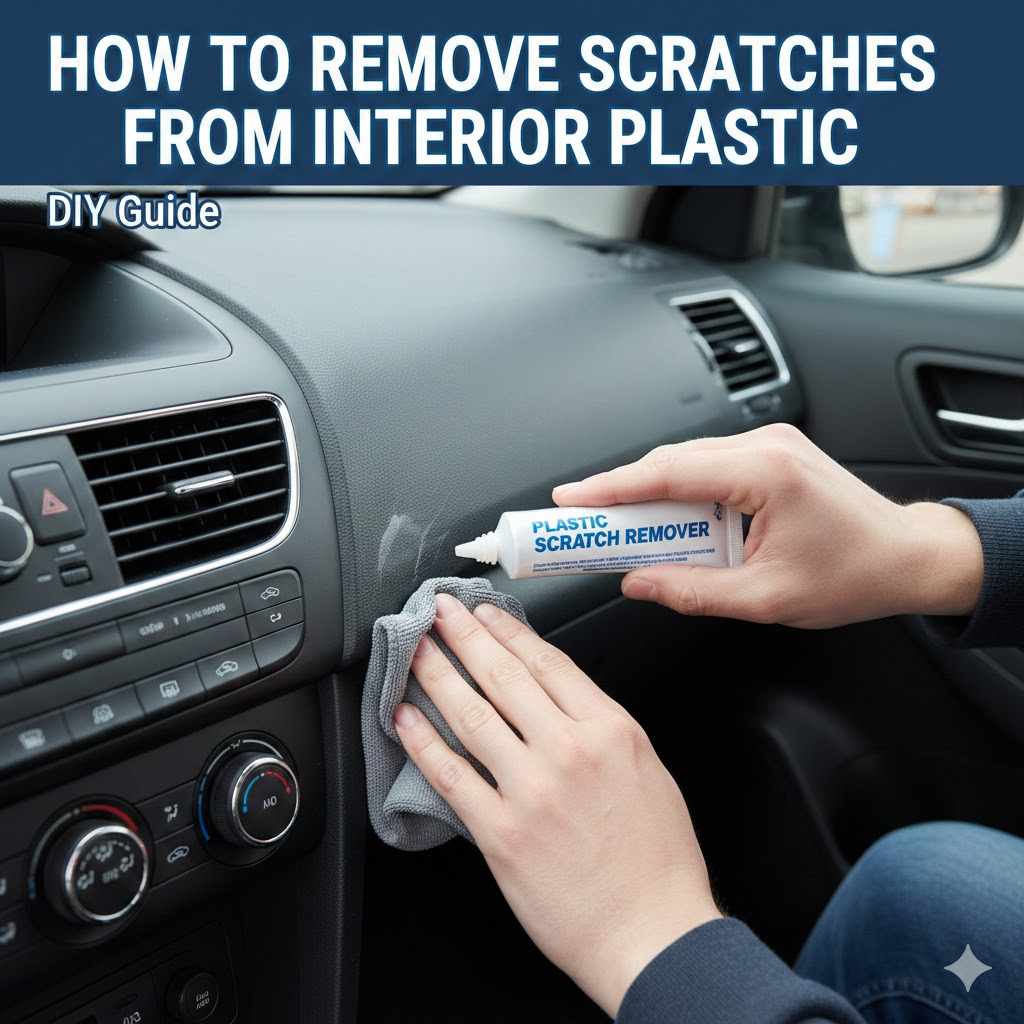
Using Plastic Cleaners and Microfiber Cloths
For minor scuffs and light scratches, a dedicated automotive plastic cleaner is often sufficient. These cleaners are formulated to gently lift dirt and grime without damaging the plastic’s surface. When used with a soft, clean microfiber cloth, they can often buff out very light marks.
The key is to work the cleaner in gently and in a consistent direction, following the line of the scratch if possible. After applying the cleaner, buff the area with a separate clean, dry microfiber cloth to reveal the refreshed surface. This method is simple, safe, and effective for the majority of everyday interior blemishes.
How to Properly Use Plastic Cleaners
Using plastic cleaners correctly is vital for achieving the best results. First, ensure the surface is free of loose dust and debris. You can do this with a quick wipe-down using a separate dry microfiber cloth.
Next, apply a small amount of the plastic cleaner directly onto a clean section of your microfiber cloth, not directly onto the plastic surface itself. Gently wipe the scratched area using light, circular motions or straight strokes, depending on the scratch pattern. Avoid pressing too hard, as this can cause further damage.
After applying the cleaner and gently working the area, use a second, clean, dry microfiber cloth to buff the area. This removes any residue and restores the shine.
Why Microfiber Cloths Are Key
Microfiber cloths are indispensable for car detailing, especially for interior plastic surfaces. Their unique composition of synthetic fibers is incredibly fine, much finer than cotton. This allows them to trap dirt and dust particles effectively without scratching the surface.
They are also highly absorbent, which is useful for applying and wiping away cleaning solutions. Using a clean microfiber cloth ensures that you aren’t reintroducing grit or debris that could cause new scratches. It’s recommended to have multiple clean cloths on hand for different steps: one for cleaning, one for buffing, and one for drying.
Plastic Polishes and Restorers
When simple cleaning isn’t enough, plastic polishes and restorers become your next best option. These products contain very fine abrasives or conditioning agents that can help to smooth out slightly deeper scratches and revive dulled plastic surfaces. Some polishes work by leveling the surface, removing microscopic imperfections to create a smoother finish.
Restorers often contain oils or silicones that can temporarily fill in minor imperfections and bring back a richer, darker color to faded plastics. Always choose a product specifically designed for automotive interior plastics to avoid damage.
Choosing the Right Polish
Selecting the correct plastic polish is crucial for successful scratch removal. Look for products labeled as “plastic polish” or “interior trim restorer.” Some are designed for glossy finishes, while others are better suited for matte or textured plastics. Read the product descriptions carefully to understand what type of plastic it’s intended for and the level of abrasive action it provides.
For light to moderate scratches, a milder polish is usually sufficient. If you’re unsure, it’s always best to start with a less aggressive option. Many reputable brands offer kits or specific products for different plastic types found in car interiors.
Application Techniques for Polishes
Applying plastic polish correctly requires patience and a gentle touch. Begin by thoroughly cleaning the area to remove any dirt or debris. Apply a small amount of polish to a clean applicator pad or a folded microfiber cloth.
Work the polish into the scratched area using light to moderate pressure. For deeper scratches, you might need to make multiple passes. Work in a consistent direction, following the scratch pattern, or use light circular motions.
After applying the polish, allow it to haze slightly according to the product instructions. Then, buff off the residue with a clean, dry microfiber cloth. Repeat if necessary, inspecting your progress.
Heat Gun or Hair Dryer Method (with Caution)
For certain types of plastic, controlled heat can be a surprisingly effective way to address scratches. This method involves using a heat gun or a hair dryer on a low setting to gently warm the surface of the plastic. The heat causes the plastic to become more pliable, allowing minor scratches to ‘flow’ and fill themselves in.
However, this method requires extreme caution. Too much heat can melt, warp, or discolor the plastic, causing irreversible damage. It is best suited for specific types of semi-gloss or matte plastics and should only be attempted by those who are comfortable with its risks, after extensive research and practice on scrap material.
When to Consider Heat
The heat method is typically considered a last resort for minor to moderate surface scratches on specific types of interior plastic. It works best on plastics that have a slightly softer surface or a finish that can be easily manipulated by warmth. For instance, some dashboard trims or textured door panel inserts might respond well.
It’s generally not recommended for soft-touch plastics, painted surfaces, or clear plastic components, as heat can easily damage these. Before attempting this, it is essential to identify the type of plastic you are working with and understand its heat tolerance. Always test on an inconspicuous area first.
Precautions and Safety
Using a heat gun or hair dryer requires significant caution. Always use the lowest heat setting and keep the tool moving constantly to avoid concentrating heat on one spot. Hold the heat source at least 6-10 inches away from the plastic surface.
Observe the plastic closely for any signs of melting or discoloration. If you see any, immediately move the heat source away. It’s also wise to wear gloves to protect your hands and work in a well-ventilated area.
Never use excessive force, as the goal is to gently encourage the plastic to reform, not to melt it away.
Restoring Heavily Damaged Plastic
When interior plastic has suffered significant damage, such as deep gouges or widespread scuffs, more advanced techniques might be necessary. These can include specialized plastic repair fillers, sanding, and even painting or dyeing. The goal here is to rebuild the damaged area and restore its original appearance as closely as possible.
This process is more involved and requires careful attention to detail and the right materials to achieve professional-looking results. It’s a good idea to practice these techniques on a spare piece of plastic before working on your car’s interior.
Using Plastic Repair Fillers
For deep scratches and gouges that have removed material, plastic repair fillers can be used to fill the void. These fillers are typically two-part epoxies or specialized plastic compounds that harden to a durable finish. The process involves cleaning the damaged area thoroughly, then carefully applying the filler to rebuild the missing material.
Once cured, the hardened filler can be sanded smooth to match the surrounding surface. This requires a steady hand and careful application to ensure the filler blends seamlessly with the original plastic. It’s a great way to repair significant damage that would otherwise be impossible to remove.
Types of Plastic Fillers
There are several types of plastic repair fillers available, each suited for different applications. Two-part epoxy fillers are very common and offer excellent strength and durability. They usually come in a paste or putty form and require mixing equal parts of the resin and hardener.
Some kits also include reinforcing mesh for larger repairs. Other options include specialized plastic welding kits, which use heat to melt and fuse plastic rods into the damaged area, or flexible fillers designed for areas that experience a lot of movement. For interior trim, a two-part epoxy filler is often the most accessible and effective choice for beginners.
Sanding and Finishing Techniques
After a plastic filler has cured, the next critical step is sanding. This process aims to make the filled area flush with the surrounding plastic and remove any texture differences. Start with a coarser grit sandpaper, perhaps 220 or 320, to shape the filler.
Gradually move to finer grits, such as 400, 600, and even 1000 grit, to achieve a smooth finish. It’s often best to sand wet, using water to lubricate the sandpaper and reduce dust. After sanding, you may need to use a plastic polish or a fine-grit rubbing compound to blend the repaired area’s finish with the rest of the trim.
For a perfect match, painting or dyeing the repaired area might be necessary.
Painting and Dyeing Interior Trim
If scratches are too deep to be filled or if the plastic has faded significantly, painting or dyeing can be a viable solution. This involves using specialized automotive interior paints or dyes that are designed to adhere to plastic surfaces and withstand UV exposure and temperature changes. The process requires thorough cleaning and preparation of the trim, often involving scuffing the surface to create adhesion.
Multiple thin coats are typically applied to achieve an even finish. This method can completely transform the look of damaged trim and is excellent for restoring uniformity across the interior.
Choosing the Right Paint or Dye
Selecting the correct paint or dye is paramount for a successful interior trim restoration. Automotive interior paints are specifically formulated to bond with plastics and vinyls, and they come in a wide array of colors and finishes, including matte, satin, and gloss. Many brands offer color-matching services or pre-mixed formulations for popular car models.
Interior dyes are often a good choice for refreshing faded black or grey trim. They penetrate the plastic rather than forming a surface layer, offering a more natural look. Always choose products designed for automotive interiors to ensure durability and proper adhesion.
Look for water-based or solvent-based options depending on your preference and the trim material.
Preparation for Painting/Dyeing
Proper preparation is the cornerstone of any successful painting or dyeing job on interior plastics. Begin by thoroughly cleaning the trim piece with an appropriate interior cleaner to remove all dirt, grease, and residue. For painted or dyed surfaces, it’s often necessary to scuff the surface lightly with fine-grit sandpaper (around 400-600 grit) or a scuff pad.
This creates a surface texture that the new paint or dye can adhere to. After scuffing, clean the area again to remove any dust. Mask off any surrounding areas that you do not want to paint or dye using painter’s tape and masking paper.
A good prep job ensures the best possible adhesion and a flawless final finish.
Example: Restoring a Scratched Dashboard Panel
Imagine a car owner with a dashboard panel that has a noticeable scratch from a dropped phone.
- Clean the Area: The owner first cleans the panel thoroughly with an interior cleaner and a microfiber cloth.
- Assess the Scratch: It’s a medium-depth scratch, about 1mm wide and 3mm long. A simple polish won’t fix it.
- Apply Filler: Using a two-part plastic epoxy filler, the owner carefully applies it to the scratch, slightly overfilling it to allow for sanding.
- Cure and Sand: After the filler cures for 24 hours, the owner sands it down using 320, then 600, then 1000 grit sandpaper until it’s flush with the panel.
- Color Match: The panel is a common matte black.
- The owner uses a matte black interior trim spray paint, applying several light coats.
- Finish: Once dry, the panel looks as good as new, with the scratch completely gone and the finish matching the surrounding dashboard.
This step-by-step process shows how a deep scratch can be effectively repaired.
Tools and Supplies You’ll Need
To tackle scratches on your car’s interior plastic, you’ll need a few key supplies. Having the right tools makes the job much easier and the results better. This includes various types of cloths, cleaning agents, and potentially specialized repair products.
Investing in good quality supplies is important, as cheap or incorrect items can lead to more damage.
Essential Cleaning Supplies
- Microfiber Cloths: You’ll need several clean, high-quality microfiber cloths. They are crucial for cleaning, buffing, and drying without causing new scratches.
- Interior Plastic Cleaner: A pH-neutral cleaner specifically designed for automotive interior plastics is essential for removing dirt and grime safely.
- All-Purpose Interior Cleaner: For general cleaning of the interior before addressing scratches, a good all-purpose interior cleaner is helpful.
These basic cleaning supplies form the foundation for any interior detailing task. They ensure the surface is ready for more targeted scratch removal treatments and help maintain the overall cleanliness and appearance of your car’s interior.
Specialized Repair Products
- Plastic Polish: For light scratches and swirl marks, a dedicated plastic polish will gently abrade and smooth the surface.
- Plastic Restorer: These products can help bring back the color and shine to faded or slightly oxidized plastics.
- Plastic Repair Filler: For deeper gouges, a two-part epoxy filler designed for automotive plastics is necessary to rebuild the damaged material.
- Automotive Interior Paint/Dye: If painting or dyeing is required, choose products specifically made for car interiors that match your trim color and finish.
These specialized products offer solutions for more significant damage. They allow you to go beyond basic cleaning and tackle issues that require rebuilding or refinishing the plastic surface. Always read product instructions carefully to ensure you are using them correctly for the best possible outcome.
Tools for Application and Sanding
- Applicator Pads: Foam applicator pads can be useful for applying polishes, fillers, and paints evenly.
- Fine-Grit Sandpaper: For smoothing out fillers or preparing surfaces for paint, you’ll need a range of fine-grit sandpaper (e.g., 320, 600, 1000, 2000 grit).
- Masking Tape: High-quality painter’s tape is essential for protecting areas you don’t want to treat with paint or fillers.
- Heat Gun or Hair Dryer (Optional): For specific techniques, a heat source might be needed, but use with extreme caution.
Having the right tools ensures precision and effectiveness. Sandpaper helps blend repairs, masking tape protects surrounding areas, and applicator pads allow for controlled product application. If you choose to use heat, remember that it’s a delicate process requiring careful handling.
Maintaining Your Interior Plastic After Repair
Once you’ve successfully removed scratches from your interior plastic, maintaining that clean look is key. Regular cleaning and protection will prevent new scratches from forming and keep your interior looking its best. Avoiding harsh chemicals and abrasive materials is crucial.
Applying a protectant can also add a layer of defense against UV damage and everyday wear.
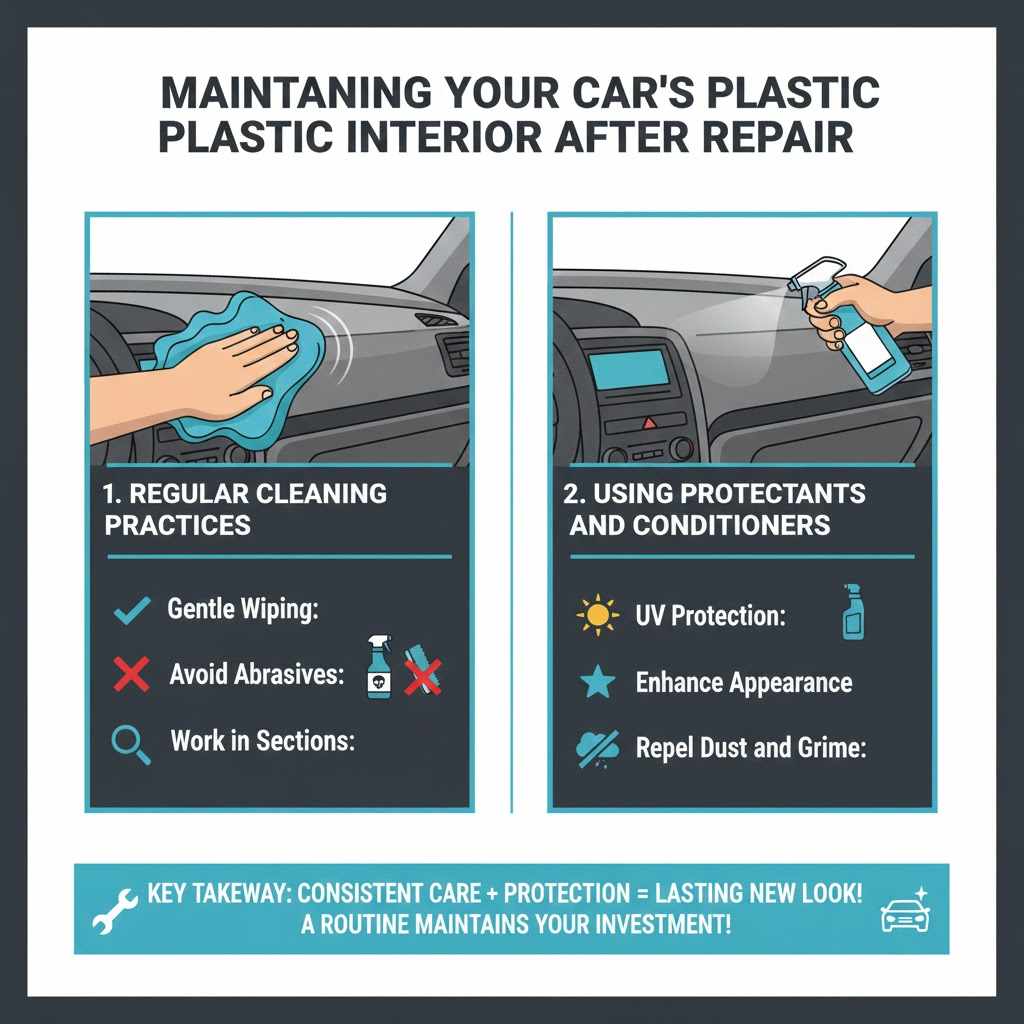
Regular Cleaning Practices
- Gentle Wiping: Always use a clean, dry microfiber cloth for dusting. For more stubborn dirt, use a dedicated interior cleaner specifically formulated for plastics.
- Avoid Abrasives: Never use harsh chemicals like bleach, ammonia, or abrasive household cleaners. These can damage the plastic and its finish.
- Work in Sections: Clean one small area at a time. This prevents cleaners from drying on the surface and causing streaks.
Consistent, gentle cleaning is the best way to keep your interior plastics looking great. By following these simple practices, you can prevent future damage and maintain the refreshed appearance you worked hard to achieve.
Using Protectants and Conditioners
- UV Protection: Many interior protectants contain UV inhibitors that help prevent the plastic from fading and cracking due to sun exposure.
- Enhance Appearance: Protectants can restore a subtle sheen to matte or satin finishes and can temporarily fill in very minor imperfections, giving the plastic a richer look.
- Repel Dust and Grime: Some protectants create a slight anti-static barrier, making surfaces less attractive to dust and easier to wipe clean.
Applying a good quality protectant after cleaning is a valuable step. It not only enhances the look of your interior plastic but also provides a layer of defense against the elements, helping to preserve your repair and keep your car’s interior looking new for longer.
Frequently Asked Questions
Question: How often should I clean my interior plastic surfaces?
Answer: It’s a good idea to dust your interior plastic surfaces with a dry microfiber cloth at least once a week. A more thorough cleaning with a plastic cleaner can be done monthly or as needed, especially after spills or heavy use.
Question: Can I use regular household cleaners on my car’s interior plastic?
Answer: No, it’s strongly advised against using regular household cleaners. Many contain harsh chemicals that can damage, discolor, or dull automotive interior plastics, leading to more problems than they solve.
Question: What is the difference between a plastic cleaner and a plastic polish?
Answer: A plastic cleaner is designed to remove dirt and grime without altering the surface. A plastic polish contains very fine abrasives that can gently remove light scratches and swirl marks by smoothing the plastic surface.
Question: Will a heat gun damage my interior plastic?
Answer: Yes, a heat gun can definitely damage interior plastic if not used with extreme caution. Too much heat or holding it too long in one spot can melt, warp, or discolor the plastic, causing permanent damage.
Question: How can I tell if a scratch is too deep to fix?
Answer: If you can easily feel a significant groove with your fingernail, or if the scratch has removed color from the plastic, it is likely too deep for simple polishing. These deeper scratches may require fillers, sanding, or painting.
Wrap Up
Learning How to Remove Scratches from Interior Plastic is achievable. You can start with simple cleaners and microfiber cloths for light marks. For deeper issues, plastic polishes, fillers, or even careful heat application offer solutions.
Always remember to test products first and work gently. With the right approach and supplies, you can restore your car’s interior to a scratch-free, fresh appearance.