How to Remove Tint From a Car Window Without Scratching
Removing tint from a car window without scratching the glass is a delicate process that requires the right tools and technique. Whether your window film is bubbling, fading, or you simply want a fresh start, this guide walks you through every step to get the job done safely and cleanly.
Simply put, the safest way to remove tint from a car window without scratching is to use a combination of heat, steam, and gentle adhesive removers. Avoid razor blades and harsh scrapers at all costs. Patience and the right supplies are your best tools for a scratch-free result.
Key Takeaways
- Removing tint from a car window without scratching requires heat, patience, and non-abrasive tools.
- Always start with a heat gun or steamer to loosen the adhesive before peeling.
- Avoid metal scrapers — use plastic razors or microfiber cloths instead.
- Adhesive residue is best tackled with isopropyl alcohol or a dedicated adhesive remover.
- Clean and inspect every window thoroughly after removal to ensure no scratches or leftover glue.
What You Need to Remove Car Window Tint Safely
Before you start, gather the right supplies. Using improper tools is the number one cause of scratches during tint removal. The right equipment makes the process smooth and damage-free.
You will need items that generate heat, help you peel the film, and remove adhesive without harming the glass. Avoid anything abrasive like steel wool or sharp metal blades.
- Heat gun or handheld steamer — softens the adhesive so the film peels off easily
- Plastic razor blades or a plastic scraper — gentle on glass, unlike metal alternatives
- Isopropyl alcohol (70% or higher) — dissolves sticky adhesive residue
- Microfiber cloths — lint-free and soft, safe for glass surfaces
- Spray bottle with soapy water — keeps the film moist and reduces friction
- Goo Gone or dedicated adhesive remover — for stubborn glue spots
- Protective gloves and safety glasses — keep your hands and eyes safe from chemicals and heat
Tip: If you do not have a heat gun, a hairdryer on the highest setting works as a backup. However, a dedicated heat gun provides more consistent heat and reduces the risk of overheating the glass.
Having all these items on hand before you begin will prevent you from stopping mid-project and using makeshift tools that could scratch the window.
How to Prepare Your Windows Before Removing Tint
Preparation is just as important as the removal itself. A clean, well-prepared window allows the heat and adhesive remover to work effectively. Skipping this step often leads to patchy removal and extra scraping.
Start by parking your car in a shaded area or indoors. Direct sunlight can make the glass too hot, which interferes with the heat gun and makes the adhesive gummy rather than pliable.
- Roll down the window slightly (1-2 inches) to access the top edge of the tint film
- Wash the window thoroughly with standard glass cleaner to remove dirt and grime
- Dry the glass completely with a microfiber cloth
- Lay down protective plastic sheeting on the door panel and floor to catch drips
- Put on your gloves and safety glasses before applying any heat or chemicals
Warning: Never use a heat gun on a window that is cracked or chipped. The heat can cause the crack to spread, ruining the entire window. If your window has existing damage, consult a professional before attempting tint removal.
Once the glass is clean and dry, you are ready to begin the removal process. Proper preparation reduces the chance of scratches and makes each step more effective.
Step 1: Heat the Tint Film Properly
Heat is your best friend when it comes to removing tint from a car window without scratching. The adhesive softens under heat, allowing the film to release from the glass without forcing or prying.
Hold the heat gun about 6-8 inches away from the glass. Move it in a constant, sweeping motion. Do not hold it in one spot for more than a few seconds, as concentrated heat can crack the glass or burn the tint film.
- Set your heat gun to medium heat (around 300-400°F)
- Start at the top corner of the window and work your way down
- Heat a 6×6 inch section for about 30 seconds
- Test the edge with a plastic razor — if it lifts easily, the adhesive is ready
- Move to the next section and repeat the process
Important: If you notice the tint film turning brown or smoking, you are holding the heat gun too close or too long. Back off immediately and let the glass cool for 60 seconds before resuming.
According to the International Window Film Association, professional installers recommend heating the film to approximately 180-200°F surface temperature for optimal peeling without damaging the glass.
Step 2: Peel Off the Tint Film Cleanly
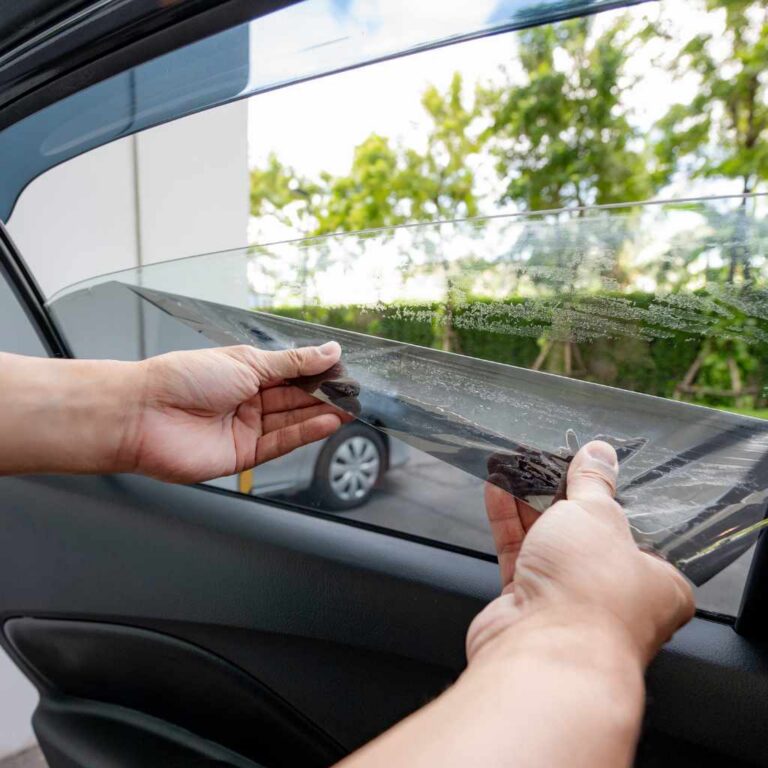
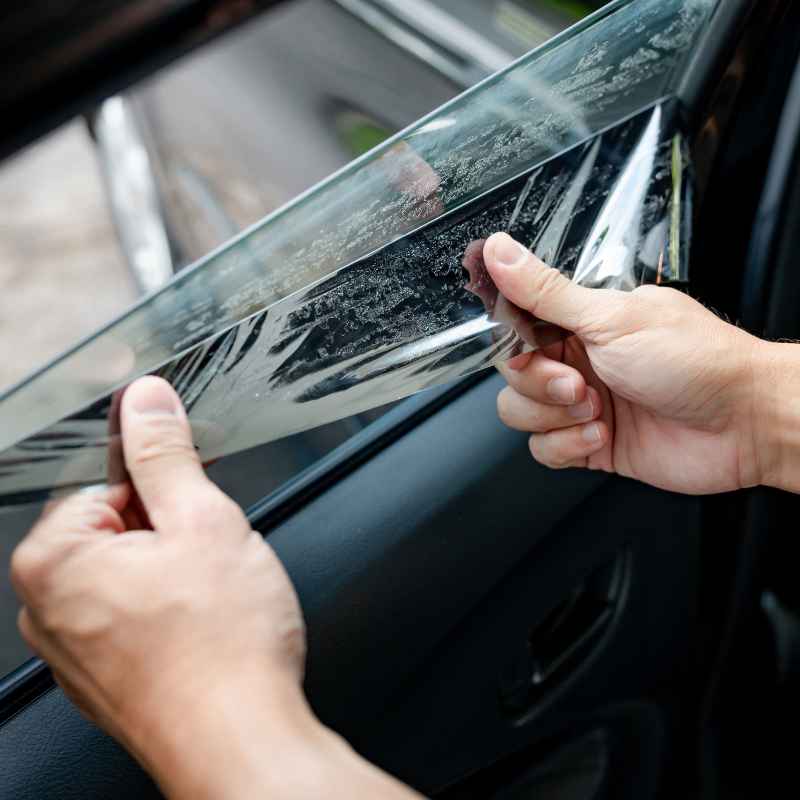
Once the adhesive is soft, peeling the film should require minimal force. If you feel resistance, apply more heat rather than pulling harder. Pulling too hard is a common way to leave adhesive behind and risk scratching the glass with the film’s edge.
Start at the corner you heated first. Lift the edge gently with a plastic razor. Once you have a small flap, grip it with your fingers and pull downward at a 45-degree angle.
- Peel in one continuous motion when possible — stopping and restarting can tear the film
- If the film tears, heat the remaining section again before continuing
- Keep the film taut as you pull to prevent it from bunching up
- Work from top to bottom, section by section
- Discard each piece of film immediately so it does not stick to itself or the car
| Peeling Scenario | Recommended Action |
|---|---|
| Film lifts easily | Continue peeling — heat level is correct |
| Film resists or stretches | Apply more heat for 15-20 seconds |
| Film tears mid-peel | Reheat the torn edge and grab a new flap |
| Adhesive stays on glass | Move to Step 3 — adhesive removal |
Most factory-installed tint films peel off in one or two pieces when adequate heat is applied. Aftermarket films may be more stubborn due to age and adhesive quality. Either way, patience is the key to a scratch-free result.
Step 3: Remove Stubborn Adhesive Residue
After peeling the film, you will likely see leftover adhesive on the glass. This is normal and does not indicate a problem. The adhesive layer is separate from the film and often sticks to the glass when the film is removed.
Removing tint from a car window without scratching means avoiding abrasive scrubbers. Instead, use chemical softeners and gentle friction to dissolve the glue.
- Spray the adhesive residue with isopropyl alcohol or a dedicated adhesive remover
- Let it sit for 2-3 minutes to break down the glue
- Gently rub with a microfiber cloth in circular motions
- For stubborn spots, use a plastic razor at a low angle (15 degrees)
- Reapply adhesive remover as needed — never scrape dry glass
Tip: Mix one part isopropyl alcohol with one part water in a spray bottle. This solution is effective enough to dissolve most adhesives but mild enough not to damage the glass or surrounding trim.
| Adhesive Remover | Effectiveness | Scratch Risk |
|---|---|---|
| Isopropyl alcohol | High for fresh adhesive | Very low |
| Goo Gone or similar | High for aged adhesive | Very low |
| Steam | Moderate | Low |
| White vinegar | Low to moderate | Very low |
| Razor blade (metal) | High | High — not recommended |
If you use a chemical adhesive remover, always test it on a small, hidden area of the window trim first to ensure it does not cause discoloration or damage to the surrounding materials.
Step 4: Clean and Inspect the Window Glass
Once all adhesive is gone, give the window a thorough cleaning. This final step reveals any missed spots and confirms that no scratches occurred during the process.
Use a fresh microfiber cloth and a streak-free glass cleaner. Wipe in horizontal strokes on one side and vertical strokes on the other so you can easily spot any remaining residue.
- Spray the entire window with glass cleaner
- Wipe with a clean, dry microfiber cloth
- Inspect under direct light — use a flashlight if indoors
- Check for any adhesive patches you missed
- Repeat the cleaning process if needed
Important: If you notice fine scratches on the glass after cleaning, you may have used a tool that was too abrasive. Light scratches can often be buffed out using a glass polishing compound and a soft pad. Deep scratches may require professional glass restoration.
According to the Automotive Window Film Association, approximately 30% of DIY tint removal attempts result in minor glass scratches. Taking your time during the cleaning phase helps you catch issues early before they worsen.
Common Mistakes That Cause Scratches During Tint Removal
Even experienced DIYers can accidentally scratch a window during tint removal. Knowing the most common mistakes helps you avoid them entirely. Prevention is far easier than repair.
Most scratches happen because of impatience or using the wrong tool for the job. A few seconds of carelessness can leave permanent marks on your glass.
- Using metal razor blades — even a single pass can leave deep scratches
- Skipping the heating step — cold adhesive causes the film to stick and tear
- Pulling the film too fast — sudden force can make the film edge dig into the glass
- Scraping dry adhesive — always lubricate the surface before scraping
- Using abrasive pads or steel wool — these create micro-scratches that fog the glass
- Working on a dirty window — dirt particles act like sandpaper under your scraper
- Applying too much heat — overheating can crack the glass or damage defroster lines
Warning: Rear windows with built-in defroster lines are especially vulnerable. The defroster grid is printed onto the glass and can be scraped off easily. If your car has rear defroster lines, use only chemical adhesive removers and microfiber cloths — no scraping at all.
By being aware of these common pitfalls, you can adjust your technique and protect your windows from unnecessary damage. A careful approach always yields better results than rushing through the job.
Alternative Methods for Stubborn Tint Removal
Sometimes the standard heat-and-peel method does not work well, especially on very old tint or multiple layers of film. In those cases, alternative techniques can help without increasing the risk of scratches.
The ammonia bag method is a popular professional technique. It uses ammonia fumes to break down the adhesive over several hours, making the film release almost effortlessly.
- Mix one part ammonia with three parts water in a spray bottle
- Spray the solution onto the interior side of the tinted window
- Cover the window with a black trash bag and tape the edges
- Park the car in direct sunlight for 2-4 hours
- Remove the bag and peel the film — it should come off easily
Tip: The ammonia bag method works particularly well for older tint films that have been on the window for 5+ years. The extended exposure time softens even the most stubborn adhesives.
| Method | Time Required | Scratch Risk | Best For |
|---|---|---|---|
| Heat gun + peel | 15-30 min per window | Low | Standard aftermarket tint |
| Steamer | 20-40 min per window | Very low | All tint types, safe for defrosters |
| Ammonia bag | 2-4 hours | Very low | Old, brittle, or multiple-layer tint |
| Chemical spray + bag | 1-3 hours | Very low | Stubborn adhesive on sensitive glass |
The ammonia method is the gentlest option for your glass. However, ammonia fumes are strong, so work in a well-ventilated area and wear a mask. Never use this method if you have respiratory sensitivities.
Frequently Asked Questions
Can I remove car window tint without a heat gun?
Yes. A handheld steamer or even a strong hairdryer can substitute for a heat gun. The key is consistent, gentle heat that softens the adhesive without damaging the glass.
Steaming is actually preferred for windows with defroster lines because it is less intense than direct heat from a gun.
Will removing tint damage my rear defroster lines?
It can if you use metal scrapers or abrasive tools. Defroster lines are fragile and can be scraped off easily. For rear windows, use only chemical adhesive removers, steam, or the ammonia bag method.
Never scrape across the defroster lines.
How long does it take to remove tint from all car windows?
For a standard sedan with four side windows and a rear window, plan for 2-4 hours total. Front windows are usually the fastest (15-20 minutes each), while the rear window with defroster lines takes longer due to the extra caution required.
What is the best adhesive remover for car window tint?
Isopropyl alcohol (70% or higher) is the safest and most affordable option. For older or more stubborn adhesive, Goo Gone or a dedicated automotive adhesive remover works well. Avoid acetone-based removers as they can damage the window trim and paint.
Can I retint the window immediately after removal?
No. Wait at least 24-48 hours after removal before applying new tint. This allows any remaining adhesive solvents to evaporate and ensures the glass is completely clean and dry.
New tint applied to a surface with residue will not stick properly and may bubble.
Final Thoughts
Removing tint from a car window without scratching comes down to using the right tools, applying consistent heat, and never rushing the peeling process. Stick with plastic scrapers, microfiber cloths, and chemical adhesive removers. A patient approach saves you from costly glass repairs and leaves you with a clean, clear window ready for new tint or a fresh look.
Products related to this article
Sponsored / affiliate links. As an Amazon Associate I earn from qualifying purchases. I may earn additional commission from eligible campaigns.