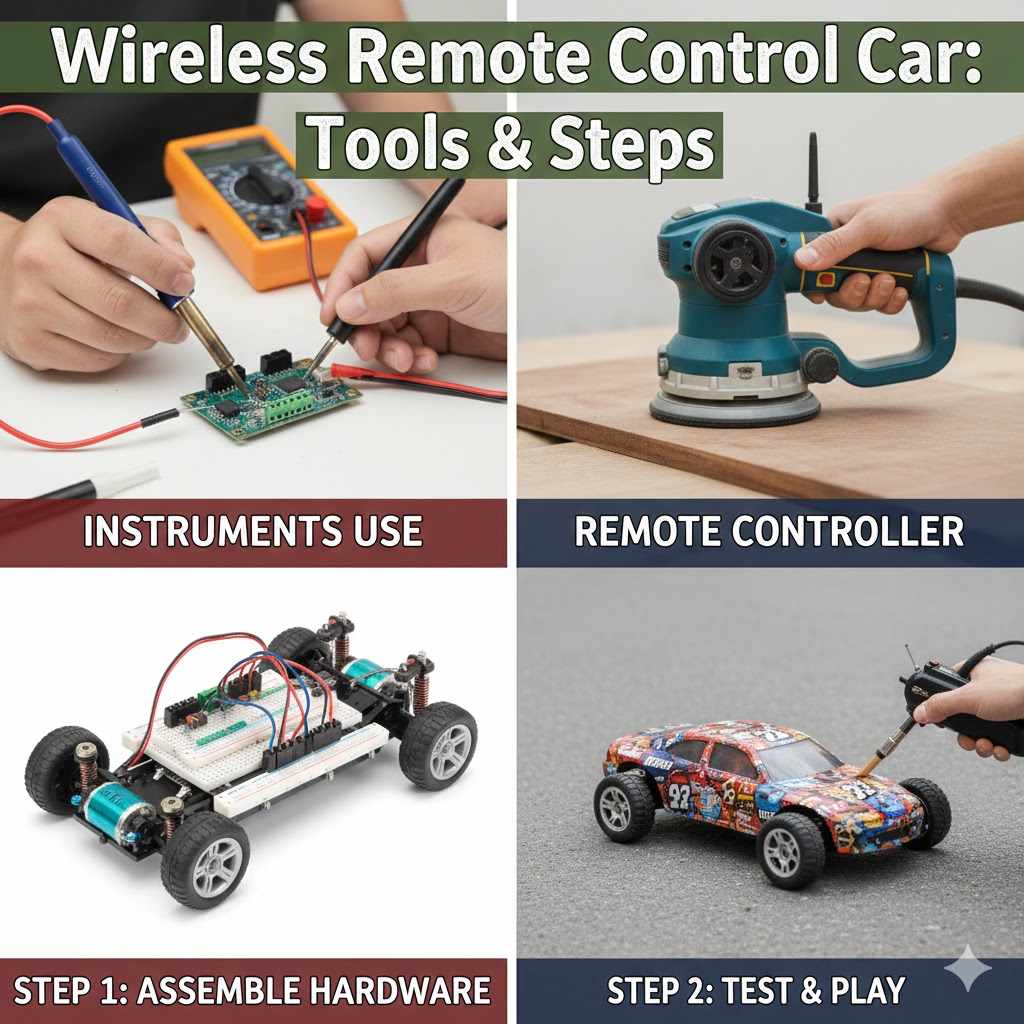
Instrunment Use For Making A Wireless Remote Control Car And How To Make It
Making a wireless remote control car involves choosing the right components, like a transmitter and receiver, motors, and a power source. You’ll connect these parts to create a working model car that you can control from a distance.
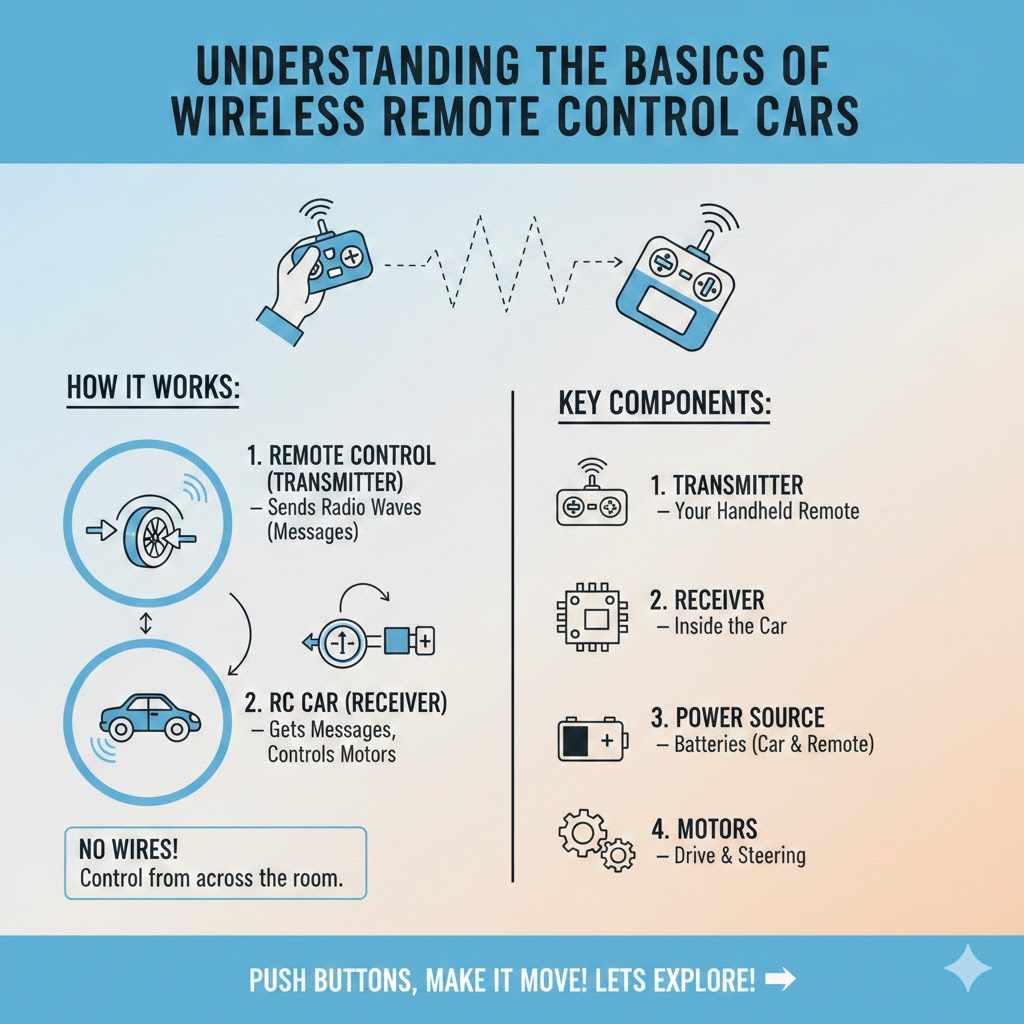
Understanding the Basics of Wireless Remote Control Cars
A wireless remote control car works using radio waves. Think of it like a walkie-talkie. One device sends a message.
Another device receives that message. For your car, the remote control is the transmitter. The car itself has a receiver.
The receiver tells the car’s motors what to do.
This system allows you to control movement without wires. It’s what makes RC cars so much fun. You can steer and drive them from across a room or even further.
The key is having a reliable connection between the remote and the car.
You’ll need a few main parts to get started. These are the building blocks of any RC car. We will explore each one in detail.
Getting these right is the first step to success. It’s exciting to think about making something move just by pushing buttons.
Your First RC Car Build: Essential Instruments and Parts
Let’s talk about the tools and parts you’ll need. You don’t need a whole workshop. Simple instruments work well for most projects.
This makes building an RC car accessible for everyone. It’s about having the right things at hand.
For tools, you’ll want:
- A small Phillips head screwdriver set.
- Wire strippers.
- A soldering iron and solder (optional but very helpful).
- Pliers (needle-nose are great).
- A hobby knife or box cutter.
- Safety glasses! Always protect your eyes.
These are common tools. Many people already have them. If not, they are easy to find at hardware stores or online.
They are not complicated to use. They help you put the car together neatly and securely.
Now, for the car parts:
- Chassis: This is the car’s frame. You can buy a pre-made chassis. Or, you can make one from sturdy plastic or wood.
- Motors: You’ll need at least one DC motor. Often, two are used for steering and driving.
- Wheels and Tires: Pick wheels that fit your motors and chassis.
- Battery Pack: This powers the car.
- Remote Control Transmitter and Receiver: This is the wireless part. You can buy simple 2-channel or 4-channel systems.
- Electronic Speed Controller (ESC): This controls the speed of the motor(s).
- Servo Motor: This is used for steering. It turns the wheels left or right.
- Wires and Connectors: To connect all the parts.
Each of these parts plays a crucial role. Choosing good quality parts makes a big difference. It means your car will work better.
It will also last longer. Don’t worry if it seems like a lot. We’ll go step-by-step.
Understanding Your Transmitter & Receiver
The transmitter is what you hold in your hand. It has joysticks or buttons. Pressing them sends signals.
The receiver is a small box on your car. It picks up those signals. These signals then tell the motors what to do.
Most beginner systems use 27MHz or 49MHz frequencies. Higher frequencies like 2.4GHz offer better range and less interference. For a first build, a simple 2-channel system is often best.
One channel for forward/reverse. One channel for left/right steering.
The Heart of the Car: Motors and Power
Motors are what make your car move. For most RC cars, small DC motors are used. These motors spin a shaft.
This shaft can then turn the wheels. You can get motors that come with gears attached. These are called geared motors.
Geared motors are great because they offer more torque. Torque means turning power. This helps the car move even on rough surfaces.
It also helps it climb small inclines. The gear ratio affects speed and power. A higher gear ratio means more torque but less speed.
For steering, a special motor called a servo is used. A servo can move to a specific angle. It’s perfect for turning wheels left and right.
You control how far it turns. This allows for precise steering. It’s not just on or off like a simple motor.
Powering all of this is your battery pack. For simple cars, AA or AAA batteries in a holder work. For more powerful builds, LiPo (Lithium Polymer) batteries are common.
These are rechargeable and offer great power. But they need careful handling and specific chargers. For beginners, sticking to alkaline or NiMH (Nickel-Metal Hydride) batteries is safer and easier.
The battery needs to be strong enough. It must power the motors and the receiver system. Always check the voltage requirements for your components.
You want to match the battery voltage to what your electronics need. Too much voltage can fry parts. Too little means they won’t work.
Battery Power Tips
Battery Holder: Choose one that fits your batteries and has easy-to-use connectors.
Battery Type: Alkaline for simplicity, NiMH for reusability, LiPo for advanced power (with caution).
Voltage Check: Always match battery voltage to your motors and electronics.
Runtime: More battery capacity (mAh) means longer run time.
Wiring It All Up: Connecting the Components
Connecting the parts is where it all comes together. This is where your wires, connectors, and maybe soldering iron come in. The transmitter sends signals.
The receiver gets them. The receiver then tells the Electronic Speed Controller (ESC) what to do.
The ESC controls the DC motor’s speed and direction. It takes power from the battery. It sends the right amount of power to the motor.
When you push forward on the remote, the ESC tells the motor to spin forward. When you pull back, it tells the motor to spin backward.
The steering servo is usually connected directly to the receiver. The receiver has specific ports for steering and motor control. You just plug the wires in.
Make sure you plug them into the correct ports. They are usually labeled.
It’s important to keep wires neat. Tangled wires can snag on things. They can also short-circuit.
Use zip ties or electrical tape to keep them tidy. This makes your car look cleaner. It also helps prevent problems down the line.
Safety first with all wiring connections.
If you’re soldering, take your time. Good solder joints are strong and reliable. Cold solder joints can cause intermittent problems.
Watch some basic soldering tutorials online if you’re new to it. Practice on some scrap wires first.
Wiring Checklist
Receiver Power: Connect battery to receiver via ESC.
Motor Connection: Connect ESC to the drive motor.
Steering Servo: Connect servo to the steering channel on the receiver.
Antenna: Extend the receiver’s antenna for best signal.
Wire Management: Keep wires tidy and secure.
Building the Chassis and Mounting Components
The chassis is the foundation of your car. A strong chassis keeps everything together. It protects your electronics.
For a first build, buying a simple RC car chassis kit is a good idea. These kits come with instructions. They make assembly easier.
If you’re making your own chassis, think about the layout. Where will the motors go? Where will the battery sit?
How will the receiver and ESC be mounted? You want to balance the weight. This helps with handling.
It makes the car stable.
Mount the motors securely. They shouldn’t wobble. You can use small screws or strong double-sided tape.
Connect the drive shaft from the motor to the wheels. If you have a separate axle, mount that first. Then attach the wheels to the axle.
Mount the steering servo near the front wheels. Connect its arm to a steering linkage. This linkage will connect to the front wheels.
When the servo moves, it pushes or pulls the linkage. This turns the wheels. Make sure the steering moves freely.
The receiver and ESC are often mounted on top of the chassis. Use double-sided foam tape. This helps absorb vibrations.
It keeps them from falling off. Make sure they are not too close to hot components. They need some air circulation.
Don’t forget about the battery. It’s often the heaviest part. Place it low on the chassis.
This lowers the car’s center of gravity. A lower center of gravity means less chance of tipping over. Secure it well.
It shouldn’t slide around.
The “Brains” of the Operation: Transmitter and Receiver Signals
The transmitter and receiver system is the core of wireless control. You’ll usually buy these as a matched set. The transmitter has an internal antenna.
The receiver on the car also has an antenna. This antenna is often a wire that you should extend.
The receiver has several channels. Each channel is controlled by a different stick or button on the transmitter. For a car, you typically need at least two channels: one for throttle (forward/reverse) and one for steering (left/right).
When you move the joystick on the transmitter, it sends a radio signal. This signal travels through the air to the receiver. The receiver decodes this signal.
It then sends an electrical command to the ESC and the servo.
The ESC receives the throttle signal. It translates this into motor speed. The servo receives the steering signal.
It translates this into wheel angle. It’s a chain reaction. Each part depends on the one before it.
Binding is an important step for some systems. This is how the transmitter and receiver “learn” each other. It creates a unique connection.
This prevents other people’s remotes from controlling your car. Follow the instructions that come with your transmitter and receiver set. Binding is usually a simple process.
Putting It All Together: A Step-by-Step Walkthrough
Let’s imagine building a simple, rear-wheel-drive car. This is a great starting point.
- Prepare the Chassis: Lay out your chassis. Identify mounting points for motors, battery, receiver, and ESC.
- Mount Drive Motor: Attach the DC motor to the chassis. Connect it to the rear axle or drive shaft.
- Mount Battery Holder: Secure the battery holder. Place it low and central for balance.
- Mount Receiver and ESC: Fix the receiver and ESC to the chassis. Ensure they are accessible for wiring.
- Wire the Drive System: Connect the ESC to the drive motor. Connect the battery pack to the ESC.
- Wire the Steering (if applicable): Mount the steering servo. Connect it to the correct channel on the receiver. Link the servo arm to your steering mechanism for the front wheels.
- Install Wheels: Attach the wheels to the axles. Make sure they spin freely.
- Connect Transmitter: Ensure your transmitter has batteries.
- Bind the System: Follow your transmitter/receiver instructions to bind them.
- Test: Power on the car. Test the throttle and steering functions. Make small adjustments as needed.
This is a basic flow. Your specific parts might have slightly different steps. Always refer to the manuals that come with your components.
They offer the most accurate guidance. Taking your time here is key. Double-check connections before powering up.
Contrast Matrix: Building vs. Buying
Myth: Building an RC car is always more expensive than buying one.
Reality: For basic models, building can be similar in cost. But for custom features or high performance, building offers more value. It also teaches you more!
Myth: Building requires advanced technical skills.
Reality: Simple builds use basic tools and plug-and-play components. Complexity increases with advanced features, but learning is step-by-step.
Myth: Ready-to-run (RTR) cars are always better.
Reality: RTR cars are convenient. But built cars often offer better performance for the money. They also allow for easier upgrades and repairs.
Troubleshooting Common Issues
Even with careful building, things can go wrong. This is normal. Don’t get discouraged.
Most problems are simple to fix. They often come down to wiring or power.
Car doesn’t move: Check battery connections. Make sure the battery is charged. Is the ESC plugged into the receiver correctly?
Is the motor connected to the ESC?
Steering doesn’t work: Is the servo plugged into the correct channel on the receiver? Is the servo itself connected to power? Check the servo linkage.
Is it binding or stuck?
Car moves erratically: This can be a sign of a weak signal. Ensure the receiver antenna is extended. Check for sources of radio interference nearby.
Make sure all wire connections are secure.
Motors get hot quickly: This could mean too much strain on the motor. Are the wheels rubbing on anything? Is the car too heavy?
Or the motor might be too small for the job.
I remember building my first car. The steering was all backwards. Forward on the stick made the wheels turn right.
It was so frustrating! I checked the servo connection on the receiver. I realized I had plugged it into the wrong channel.
Swapping it fixed it right away. It was a simple mistake but felt huge at the time.
Enhancements and Next Steps
Once your basic car is working, you can think about upgrades. You can add lights. You could get a more powerful motor.
Maybe a better battery for longer run times. Or perhaps a more advanced transmitter with more channels.
You could also explore different types of chassis. Want to go off-road? Look into trucks or buggies with suspension.
Want to go fast? Consider a lower-profile car designed for speed.
Learning about different electronics is also a path. Maybe you want to add sensors. Or control your car with a smartphone.
The world of RC electronics is vast and exciting. Each upgrade teaches you more. It makes your car unique.
Don’t be afraid to experiment. That’s how you learn best. Try different parts.
See what works. What makes your car better? The internet is full of guides and forums.
You can find help for almost any problem or upgrade idea.
Quick Scan: Parts Overview
| Component | Function | Beginner Choice | Advanced Option |
| Chassis | Car’s frame | Plastic kit | Carbon fiber, custom metal |
| Motor | Drives wheels | Simple DC motor (geared) | Brushless motor, high-RPM |
| ESC | Controls motor speed | Brushed ESC | Brushless ESC, sensored |
| Servo | Steers wheels | Standard servo | Digital servo, metal gears |
| Transmitter/Receiver | Wireless control | 2-channel AM/FM | 2.4GHz, multiple channels |
| Battery | Provides power | AA/AAA or NiMH pack | LiPo (2S, 3S) |
Making Your Own Wireless Remote Control System
While buying a transmitter and receiver set is easiest for beginners, you can also build your own. This is more advanced. It requires understanding microcontrollers like Arduino or Raspberry Pi.
You would also need radio modules.
You would program the microcontroller to take input from joysticks or buttons. This input becomes data. This data is sent wirelessly using a radio module.
On the car, another microcontroller and radio module receive the data.
The receiving microcontroller then sends commands to motor drivers and servos. This gives you full control over every aspect. You can create custom control schemes.
You can even add features like telemetry (sending data back from the car). But this is a significant step up in complexity. For your first project, a pre-made system is highly recommended.
The beauty of using microcontrollers is flexibility. You can write code to make your car do exactly what you want. You can experiment with different communication protocols.
You can even use Bluetooth or Wi-Fi for control. This opens up a world of possibilities for custom projects.
Safety First: Important Considerations
Building and operating RC cars involves some safety points. Always wear safety glasses when working with tools or soldering. Ensure your battery is charged correctly.
Overcharging can be dangerous, especially with LiPo batteries.
When operating your car, be aware of your surroundings. Don’t drive it near people or pets. Avoid driving on public roads.
Check local laws regarding RC vehicle operation. Make sure your car is not a hazard to anyone.
If you use LiPo batteries, never puncture them. Store them in a fire-safe bag. Understand their charging and discharging needs.
These batteries are powerful but require respect. For initial builds, simpler battery chemistries reduce risk.
Always turn off the car and the remote when you are finished. This saves battery power. It also prevents accidental activation.
Keep small parts away from young children. They can be a choking hazard.
What This Means for You: Practical Implications
Knowing how to build a wireless remote control car gives you practical skills. You learn about electronics. You learn about basic mechanics.
You develop problem-solving abilities. These are valuable skills in many areas of life. It’s a fun way to learn.
When it’s normal to build one: Anytime you want a custom RC car. When you want to understand how things work. Or simply when you want a fun project.
It’s great for birthdays or holidays. Or just for a rainy afternoon.
When to worry: If components overheat. If wires spark. If batteries swell.
These are signs something is seriously wrong. Stop immediately. Recheck your wiring and connections.
Consult resources or ask for help.
Simple checks: Before turning on, look over all your connections. Make sure wires aren’t frayed. Ensure screws are tight.
Check that nothing is blocking moving parts. These small checks prevent big issues.
Tips for a Successful Build
Here are some quick tips for your build:
- Start Simple: Don’t try to build a complex race car on your first go.
- Read the Manuals: Component instructions are your best friend.
- Organize Your Parts: Keep everything sorted. It makes assembly much smoother.
- Test Each Step: Power up and test functions as you go. Don’t wait until the end.
- Be Patient: Building takes time. Rushing leads to mistakes.
- Ask for Help: Online communities and forums are great resources.
I learned that being patient is the biggest tip. When I first started, I wanted everything done right away. I ended up having to take things apart and redo them.
It was faster in the long run to just take my time and do it right the first time. Double-checking wiring became my habit. It saved me so much headache.

Frequently Asked Questions About Making an RC Car
What is the main instrument needed to make a wireless remote control car?
The most important “instrument” is your transmitter and receiver system. This is what allows for wireless control. You’ll also need basic tools like screwdrivers and wire strippers.
Can I use a regular toy car to make a remote control car?
Yes, you can convert many toy cars. You’ll need to remove their original electronics. Then you’ll add your own motors, receiver, and battery. It’s a common way to start.
What kind of battery is best for an RC car?
For beginners, NiMH (Nickel-Metal Hydride) battery packs are a good choice. They are rechargeable and safe. For more power, LiPo (Lithium Polymer) batteries are used, but they require more careful handling and specific chargers.
How do I control the speed of my RC car?
You control the speed using an Electronic Speed Controller (ESC). The ESC receives signals from your remote receiver. It then tells the drive motor how fast to spin, allowing for forward, reverse, and braking actions.
What is the difference between a brushed and a brushless motor for RC cars?
Brushed motors are simpler, more affordable, and common in beginner RC cars. Brushless motors are more efficient, powerful, and last longer, but they require a special brushless ESC and are more expensive.
Do I need to solder to build an RC car?
Soldering is highly recommended for strong, reliable connections. However, some kits and components come with plug-and-play connectors, allowing you to build without soldering if you prefer.
Conclusion
Building a wireless remote control car is a rewarding journey. It mixes creativity with a bit of technical skill. You’ve learned about the essential parts.
You’ve seen how they connect. Remember to start simple and be patient. The process itself is a great learning experience.
Happy building!