Radiator Install: Proven, Effortless Guide
Installing a car radiator is straightforward with this guide. We’ll simplify the process with clear steps and essential tips, making it easy for any DIYer to complete the job safely and effectively. Get your car cooling like new with confidence!
Why Your Car Needs a Healthy Radiator
Your car’s radiator is like its heart, tirelessly circulating coolant to keep the engine from overheating. When it starts to fail, you might notice strange smells, steam, or your temperature gauge creeping into the red zone. A damaged or old radiator can lead to serious engine problems, which are much more expensive to fix than a simple replacement. But don’t worry! With the right approach, installing a new radiator is a project you can absolutely tackle yourself. This guide is designed to make it as easy and stress-free as possible, so you can get back on the road with a cool, happy engine.
Gathering Your Essential Tools and Supplies
Before we get our hands dirty, let’s assemble everything we need. Having all your tools and parts ready makes the swap much smoother. Think of it like setting up your workbench before starting a woodworking project – it saves time and frustration!
What You’ll Need:
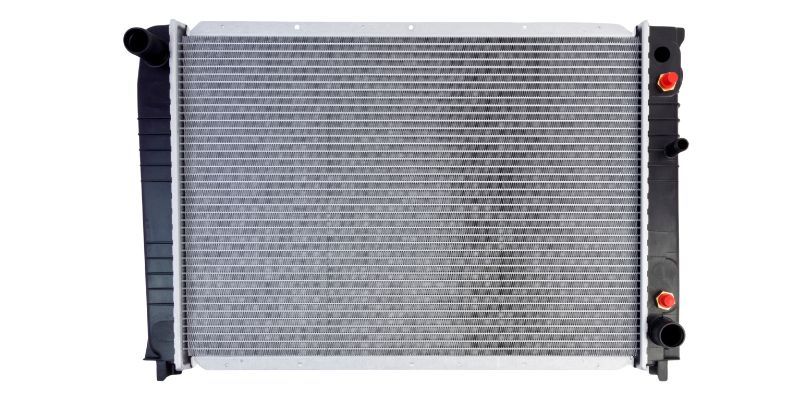
- New Radiator: Ensure it’s the correct model for your car.
- Coolant: The right type and amount specified in your owner’s manual.
- Wrench Set: For removing bolts and hose clamps.
- Pliers: Hose clamp pliers are very helpful.
- Drain Pan: To catch the old coolant.
- Funnel: For adding new coolant cleanly.
- Shop Rags/Towels: For spills and cleanup.
- Gloves and Eye Protection: Safety first!
- Jack and Jack Stands: If you need to lift the car for better access.
- Hose Removal Tool (Optional): Can make removing stubborn hoses easier.
- New Hose Clamps (Recommended): It’s a good idea to replace old clamps.
- Distilled Water: For flushing the cooling system if needed.
Step-by-Step: How to Install a Car Radiator
Let’s break down the process into manageable steps. Each step is designed to be clear and easy to follow, even if you’ve never done this before.
Step 1: Prepare Your Workspace and Safety First
Park your car on a level surface and engage the parking brake. Let the engine cool down completely. Hot coolant can cause severe burns. Wear gloves and safety glasses throughout the process. If you need to lift the car, use a jack and securely place jack stands under the frame for support. Never work under a car supported only by a jack. For more on safe lifting practices, check out resources from the National Highway Traffic Safety Administration (NHTSA).
Step 2: Drain the Old Coolant
Locate the radiator drain plug, usually at the bottom of the radiator. Place your drain pan underneath it. Carefully open the plug, letting the old coolant flow into the pan. Once it’s mostly drained, you can remove the radiator cap to help it drain faster. Some systems have a petcock valve instead of a plug; if so, use pliers to loosen it. Be sure to dispose of old coolant responsibly; it’s toxic and should not be poured down drains. Many auto parts stores accept used coolant for recycling.
Step 3: Disconnect Hoses and Other Components
With the coolant drained, it’s time to disconnect the hoses attached to the radiator. You’ll typically find two main hoses: the upper radiator hose and the lower radiator hose. Use pliers or a screwdriver to loosen the hose clamps, then gently twist and pull the hoses off the radiator fittings. You might also need to disconnect transmission cooler lines (if your car has an automatic transmission and they run through the radiator), electric fan wiring, and any mounting brackets securing the radiator. Take pictures or make notes as you go to remember how everything reconnects.
Step 4: Remove the Old Radiator
The radiator is usually held in place by mounting straps or brackets at the top and sometimes the bottom. Use your wrench set to remove these bolts or nuts. Once everything is disconnected and unbolted, you should be able to carefully lift the old radiator out of its cradle. It might be heavier than you expect, especially if it still contains some residual fluid. Be careful not to damage any surrounding components as you maneuver it out.
Step 5: Prepare the New Radiator
Before installing the new radiator, transfer any necessary parts from the old one to the new. This might include the cooling fan shroud, mounting brackets, or sensors. Ensure the drain plug (if applicable) on the new radiator is closed. Clean the area where the new radiator will sit to ensure a good seal.
Step 6: Install the New Radiator
Carefully position the new radiator into its spot. Make sure it sits flush and correctly aligned with its mounting points. Reinstall the mounting straps or brackets, tightening the bolts snugly but not overtightening them, as this could crack the plastic tanks of the radiator. Double-check that it’s secure.
Step 7: Reconnect Hoses and Components
Now, reattach the upper and lower radiator hoses to their respective fittings on the new radiator. Slide the hose clamps back into place and tighten them securely using your pliers or screwdriver. If you removed any transmission cooler lines, sensors, or wiring, reconnect them now. Make sure all connections are firm and secure to prevent leaks.
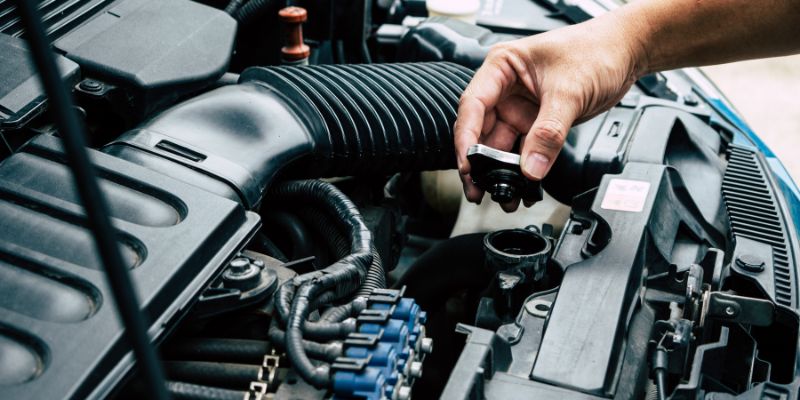
Step 8: Fill the Cooling System
Using your funnel, begin filling the radiator with your new coolant mixture. It’s often recommended to mix coolant concentrate with distilled water in a 50/50 ratio. Refer to your vehicle’s owner’s manual for the specific type of coolant and the correct mixture. Fill the radiator until the coolant level is near the top. Then, fill the coolant reservoir (overflow tank) to the “COLD” fill line.
Step 9: Bleed the Cooling System
This is a crucial step to remove air pockets from the system, which can cause overheating. Start the engine and let it run. As the engine warms up, the coolant will circulate. Keep an eye on the coolant level in the radiator and reservoir, topping them off as needed. You might see an air bleed screw on some systems; if so, open it slightly until a steady stream of coolant comes out, then close it. Once the engine reaches operating temperature and the thermostat opens (you’ll feel the upper hose get hot), turn off the engine. Allow it to cool, then recheck and top off the coolant in both the radiator and reservoir if necessary.
Step 10: Final Checks and Clean Up
With the engine cooled down, double-check all hose connections and clamps for tightness. Look for any signs of leaks around the radiator and hoses. Clean up any spilled coolant. Once you’re confident everything is secure, you can lower the car if it was raised. Take the car for a short test drive, keeping a close eye on the temperature gauge and checking again for leaks after the drive.
Understanding Coolant Types and Mixtures
Choosing the right coolant is vital for protecting your engine. Coolant, also known as antifreeze, prevents freezing in cold weather and boiling in hot weather, while also protecting against corrosion. There are several types of engine coolants, often color-coded (green, orange, pink, blue), indicating different chemical formulations. Always consult your owner’s manual to determine the specific type and the correct mix ratio with distilled water. Using the wrong type or an incorrect mixture can damage your radiator and engine components.
Here’s a quick look at common coolant types:
| Coolant Type | Common Colors | Typical Use | Notes |
|---|---|---|---|
| Inorganic Additive Technology (IAT) | Green | Older American and Asian vehicles | Shorter service life, requires more frequent changes. |
| Organic Acid Technology (OAT) | Orange, Pink, Red | Many newer American and European vehicles | Longer service life, do not mix with IAT coolants. |
| Hybrid Organic Acid Technology (HOAT) | Yellow, Orange, Pink | Many newer Asian and some European vehicles | Combines benefits of IAT and OAT; consult manual for compatibility. |
Mixing different types of coolant can lead to chemical reactions that reduce their effectiveness, clog the cooling system, and damage the radiator. Always use the coolant type specified by your vehicle’s manufacturer. Many DIYers find pre-mixed coolant (50/50 ratio) convenient, but ensure it’s the correct type for your car.
Maintaining Your Cooling System for Longevity
Once your new radiator is installed, proper maintenance will help it — and your entire cooling system — last. Regular checks are key to preventing future issues and ensuring your car runs smoothly.
Regular Maintenance Checklist:
- Check Coolant Level: Weekly, or before long trips, check the coolant level in the reservoir when the engine is cold. Top off if necessary.
- Inspect Hoses and Belts: Periodically, check hoses for cracks, swelling, or softness. Look for fraying or wear on drive belts. Replace any worn components promptly.
- Flush the System: Follow your owner’s manual recommendations for flushing the cooling system and replacing the coolant. This typically involves draining, rinsing with distilled water, and refilling with fresh coolant. A radiator flush is often recommended every 30,000 to 60,000 miles, or every few years.
- Monitor Temperature Gauge: Pay attention to your car’s temperature gauge. If it starts reading higher than normal, investigate the cause immediately.
- Check for Leaks: Look under your car for any puddles of coolant (usually brightly colored: green, orange, pink, etc.). White or greenish residue around hoses or the radiator can also indicate a slow leak.
Following these simple maintenance tips can save you from costly repairs down the road and give you peace of mind. For more in-depth maintenance information, you might find resources from reputable automotive communities helpful, such as the technical forums found on websites like AutoZone or O’Reilly Auto Parts.
Troubleshooting Common Radiator Installation Issues
Even with a clear guide, sometimes things don’t go exactly as planned. Here are a few common hiccups and how to tackle them:
- Stubborn Hoses: If hoses won’t budge, a hose removal tool can be a lifesaver. Alternatively, gently twisting the hose with pliers at the fitting can break the seal. Avoid excessive force that could damage the radiator fittings or hoses.
- Leaks After Installation: The most common cause is insufficiently tightened hose clamps or improperly seated hoses. Re-check all clamps and ensure hoses are fully seated on the fittings. A small leak might also occur from the drain plug if it wasn’t tightened correctly.
- Overheating After Installation: This is usually due to trapped air in the system. Ensure you’ve properly bled the cooling system. Running the engine with the radiator cap off (if safe to do so and the engine doesn’t overheat too quickly) while adding coolant can help dislodge air bubbles.
- Radiator Not Fitting: Double-check that you purchased the correct radiator for your vehicle’s make, model, and year. Sometimes, slight differences in trim levels or engine options require specific radiator variations.

Frequently Asked Questions About Radiator Installation
Q1: How long does it typically take to install a car radiator?
For a beginner, it can take anywhere from 2 to 4 hours, depending on the car model and how easily the old radiator comes out. Experienced DIYers might do it in under an hour.
Q2: Can I use water instead of coolant in my radiator?
No, you should never use plain water in your radiator. Coolant (antifreeze) provides essential protection against freezing, boiling, and corrosion. Water alone will not offer these protections and can lead to serious engine damage.
Q3: What happens if I don’t bleed the air out of the cooling system?
Air pockets in the cooling system can prevent proper coolant circulation, leading to localized hot spots and engine overheating. This can cause significant damage to the engine.
Q4: Do I need to replace the radiator hoses when installing a new radiator?
It’s highly recommended to replace old hoses whenever you replace the radiator. Hoses can become brittle or weak over time and may fail shortly after the radiator replacement, leading to leaks and potential overheating.
Q5: How do I dispose of old coolant safely?
Old coolant is toxic and must be disposed of properly. Most auto parts stores and local recycling centers accept used coolant. Never pour it down a drain or on the ground.
Q6: What is the difference between a radiator and a heater core?
The radiator is the main component that cools the engine by dissipating heat from the coolant into the outside air. The heater core is a smaller radiator located inside the car’s dashboard that uses engine heat to warm the cabin.
Conclusion
You’ve successfully navigated the process of installing a car radiator! Remember, taking your time, following these steps, and prioritizing safety will ensure a job well done. A properly functioning cooling system is crucial for your engine’s health and your car’s overall performance. By tackling this DIY project, you’ve saved money and gained valuable experience. Keep up with regular maintenance checks, and your new radiator will serve you faithfully for miles to come. Happy driving!