How to Flush a Car Cooling System (Radiator, Hoses & Block)
A full cooling system flush drains old coolant out of the radiator, the hoses, and the engine block itself, not just the overflow reservoir. Skipping the block drain plug is the most common shortcut in quick tutorials, and it can leave a third or more of the old, rusty coolant sitting in the engine after a so-called “flush.” Most manufacturers recommend a full flush every 30,000 miles or two years, though your owner’s manual has the exact interval for your car. Below is the complete process, including the block-drain step most guides skip.
Why Flushing Your Cooling System Matters
BEST FOR A FULL RADIATOR-TO-BLOCK FLUSH
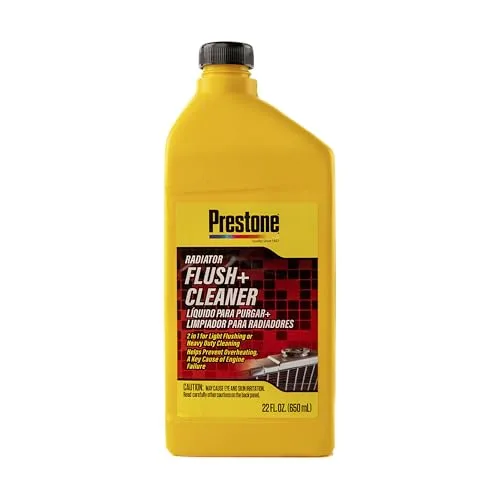 |
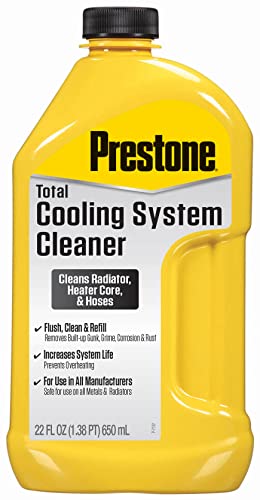
Prestone AS105 Total Cooling System Cleaner – $13.07 Cleans rust, scale, and sludge out of the radiator, heater core, and hoses in one run before you drain and refill, which is the flush-solution step covered later in this guide.
|
I remember the first time I ignored my car’s cooling system. My engine started acting up, and I learned the hard way that old coolant can cause big problems. Flushing your cooling system removes dirt, rust, and old coolant that can clog your radiator and heater core. This keeps your engine at the right temperature and extends its life.
A proper radiator flush also improves fuel efficiency and prevents corrosion. If you notice your car overheating even though the coolant looks fine or the heater not working well, it’s probably time for a flush. Most experts recommend doing this every 30,000 miles or every two years, but check your car’s manual to be sure. Trust me, a little maintenance now saves you a lot of trouble later.
Gathering the Right Tools and Supplies
Before you start, you’ll need a few things. I always make sure I have everything ready so I don’t have to run to the store mid-project. Here’s what you’ll need for a cooling system flush:
| Item | Purpose |
|---|---|
| Coolant (Antifreeze) | Replaces old fluid in the system |
| Drain Pan | Catches old coolant for safe disposal |
| Distilled Water | Used for flushing and mixing coolant |
| Funnel | Helps pour coolant without spills |
| Wrench or Screwdriver | Opens the radiator drain plug |
| Radiator Flush Solution | Cleans out rust and debris |
| Safety Gloves and Goggles | Protects you from hot or harmful fluids |
| Rags | Cleans up spills and messes |
Make sure you buy the right coolant for your car. Check your owner’s manual or ask at the auto parts store. I once grabbed the wrong type and had to start over—don’t make that mistake! Also, use distilled water, not tap water, to avoid mineral buildup in your radiator.
Preparing Your Car for the Flush
Safety first! I always park my car on a flat surface and let the engine cool completely. A hot cooling system can be dangerous—hot coolant can burn you badly. Once the engine is cool, pop the hood and locate the radiator and its drain plug. It’s usually at the bottom of the radiator, but your car’s manual can confirm.
I also like to put on gloves and goggles at this stage. Coolant is toxic, and you don’t want it on your skin or in your eyes. Place the drain pan under the radiator to catch the old fluid. If your car has a coolant reservoir, check if it needs to be drained too. Some cars have a separate drain for it.
Draining the Old Coolant
Now it’s time to get that old coolant out. I start by loosening the radiator drain plug with a wrench or screwdriver (exact location varies by model, so check our guide to finding your car’s coolant drain if you can’t spot it). Be ready for the fluid to come out—it can be messy! Let it drain completely into the pan. This usually takes a few minutes. If your car has a reservoir, remove its cap and drain it too.
One thing I’ve learned: don’t rush this part. Make sure all the old coolant is out before moving on. If you see a lot of gunk or rust in the fluid, that’s a sign your cooling system really needs this flush. Once it’s drained, tighten the plug back up to avoid leaks.
Don’t Skip the Engine Block Drain Plug (For a True Full Flush)
Here’s the step most quick tutorials leave out: the radiator drain plug only empties the radiator itself. A meaningful amount of old, contaminated coolant stays trapped in the engine block and cylinder head passages until you drain it separately. On most V6 and V8 engines, look for a second, smaller brass or plastic petcock low on the side of the engine block, often near the exhaust manifold; some engines use a plug you remove with a wrench instead of a petcock you turn by hand.
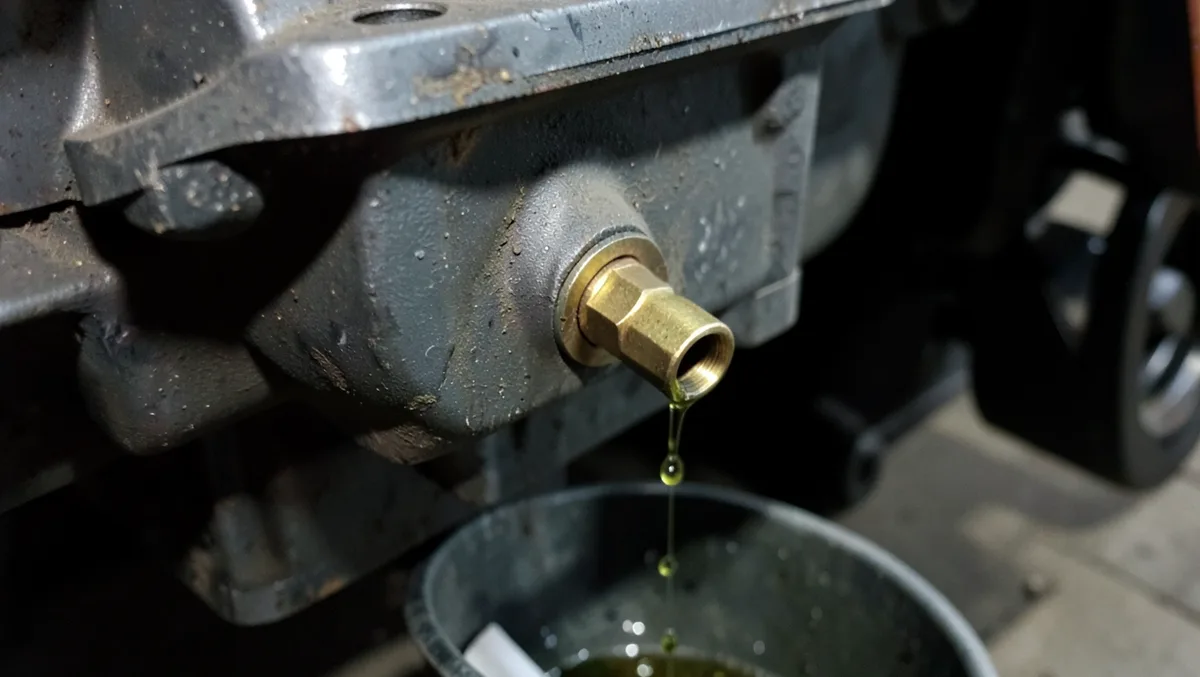
Place your drain pan under the block petcock before you open it, since it can spray at an angle. If your car doesn’t have a dedicated block drain (some four-cylinder engines don’t), disconnecting the lower radiator hose at the engine side, or a heater hose at its lowest point, achieves a similar result and lets more of the old coolant out before you move on to the cleaning solution. This one extra step is the real difference between a quick coolant top-off and a genuine full cooling system flush.
Flushing the System with a Cleaning Solution
This step is where the magic happens. I use a radiator flush solution to clean out any leftover debris. Pour the solution into the radiator, then fill the rest with distilled water. Follow the instructions on the flush solution bottle—most require you to run the engine for about 10 minutes with the heater on full blast.
I remember my first flush; I forgot to turn on the heater, and the cleaning wasn’t as thorough. The heater helps circulate the solution through the heater core, so don’t skip that part! After running the engine, let it cool again, then drain the solution the same way you drained the old coolant.
Rinsing with Distilled Water
To make sure all the cleaning solution and debris are gone, I rinse the system with distilled water. Fill the radiator and reservoir with distilled water, run the engine for a few minutes, then drain it again. You might need to do this a couple of times until the water runs clear. I usually check the drained water to see if it’s clean—cloudy water means there’s still gunk in there.
This step is super important because leftover cleaning solution can mess with your new coolant. Take your time here. I’ve found that rushing this part can lead to problems down the road, like reduced coolant effectiveness.
Refilling with New Coolant
Now comes the fun part—adding fresh coolant! I mix the coolant with distilled water in a 50/50 ratio unless the bottle says otherwise. Use a funnel to pour the mixture into the radiator and reservoir. Go slowly to avoid air bubbles, which can cause overheating later.
Once it’s full, I start the engine and let it run with the radiator cap off for a few minutes. This helps any trapped air escape. Keep an eye on the coolant level and top it off if needed. Then, put the cap back on and check for leaks. I always take my car for a short drive afterward to make sure everything’s working right.
Disposing of Old Coolant Safely
Old coolant is toxic, so you can’t just dump it down the drain. I learned this the hard way when I almost poured it into my backyard! Instead, pour the used coolant into a sealed container and take it to a recycling center or auto parts store. Many places accept it for free. Check your local regulations to be safe.
Also, clean up any spills right away. Coolant is harmful to pets and wildlife, and it’s slippery on the ground. A few rags and some water will do the trick.
Tips for Maintaining Your Cooling System
After flushing, I like to keep my cooling system in good shape. Check the coolant level every few months and top it off if needed. Look for signs of leaks, like puddles under your car. I also recommend inspecting the radiator hoses and clamps regularly—they can wear out over time.
If you live in a cold climate, make sure your coolant has enough antifreeze to prevent freezing. In hot climates, check that it’s protecting against boiling. A simple coolant tester from an auto parts store can help you check this.
Common Mistakes to Avoid
I’ve made a few mistakes over the years, so let me save you some trouble. First, never open the radiator cap when the engine is hot—you’ll get burned. Second, don’t mix different types of coolant; it can cause gelling and clog your system. Finally, don’t skip the rinse step, or you’ll leave cleaning solution in your radiator, which can cause corrosion.
Another tip: if you’re not sure about any step, take your time or ask a mechanic. It’s better to be safe than to damage your car.
When to Seek Professional Help
While I love doing a radiator flush myself, sometimes it’s best to call a pro. If you notice persistent overheating, strange noises, or leaks after the flush, there might be a bigger issue, like a failing water pump or a clogged radiator. A mechanic can diagnose and fix these problems.
Also, if your car has a complex cooling system or you’re not comfortable working on it, a shop can handle the flush for you. It usually costs $50–$150, depending on where you live. For me, the satisfaction of doing it myself is worth it, but there’s no shame in getting help!
Only need a quick coolant swap rather than the full radiator-to-block process above? Our car coolant flush guide covers the shorter version, plus a cost and interval breakdown by coolant type.
Conclusion
Flushing your car’s cooling system might sound intimidating, but it’s a straightforward job that can save you from expensive repairs. I’ve walked you through every step, from gathering tools to disposing of old coolant safely. By following this guide, you’ll keep your engine cool, your car running smoothly, and your wallet happy. So grab those tools, roll up your sleeves, and give your car the care it deserves. You’ve got this!
FAQs
Why should I flush my car’s cooling system?
Flushing removes old coolant, dirt, and rust that can clog your radiator and cause overheating. It keeps your engine running smoothly and prevents costly damage.
How often should I flush my cooling system?
Most cars need a radiator flush every 30,000 miles or two years. Check your owner’s manual for your car’s specific schedule.
Can I use tap water instead of distilled water?
No, tap water has minerals that can build up in your cooling system. Always use distilled water for flushing and mixing coolant.
Is it safe to do a radiator flush at home?
Yes, as long as you follow safety steps, like letting the engine cool and wearing gloves. If you’re unsure, a mechanic can help.
What happens if I don’t flush my cooling system?
Old coolant can cause corrosion, clogs, and overheating, which can damage your engine. Regular flushes prevent these issues.
Is draining the radiator enough, or do I need to drain the engine block too?
Draining only the radiator is not enough for a true full flush. The engine block and cylinder head hold a separate volume of old coolant that stays behind unless you open the block’s own drain petcock (or disconnect a lower hose) as described above.
Products related to this article
Sponsored / affiliate links. As an Amazon Associate I earn from qualifying purchases. I may earn additional commission from eligible campaigns.