Why Does My Car Horn Sound Weak: Essential Fixes
A weak car horn can be caused by a simple fix like a blown fuse or a more involved issue like a faulty horn relay or wiring problem. Addressing a dying horn sound promptly ensures your safety and helps you avoid costly repairs down the line.
Is your car’s horn sounding more like a sad little squeak than a commanding blast? It’s a frustrating and potentially dangerous situation. A working horn is crucial for signaling your presence on the road, warning other drivers, or even alerting pedestrians. When its sound gets weak, it’s easy to feel a bit lost, wondering if it’s a simple fix or something more serious. Don’t worry, you’re not alone! Many car owners face this issue, and with a little guidance, you can pinpoint the problem and get your horn back to its full glory. We’ll walk through the common culprits step-by-step, making it easy for even the most beginner DIYer to understand and tackle.
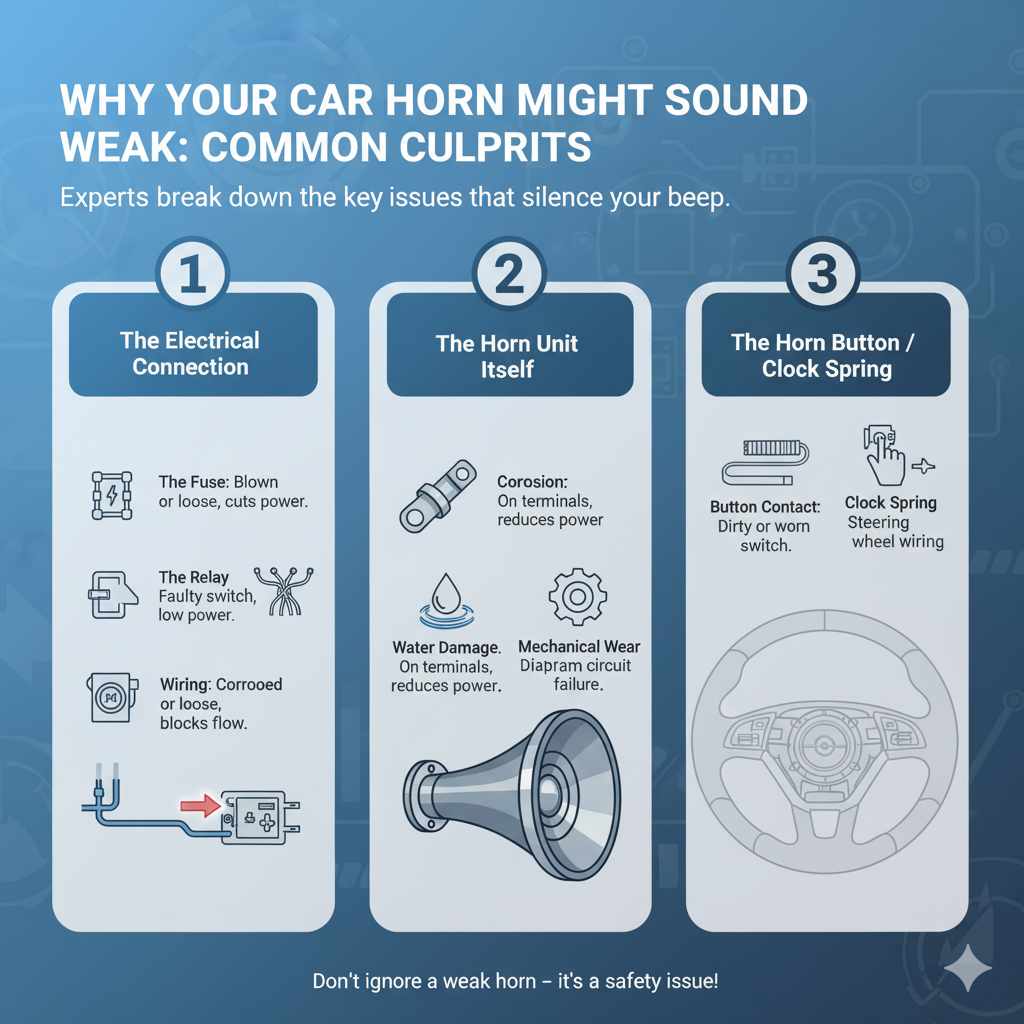
Why Your Car Horn Might Sound Weak: Common Culprits
A car horn’s job is simple: make noise. When it fails to do so effectively, it usually boils down to a few key areas. Understanding these can save you time and money, and give you the confidence to start diagnosing the issue yourself. Think of it like this: every system in your car has parts that work together, and if one part is struggling, the whole system is affected. For your horn, this usually involves electrical power, the horn unit itself, and the buttons that activate it.
1. The Electrical Connection: Power is Key
Your car horn is an electrical device. Like any electronic component, it needs a steady supply of power to function correctly. If this power source is interrupted or weakened, the sound will suffer. This is often the first thing to check because electrical issues can sometimes be the simplest to resolve.
This involves checking three main electrical components:
- The Fuse: This is a small, inexpensive safety device designed to blow and cut off power if there’s an electrical surge. If the fuse for your horn has blown, it will completely stop the horn from working or make it sound very weak.
- The Relay: A relay is like a smart switch. It uses a small electrical current to control a larger current that powers the horn. If the relay is faulty, it might not be sending enough power to the horn.
- Wiring: Corroded or damaged wires can create resistance, meaning less electricity reaches the horn, resulting in a weaker sound.
2. The Horn Unit Itself: The Sound Producer
The horn is the part that actually makes the noise. Over time, this component can wear out or become damaged. Exposure to the elements, internal corrosion, or simply age can all lead to a horn that sounds weak or stops working altogether.
Common issues with the horn unit include:
- Corrosion: Especially on older vehicles or those in humid climates, the terminals on the horn can corrode, hindering electrical flow.
- Water Damage: If water gets inside the horn unit, it can damage the internal components and affect its sound.
- Mechanical Wear: Like any mechanical part, horns can wear out over time, leading to a less robust sound.
3. The Horn Button or Steering Wheel Clock Spring
Every time you press the horn button, you’re completing an electrical circuit. If the button itself or the complex mechanism behind it (especially the clock spring in the steering wheel) is malfunctioning, it might not be sending a strong enough signal to activate the horn properly. This can manifest as a weak sound or no sound at all.
Issues here can involve:
- Button Contact: The contacts within the horn button might be worn or dirty, creating a poor connection.
- Clock Spring Failure: This delicate component allows your steering wheel to turn while maintaining electrical connections for airbags, horn, and steering wheel controls. A failing clock spring can cause intermittent horn issues or a weak sound. You can learn more about the intricate workings of a steering wheel clock spring from resources like HowStuffWorks, an authoritative source on automotive mechanics.
Troubleshooting Your Weak Car Horn: A Step-by-Step Guide
Now that we know the common reasons, let’s get our hands a little dirty (figuratively, of course!) and figure out what’s going on. Always remember to prioritize safety. Disconnect your car battery before working on any electrical components to avoid accidental shocks or short circuits. If you’re unsure about any step, it’s always best to consult a professional mechanic.
Step 1: Check the Fuse
This is typically the easiest fix, so it’s the best place to start. Your car’s fuse box usually contains fuses for all sorts of components, including the horn. You’ll need your car’s owner’s manual to locate the correct fuse.
Tools You’ll Need:
- Car Owner’s Manual
- Fuse Puller (often found in the fuse box itself) or Needle-Nose Pliers
- Replacement Fuse (same amperage rating as the original – check the fuse itself and your manual)
Instructions:
- Locate the Fuse Box: Your owner’s manual will show you where your car’s fuse box(es) are located. Common spots include under the dashboard on the driver’s side, in the glove compartment, or under the hood.
- Identify the Horn Fuse: The manual will have a diagram of the fuse box, labeling each fuse. Find the one designated for the horn.
- Inspect the Fuse: Carefully pull out the horn fuse using the fuse puller or pliers. Hold it up to the light. You’re looking for a broken or burnt-out filament inside the fuse.
- Replace if Necessary: If the fuse is blown, throw it away and insert a new one of the exact same amperage rating. Using a fuse with a higher rating can be dangerous and damage your car’s electrical system.
- Test the Horn: Reconnect your battery if you disconnected it, and try honking the horn. If it works, you’re good to go! If not, move on to the next step.
Step 2: Test the Horn Relay
If the fuse is good, the next electrical culprit is often the relay. Relays can be a bit trickier to test without specialized equipment, but often swapping with a known good relay of the same type can help diagnose the issue. Your owner’s manual should also help you locate the horn relay.
Tools You’ll Need:
- Car Owner’s Manual
- Small Flathead Screwdriver (optional, for prying covers)
- A Known Good Relay of the Same Type (optional, for swapping)
Instructions:
- Locate the Relay: Again, refer to your owner’s manual to find the horn relay. It will be in one of the fuse boxes, usually under the hood.
- Inspect the Relay: Sometimes, relays can be visually inspected for obvious damage or burnt contacts, but this isn’t always conclusive.
- Swap Test (Recommended): The easiest way to test a relay is to swap it with another identical relay in the fuse box that controls a non-essential system (like the rear defogger or fog lights, if they are the same type). If the horn starts working after the swap, the original relay was faulty. You’ll then need to purchase a new one.
- Consider Professional Help: If you don’t have a spare relay to swap or are uncomfortable doing so, this might be a good point to see a mechanic. They have the tools to test relays properly.
Step 3: Inspect Horn Wiring and Connections
Corrosion, loose connections, or damaged wires can all cause a weak horn. This is where you’ll need to get a bit closer to the horn itself.
Tools You’ll Need:
- Basic Socket Wrench Set or Pliers
- Wire Brush
- Electrical Contact Cleaner
- Multimeter (optional, but very helpful for testing voltage and continuity)
- Safety Glasses
- Work Gloves
Instructions:
- Locate the Horn: In most cars, the horn is located behind the front grille or bumper. Your owner’s manual might give you a clue, or you might need to do a quick online search for your specific car model.
- Disconnect Battery: For safety, disconnect the negative terminal of your car battery.
- Inspect the Horn Wiring: Look for any wires that are frayed, cut, loose, or corroded. Pay close attention to the connectors that plug into the horn itself.
- Clean Connectors: If you see any corrosion on the connectors, disconnect them (if possible), use a wire brush to gently clean them, and then spray them with electrical contact cleaner. Ensure they are dry before reconnecting.
- Check Ground Connection: The horn needs a good ground connection to work. Make sure the wire bolted to the car’s chassis (ground wire) is clean, tight, and free of rust.
- Test Voltage (Optional, with Multimeter): If you have a multimeter, you can test if power is reaching the horn. Connect the positive probe to the horn’s power terminal and the negative probe to a good ground point on the car chassis. Have someone honk the horn. You should see voltage readings (around 12V). If you don’t, the problem is further up the electrical system. If you do, and the horn is still weak, the horn itself might be the issue.
Step 4: Inspect and Test the Horn Unit
If the electrical supply to the horn seems good but the sound is still weak, the horn unit itself may be the problem. They are often sold in pairs, and if one fails, the other might be close behind.
Tools You’ll Need:
- Socket Wrench Set or Pliers
- Wire Brush
- Electrical Contact Cleaner
- Replacement Horn (if you decide to replace it)
- Safety Glasses
- Work Gloves
Instructions:
- Access the Horns: You’ll need to have safely accessed the horn units as described in Step 3.
- Disconnect Power: Ensure the negative battery terminal is disconnected.
- Remove the Horn(s): Typically, horns are held in place by a bolt or nut. Remove the fastener and carefully detach the horn, noting any wiring harnesses.
- Inspect for Damage: Look for visible signs of damage, rust, or corrosion on the horn unit.
- Test the Horn: Many automotive repair shops recommend simply replacing a suspect horn rather than trying to repair it. However, if you’re feeling adventurous (and have a multimeter), you can sometimes test a horn by applying 12V directly from the battery, ensuring you connect to the correct terminals. This is best done by professionals to avoid damage.
- Consider Replacement: If the horn looks damaged, is corroded, or doesn’t produce a strong sound when direct power is applied, it’s likely time to replace it. You can often buy universal horns that fit most vehicles. Always replace both if they come as a set, as the other may be on its way out.
Step 5: Check the Steering Wheel Clock Spring and Horn Switch
This is a more complex area and often feels less accessible but is vital for your horn’s function. The clock spring sits behind the steering wheel hub and allows electrical connections to continue even as you turn the wheel. A common symptom of a failing clock spring is intermittent horn operation or a weak, unreliable sound.
Tools You’ll Need:
- Steering Wheel Puller (usually required)
- Torque Wrench
- Various Socket and Wrench Sizes
- Screwdrivers (Phillips and flathead)
- Steering Column Trim Removal Tools
- Safety Glasses
- Work Gloves
- New Clock Spring Assembly (if needed)
Instructions:
- Safety First: Disconnect Battery! This is critical when working on anything involving the steering wheel, especially due to the airbag. Leave it disconnected for at least 10-15 minutes to allow any residual power to dissipate.
- Remove Airbag: This is a delicate process and requires careful attention. Consult your vehicle’s service manual or a reputable online guide for your specific make/model. Airbags are explosive devices; extreme caution is paramount.
- Remove Steering Wheel: Once the airbag is safely out of the way and disconnected, you’ll typically need a steering wheel puller to remove the steering wheel itself.
- Access the Clock Spring: The clock spring is located behind the steering wheel. You’ll need to remove any protective covers or bezels.
- Inspect the Clock Spring: Look for any visible damage, cracks, or signs of wear. Sometimes, you can test continuity with a multimeter, but diagnosing a faulty clock spring can be tricky. A common test is to see if horn functionality returns when the steering wheel is in certain positions – if so, the clock spring is highly suspect.
- Test the Horn Switch: While you’re in there, you can often test the horn button contacts directly.
- Replace if Necessary: If you suspect the clock spring is the issue, it usually needs to be replaced. This is a job many DIYers might find challenging, and it’s often recommended to have a professional mechanic handle it due to the complexity and safety implications (especially concerning the airbag system).
Common Causes and Solutions Table
To help you quickly identify potential issues, here’s a handy table summarizing common problems and their likely fixes.
| Symptom | Likely Cause | Recommended Fix |
|---|---|---|
| No sound at all | Blown fuse, disconnected wire, faulty relay, completely dead horn | Check fuse, check wiring connections, swap relay, test/replace horn unit |
| Weak, muffled sound | Low voltage (corroded connections, failing relay, loose wiring), partially failed horn unit | Clean connections, check wiring, test/replace relay, test/replace horn unit |
| Intermittent sound, or only works sometimes | Faulty relay, loose wiring connection, failing clock spring, worn horn switch | Test/swap relay, check all wiring connections, inspect clock spring and horn switch (may require professional diagnosis) |
| Sound when turned to specific angles | Faulty clock spring | Replace clock spring assembly (often requires professional help) |

When to Call a Professional
While many horn issues can be diagnosed and fixed with basic tools and a bit of patience, there are times when it’s best to hand the reins over to a professional. If any of the following apply, don’t hesitate to seek expert help:
- You’re uncomfortable with electrical work: Electricity can be dangerous. If you’re not confident, it’s safer to let a pro handle it.
- You lack the necessary tools: Some jobs, like steering wheel removal or complex wiring tests, require specialized tools.
- The problem involves the airbag system: Working near airbags without proper knowledge can be extremely hazardous.
- You’ve tried the basic steps and the horn still doesn’t work: The issue might be more complex than it appears, like a problem within the car’s Body Control Module (BCM) or a continuity issue deep within the wiring harness.
- You’re experiencing multiple electrical gremlins: If unrelated electrical components are also malfunctioning, it could point to a larger electrical system issue that needs a technician.
Remember, a qualified mechanic has the experience and diagnostic equipment to quickly and safely identify and resolve even the most intricate automotive problems. For instance, understanding the detailed electrical schematics of your car, which mechanics have access to, is beyond the scope of most beginner DIY guides. Resources like the National Highway Traffic Safety Administration (NHTSA) provide crucial information on vehicle safety standards, underscoring the importance of functional safety systems like your horn.
Frequently Asked Questions (FAQ) about Weak Car Horns
Here are answers to some common questions car owners have about a weak car horn.
Q1: Can a weak car horn be a safety hazard?
A: Absolutely. A weak horn might not be loud enough to alert other drivers or pedestrians in critical situations, significantly increasing the risk of an accident.