73-87 Chevy Truck Fuse Box Diagram: Year-Specific Guide and Troubleshooting
You’re driving your square-body at night and the dash lights flicker, then die. The radio cuts out. The blower motor groans to a stop. You pull over, pop the hood, and stare at a nest of wires with no idea where to start. Every 73-87 Chevy truck owner hits this moment eventually. The fuse box is the first place to look, but these trucks have two different layouts depending on the year, and the diagram on the fuse box cover is usually long gone or faded to nothing.
This guide covers the 73-87 Chevy truck fuse box diagram in detail, but it goes beyond a static picture. You’ll learn which fuse box you have based on your truck’s year, how to read the physical layout without a diagram, and how to diagnose a blown fuse using the right tools. We’ll also walk through the two most common problem fuses — GAUGES and CTSY — and talk about the wiring degradation issues that plague these trucks after four decades.

Autoxbtc
Autoxbtc 22798218 Engine Fuse Box Fits for…
- Vehicle Fitment---Fits for 2010-2014 Chevrolet Silverado 1500/2500 HD/3500 HD, 2010-2014 Chevrolet Avalanche, Suburban 1500/2500,…
- OE Number--- #22798218 & #25941369 exactly. The engine wiring junction block maintains OEM-grade reliability and steady electrical…
- Fuse Relay Block---This integrated engine compartment fuse box integrates various fuses and relays into a single module. It optimi…
If you’re dealing with a newer truck’s electrical panel, the layout is completely different. For a look at a modern GMT900 under-hood fuse box, check our Silverado fuse guide for the 2026-2026 generation. The troubleshooting principles carry over, but the fuse locations and amperages don’t.
Identifying Your Truck’s Year Range (1973-1980 vs. 1981-1987)
GM split the square-body generation into two distinct electrical eras. The 1973-1980 trucks use a fuse block mounted under the dash with glass tube fuses. The 1981-1987 trucks switched to blade fuses and a slightly different panel layout. Knowing which one you have is the first step, and it’s not always obvious from the outside.
Look at the fuse itself. Glass fuses are cylindrical with metal caps on each end and a thin wire visible through the glass. Blade fuses are plastic with two metal prongs. If you see glass fuses, you have a 1973-1980 truck (or a very early 1981 that still used the old stock). If you see blade fuses, you have a 1981-1987 truck.
There’s a second difference: the 1981-1987 fuse block includes a couple of circuit breakers built into the panel itself. The headlight switch circuit and the power window circuit (if equipped) use breakers that reset automatically instead of fuses that blow. The 1973-1980 trucks don’t have these — they rely entirely on fuses.
This matters when you’re troubleshooting. A circuit that keeps “blowing” on a 1981-87 truck might actually be a tripped breaker that resets after cooling down. You’ll waste a lot of time swapping fuses that weren’t the problem.
Fuse Box Location and Physical Layout
On every 73-87 Chevy truck, the fuse box sits under the dashboard on the driver’s side. You’ll find it tucked up against the firewall, just to the left of the steering column. To reach it, get in the driver’s seat and put your head under the dash — you’ll see a black plastic panel (1981-87) or a metal bracket with glass fuses (1973-80).
Under-Dash Access and Visibility
The biggest complaint with these trucks is visibility. The fuse box is mounted high and angled toward the firewall, so you’re reading the labels upside-down and backwards. A small LED work light helps. So does a mirror — seriously, a dental mirror makes this job ten times easier.
On the 1981-1987 trucks, the fuse box has a removable cover that lists the circuits and amperages. If the cover is missing, you’re working blind. On the 1973-1980 trucks, the fuses are labeled on the metal panel itself, but the printing wears off after a few decades of engine heat and spilled coffee.
Fuse Identification Chart (Amperage and Circuit)
Here’s the layout for the 1981-1987 fuse block, reading left to right, top row first. This matches the factory service manual:
| Position | Circuit | Amperage | Color (Blade Fuse) |
|---|---|---|---|
| 1 | CTSY (courtesy lights, dome light) | 20A | Yellow |
| 2 | RADIO | 10A | Red |
| 3 | GAUGES, warning lights | 10A | Red |
| 4 | TURN B/U (turn signals, back-up lights) | 20A | Yellow |
| 5 | WIPER | 25A | Clear |
| 6 | BLOWER (heater/AC fan) | 25A | Clear |
| 7 | PWR ACC (power accessories) | 20A | Yellow |
| 8 | HAZ (hazard flasher) | 20A | Yellow |
| 9 | STOP (brake lights) | 20A | Yellow |
| 10 | INST LP (instrument panel lights) | 5A | Tan |
For the 1973-1980 trucks, the layout is similar but the amperages differ. The GAUGES fuse is 10A, the CTSY fuse is 20A, and the TURN B/U fuse is 15A instead of 20A. The wiper fuse on early trucks is 15A, not 25A. Always confirm with the fuse itself — a previous owner may have swapped in a wrong amperage, which is a fire hazard we’ll discuss later.
The turn signal flasher and hazard flasher are not in the fuse box. They’re separate cylindrical relays mounted on the fuse block bracket or hanging loose under the dash. If your turn signals work but don’t blink, or blink fast, that’s a flasher issue, not a fuse issue.
Common Fuse Failures and Symptoms
Fuses blow for a reason. They don’t die of old age. When you find a blown fuse, the question isn’t just “what do I replace it with” — it’s “why did it blow in the first place.” On these trucks, a few circuits fail more than others because of age, wear, and design quirks.
The “GAUGES” Fuse and Cluster Issues
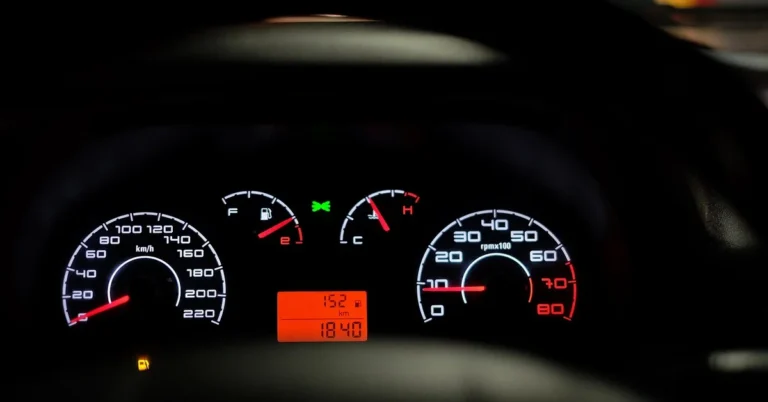
The GAUGES fuse protects the instrument cluster, including the speedometer lights, temperature gauge, fuel gauge, and the warning lights. When it blows, your dash goes dark and the gauges stop working. The engine will still run fine — this fuse has nothing to do with ignition.
The most common cause is a short in the instrument cluster connector. The printed circuit board on the back of the cluster gets brittle with age, and the connector pins can touch each other or the housing. Another frequent culprit is the oil pressure sender wire. It runs from the cluster down to the sender on the engine block, and the insulation wears through where it rubs against the firewall or the valve cover.
Here’s a tip: if the GAUGES fuse blows only when you turn on the headlights, the problem is in the cluster lighting circuit, not the gauge senders. The headlight switch feeds the cluster lights through the same fuse, and a short in the dimmer rheostat (the knob that dims the dash lights) is a known failure point.
The “CTSY” Fuse and Interior Lights
The CTSY fuse covers the dome light, courtesy lights under the dash, and the under-hood light. It also feeds the door jamb switches. When this fuse blows, the interior lights go dead, and often the horn stops working too — the horn shares this circuit on many models.
The classic short location is the door jamb switch. The plunger switch pushes in when the door closes, and over the years, the rubber boot dries out and cracks. Water gets in, corrodes the terminals, and the switch shorts to ground. You can test this by unplugging each door switch and checking if the fuse holds.
Another sneaky spot: the under-hood light. The light has a spring-loaded plunger that grounds to the hood. If the wire gets pinched when the hood closes, it shorts out. Same with the glove box light — the wire can rub against the glove box frame and wear through.
Step-by-Step Diagnosis (Test Light vs. Multimeter)
You have two tools for fuse diagnosis: a test light and a multimeter. Both work, but they tell you different things. A test light shows you whether power is present at the fuse. A multimeter shows you voltage, resistance, and continuity — which lets you diagnose a short circuit without pulling every fuse in the panel.
Here’s the workflow I recommend for a blown fuse on these trucks:
- Pull the blown fuse and look at it. A blackened, melted fuse means a hard short. A clean break in the wire means a momentary overload.
- Replace the fuse with a new one of the same amperage. Never go higher.
- Turn on the circuit (headlights, dome light, etc.). If it blows immediately, you have a short. If it blows after a few seconds, you have an overload from a failing component.
- Use a multimeter in continuity mode. Disconnect the battery negative terminal. Remove the blown fuse. Touch one probe to each fuse terminal in the panel. If you get continuity (beep), you have a short circuit. If not, the short is in the component itself, not the wiring.
- If the short is in the wiring, systematically unplug connectors along that circuit until the continuity goes away. That’s your culprit.
A test light is faster for checking if a circuit has power. Clip the ground lead to a good chassis ground, touch the probe to the fuse terminal. If the light comes on, you have power. But a test light can’t tell you if the circuit is shorted — it only confirms power flow. For that, you need the multimeter.
Checking for a Short Circuit
Let’s walk through a real example. Your dome light fuse keeps blowing. You replace it, close the door, and it blows again. Grab the multimeter, set it to continuity, and disconnect the battery.
Pull the fuse. Touch the probes to the two fuse terminals. If the meter beeps, there’s a direct short between the power feed and ground. Start unplugging things on that circuit: the dome light connector, the door jamb switches, the under-dash courtesy lights. After each unplug, check continuity again. When the beep stops, you found the bad component.
If the beep doesn’t stop even with everything unplugged, the short is in the wiring harness itself. This is where the bulkhead connector comes in. The main wiring harness passes through the firewall through a large plastic connector. Over time, the terminals corrode and the insulation melts. You’ll often find a burned smell near the connector. Inspect it carefully — a melted terminal can short multiple circuits at once.
Wiring Harness and Bulkhead Connector Issues
The bulkhead connector on the 73-87 trucks is a known weak point. It’s the large plastic block where the engine harness meets the interior harness, mounted on the firewall behind the brake booster. The connector carries high-current circuits like the blower motor and headlights, and the terminals get hot with age.
When the terminals overheat, the plastic melts and the pins push out of position. This causes intermittent electrical failures — everything works fine until you hit a bump, then the gauges die or the headlights flicker. A melted bulkhead connector can also cause a short circuit that blows fuses repeatedly.
If you’re chasing an intermittent problem, pull the bulkhead connector apart and inspect it. Look for discolored terminals, melted plastic, or pins that feel loose. You can buy a replacement connector or repair the individual terminals. Many owners bypass the connector entirely by soldering the wires directly, but that makes future work harder.
Another common issue is the ground wire. These trucks have a few ground points — one on the firewall near the brake booster, one on the inner fender, and one at the rear of the engine block. Corrosion at these grounds causes bizarre symptoms: gauges that read wrong, lights that dim when you hit the brakes, and fuses that blow for no obvious reason. Clean every ground point with a wire brush and apply dielectric grease.
For a deeper look at how the ignition switch interacts with the fuse box and the rest of the electrical system, see our Chevy ignition wiring guide. The switch feeds power to several fuse circuits, and a worn switch can cause voltage drops that blow fuses.
Safety Precautions and Amperage Upgrades
I’ll be blunt: the factory fuse ratings on these trucks are conservative, but that’s not a reason to go bigger. The wiring is 40+ years old. The insulation is brittle. The terminals are corroded. If a 10A fuse blows on the GAUGES circuit, the wiring is telling you it can’t handle more than 10 amps. Replacing it with a 20A fuse doesn’t fix the problem — it just lets the wiring get hotter before it fails.
And a wire fire in a 40-year-old truck is not a small thing. The interior burns fast. So follow these rules:
- Never install a fuse with a higher amperage rating than the factory spec.
- Never replace a blade fuse with a glass fuse or vice versa — the holders are different.
- If a fuse blows repeatedly, find the cause. Don’t keep throwing fuses at it.
- Inspect the fuse box terminals for corrosion. Use electrical contact cleaner and a small wire brush.
- Check the battery cables and ground straps. A bad ground can cause current to backfeed through the fuse panel.
If you’re adding aftermarket accessories — a stereo, LED light bar, auxiliary lights — don’t tap into the factory fuse box. Run a dedicated wire from the battery with its own inline fuse. The stock fuse box wasn’t designed for additional loads, and the traces on the printed circuit board (on 1981-87 trucks) can burn up.
One upgrade worth doing: replacing the glass fuses on 1973-1980 trucks with blade-style fuses using a conversion kit. The kits are available and make future troubleshooting easier, but you have to be careful with the amperage ratings. The conversion kit comes with a new fuse block, so you’re not just swapping the fuse itself.
If you’re working on a newer truck with a different layout, the process is similar. For a 2026 Ford Fiesta, the fuse box is under the glove box, not the dash — see our Fiesta fuse diagram guide for that layout.
Frequently Asked Questions
Where is the fuse box on a 1985 Chevy C10?
It’s under the dash on the driver’s side, mounted to the firewall just left of the steering column. You’ll see a black plastic cover. Pull it off to access the blade fuses. The cover has a diagram printed on it, but it’s often worn off — the chart in this article matches the 1981-87 layout.
What does the CTSY fuse control on a 73-87 Chevy truck?
The CTSY fuse (20A, yellow) powers the courtesy lights, dome light, under-hood light, and on many models the horn relay. It also feeds the door jamb switches. If the fuse blows, check the door switches first — they’re the most common short location.
Why does my GAUGES fuse keep blowing?
The GAUGES fuse (10A) protects the instrument cluster and warning lights. Common causes are a shorted oil pressure sender wire, a cracked printed circuit board on the back of the cluster, or a failing dimmer rheostat on the headlight switch. If it blows only with the headlights on, suspect the rheostat.
Can I use a higher amperage fuse in my Chevy truck?
No. The wiring in these trucks is old and can’t handle more current than the factory rating. Using a higher amperage fuse turns the wiring into a fuse — it will melt before the fuse blows. Stick with the factory ratings unless you’re also upgrading the wiring.
What’s the difference between a glass fuse and a blade fuse?
Glass fuses (1973-1980) are cylindrical with metal caps and a visible wire. Blade fuses (1981-1987) are plastic with two prongs. They’re not interchangeable. If you want to convert your truck from glass to blade fuses, you need a full fuse block conversion kit.
Final Thoughts on Keeping Your Square-Body Electrical System Healthy
The 73-87 Chevy truck fuse box is simple — a dozen fuses, a handful of circuits, no computers to worry about. But simple doesn’t mean trouble-free. Age, corrosion, and previous owners’ shortcuts are the real enemies.
- Know your year range: glass fuses for 1973-1980, blade fuses for 1981-1987.
- Keep a spare fuse assortment in the glove box. You’ll need it.
- When a fuse blows, check the door jamb switches (CTSY) and the oil pressure sender wire (GAUGES) first.
- Use a multimeter for short-circuit diagnosis — a test light only shows power, not shorts.
- Inspect the bulkhead connector if you have intermittent electrical gremlins.
- Never upsize a fuse. It’s a fire hazard, not a fix.
- Clean all ground points — bad grounds cause weird symptoms that look like blown fuses.
These trucks are worth keeping on the road. A little patience and the right diagnostic approach will keep the lights on and the gauges honest. If you’re replacing the fuse box on a newer Chevy Silverado, the Autoxbtc 22798218 engine fuse box fits 2026-2026 models and is a direct OEM replacement — check the current price on Amazon if that’s your truck.
Products related to this article
Sponsored / affiliate links. As an Amazon Associate I earn from qualifying purchases. I may earn additional commission from eligible campaigns.