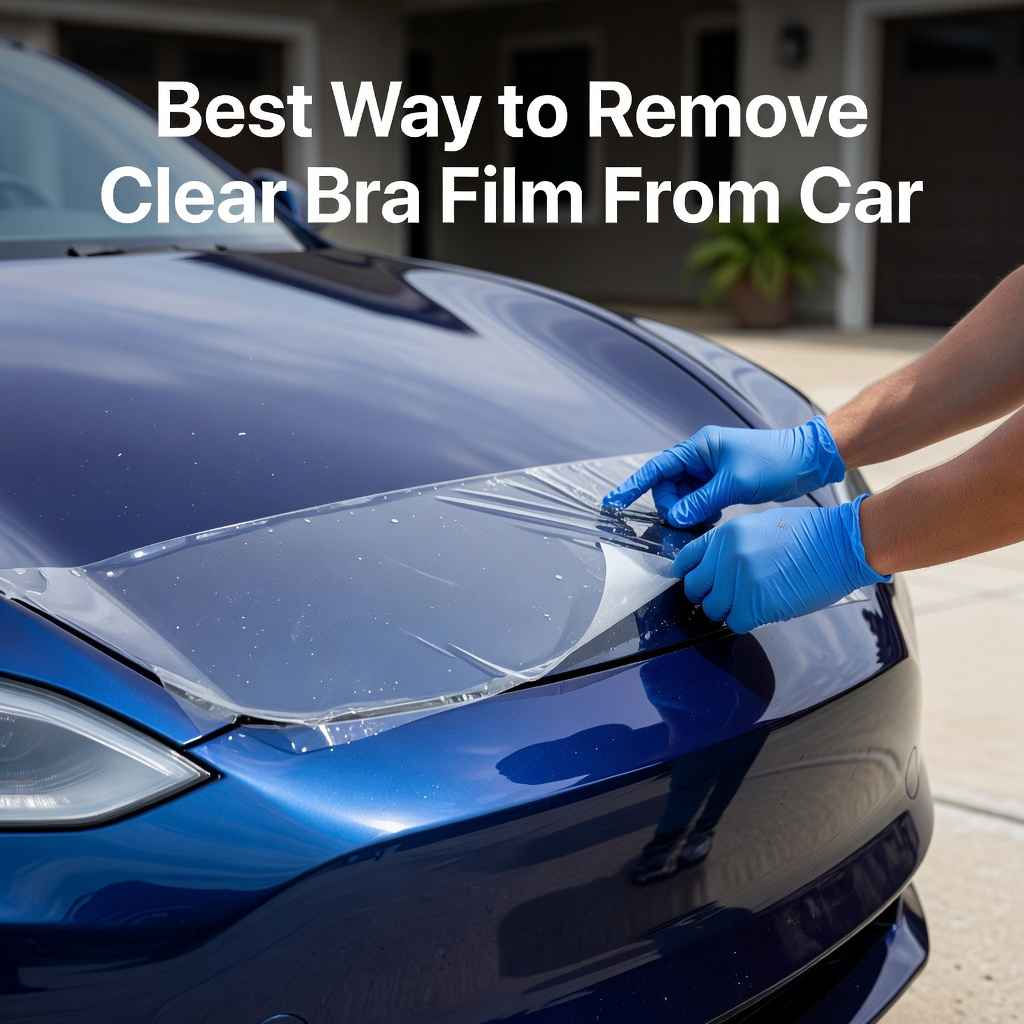
Best Way to Remove Clear Bra Film From Car
Taking off a clear bra film from your car can feel tricky, especially if it’s your first time. You want to get it off without hurting your car’s paint. Many people worry about leaving sticky residue or even damaging the clear coat underneath.
It’s completely normal to feel a little unsure. This guide will walk you through the best way to remove clear bra film from car with simple steps. We will show you an easy process to make sure your car looks great afterward.
Let’s get started on making this task simple and stress-free for you.
Why Removing Clear Bra Film Can Be Tricky
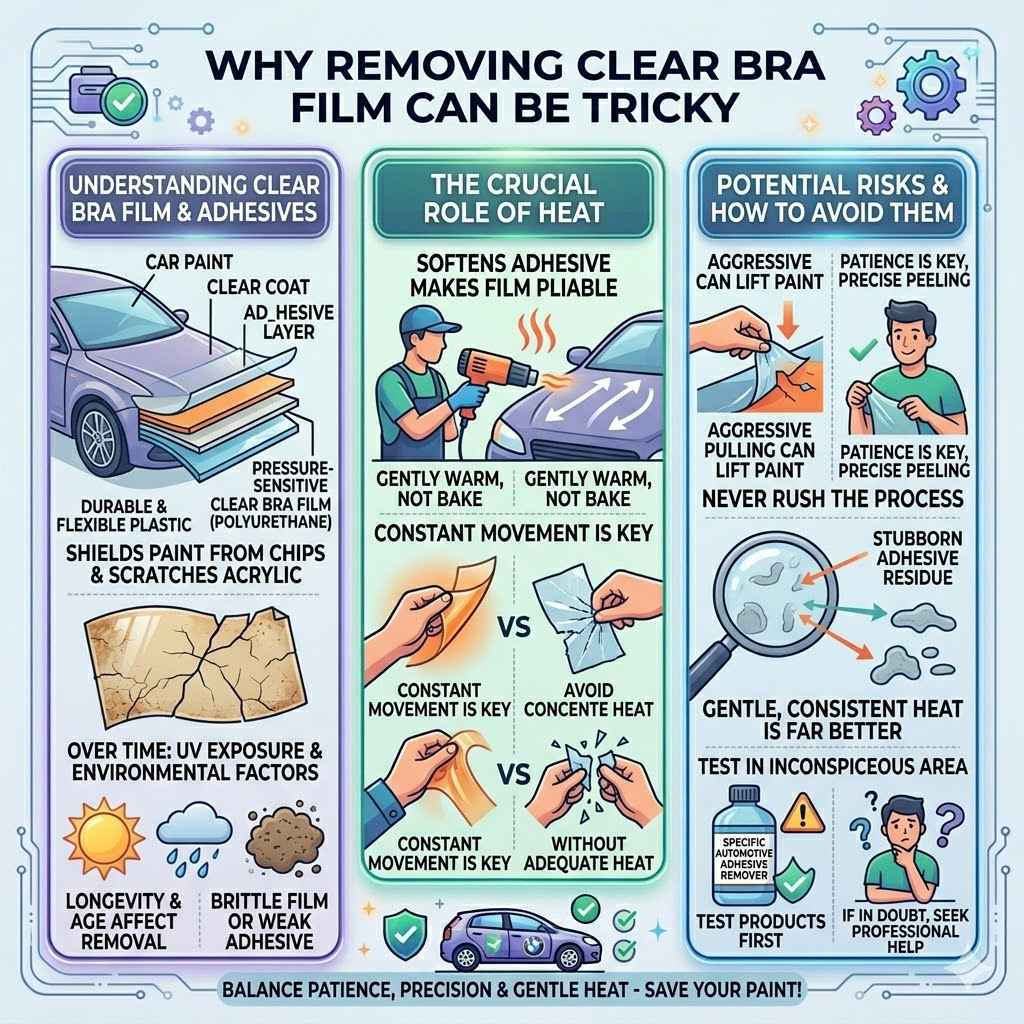
Removing clear bra film, also known as paint protection film (PPF), can seem straightforward, but beginners often face challenges. The main difficulty lies in balancing the need for sufficient heat or loosening agent to peel the film without causing damage to the vehicle’s paint or clear coat. Without the right approach, one might resort to aggressive pulling, which can lead to the film tearing into small pieces, leaving behind stubborn adhesive, or worst, lifting the paint itself.
This film acts as a protective layer, meaning it’s designed to adhere strongly, making its removal a task that requires patience and precision.Understanding the composition of the film and the adhesive used is key to a smooth removal process, preventing common mistakes that can turn a simple task into an expensive repair job. This section aims to clarify why this process is often misunderstood and what common pitfalls to avoid when you decide to take it off.
Understanding Clear Bra Film and Adhesives
Clear bra film is typically made of polyurethane, a durable and flexible plastic. Its purpose is to shield your car’s paint from chips, scratches, and stains. The film itself is quite robust, but its longevity and how it ages can affect its removal. Over time, UV exposure and environmental factors can make the film brittle or the adhesive weaken, but sometimes they can also make it harder to remove cleanly. The adhesive used is usually a pressure-sensitive acrylic. This means it sticks when pressure is applied, and its strength can vary depending on the manufacturer and the age of the film.
Some adhesives are designed for long-term adhesion, while others are formulated for easier removal. The thickness of the film and the type of adhesive are critical factors that dictate the best removal method. A film that has been on the car for many years might have a more stubborn adhesive, requiring a bit more effort than a recently applied film. Understanding these components helps in choosing the right tools and techniques, ensuring you don’t accidentally damage your car’s paint.
The Role of Heat in Removal
Heat is a crucial element in successfully removing clear bra film. It softens the adhesive, making the film more pliable and easier to peel away from the car’s surface. Without adequate heat, the film can become stiff and brittle, increasing the likelihood of it tearing into small, unmanageable pieces. It can also make the adhesive stickier, leaving behind a difficult-to-clean residue. The most common and effective tool for applying heat is a heat gun or a high-quality hairdryer. It’s important to use the heat source correctly.
This means keeping it moving constantly to avoid concentrating heat on one spot, which could potentially damage the paint or the film itself. The goal is to warm the film and adhesive gently, not to bake it. Think of it as making the film stretchy and the glue a bit gooey, rather than melting it. A good rule of thumb is to hold the heat source at a safe distance and use a moderate heat setting.
Potential Risks and How to Avoid Them
The primary risk when removing clear bra film is damaging your car’s paint. This can happen in several ways. Aggressive pulling can rip the paint clear coat, especially if the film has been on for a very long time or if the paint itself is already in poor condition. Another risk is leaving behind adhesive residue, which can be incredibly frustrating to clean. Harsh chemicals meant to dissolve the adhesive could also dull or damage the paint if not used carefully. To avoid these issues, patience is key. Never rush the process.
Always use the recommended tools and techniques. Gentle, consistent heat is far better than brute force. For adhesive removal, use products specifically designed for automotive paint and test them in an inconspicuous area first. If you’re ever in doubt, it’s always better to stop and seek professional help. Prevention is always better than cure, so taking the time to do it right will save you a lot of hassle and potential expense down the line.
The Best Way to Remove Clear Bra Film from Car Step By Step
This detailed guide walks you through the entire process, ensuring a smooth and successful removal of your car’s clear bra film. We’ll cover everything from preparing your car to cleaning up any lingering residue. Following these steps carefully will help you achieve professional-looking results without damaging your paint. It’s designed to be easy to follow, even for those who have never attempted this before. We aim to make this seemingly difficult task manageable and stress-free.
Step 1 Preparation and Tools Needed
Before you start peeling, good preparation is essential. First, ensure your car is clean. Wash and dry it thoroughly. This removes dirt and grit that could scratch the paint during the removal process. Next, gather your tools. You will need a heat gun or a powerful hairdryer, a plastic razor blade or a specialized plastic squeegee for film removal, a good quality adhesive remover (like Goo Gone Automotive or a specialized PPF adhesive remover), isopropyl alcohol (rubbing alcohol), and several clean microfiber towels.
It’s also helpful to have a spray bottle filled with soapy water, which can be used to keep the area lubricated and prevent scratching. Having everything ready before you begin ensures you won’t have to stop mid-process, which is important for maintaining consistent heat and tension on the film.
Step 2 Applying Heat to the Film
Begin by applying heat to a small section of the clear bra film. Hold your heat gun or hairdryer about 6-8 inches away from the surface. Move the heat source constantly in a sweeping motion, back and forth. You want to warm the film until it becomes slightly soft and pliable, not hot. This process usually takes about 30-60 seconds per section, depending on the heat output of your tool and the ambient temperature.
The goal is to soften the adhesive underneath without overheating the paint. Overheating can damage the clear coat, causing discoloration or hazing. A good indicator that the film is ready is when you can feel it becoming more flexible.
Step 3 Peeling the Film
Once a section is adequately heated, start to peel the film. Use your fingers to lift a corner of the film. Begin pulling the film away slowly and at a consistent angle, ideally around 45 degrees. Maintain steady tension on the film as you pull. It should peel away smoothly. If the film starts to tear, or if you encounter significant resistance, stop and apply more heat to that area.
Continue heating and peeling, working in small sections. It is crucial to pull the film back over itself, rather than straight up. This technique helps to minimize stress on the paint and reduces the chance of lifting the clear coat. Keep your microfiber towels handy to wipe away any loose debris or adhesive that may come off.
Step 4 Removing Adhesive Residue
After the film is completely removed, you will likely have some adhesive residue left on your car’s paint. This is very common. Do not try to scrape this off with abrasive materials, as you will scratch your paint. Instead, apply a generous amount of your chosen adhesive remover to a microfiber towel. Gently rub the residue in a circular motion. Allow the remover to sit on the residue for a few minutes to work its magic.
For stubborn spots, you might need to repeat this process. Once the majority of the adhesive is gone, clean the entire area with isopropyl alcohol and a clean microfiber towel. This will remove any remaining remover and ensure the surface is clean and ready for waxing or further detailing.
Step 5 Final Cleaning and Protection
The final step is to give the entire area a thorough cleaning. Wash your car again with a mild car wash soap and water to remove any lingering traces of adhesive remover or alcohol. Rinse thoroughly and dry with a clean microfiber towel. Once the paint is completely dry, it’s highly recommended to apply a coat of wax or a sealant. This will not only make your car’s paint look great but also provide a layer of protection.
The paint might feel a bit different after the film removal, and a good polish and wax can restore its shine and smoothness. If you notice any minor imperfections in the paint that were previously covered by the film, a clay bar treatment followed by a polish might be necessary to bring it back to its original condition.
Advanced Techniques for Stubborn Film and Adhesive
Sometimes, even with the best efforts, clear bra film and its adhesive can be particularly stubborn. This is often the case with older installations, films that have been exposed to extreme weather, or if the film was applied with a very strong adhesive. In these situations, you might need to employ a few advanced techniques to ensure a clean removal without harming your car’s finish.
These methods involve slightly more specialized tools or products, but they can make a significant difference when standard approaches are not enough. It’s important to approach these methods with even more caution and patience.
Using a Plastic Razor Blade or Squeegee
For very persistent edges or areas where the film just won’t lift, a plastic razor blade or a specialized plastic squeegee designed for PPF removal can be helpful. These tools are designed to glide over paint without scratching, provided they are used correctly. Always use these tools at a very low angle against the paint surface.
It’s best to use them in conjunction with heat and a lubricant, such as soapy water sprayed on the area. The combination of heat, lubrication, and the gentle scraping action can help lift edges that are otherwise stuck fast. Never use a metal razor blade, as this will undoubtedly scratch your paint. These plastic tools are a safer alternative for breaking the bond between the film and the paint.
When to Consider a Professional Detailer
There are certain situations where it is best to call in the professionals. If your car has a high-value finish, if the film has been on for an exceptionally long time (say, over 7-10 years), or if you notice any existing paint damage such as deep scratches or peeling clear coat, it might be wise to consult a professional detailer. They have specialized tools, experience, and chemicals that can handle difficult removals.
They can also assess the condition of your paint and advise on any necessary paint correction afterward. Attempting to remove a compromised film on a delicate paint job yourself could lead to much more expensive repairs than hiring an expert would have cost. Professionals can also ensure the film is removed evenly, minimizing the risk of tearing and adhesive issues.
Dealing with Difficult Adhesive Residue
Stubborn adhesive residue is often the most challenging part of removing clear bra film. If standard adhesive removers are not cutting it, you might need to try a stronger, yet still automotive-safe, product. Some detailers use specialized clay bars designed for removing adhesive or tar. These can be effective, but they require lubrication and careful use to avoid marring the paint.
Another option is to gently use a rubbing alcohol solution (at least 70% isopropyl alcohol) and allow it to soak into the residue for a longer period. For extremely tough spots, a product like 3M Adhesive Remover (ensure it’s automotive safe) can be very effective, but it’s crucial to follow the product’s instructions precisely and test it on an inconspicuous area first. Patience and repeated applications are often more effective than aggressive scrubbing.
Case Study: Successful Removal on a 10-Year-Old Sports Car
A classic example of successful clear bra film removal involved a 10-year-old sports car with the original film still intact. The owner noticed the edges were starting to lift and the film had yellowed considerably. Initially, they attempted removal using a hairdryer but found the adhesive was extremely tough. They then invested in a variable-temperature heat gun, allowing them to control the heat more precisely.
Working in small 1-foot sections, they heated the film until it was just pliable, then gently pulled at a 45-degree angle, using a plastic squeegee to aid in lifting the edges. This process took several hours over two days. The most challenging part was the adhesive residue, which required multiple applications of a strong automotive adhesive remover and a final polish. The result was a paint job that looked significantly refreshed and free of any damage, proving that with the right tools and patience, even old film can be removed successfully.
Maintaining Your Car’s Paint After Film Removal
Once you’ve successfully removed the clear bra film, your car’s paint is now exposed. This is the perfect time to give it some extra attention to ensure it stays looking its best for years to come. Proper aftercare will protect your paint, enhance its shine, and address any minor imperfections that might have been hidden by the film.
It’s a crucial step that many people overlook, but it can make a big difference in the overall appearance and longevity of your car’s finish. Think of it as giving your car a fresh start after its protective layer has been removed.
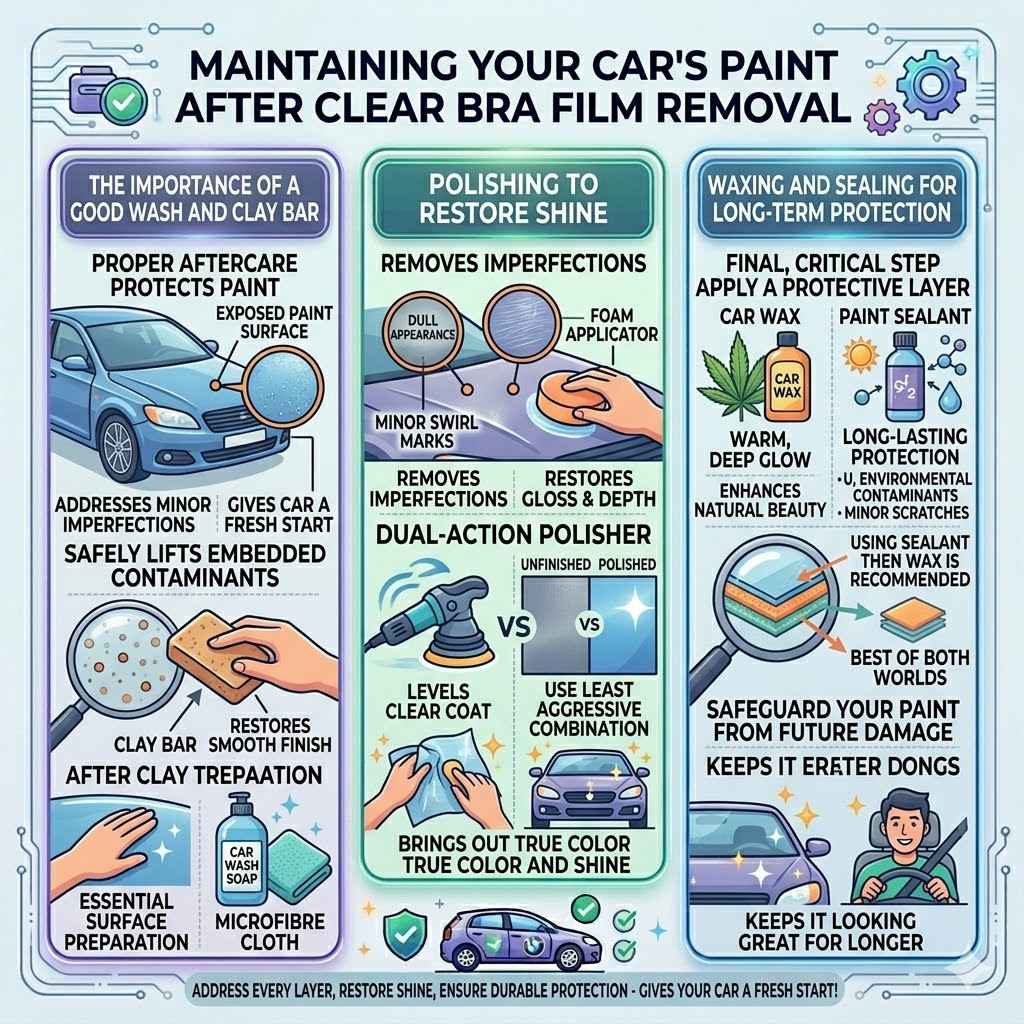
The Importance of a Good Wash and Clay Bar
After removing the film and all adhesive residue, the first step should always be a thorough wash. Use a high-quality car wash soap and plenty of water to remove any remaining contaminants. Once clean, inspect the paint closely under good lighting. You might notice some “paint transfer” or slight dullness where the film was.
This is where a clay bar treatment comes in handy. A clay bar is a malleable compound that safely lifts embedded contaminants from the paint surface that washing alone cannot remove. Using a clay bar with a suitable lubricant will restore a smooth finish to your paint. This process is essential for preparing the surface for polishing and waxing.
Polishing to Restore Shine
Even after a clay bar treatment, the paint might still have minor swirl marks or a dull appearance. A polish is designed to remove these imperfections and restore the gloss and depth of your car’s paint. Polishing involves using a mild abrasive to level out the clear coat, removing light scratches and swirl marks.
This can be done by hand using a foam applicator or by machine with a dual-action polisher for faster and more consistent results. Always start with the least aggressive polish and pad combination and test it in an inconspicuous area first. A good polish will bring out the true color and shine of your car’s paint, making it look as good as new.
Waxing and Sealing for Long-Term Protection
The final, and perhaps most critical, step is to apply a protective layer. This is typically done with either a car wax or a paint sealant. Waxes, often made from carnauba, provide a warm, deep glow and are great for enhancing the natural beauty of the paint. Sealants, on the other hand, are synthetic and generally offer longer-lasting protection against UV rays, environmental contaminants, and minor scratches.
Many detailers recommend using a sealant followed by a wax for the best of both worlds – durability and a beautiful finish. Applying one of these protective layers will not only make your car look fantastic but will also safeguard your paint from future damage, keeping it looking great for longer.
Frequently Asked Questions
Question: Can I remove clear bra film myself
Answer: Yes, you can often remove clear bra film yourself with the right tools and patience. It requires careful application of heat and gentle peeling to avoid damaging your car’s paint.
Question: What is the best heat source for removing clear bra film
Answer: A heat gun set to a moderate temperature or a powerful hairdryer is generally the best heat source. Always keep it moving to avoid overheating any single spot.
Question: How do I remove sticky residue left by the film
Answer: Use an automotive-specific adhesive remover. Apply it to a microfiber towel, rub the residue gently, and let it soak in. Isopropyl alcohol can also help for lighter residue.
Question: Will removing the film damage my car’s paint
Answer: There is a risk of paint damage, especially if the film is old or the paint is not in good condition. Gentle techniques, proper heat, and the right tools minimize this risk.
Question: How long does it take to remove clear bra film
Answer: The time required varies greatly depending on the size of the vehicle, the age and condition of the film, and your experience. It can take anywhere from a few hours to a full day or more.
Summary
Successfully removing clear bra film from your car is achievable with the right approach. Focus on using gentle heat to soften the adhesive, then peel the film slowly and at a consistent angle. Always have adhesive remover and microfiber towels ready for residue cleanup. After removal, a thorough wash, clay bar, polish, and wax will restore and protect your paint’s finish. This process ensures your car looks its best, free from old film and protected for the future.