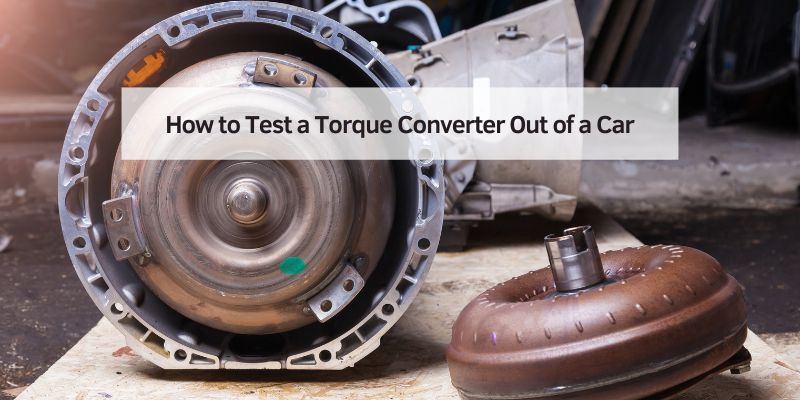
How to Test a Torque Converter Out of a Car
Testing a torque converter off the car comes down to three checks you can do by hand in about 30 minutes: the one-way clutch in the splines, the internal end play, and the stator clutch. None of them need a shop or a dyno — a pair of snap ring pliers, a flashlight, and a cup of transmission fluid are enough to catch a bad clutch, worn bearings, or a stuck stator before you bolt the converter back onto the transmission.
Why Test a Torque Converter Off the Car?
BEST FOR OFF-CAR TORQUE CONVERTER TESTING
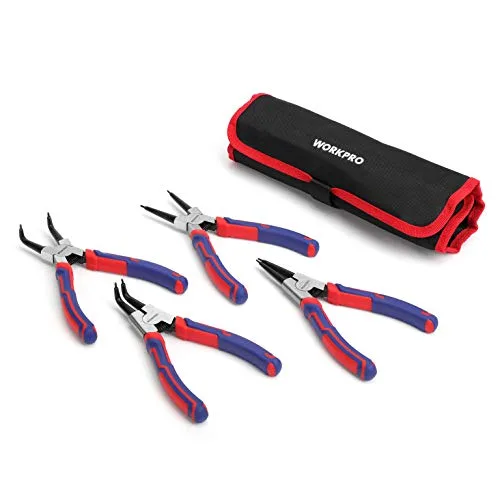 |
WORKPRO 4-Piece Snap Ring Pliers Set – $26.99 This is the exact style of pliers used in Steps 2 and 3 below to reach into the converter hub and check the splines and end play.
|
Bench-testing a torque converter before it goes back in the car is the same logic as checking a used part before you pay for the labor to install it. A converter that looks fine from the outside can still have a stuck one-way clutch, worn bushings, or metal debris inside — and any one of those can cause slipping, overheating, or a repeat transmission failure a few weeks after the rebuild. Catching the problem now means one teardown instead of two.
Tools You’ll Need
None of this requires a full shop. Here’s what covers every step below:
- Snap ring pliers (small, external type, about $10–$30 at auto stores)
- Screwdriver (small flathead, already in most toolkits)
- Clean rag (for wiping fluid and grime)
- Flashlight (to see inside the converter and check the hub)
- Transmission fluid (a cup or so, check your car’s manual for the correct type)
- Optional: Dial indicator (for a precise end play reading, around $20–$30)
These tools are cheap and reusable. If you’re missing one, borrow it or check a local auto parts store.
Step-by-Step Guide to Testing a Torque Converter
Work through these six checks in order. Each one takes just a few minutes, and together they cover the failure points that actually cause converters to fail.
Step 1: Inspect the Outside
Start with a visual check. Look over the housing for cracks, dents, or fluid stains around the welds and seal area. Use your flashlight to catch rust or seepage in low light. A converter that’s leaking or visibly dented at the housing should be replaced outright, no further testing needed — a cracked case only gets worse under the pressure of a running transmission.
Step 2: Check the Splines (One-Way Clutch Test)
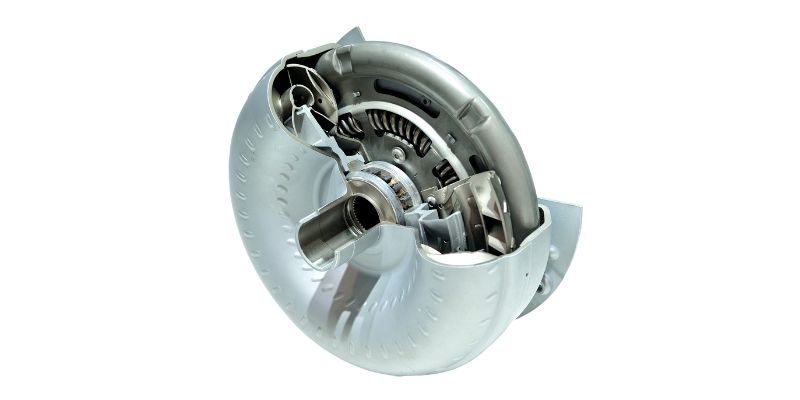
The splines are the toothed section inside the converter’s hub. Reach in with your snap ring pliers and try turning the larger splines by hand. On a good converter, they turn freely in one direction and lock up solid in the other — that’s the one-way clutch, sometimes called a sprag, doing its job. If the splines spin freely in both directions, the clutch is stuck or worn out, and the converter can’t hold the stall speed it’s supposed to. That converter needs to be replaced or rebuilt.
Step 3: Test for End Play
End play is how much the internal turbine spline can move in and out of the hub. Gently pull and push it with your pliers. There’s no single spec that applies to every converter — it varies by design and manufacturer — but the movement should be small: many rebuild specs call for well under 1/16 inch, and some are as tight as a few thousandths of an inch. If you feel more than a slight wiggle, or the play seems loose compared to a known-good converter of the same part number, worn bearings or thrust washers are the likely cause. A dial indicator gives you an exact number if you want one; for a quick pass/fail check, your fingers are enough.
Step 4: Spin and Listen
Pour a small amount of transmission fluid into the converter, hold it upright, and spin the turbine by hand. It should turn smoothly and quietly. Grinding, rattling, or a rough, gritty feel usually points to damaged bearings or debris loose inside the case — a loose bearing rolling around can sound almost like marbles in a jar. Dump the fluid out afterward and check it: dark, burnt-smelling fluid or visible metal flakes both point to internal wear, even if the spin test itself felt fine.
Step 5: Check the Stator Clutch
The stator sits deeper in the hub and redirects fluid back to the impeller, which is what lets a torque converter multiply torque at low speed. Insert a small screwdriver into the stator splines and turn it: it should spin freely one way and lock solid the other. If it turns both ways, or won’t turn at all, the stator’s one-way clutch has failed — expect poor low-speed acceleration and, over time, overheating from reduced torque multiplication. If you’re working on a GM TH350-style converter specifically, our guide on testing TH350 stator clearance covers the exact shim-and-clearance measurement for that transmission.
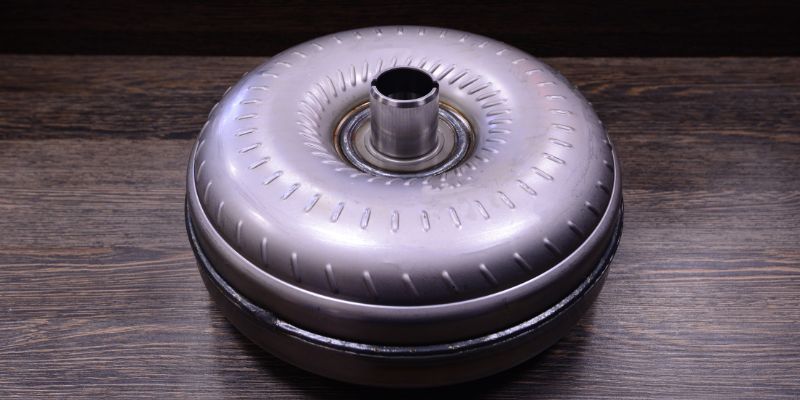
Step 6: Inspect the Pump Drive Hub for Scoring
This step gets skipped more than any other, and it’s the reason a brand-new transmission pump seal can start leaking within days of a reinstall. The hub — the neck that slides into the transmission’s front pump seal — needs a smooth surface where the seal rides. Wipe it down and look closely under your flashlight for burrs, deep scratches, or a visible groove worn into the metal. Light burrs can usually be polished out with crocus cloth or fine emery paper. A deep groove is a different story: even a new seal will leak against it, so the hub itself (or the whole converter, depending on design) needs to be replaced rather than reused.
Common Mistakes to Avoid
These slip-ups are easy to make and easy to avoid once you know to look for them:
- Skipping the fluid check: always inspect the fluid you pour out. Dark or metallic fluid means trouble inside, even if every other test passed.
- Using the wrong tools: regular pliers can chew up the splines. Stick to snap ring pliers built for this.
- Ignoring small damage: a small crack, dent, or scored hub only gets worse under load, so don’t install a converter you’re unsure about.
Benefits and Drawbacks of Testing Off the Car
Off-car testing is quick, cheap, and lets you catch problems in your own garage without the car running. The trade-off is that you can’t reproduce real hydraulic pressure or load this way. The alternative, an in-car stall speed test, does test the converter under real load, but it’s riskier: hold the brake and floor the throttle for more than about five seconds and you risk overheating the transmission, and it’s not a safe test on vehicles with traction control, ABS, or an electronically controlled transmission. For a first pass on a converter that’s already out of the car, the checks above are the safer and more practical starting point.
Practical Tips for Off-Car Testing
A few habits make this whole process faster and more reliable:
- Clean everything first: wipe the converter down with a rag before you start. Grime hides cracks and leaks.
- Mark your converter: if you’re comparing more than one, label them with a marker so you don’t mix up which one passed.
- Take it to a shop if the results are unclear: a transmission shop can bench-test a converter more precisely than a hand check, often for a small fee.
Comparing Testing Methods
Here’s how off-car testing stacks up against an in-car stall test:
| Method | Pros | Cons | Best For |
|---|---|---|---|
| Off-Car Testing | Cheap, quick, no running car needed | Can’t test under real load | Beginners, home mechanics |
| In-Car Stall Test | Tests real performance under load | Risky for some transmissions; not safe on all vehicles | Advanced mechanics |
Table 1: Comparing torque converter testing methods
Tools Cost Breakdown
What you might spend on tools if you’re starting from zero:
| Tool | Cost | Where to Get |
|---|---|---|
| Snap Ring Pliers | $10–$30 | AutoZone, Amazon |
| Small Screwdriver | $5 or less | Any hardware store |
| Dial Indicator | $20–$30 | Harbor Freight, eBay |
Table 2: Estimated costs for torque converter testing tools
Frequently Asked Questions
How Do I Know If My Torque Converter Is Bad?
A bad torque converter often shows cracks or dents in the housing, splines that spin freely in both directions instead of locking one way, or a rattling or grinding sound when you spin it by hand. Dark, burnt, or metallic-looking fluid drained from inside is another sign it needs to be replaced.
Can I Test a Torque Converter Without Tools?
You can do a basic check by spinning it by hand and listening for noise, but snap ring pliers let you reach the splines to test the one-way clutch and end play, which is where most real failures show up. Without them, you can miss a bad clutch entirely.
How Long Does It Take to Test a Torque Converter?
Once you have the tools in hand, the full set of checks above takes about 15–30 minutes, including cleaning the converter first.
What Happens If I Install a Bad Torque Converter?
A failing converter can cause slipping gears, overheating, or damage that spreads to the rest of the transmission. Testing it first is far cheaper than pulling the transmission back out to fix a problem you could have caught on the bench.
Can a Beginner Test a Torque Converter?
Yes. With the basic tools listed above and the steps in this guide, a beginner can run every one of these checks. Go slowly and double-check anything that feels ambiguous, especially the end play test.
Is It Safe to Test a Torque Converter at Home?
Yes, as long as you handle the converter carefully and use the right tools. Avoid forcing the splines with anything other than snap ring pliers, and keep your workspace clean so you don’t slip on spilled fluid.
How Much Does a New Torque Converter Cost?
A new torque converter typically costs $100–$300 for the part alone, depending on the vehicle. Testing the old one first can save you from buying a replacement you don’t actually need. See our full torque converter symptoms and replacement cost guide if you’re still diagnosing whether the converter is the actual problem.
Why Does My New Transmission Pump Seal Leak Right After Installing a Torque Converter?
This is almost always a scored or burred front hub, not a bad seal. If the hub has a groove where the old seal was riding, a new seal will leak against it too. Check the hub in Step 6 above before you reinstall the converter, and polish out light burrs or replace the hub if the groove is deep.
Wrapping It Up
Testing a torque converter out of the car is a straightforward way to catch a bad one-way clutch, worn bearings, or a scored hub before it goes back into the transmission. With basic tools and about 30 minutes, you can confirm whether it’s safe to reinstall or whether it needs to be replaced. For more background on symptoms and replacement cost, or for reference, trusted sites like AutoZone and Advance Auto Parts carry the tools and parts covered above.
Products related to this article
Sponsored / affiliate links. As an Amazon Associate I earn from qualifying purchases. I may earn additional commission from eligible campaigns.