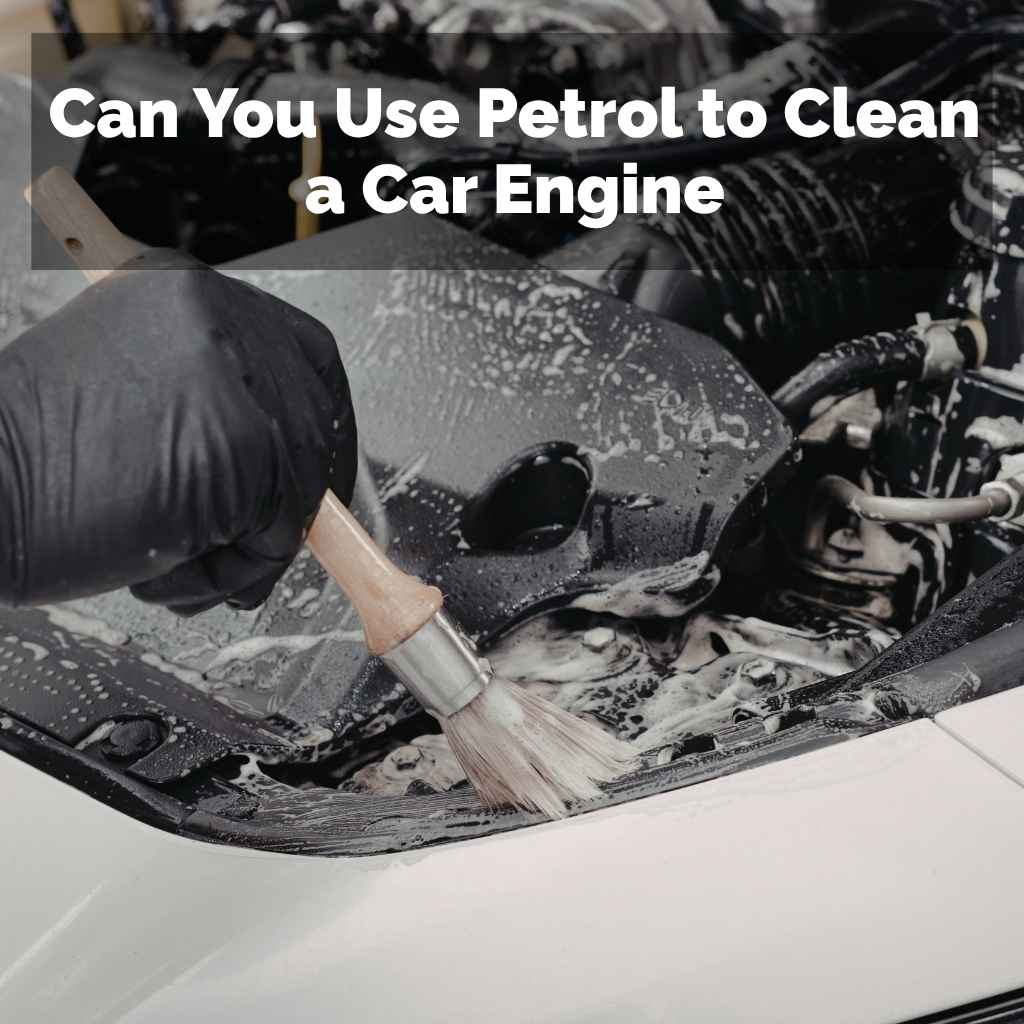
Can You Use Petrol to Clean a Car Engine
Many car owners wonder Can You Use Petrol to Clean a Car Engine? It sounds like a quick fix, right? You might see old guides or hear stories that suggest it’s a fast way to degrease. But for new car enthusiasts, figuring out the right way to clean your engine can feel tricky.
There are a lot of different cleaning products out there, and it’s hard to know which ones are safe. Don’t worry though, we’ll walk through this step by step in a way that’s easy to follow. We will explore safe and effective ways to get your engine looking great.
Is Petrol Safe for Cleaning Your Car Engine
When people ask Can You Use Petrol to Clean a Car Engine? they’re often thinking about its strong degreasing power. Petrol, or gasoline, is a hydrocarbon solvent. This means it’s really good at dissolving oil, grease, and grime.
This is why it’s used as fuel. Its ability to break down tough substances makes it seem like a perfect cleaning agent for an engine bay that often gets very dirty. However, using petrol directly on your engine comes with significant risks that most people aren’t aware of until it’s too late.
It’s not just about effectiveness; it’s also about safety and potential damage.
Understanding Petrol’s Properties
Petrol is a highly flammable liquid. This is its most significant characteristic when considering its use for cleaning. Its low flash point means it can ignite very easily from a spark, static electricity, or even a hot surface.
This makes it incredibly dangerous to use in an enclosed space like a car’s engine bay, which contains many potential ignition sources. Beyond flammability, petrol is also a volatile organic compound (VOC). This means it evaporates quickly, releasing fumes into the air.
These fumes are not only a fire hazard but can also be harmful to your health if inhaled in large quantities. The evaporation also means it can dry out rubber and plastic components, leading to cracking and premature wear. Its strong chemical nature can also strip away protective coatings and damage sensitive electronic parts, which are common in modern engines.
This makes it a risky choice for cleaning delicate automotive systems.
In terms of its chemical composition, petrol is a complex mixture of hydrocarbons. These are molecules made of hydrogen and carbon atoms. The specific blend varies depending on the refinery and the region, but it generally includes alkanes, cycloalkanes, and aromatic hydrocarbons.
These different components give petrol its cleaning and dissolving capabilities. For instance, some of the lighter hydrocarbons in petrol evaporate very quickly, helping to lift and carry away light oils and dust. Heavier hydrocarbons are more effective at dissolving thicker, baked-on grease.
This dual action makes it seem powerful. However, the very solvents that make it an effective cleaner are also what make it so damaging to engine components not designed to be exposed to them for extended periods. It’s like using a strong industrial solvent on delicate skin; it might clean it, but it will also cause irritation and damage.
The Risks of Using Petrol on Your Engine
Using petrol to clean your car’s engine carries several serious risks. The most immediate danger is fire. The engine bay is full of electrical wiring, hot metal parts, and rubber hoses.
Any spark, including static electricity generated by moving parts or even by pouring the petrol, can cause a catastrophic fire. This is not a hypothetical danger; there are many accounts of people having accidents while trying to clean their engines with flammable liquids. Beyond the fire hazard, petrol can severely damage your car’s engine components.
It can dry out and crack rubber seals, gaskets, and hoses, leading to leaks and failures. Plastic parts can become brittle and break. Sensitive electronic sensors and connectors can be corroded or damaged by petrol’s chemical composition, leading to expensive repairs and performance issues.
It can also strip away protective greases and lubricants that are essential for the moving parts of your engine, causing premature wear and tear. The fumes are also a health hazard to the person doing the cleaning and can be harmful to the environment when they evaporate.
Consider a scenario where a car owner, eager to impress, sprays petrol liberally onto a hot engine after a drive. The heat from the engine can cause the petrol to vaporize rapidly, creating a highly flammable atmosphere. A small spark from a loose wire or even a metal tool accidentally touching another metal part can ignite these vapors.
The resulting fire can quickly spread through the engine bay, damaging the vehicle severely and posing a significant risk to the driver and bystanders. This is why professionals always recommend specialized engine cleaners and proper safety precautions. Even if a fire is avoided, the petrol can seep into crevices and continue to degrade rubber and plastic components over time, leading to problems that appear weeks or months later.
This makes the perceived quick fix a long-term costly mistake.
Fire Hazards
The most critical risk associated with using petrol for engine cleaning is the severe fire hazard. Petrol is extremely flammable. Its vapors can ignite from even the smallest spark or heat source.
In an engine bay, there are numerous ignition sources: hot engine parts, the exhaust system, electrical components, and even static electricity. The rapid evaporation of petrol in a warm engine compartment creates an explosive atmosphere. A single stray spark can lead to a flash fire that can quickly engulf the entire engine bay and beyond, causing extensive damage to the vehicle and posing a serious threat to life.
This danger is so pronounced that many automotive safety organizations strongly warn against using petrol or other highly flammable solvents for engine cleaning. The consequences of a fire can be devastating, leading to the total loss of the vehicle and potentially serious injuries.
Damage to Engine Components
Petrol is a harsh chemical. It can significantly damage the various materials found in a car’s engine bay. Rubber and plastic parts, such as hoses, seals, gaskets, and wire insulation, are particularly vulnerable.
Petrol can dry out these materials, making them brittle and prone to cracking. This can lead to leaks of essential fluids like oil, coolant, or power steering fluid, which can cause further damage and costly repairs. Modern engines also contain sensitive electronic components, sensors, and connectors.
Petrol can corrode these parts, disrupt electrical connections, and cause malfunctions. The very solvents that break down grease can also strip away protective lubricants and coatings from metal parts, leading to increased friction and premature wear. This cumulative damage means that while the engine might look superficially cleaner immediately after using petrol, its long-term health and reliability will likely be compromised.
Health and Environmental Concerns
Beyond the risks to the car and the immediate danger of fire, using petrol for cleaning poses health and environmental risks. Petrol fumes are toxic. Inhaling them can cause headaches, dizziness, nausea, and respiratory problems.
Prolonged exposure can lead to more serious health issues. When petrol evaporates, it releases volatile organic compounds (VOCs) into the atmosphere. These VOCs contribute to air pollution and the formation of smog.
If petrol spills onto the ground, it can contaminate soil and groundwater, posing a threat to ecosystems. Proper disposal of any residue or rags used with petrol is also a concern, as it is considered hazardous waste. This makes petrol a poor choice from a responsible and safe cleaning perspective.

Safe Alternatives to Petrol for Engine Cleaning
Given the significant dangers associated with using petrol, it’s wise to explore safer and more effective alternatives. The automotive care industry has developed a range of specialized products designed specifically for cleaning engine bays without causing harm. These alternatives are formulated to be powerful enough to tackle grease and grime but gentle enough to protect your car’s components and the environment.
They also significantly reduce the risk of fire and health issues. Moving away from petrol means you can achieve a clean engine bay with peace of mind, knowing you are not jeopardizing your vehicle’s safety or longevity. The following sections will explore these better options in detail.
Specialized Engine Degreasers
Specialized engine degreasers are the go-to solution for cleaning car engines. These products are specifically formulated to break down oil, grease, and road grime that accumulate in the engine bay. They are typically available in spray cans or liquid forms.
Most degreasers are water-based or solvent-based, but the solvents used are much safer than petrol. They are designed to be effective on tough engine grime without damaging rubber, plastic, or painted surfaces. Many are biodegradable, reducing their environmental impact.
When choosing a degreaser, look for products labeled as “safe for engine bays” or “automotive degreaser.” They often come with clear instructions on how to apply them, let them dwell, and then rinse them off. Some might require a light scrub with a brush. The key benefit is that they are engineered to clean effectively while minimizing risks, making them a far superior choice compared to flammable household items.
A common type of specialized degreaser is a citrus-based cleaner. These use natural citrus oils as solvents, which are biodegradable and have a pleasant smell. They are very effective at cutting through grease and oil.
Another popular type is a water-based degreaser. These often contain powerful surfactants that lift dirt and grease from surfaces. They are typically safe for most engine components.
Some heavy-duty degreasers might use stronger, but still safer, chemical solvents that are specifically chosen for their effectiveness on automotive grease and their compatibility with engine materials. These often work faster but might require more careful rinsing to ensure no residue is left behind. Regardless of the base, these products are designed with the engine’s complex materials in mind, offering a balance of cleaning power and safety that petrol simply cannot match.
DIY Safe Cleaning Solutions
For those who prefer a more hands-on approach or want to use readily available household items, there are safe DIY cleaning solutions. A mixture of dish soap and warm water can be surprisingly effective for lighter grime. Dish soap is designed to cut through grease on dishes, and it works similarly on engine components.
You can create a solution and use it with a soft brush or cloth to wipe down accessible areas. For slightly tougher grime, a paste made from baking soda and water can be used as a gentle abrasive cleaner. Baking soda is mild and non-toxic.
For stubborn spots, a solution of white vinegar and water can help break down some types of grime, though it should be used sparingly and rinsed thoroughly as vinegar is acidic. Always remember to protect sensitive areas like the air intake and alternator from excessive moisture.
One practical DIY method involves using an all-purpose cleaner (APC) diluted with water. Many APCs are formulated to be safe for various surfaces. By diluting them to a lower concentration, they become suitable for engine bay cleaning.
A common ratio might be 1:10 or 1:20 APC to water, depending on the product’s strength and the level of dirt. This allows for a targeted approach, where you can spray the diluted cleaner onto specific areas, let it sit for a few minutes, and then agitate with a brush and rinse. This method is cost-effective and gives you control over the cleaning agents used.
It’s always a good idea to test any DIY solution on an inconspicuous area first to ensure it doesn’t cause any discoloration or damage to the specific materials in your engine bay. This careful testing step is crucial to avoid unintended consequences.
Proper Application and Safety Procedures
Regardless of the cleaning product you choose, proper application and safety procedures are paramount. Before you start, ensure the engine is cool to the touch. A hot engine can cause cleaning products to evaporate too quickly, reducing their effectiveness and potentially causing damage.
You should also protect sensitive engine components. Cover the air intake, alternator, fuse box, and any exposed electrical connectors with plastic bags and tape. This prevents water or cleaning solution from entering these areas, which can lead to short circuits or corrosion.
When using any cleaning product, wear appropriate personal protective equipment (PPE), such as gloves and eye protection. Ensure the area you are working in is well-ventilated. Always follow the specific instructions on the product label.
After cleaning, rinse the engine bay thoroughly with a gentle stream of water. Avoid using a high-pressure washer directly on engine components, as this can force water into sensitive areas.
For instance, when using a spray degreaser, it’s best to apply it to a cool engine and allow it to sit for the recommended time, usually 5-10 minutes, to penetrate the grime. Then, use a variety of brushes – soft for painted surfaces, stiffer for heavily soiled metal parts – to agitate the dirt. A final rinse with a garden hose on a gentle setting is usually sufficient.
High-pressure washers, while seemingly efficient, can push water past seals and into electrical connectors, causing problems down the line. Many professionals recommend a low-pressure rinse. After rinsing, it’s crucial to dry the engine bay.
This can be done with compressed air, microfiber towels, or by simply letting the engine run for a few minutes to allow heat to evaporate residual moisture. This thoroughness ensures a clean engine and minimizes the risk of future issues.
How to Clean Your Car Engine Safely Step by Step
Now that we understand the risks of petrol and have explored safer alternatives, let’s walk through a safe and effective method to clean your car engine. This step-by-step guide will help you achieve a clean engine bay without causing damage. Following these instructions will not only make your engine look better but also help maintain its components and potentially identify any small leaks or issues you might not have noticed before.
This process is designed for car owners of all skill levels, ensuring you can tackle the job with confidence.
Preparation and Protection
The first and most crucial step is preparing the engine bay and protecting sensitive components. Ensure the engine is completely cool. This might mean cleaning your car the day after driving it or letting it sit for several hours.
You want to avoid any risk of burns from hot surfaces and prevent cleaning solutions from evaporating too quickly. Next, gather your supplies: a specialized engine degreaser or safe DIY cleaner, various brushes (soft and stiff bristled), microfiber towels, plastic bags, painter’s tape or rubber bands, and personal protective equipment like gloves and eye protection.
Begin by visually inspecting your engine bay. Identify areas that are heavily soiled and any components that need extra protection. Use plastic bags to cover the alternator, air intake, fuse box, exposed wiring harnesses, and any other electrical components.
Secure these bags tightly with painter’s tape or rubber bands. This barrier is essential to prevent water and cleaning solutions from causing electrical issues. You might also want to cover the distributor cap if your car has one, although many modern cars do not have this component.
If you have a cold air intake, ensure its filter is protected from moisture. Taking this time for protection is key to a successful and safe cleaning process.
Applying the Cleaner
Once everything is protected, you can start applying your chosen cleaning solution. If you are using a commercial engine degreaser, read and follow the product’s instructions carefully. Typically, you’ll spray the degreaser generously over the greasy and dirty areas of the engine.
For DIY solutions like diluted all-purpose cleaner or dish soap and water, use a spray bottle to apply the mixture. Work in sections, focusing on one area at a time. Allow the cleaner to sit for the recommended dwell time – usually 5 to 10 minutes.
This allows the cleaning agents to break down the oil and grime effectively. Avoid letting the cleaner dry on the surface, especially in warm weather. If it starts to dry, lightly mist it with water or more cleaner.
The key here is to let the chemicals do the heavy lifting. You don’t need to drench the entire engine bay at once. Applying cleaner to a specific section, letting it work, and then moving to the next area ensures consistent and effective cleaning.
If you are using a water-based cleaner, it will be less aggressive than a solvent-based one, and you might need to let it dwell a bit longer. For very tough, baked-on grime, you might consider a second application or a more aggressive degreaser, but always with caution. The goal is to lift the dirt, not to strip away paint or coatings.
Agitation and Scrubbing
After the cleaner has had time to work, it’s time to agitate the grime. Use your brushes to scrub the soiled areas. Use softer brushes for painted surfaces and plastic covers, and stiffer brushes for heavily greased metal parts like the engine block or oil pan.
This scrubbing action helps to loosen the dirt and grease that the cleaner has broken down. Pay attention to nooks and crannies, using smaller brushes or even old toothbrushes to get into tight spots. You should start to see the grime lifting from the surfaces.
Don’t be afraid to apply a bit of pressure, but avoid excessive force that could scratch or damage components. If you notice any areas that are particularly stubborn, you can apply a little more cleaner and continue scrubbing.
The agitation phase is where you truly lift the contaminants. Imagine you are washing dishes; scrubbing is essential to remove stuck-on food. Similarly, brushing helps lift the emulsified grease and dirt from the engine’s surfaces.
Different brush types are important. A nylon brush might be too soft for thick grease on the engine block but perfect for cleaning the plastic engine cover. Conversely, a wire brush might be too harsh for most engine components and could cause scratching.
A good set of detailing brushes, including some with natural bristles and some with synthetic bristles of varying stiffness, will be invaluable. The goal is to dislodge the grime, making it easy for the rinse to carry it away. This step often reveals how effective your cleaner and your efforts are.
Rinsing and Drying
Once you have scrubbed all the areas, it’s time to rinse away the loosened dirt and cleaning solution. Use a garden hose with a gentle stream of water. Avoid using a high-pressure washer, as it can force water into electrical connectors and seals, causing damage.
Start rinsing from the top of the engine bay and work your way down. Thoroughly rinse all areas where you applied the cleaner to ensure no residue is left behind, as leftover cleaner can sometimes attract more dirt or cause staining. Make sure to rinse away all the suds and grime.
After rinsing, it’s essential to dry the engine bay. Remove the protective plastic bags and covers.
You can dry the engine bay using compressed air, which is very effective at blowing water out of crevices. If you don’t have access to compressed air, use clean, dry microfiber towels. Absorbent microfiber towels are ideal for soaking up water.
Another effective method for drying is to start the engine and let it run for about 5-10 minutes. The heat generated by the engine will help evaporate any remaining moisture. Ensure you have removed all the plastic coverings before starting the engine.
This final drying step is critical to prevent corrosion and electrical issues, ensuring your engine remains in good condition after cleaning. A clean and dry engine bay looks great and can help you spot potential leaks or maintenance needs.
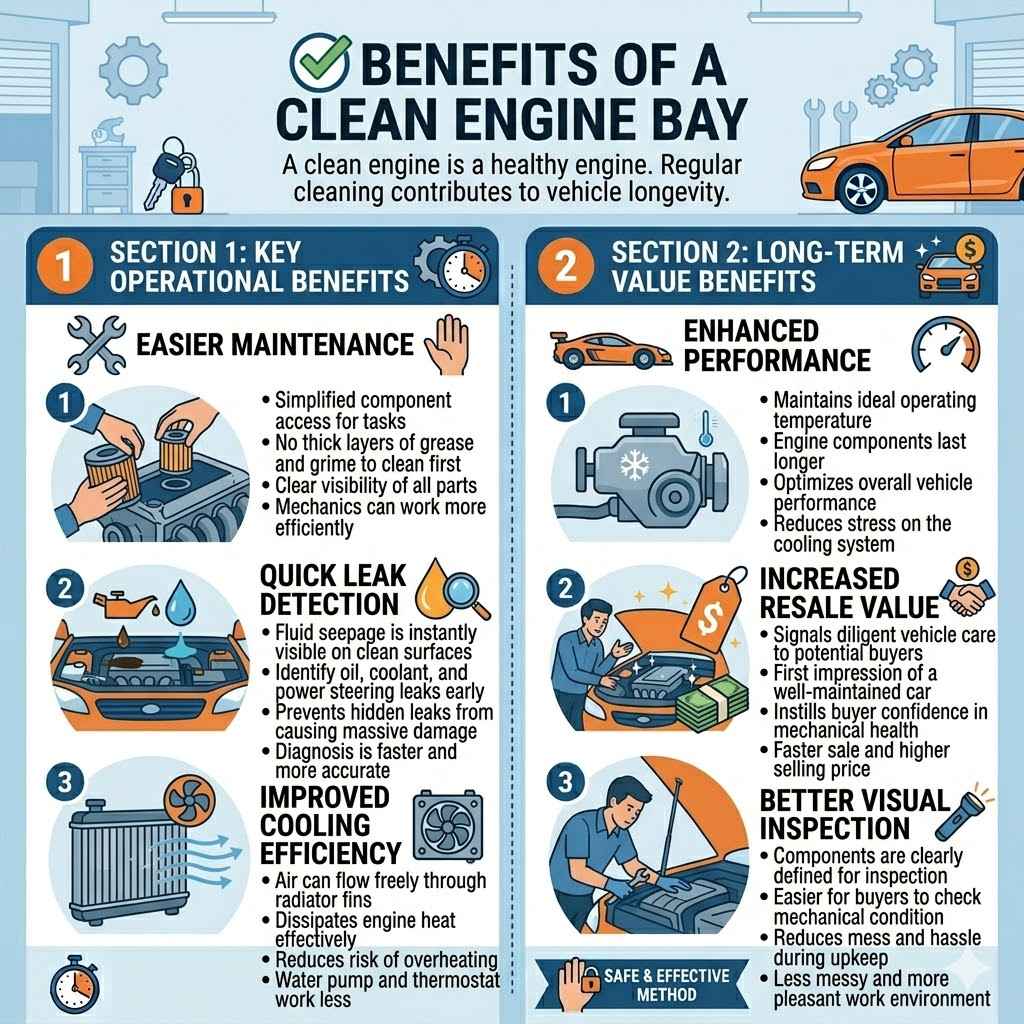
Benefits of a Clean Engine Bay
Keeping your car’s engine bay clean offers more than just aesthetic appeal. A clean engine compartment contributes to the overall health and longevity of your vehicle. It can help you spot problems early, improve performance, and even make maintenance easier.
When you invest time in cleaning, you are investing in your car’s future. Let’s explore the tangible benefits that come from a well-maintained engine bay.
Easier Maintenance and Leak Detection
A clean engine bay makes maintenance tasks much easier. When everything is free of grease and grime, it’s simpler to access components for oil changes, filter replacements, or inspections. You can clearly see the parts you need to work on.
More importantly, a clean engine bay is crucial for detecting leaks. Oil leaks, coolant leaks, or power steering fluid leaks are often hidden under layers of dirt and grime. Once cleaned, any new fluid seepage will be immediately visible on the clean surfaces, allowing you to catch potential problems early.
Early detection of leaks can prevent more serious damage and costly repairs down the line. For instance, a small coolant leak, if unnoticed, can lead to overheating and severe engine damage. A clean bay makes these issues apparent before they become catastrophic.
Imagine trying to find a small oil leak on a greasy, dirt-covered engine block. It’s like looking for a needle in a haystack. However, on a clean engine, a fresh drop of oil will stand out immediately.
This allows for quicker diagnosis and repair. Mechanics can also work more efficiently and accurately when the engine bay is clean, which can translate to lower labor costs for you. Furthermore, when you are performing your own maintenance, such as topping up fluids, it’s far less messy and more pleasant to work in a clean environment.
This encourages more frequent and thorough checks, leading to better overall vehicle care.
Improved Cooling Efficiency
A buildup of dirt, leaves, and debris in the engine bay can obstruct airflow to critical cooling components like the radiator and intercooler. These components rely on air passing through their fins to dissipate heat from the engine’s coolant and air charge. When they become clogged with debris, their efficiency is reduced.
This can lead to the engine running hotter than it should. An engine that runs too hot is more prone to damage, such as warped cylinder heads or blown head gaskets. By keeping the engine bay clean, you ensure that air can flow freely through the radiator and other cooling systems, allowing them to function optimally.
This helps maintain the engine at its ideal operating temperature, which is essential for performance and longevity.
Consider the radiator fins. They are designed to be a network of thin channels for air to pass through. If these channels are blocked by mud, leaves, or other road debris, the air cannot effectively cool the fluid circulating within the radiator.
This increased operating temperature puts more stress on the engine’s cooling system, forcing the fan to work harder and potentially leading to premature wear on components like the water pump and thermostat. A clean engine bay ensures that the cooling system operates at its peak, especially important during hot weather or when the vehicle is under heavy load, like when towing or driving uphill. This simple maintenance step can prevent costly overheating issues.
Enhanced Resale Value
When it comes time to sell your car, its overall condition plays a significant role in its resale value. A clean and well-maintained engine bay can be a strong selling point. It signals to potential buyers that the car has been cared for and is mechanically sound.
A dirty, greasy engine bay, on the other hand, can raise red flags and make buyers suspect underlying mechanical issues or neglect, even if the engine is in good working order. A visibly clean engine bay gives a positive first impression and can instill confidence in a buyer. This can lead to a faster sale and a higher price for your vehicle.
The effort to keep it clean is a small investment that can yield a good return.
Potential buyers often look for visual cues that indicate a car has been well-maintained. A spotless engine bay suggests that the owner has taken pride in their vehicle and has been diligent with upkeep. This can be a deciding factor when comparing similar vehicles.
Furthermore, a clean engine makes it easier for a buyer to perform their own inspection or for a mechanic to give it a thorough once-over, which can increase buyer confidence. While the engine’s performance is paramount, the presentation matters greatly, and a clean engine bay contributes significantly to that presentation. This attention to detail can make your car stand out from the competition in the used car market.
Frequently Asked Questions
Question: Is it safe to use kerosene to clean a car engine
Answer: Kerosene is also a petroleum distillate and highly flammable, similar to petrol. While it might be used in some industrial cleaning applications, it is not recommended for cleaning car engines due to fire risks and potential damage to rubber and plastic components. Specialized automotive cleaners are a much safer alternative.
Question: How often should I clean my car engine
Answer: Cleaning your car engine typically doesn’t need to be done very often. Once or twice a year is usually sufficient, depending on your driving conditions. If you frequently drive on dusty or muddy roads, or in areas with a lot of salt in winter, you might consider cleaning it more often, perhaps quarterly.
Question: Will cleaning my engine void my warranty
Answer: Generally, cleaning your engine with appropriate products and procedures should not void your warranty. However, if you were to use harsh chemicals like petrol and cause damage, that damage would likely not be covered. Always use products and methods that are safe for automotive use.
Question: Can I use a pressure washer to clean my engine
Answer: It is generally not recommended to use a high-pressure washer directly on engine components. The high water pressure can force water past seals, into electrical connectors, and damage sensitive parts. A gentle rinse with a garden hose is a safer option.
Question: What should I do if I accidentally spilled petrol on my engine
Answer: If you accidentally spill petrol on your engine, the most important thing is to let it evaporate completely in a well-ventilated area and ensure there are no ignition sources nearby. Do not start the engine. Once it has fully evaporated, you can proceed with cleaning using safe automotive products.
Summary
While petrol’s degreasing power might seem tempting, using it to clean a car engine is dangerous due to fire risks and potential damage to components. Safer alternatives like specialized engine degreasers or DIY solutions are recommended. Proper preparation, protection of sensitive parts, and following a step-by-step cleaning process ensure a clean and well-maintained engine bay that offers numerous benefits.