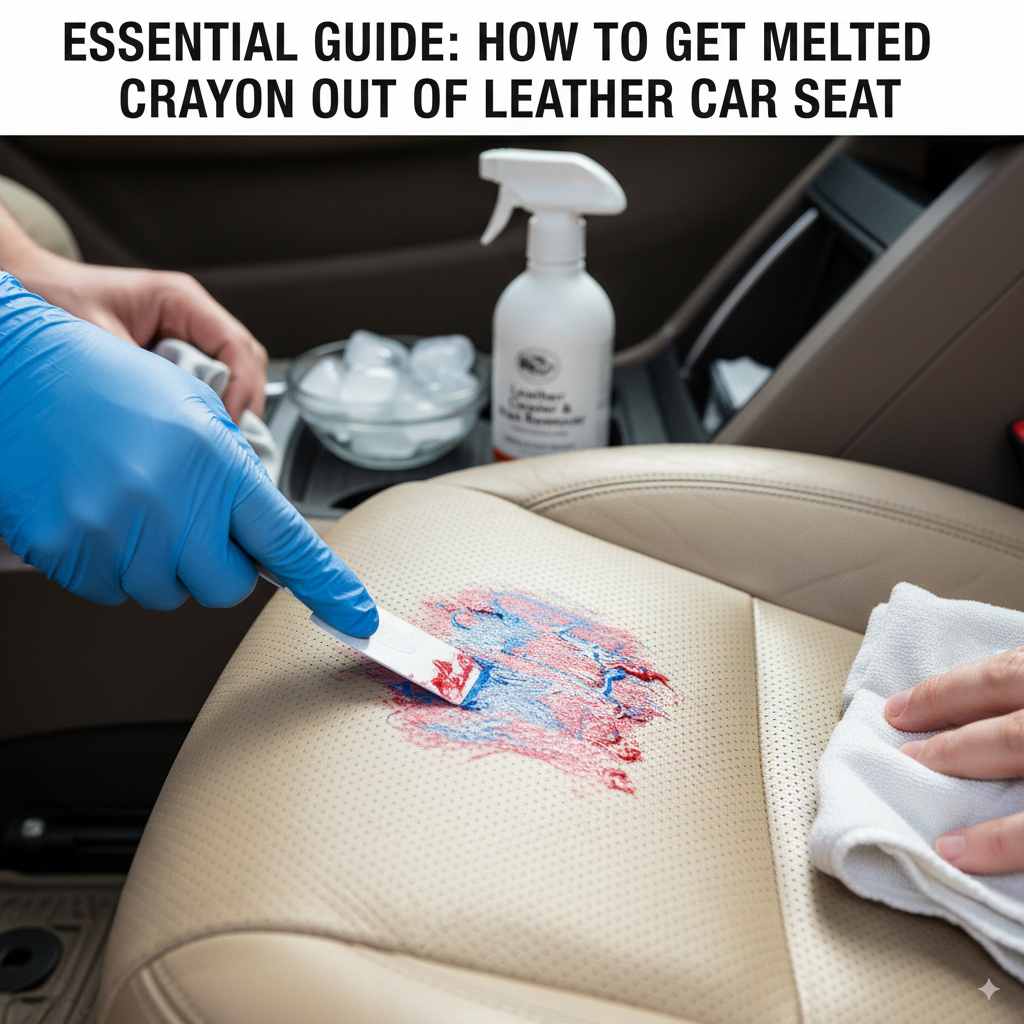
Essential Guide: How to Get Melted Crayon Out Of Leather Car Seat
To remove melted crayon from leather car seats, gently scrape off excess, then use rubbing alcohol or a specialized leather cleaner. Test in an inconspicuous spot first, work from the outside in, and condition the leather afterward to restore its suppleness and protect it.
It’s a parenting rite of passage: the unexpected art project finds its way onto your car’s pristine leather seats. Melted crayon, a waxy, colorful mess, can feel like a disaster, especially on nice leather. But don’t despair! As your friendly automotive guide, I’m here to show you that cleaning this sticky situation is totally doable. You don’t need to be a car detailing pro to tackle this. We’ll walk through it step-by-step, using simple methods and common household items. Get ready to restore your car seats to their former glory!
Understanding the Challenge: Why Crayons Love Leather
Crayons are essentially made of pigment and wax. When they heat up, especially in a sunny car, that wax melts into a sticky, oily substance. Leather, with its porous nature, can easily absorb this. The challenge isn’t just the color; it’s that waxy residue that can be tough to lift without damaging the leather’s finish. Different types of leather (aniline, semi-aniline, pigmented) might react slightly differently, but the general approach to removing crayon remains similar across the board.
The good news is that most car leather today is treated or coated (pigmented), which makes it more resilient and easier to clean than natural uncolored leather. This protective layer is your ally in this crayon-removal mission. We’ll focus on methods that work effectively on these common automotive leather types.
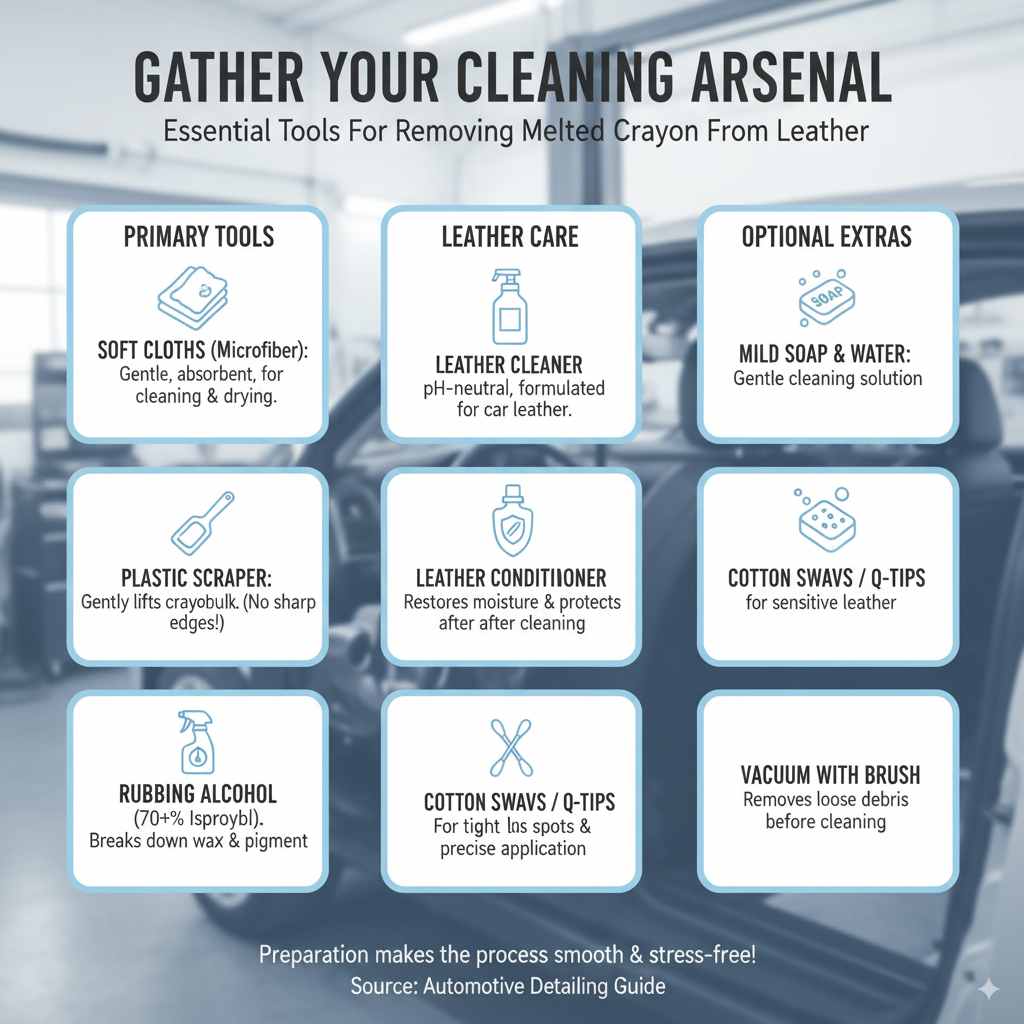
Gather Your Cleaning Arsenal
Before we dive into the cleaning process, let’s make sure you have the right tools. Having everything ready makes the job smoother and less stressful. Here’s a list of what you’ll likely need:
- Soft cloths: Microfiber cloths are ideal because they are gentle and absorbent. Have a few handy – one for cleaning, one for rinsing, and one for drying.
- Plastic scraper or old credit card: For gently lifting the bulk of the melted crayon. Avoid anything sharp that could scratch the leather.
- Rubbing alcohol (isopropyl alcohol): This is a common household item that works wonders on waxy, oily stains. Ensure it’s at least 70% isopropyl alcohol for effectiveness.
- Leather cleaner: A pH-neutral cleaner specifically designed for car leather is a great alternative or follow-up to rubbing alcohol. Look for reputable brands.
- Leather conditioner: Essential for restoring moisture and protecting the leather after cleaning.
- Cotton swabs or Q-tips: For getting into tight spots and for precise application.
- Mild soap and water: For a gentle cleaning solution if other methods are too harsh.
- Vacuum cleaner with a brush attachment: To remove any loose debris.
Step-by-Step Guide: Melting Crayon? No Problem!
Now, let’s get down to business. Follow these steps carefully to remove that melted crayon without harming your leather seats.
Step 1: Let It Cool and Harden (If Possible)
If the crayon is still warm and gooey, try to let it cool down. If the crayon melted recently and is still soft, a quick blast of cool air from a fan (not a hairdryer on hot!) might help it re-harden slightly. This makes it easier to remove the bulk without smearing it further into the leather.
Step 2: Gently Scrape Away Excess Crayon
Once the crayon has cooled and solidified a bit, use your plastic scraper or old credit card. Hold it at a shallow angle against the leather and gently scrape away as much of the crayon residue as possible. The goal here is to remove the thickest layer. Work carefully to avoid scratching the leather. If the crayon is stubborn or deeply embedded, don’t force it; just remove what you can easily lift.
Step 3: The Rubbing Alcohol Method (Test First!)
This is often the most effective method for breaking down the wax and pigment. However, always test any cleaning solution on an inconspicuous area of the leather first. This could be under the seat, on the back of a headrest, or on a hidden seam. Let it dry completely to check for any discoloration or damage.
If the test spot looks good:
- Dampen a clean microfiber cloth or a cotton swab with rubbing alcohol. Don’t soak it; just make it damp.
- Gently dab and wipe the crayon stain. Start from the outside edge of the stain and work your way inwards. This prevents spreading the color or wax.
- You’ll notice the crayon color transferring onto the cloth or swab. Use a clean section of the cloth or a fresh swab as you work to avoid reapplying the color.
- Be patient. This might take a few passes. Avoid aggressive scrubbing, as it can damage the leather’s surface.
For more stubborn marks, you can apply rubbing alcohol directly to a cotton swab and dab it onto the stain, then gently work it out.
Step 4: Using a Dedicated Leather Cleaner (Alternative/Follow-up)
If you prefer not to use rubbing alcohol, or if it didn’t fully remove the stain, a good quality pH-neutral leather cleaner is your next best bet. These cleaners are formulated to be tough on dirt but gentle on leather.
- Apply a small amount of leather cleaner to a clean microfiber cloth.
- Gently dab and wipe the stained area, working from the outside in, just like with the rubbing alcohol.
- Rinse the area: Dampen a separate clean cloth with plain water and gently wipe away any cleaner residue.
- Dry the area thoroughly with a dry microfiber cloth.
You can find excellent recommendations for automotive leather cleaners at resources like Meguiar’s Leather Care products, a trusted name in car care.
Step 5: Dealing with Different Leather Types
While the core methods apply broadly, a quick note on leather types:
- Pigmented/Coated Leather: This is the most common type in cars. It has a durable surface coating, making it more resistant to stains and easier to clean. The rubbing alcohol and leather cleaner methods will likely work very well here.
- Aniline/Semi-Aniline Leather: These are more natural and porous. They absorb liquids more readily. If you have this type (less common in modern cars), be extra cautious. Use the gentlest methods possible. Start with plain water and a mild soap solution. If using rubbing alcohol or a cleaner, dilute it significantly and always do a thorough patch test. Excessive rubbing can also damage the delicate surface.
Most car interiors use pigmented leather, so you’re likely in good shape. If unsure, consult your car’s owner’s manual or manufacturer’s website. For more in-depth information on leather types, organizations like the Leather Industries of America offer valuable consumer care guidance.
Step 6: Stubborn Stains and Special Cases
If the crayon color has deeply penetrated, or if the above methods haven’t completely removed it, you might need a bit more patience.
- Repeat the cleaning process: Sometimes, multiple gentle applications are more effective than one aggressive one.
- Try a mild soap solution: Mix a few drops of mild, pH-neutral soap (like a gentle dish soap or a dedicated car-wash soap) with distilled water. Dampen a cloth, wipe gently, and then rinse thoroughly with plain water.
- Commercial Crayon Removers: There are specialized products designed to remove crayon marks. If you go this route, read reviews carefully and ensure the product is safe for automotive leather. Always patch test.
- Professional Help: If the stain is extensive or you’re worried about damaging expensive leather, consider consulting a professional auto detailer. They have specialized tools and knowledge for difficult stains.
Step 7: Condition Your Leather
After cleaning, especially if you used rubbing alcohol, your leather might feel a bit dry. This step is crucial for maintaining the leather’s health and appearance.
- Ensure the cleaned area is completely dry.
- Apply a small amount of high-quality leather conditioner to a clean microfiber cloth.
- Gently massage the conditioner into the leather in a circular motion, covering the cleaned area and a bit beyond.
- Buff off any excess conditioner with another clean, dry cloth.
Conditioning replenishes the oils in the leather, keeping it soft, supple, and protected against future damage. It also helps to restore the natural sheen.
Preventing Future Crayon Disasters
We can’t always stop kids from drawing, but we can put some measures in place to prevent crayon chaos:
- “Art Zones”: Designate specific areas for messy activities. Maybe an art kit stays at home, or long car trips come with a “no crayon” rule for the car.
- Crayon Keepers: Invest in crayon organizers or boxes that keep them contained.
- Washable Crayons: Opt for washable crayons when available. They are generally easier to remove.
- Seat Covers/Protection: For frequent travelers with young artists, consider using seat protectors or even old towels during known “art time” in the car.
Tools at a Glance: Crayon Removal Comparison
Here’s a quick look at common cleaning agents for melted crayon on leather.
| Cleaning Agent | Pros | Cons | Best For |
|---|---|---|---|
| Rubbing Alcohol (Isopropyl Alcohol) | Effective at breaking down wax and pigment, readily available. | Can be drying to leather if used excessively, needs patch testing. | Most common crayon stains on pigmented leather. |
| Specific Leather Cleaner | Formulated for leather, usually pH-neutral, safer. | May require more effort for very tough stains, cost can be higher. | General cleaning and stains; good follow-up to alcohol. |
| Mild Soap and Water | Very gentle, readily available, low risk of damage. | Less effective on deeply embedded wax or stubborn pigment. | Light stains, sensitive leather types, or as a rinsing agent. |
| Commercial Crayon Remover | Specifically designed for crayon removal, can be very effective. | Requires careful selection to ensure leather safety, can be expensive. | Extremely stubborn or widespread crayon marks. |
Frequently Asked Questions (FAQ)
Q1: Will rubbing alcohol damage my car’s leather seats?
A1: Rubbing alcohol can be drying to leather if used too frequently or in high concentrations without conditioning afterward. However, for targeted stain removal, a brief application followed by thorough conditioning is generally safe for most pigmented automotive leather. Always test on an inconspicuous spot first.
Q2: How can I tell what type of leather my car has?
A2: Most modern car seats have “pigmented” or “coated” leather, which has a protective surface layer. If your leather feels very smooth and slightly plasticky, it’s likely pigmented. Natural or “aniline” leather feels softer, more luxurious, and shows natural markings. Check your car’s owner’s manual, or look for information on the manufacturer’s website for your specific make and model. If in doubt, err on the side of caution and use gentler methods.
Q3: Can I use a hairdryer to melt the crayon off?
A3: It’s best to avoid using heat, like from a hairdryer on a hot setting. While it might melt the crayon, it can also cause the wax to spread further into the leather pores, making the stain harder to remove. Letting it cool and harden, or using cool air, is a safer initial approach.
Q4: What if the crayon stain is old and dried?
A4: For old, dried crayon stains, the process is similar. You’ll start by gently trying to scrape away any hardened residue. Then, use rubbing alcohol or a leather cleaner to break down any remaining wax and pigment. Be prepared for it to potentially take a few passes, as older stains can be more set-in.
Q5: How often should I condition my leather car seats?
A5: It’s a good idea to condition your leather car seats every 3-6 months, depending on your climate and how much use they get. Regular conditioning keeps the leather supple, prevents cracking, and protects it from spills and stains, including future crayon incidents!
Q6: Are household products safe for my leather car seats?
A6: Some household products are safe, like mild soap and water or rubbing alcohol (with caution and testing). However, many household cleaners (like all-purpose cleaners, glass cleaners, or harsh detergents) are too aggressive and can strip the leather’s natural oils, cause discoloration, or damage the finish. Always use products specifically designed for leather or test extensively on a hidden area.
Conclusion: You’ve Conquered the Crayon Crisis!
See? That melted crayon mess doesn’t stand a chance against your newfound cleaning knowledge! You’ve learned how to gently remove the offending waxy art, tackle the color stain with simple, effective solutions like rubbing alcohol or specialized cleaners, and most importantly, how to restore and protect your leather with conditioning. Remember, patience is key, and always start with a test spot. By following these steps, you’ve not only cleaned up a sticky situation but also gained confidence in your ability to handle common car care challenges. Your car seats are looking great, and you’ve saved yourself a trip (and money!) by tackling it yourself. Great job!