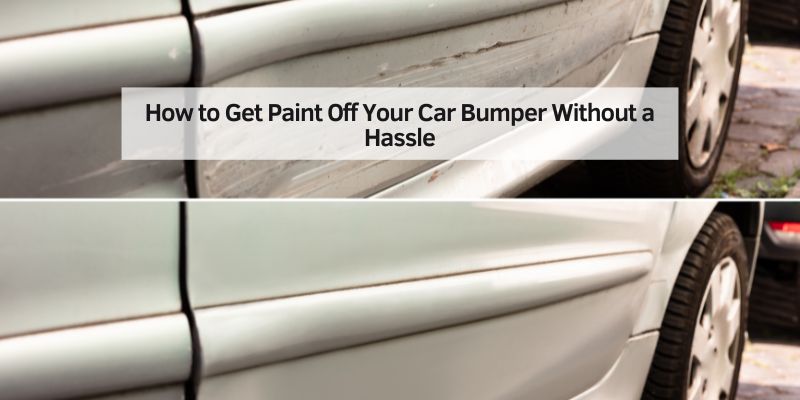
How to Get Paint Off a Car Bumper: Clay Bar to Compound
Most paint transfer sits on top of your clear coat, not cut into it — so it comes off with WD-40, a clay bar, or rubbing compound, not sanding. I learned this the hard way after scraping my bumper against a red parking-lot pole; a $5 can of WD-40 and 10 minutes fixed what looked like permanent damage. The order you try these in matters more than which one you pick, since starting too aggressive can dull the clear coat. This guide covers the safest method first, when to escalate, and the one WD-40 myth most guides get wrong.
Quick Answer
Wash the bumper, then try the least aggressive method first: a clay bar for light transfer, WD-40 for smeary marks, and rubbing compound only if those fail. Reaching straight for compound or sanding on a light mark risks thinning the clear coat unnecessarily.
What Is Paint Transfer and Why Does It Happen?
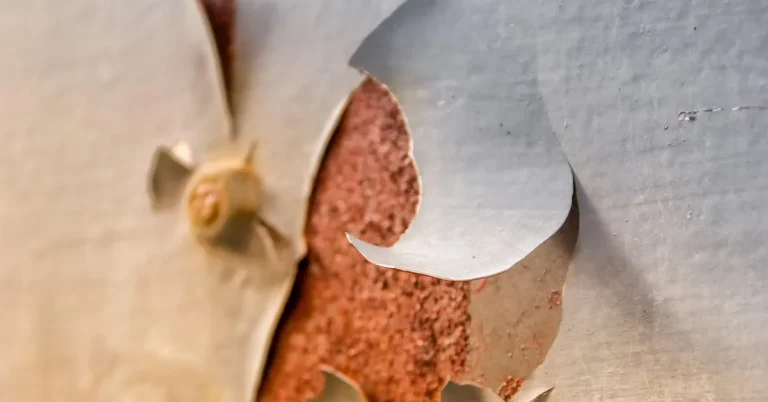
Paint transfer happens when your car bumper rubs against something painted, like a pole or another car. It leaves a colorful streak that sticks out like a sore thumb. It’s common in tight parking spots or drive-thrus. The good news? Most paint transfers are surface-level and don’t harm your bumper’s paint. Knowing this helps you pick the right method to clean it up without stress.
Tools and Materials You’ll Need
Before you start, grab these simple items. Most are probably in your garage or at a local store. Here’s what works best:
- Mild car soap: Cleans dirt so you don’t scratch the bumper.
- Microfiber cloths: Soft and safe for your car’s surface.
- WD-40: Loosens light paint marks (about $5 at Walmart).
- Rubbing compound: Removes stubborn paint (Turtle Wax is a good pick, around $7).
- Magic Eraser: Great for tough spots, but use gently (about $3 for a pack).
- Car wax: Protects the bumper after cleaning (Meguiar’s is solid, around $8).
- Bucket and water: For washing the bumper first.
For safety, wear gloves to avoid skin irritation from chemicals. Work in a shaded area to keep products from drying too fast.
Best Paint Transfer Remover Pick
Motsenbocker’s Lift Off Paint Scuff & Graffiti Remover
A dedicated paint-transfer remover formulated to break down foreign paint without the clear-coat risk that comes with reaching for WD-40 or compound first.
- Best for: Paint transfer that survives a clay bar attempt but isn’t worth risking compound on yet
- Why we picked it: Purpose-built for foreign paint, not a general-purpose lubricant like WD-40
- Main drawback: Costs more per use than a $5 can of WD-40
Compare more paint-transfer removal essentials
 Option 1 Meguiar’s Smooth Surface Clay Kit
|
 Option 2 Chemical Guys Workhorse Microfiber Towels (3-Pack)
|
 Option 3 Meguiar’s Ultimate Compound
|
As an Amazon Associate we earn from qualifying purchases.
Easy Step-by-Step Guide to Get Paint Off Your Car Bumper
Here’s how I tackle paint transfer on my bumper. Follow these steps, and it’s a piece of cake!
- Wash the Bumper: Mix car soap with water in a bucket. Use a microfiber cloth to clean the bumper. This removes dirt that could scratch the paint. Dry it with a clean cloth.
- Check the Damage: Look closely at the paint mark. If it’s light and smeary, WD-40 might do the trick. Thicker paint needs a rubbing compound or Magic Eraser.
- Try WD-40 for Light Marks: Spray WD-40 on a microfiber cloth. Gently rub the paint in small circles. Wipe it clean with a dry cloth. Repeat if needed. This worked like magic on my red pole scrape!
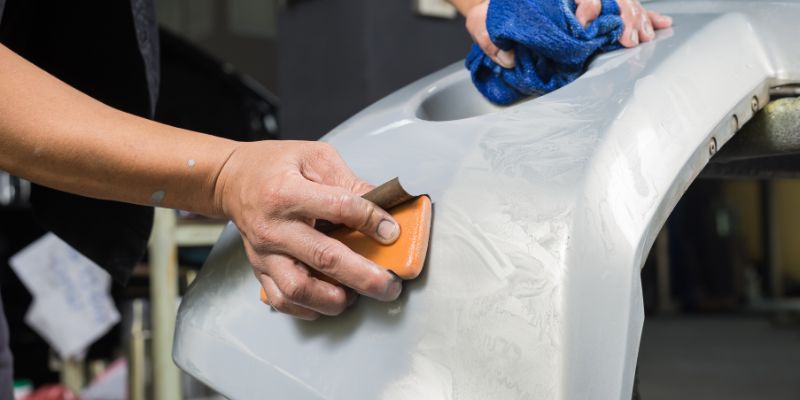
- Use Rubbing Compound for Stubborn Paint: Dab a pea-sized amount of rubbing compound on a cloth. Rub gently in circles over the paint. Wipe it off with a clean cloth. Don’t press too hard—it’s slightly abrasive.
- Magic Eraser for Tough Spots: Wet a Magic Eraser with water or WD-40. Rub lightly to lift paint. Check often to avoid damaging the clear coat. This is my go-to for tricky spots.
- Polish and Wax: Apply car wax with a cloth in circular motions. This shines the bumper and protects it. My bumper looked brand new after this step!
Comparing Methods: Which Works Best?
Different paint marks need different approaches. Here’s a table to help you choose:
| Method | Best For | Cost | Time | Ease |
|---|---|---|---|---|
| WD-40 | Light paint transfer | $5 | 5-10 min | Very easy |
| Rubbing Compound | Moderate paint marks | $7 | 10-15 min | Easy |
| Magic Eraser | Stubborn, thick paint | $3 | 10-20 min | Moderate |
Benefits and Drawbacks of Each Method
- WD-40: Fast and cheap, but not strong enough for thick paint. Safe for most bumpers.
- Rubbing Compound: Great for painted bumpers, but too much pressure can dull the finish. Test in a small spot first.
- Magic Eraser: Super effective, but can scratch if you’re not careful. Use light pressure.
For chrome bumpers, try Goo Gone instead of a Magic Eraser to avoid scratches. If the paint is super thick, sanding might work, but it’s risky for beginners.
The Right Order: Why Clay Bar Should Come Before Compound
Professional detailers follow one rule for paint transfer that most DIY guides skip: always try the least aggressive method first, and only escalate if it does not work. That order is wash, then clay bar, then WD-40 or a dedicated paint-transfer remover, and rubbing compound or polish only as a last resort — because every pass with an abrasive compound removes a microscopic layer of clear coat, and clear coat does not grow back.
A clay bar lifts surface contamination, including light paint transfer, without any abrasive contact at all — it is the safest option in this guide, safer than either WD-40 or rubbing compound. Save the rubbing compound for paint that survives a clay bar and a WD-40 attempt.
One correction worth making: WD-40 is not risk-free on clear coat. Left on too long or used repeatedly on the same spot, it can soften and thin the clear coat, which is the opposite of what you want — wipe it off within a minute or two of application rather than letting it sit.
📊 The safest removal sequence for paint transfer is wash, then clay, then chemical remover, with compounding or polishing reserved for cases that do not respond to gentler methods. — Source: Chemical Guys, How to Remove Paint Transfer From Cars
“Since you’re rubbing an abrasive on your car’s paint, you need to be careful. If you rub too hard, you will remove not just the paint transfer but also your car’s paint.”
My Personal Tips and Common Mistakes to Avoid
After a few bumper scrapes, I’ve learned what works and what doesn’t. Here are my top tips:
- Start small: Test any product on a tiny area first. My first try with a Magic Eraser was too hard, and I nearly dulled the paint!
- Don’t skip washing: Dirt can scratch your bumper if you rub without cleaning.
- Be patient: Rushing can harm the clear coat. Take your time for a smooth finish.
Common Mistakes:
- Using too much pressure with abrasive tools like Magic Erasers — this is different from an actual rubber scuff mark, which needs its own approach.
- Skipping waxing, which leaves the bumper unprotected.
- Not checking if your bumper is plastic or chrome—methods differ! If the bumper itself is scratched under the paint, see removing scratches from a plastic bumper instead.
Cost-Saving Ideas and Safety Tips
You can save money by using household items like toothpaste for very light marks. A small dab on a cloth works like a mild rubbing compound. Avoid harsh chemicals like paint thinner, which can strip your bumper’s paint. Always wear gloves when using WD-40 or Goo Gone to protect your skin. Work in a well-ventilated area to avoid fumes. For more car care tips, check out sites like Car and Driver or AutoZone.
Alternative Approaches
If DIY isn’t your thing, a professional detailer can remove paint for $50-$150, depending on the damage. This is pricier but safer for tricky cases. Another option is a clay bar, which gently lifts paint without chemicals. It’s about $10 and great for light transfer. I tried a clay bar once, and it was super satisfying, like erasing a mistake!
Comparing Professional vs. DIY Costs
| Option | Cost | Time | Skill Needed |
|---|---|---|---|
| DIY (WD-40, etc.) | $5-$15 | 10-20 min | Beginner |
| Professional | $50-$150 | 1-2 hours | None |
| Clay Bar | $10-$20 | 15-30 min | Beginner |
Frequently Asked Questions
How Do I Know If the Paint Is Too Thick to Remove at Home?
Look at the mark. If it’s raised or chunky, it might need sanding or a professional. Thin, smeary paint is easier for DIY methods like WD-40 or rubbing compound.
Can I Use Toothpaste to Remove Paint?
Yes, for light marks. Dab non-gel toothpaste on a cloth and rub gently. It’s a mild abrasive, like rubbing compound, but test it first to avoid surprises.
Will WD-40 Damage My Bumper’s Paint?
Generally, yes, if you wipe it off quickly. WD-40 softens paint on most painted bumpers, but leaving it on too long or reapplying it repeatedly on the same spot can soften and thin the clear coat itself — wipe it off within a minute or two rather than letting it sit.
How Do I Protect My Bumper After Removing Paint?
Apply car wax. It seals the surface and prevents new damage. Wax every few months for extra protection, especially if you park in tight spots.
What If My Bumper Is Chrome, Not Plastic?
Use Goo Gone or lacquer thinner. Avoid Magic Erasers, as they can scratch chrome. Test any product on a small area first to be safe.
Can I Use a Magic Eraser on Any Bumper?
Be cautious. Magic Erasers work well but can dull plastic bumpers if you rub too hard. Use light pressure and check often.
How Long Does It Take to Remove Paint?
It depends. Light marks take 5-10 minutes with WD-40. Thicker paint might need 15-20 minutes with a rubbing compound or Magic Eraser.
Conclusion
Getting paint off your car bumper is easier than it looks! With simple tools like WD-40, a rubbing compound, or a Magic Eraser, you can make your bumper look new again. Start with a clean surface, pick the right method, and take your time. My red pole disaster turned into a shiny success, and yours can too! Try these steps this weekend, and let me know how it goes. Share your tips or funny car stories in the comments—it’s always a blast to hear them!
Products related to this article
Sponsored / affiliate links. As an Amazon Associate I earn from qualifying purchases. I may earn additional commission from eligible campaigns.