How to Check a Car Alternator With a Multimeter: Pro & Easy
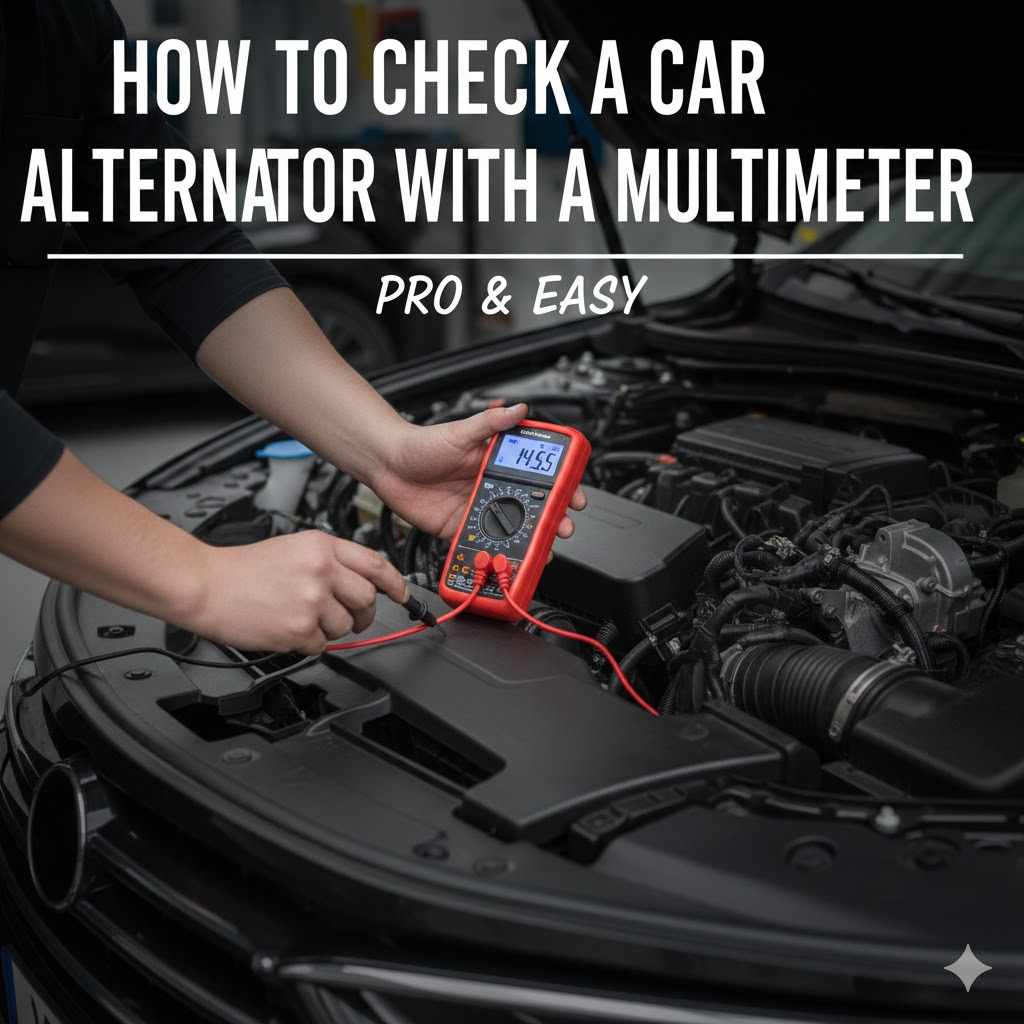
To check a car alternator with a multimeter, first set the multimeter to 20 DC volts. With the engine off, connect the red probe to the positive battery terminal and the black probe to the negative. A healthy battery should read around 12.6 volts. Next, start the engine. The voltage should rise to between 13.8 and 14.7 volts, indicating the alternator is charging properly.
Is your car having trouble starting? Do your headlights seem dim at night? These little annoyances can be stressful, and they often point to a problem with your car’s charging system. The battery gets the blame, but often, the real culprit is a failing alternator.
You might think you need a trip to the mechanic to figure it out. But what if I told you that you could diagnose the problem yourself in just a few minutes? It’s true! With a simple tool called a multimeter, you can check your alternator right in your own driveway.
Don’t worry if you’ve never used one before. In this guide, I’ll walk you through every step in plain, simple language. We’ll make this process easy, safe, and maybe even a little fun. Let’s get you back on the road with confidence!
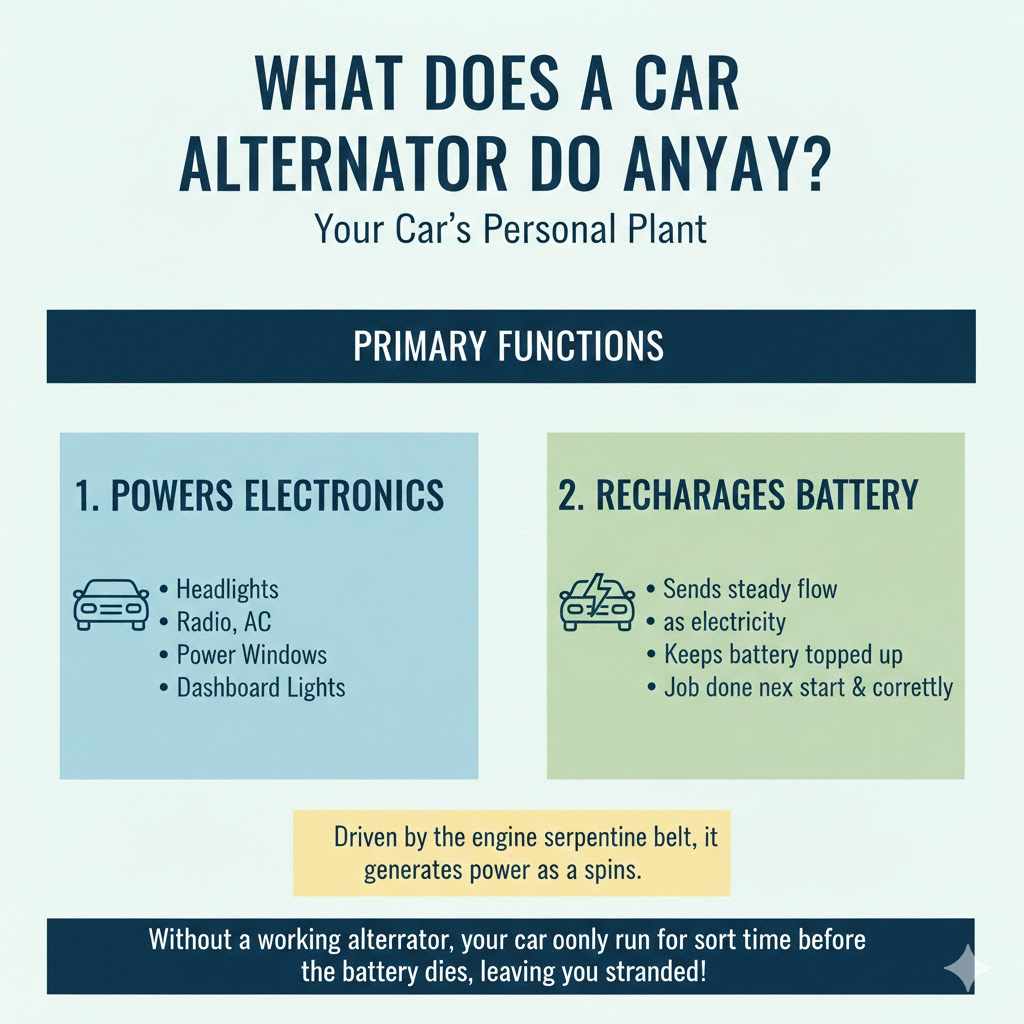
What Does a Car Alternator Do Anyway?
Think of your car’s alternator as its own personal power plant. While many people believe the battery powers everything, that’s only half the story. The battery’s main job is to provide the big jolt of electricity needed to start the engine.
Once the engine is running, the alternator takes over. It’s driven by a belt connected to the engine (the serpentine belt), and as it spins, it generates electrical power. This power does two very important things:
- It powers all your car’s electronics. This includes your headlights, radio, air conditioning, power windows, and dashboard lights.
- It recharges your battery. The alternator sends a steady flow of electricity back to the battery, keeping it topped up and ready for the next time you need to start the car.
Without a working alternator, your car would only run for a short time before the battery drained completely, leaving you stranded. That’s why knowing how to check it is such a valuable skill.
Signs Your Alternator Might Be Failing
Your car is pretty good at giving you hints when something is wrong. A failing alternator is no exception. If you notice any of these common warning signs, it’s a good time to grab your multimeter and run a quick test.
- Warning Light on the Dashboard: This is the most obvious sign. You might see a light shaped like a battery, or it might say “ALT” (alternator) or “GEN” (generator). Don’t ignore this light!
- Dim or Flickering Lights: If your headlights and dashboard lights seem dimmer than usual, or if they flicker and brighten as you speed up or slow down, your alternator is likely struggling to provide consistent power.
- A Dead Battery: A battery can die for many reasons, but if you find yourself needing a jump-start frequently, the alternator may not be recharging it properly.
- Strange Noises: A grinding or whining sound coming from under the hood can be a sign of bad bearings inside the alternator.
- Electrical Issues: Are your power windows moving slower than usual? Is your radio acting glitchy? These random electrical problems can happen when the alternator isn’t supplying enough voltage.
- A Strange Smell: A smell like burning rubber or hot wires could mean the alternator’s belt is slipping or the alternator itself is overheating. This is a serious sign that needs immediate attention.
Tools You’ll Need for the Job
The best part about this test is that you don’t need a garage full of expensive tools. You only need a few simple items to get the job done safely and accurately.
- A Digital Multimeter: This is the most important tool. You don’t need a fancy, expensive one. A basic digital multimeter from any hardware or auto parts store will work perfectly. They are very affordable and incredibly useful for all sorts of DIY projects.
- Safety Glasses: Your eyes are precious. Always wear safety glasses when working under the hood of a car.
- Gloves (Optional): A pair of work gloves can keep your hands clean and protect them from hot engine parts.
- A Friend (Optional but helpful): For one part of the test, you’ll need to turn on several electrical accessories in your car. Having a friend to help makes this step much easier.
Safety First! Before You Start Testing
Working on a car is perfectly safe as long as you follow a few simple rules. Your safety is the number one priority. Before you connect a single wire, please run through this quick checklist:
- Park your car on a flat, level surface. Avoid slopes or uneven ground.
- Engage the parking brake firmly.
- If you have an automatic transmission, put it in “Park.” If it’s a manual, put it in “Neutral.”
- Make sure the engine is turned off before you begin setting up.
- Wear your safety glasses.
- Be aware of moving parts. The engine will be running for part of this test, so keep your hands, hair, and any loose clothing away from belts and fans.
How to Set Up Your Multimeter
A multimeter might look a little intimidating with its dial and ports, but it’s very easy to set up for this test. Here’s all you need to do:
- Plug in the Probes: Your multimeter has two probes: a red one and a black one. Plug the black probe into the port labeled “COM” (for common, or ground). Plug the red probe into the port labeled with a “V” (for voltage).
- Set the Dial: Look for the DC Voltage section on the dial. It’s usually marked with a “V” followed by a straight line and three dots (or dashes). Since a car’s electrical system runs on 12 volts, turn the dial to the “20” setting in the DC Voltage section. This sets the multimeter to read a maximum of 20 volts, which is perfect for our test.
That’s it! Your multimeter is now ready to measure your car’s voltage.
Step-by-Step Guide: How to Check a Car Alternator With a Multimeter
Alright, you’ve got your tools, you’ve taken your safety precautions, and your multimeter is set up. Now it’s time for the fun part! We will perform three simple tests that will give you a complete picture of your charging system’s health.
Step 1: The Static Voltage Test (Engine Off)
First, we need to check the health of your battery. A weak or dead battery can sometimes act like a bad alternator, so we want to rule that out from the start. This test is done with the car’s engine completely off.
- Make sure the engine has been off for at least a few minutes.
- Open the hood and locate your car’s battery. You’ll see two connection points, or terminals. One is marked with a plus sign (+) and is the positive terminal. The other is marked with a minus sign (-) and is the negative terminal.
- Touch the tip of the red multimeter probe to the metal part of the positive (+) battery terminal.
- Touch the tip of the black multimeter probe to the metal part of the negative (-) battery terminal.
- Look at the multimeter screen. It will show you the battery’s static voltage.
A healthy, fully charged car battery should have a stable voltage. Here’s how to read the results:
| Voltage Reading (Engine Off) | What It Means |
|---|---|
| 12.6V or Higher | Excellent! Your battery is fully charged and in great shape. |
| 12.4V to 12.5V | Good. Your battery is about 75% charged. This is perfectly fine. |
| 12.3V or Lower | Needs Attention. Your battery is low. It could be due to an old battery or because the alternator isn’t charging it. You should charge the battery with a battery charger before proceeding to the next test for the most accurate results. |
Step 2: The Charging System Test (Engine Running)
Now it’s time to see the alternator in action. This test measures the voltage the alternator is producing to run the car and recharge the battery.
- Keep the multimeter probes connected to the battery terminals exactly as they were in Step 1.
- Make sure the area around the engine’s belts and fans is clear.
- Start the car’s engine and let it run.
- Look at the multimeter screen again. You should see the voltage jump up from the static reading.
This reading tells you if your alternator is doing its job. A healthy alternator should produce a voltage significantly higher than the battery’s static voltage. According to the National Highway Traffic Safety Administration (NHTSA), a properly functioning charging system is critical for vehicle safety and reliability.
| Voltage Reading (Engine Running) | What It Means |
|---|---|
| 13.8V to 14.7V | Perfect! Your alternator is working exactly as it should. It’s providing plenty of power to run the car and charge the battery. |
| Below 13.5V | Problem Alert. The voltage is too low. The alternator is not producing enough electricity to charge the battery and run your car’s systems. This is a strong sign of a failing alternator. |
| Above 14.8V | Problem Alert. The voltage is too high. This usually means the voltage regulator (which is often inside the alternator) has failed. Overcharging can damage your battery and other sensitive electronics. |
Step 3: The Load Test (Putting the Alternator to Work)
A healthy alternator should be able to provide plenty of power even when you demand a lot from it. This final test puts the alternator under stress to make sure it can handle the load.
- Keep the engine running and the multimeter probes connected to the battery.
- This is where a friend is helpful! Have them sit in the driver’s seat.
- Ask your friend to turn on everything electrical they can. This includes:
- Headlights (on high beam)
- Interior dome lights
- Radio
- Heater or A/C fan on the highest setting
- Rear window defroster
- Wipers
- With all these accessories running, look at the multimeter’s reading one last time.
The voltage will naturally drop a bit with all that demand, but it shouldn’t fall off a cliff. A strong alternator will keep the voltage steady. The reading should stay above 13.0V. If the voltage drops below 13.0V, it means the alternator is getting weak and can’t keep up with the electrical demand of your car. It’s a clear sign that it will likely fail completely soon.
What Do Your Alternator Test Results Mean?
Congratulations, you’ve just performed a complete and accurate alternator test! Now let’s break down what your results mean in simple terms.
- Everything Looks Good: If your battery read above 12.4V with the engine off, and your alternator read between 13.8V and 14.7V while running and stayed above 13.0V under load, then your charging system is healthy! Your problem likely lies elsewhere.
- Low Voltage When Running: If the voltage was below 13.5V with the engine running, this is the classic sign of a bad alternator. It’s not producing enough juice.
- High Voltage When Running: If the reading was above 14.8V, your alternator is overcharging the system. This points to a faulty voltage regulator, which typically requires replacing the entire alternator unit.
- Good Voltage, But Fails the Load Test: If the voltage was fine with the engine running but dropped below 13.0V when you turned everything on, your alternator is on its last legs. It can handle a normal day, but it’s too weak to manage heavy electrical loads.
- Low Static Voltage to Start: If your battery read below 12.3V before you even started the car, the battery itself is the first problem to solve. Use a dedicated battery charger to fully charge it, then perform all three tests again. If the battery won’t hold a charge, it needs to be replaced.
Beyond the Multimeter: Other Alternator Checks
The multimeter test is the most definitive way to check your alternator, but you can also use your eyes and ears to spot other potential issues with the charging system.
- Check the Serpentine Belt: This is the long, black rubber belt that spins the alternator. Is it cracked, frayed, or glazed-looking? Is it tight? You should only be able to press it down about half an inch. A loose or worn belt will slip on the alternator pulley and prevent it from charging properly. You can find detailed information on serpentine belts from trusted sources like NAPA Auto Parts.
- Listen for Noises: With the engine running, listen closely to the alternator. A healthy alternator is nearly silent. If you hear a high-pitched whining, grinding, or rattling sound, the internal bearings are likely failing.
- Check Connections: With the engine off, take a look at the wires connected to the back of the alternator. Are they tight? Is there any corrosion? A loose or corroded connection can prevent electricity from flowing properly.
What to Do If Your Alternator is Bad
So the tests point to a bad alternator. What now? Your primary option is to have it replaced. For most modern cars, alternators are not repaired; they are replaced as a complete unit.
You have two main paths:
- Do It Yourself (DIY): If you are comfortable working on cars and have a good set of tools, replacing an alternator can be a manageable DIY project. It can save you a significant amount of money on labor costs.
- Visit a Professional Mechanic: For most beginners, this is the recommended and safest option. A trusted mechanic has the experience and specialized tools to do the job correctly and quickly.
If you choose to find a mechanic, it’s wise to get a few quotes. The Federal Trade Commission (FTC) provides excellent guidance on how to choose a reputable auto repair shop and understand your rights as a consumer.

Frequently Asked Questions (FAQ)
Can I test an alternator without a multimeter?
You can look for the symptoms mentioned earlier (dim lights, warning lights, noises), but these are not definitive proof. The multimeter test is the only way to accurately measure the alternator’s voltage output and know for sure if it’s working correctly.
How long does a car alternator usually last?
A typical alternator lasts between 7 to 10 years, or about 100,000 to 150,000 miles. However, this can vary depending on the quality of the part, driving conditions, and the electrical demands placed on it.
Is it safe to drive with a bad alternator?
It is not recommended. A failing alternator won’t recharge your battery, so your car will be running only on battery power. Once the battery is drained (which can happen quickly), your car’s engine will shut off, and you will be stranded.
Can a bad battery kill a new alternator?
Yes, absolutely. A battery that is old or has a bad cell cannot hold a proper charge. This forces the alternator to work constantly at its maximum output to try and charge it, leading to overheating and premature failure. Always make sure you have a healthy battery when installing a new alternator.
How much does a multimeter cost?
You don’t need an expensive tool for this job. Basic, reliable digital multimeters are very affordable and can often be found for $15 to $30 at hardware stores, auto parts stores, or online.
Can jump-starting a car damage the alternator?
Yes, if done incorrectly. Connecting the jumper cables in the wrong order or to the wrong terminals can cause a massive voltage spike that can fry the sensitive electronics in your car, including the alternator’s voltage regulator.
What’s the difference between an alternator and a generator?
They both produce electricity, but they do it differently. Generators were used in very old cars and produced DC power. Alternators, used in all modern cars, produce AC power that is then converted to DC power. Alternators are much more efficient, especially at low engine speeds.
You’ve Got This!
There you have it! You now know how to test a car alternator like a pro using just a simple multimeter. By following these steps, you’ve not only learned how to diagnose a common car problem but also taken a huge step toward becoming more confident and knowledgeable about your vehicle.
Remember, car maintenance doesn’t have to be intimidating. Breaking it down into small, manageable steps makes all the difference. You’ve learned to check your battery’s health, measure your alternator’s output, and even put it through a stress test. This is a skill that will save you time, money, and the headache of being stranded by a dead battery.
So next time your car’s lights start to flicker, don’t panic. Grab your multimeter, follow this guide, and take control. You’re more capable than you think!