How to Cut and Buff a Car: A Beginner’s Guide to a Shiny Ride
My first attempt at cutting and buffing my car was a mess—swirls everywhere and a sore arm to boot! But after years of tinkering in my garage, I’ve learned the tricks to make a car gleam like it just rolled off the lot. In this guide, I’ll walk you through how to cut and buff a car in simple steps, whether you’re a newbie, a car enthusiast, or a seasoned pro. You’ll get easy tips, tools you need, and mistakes to dodge, all explained like I’m chatting with a young friend. Let’s make your car sparkle!
What Is Cutting and Buffing a Car?
Cutting and buffing is like giving your car’s paint a big hug. It’s a process to remove scratches, swirls, and dull spots from the paint to make it shiny again. Cutting uses a rough compound to smooth out flaws, like sanding a bumpy table. Buffing polishes the surface to a glossy finish. It’s perfect for fixing faded paint or light scratches. Why does it matter? A shiny car looks awesome and can even boost its value!
Why You Should Try Cutting and Buffing
This process is a game-changer for your car. Here’s why it’s worth your time:
- Saves Money: Skip the $500+ detail shop bill and do it yourself for under $100.
- Looks Amazing: Your car will shine like a mirror, turning heads everywhere.
- Protects Paint: Removing flaws helps sealants and waxes stick better, guarding against rust.
But it’s not perfect. It takes time (4-6 hours for beginners), and you can damage paint if you’re not careful. Still, with patience, it’s a fun project!
Tools and Materials You’ll Need
You don’t need fancy gear to start. Here’s a simple list to get going:
- Orbital Polisher: A random orbital like the Turtle Wax Hybrid Solutions Polisher (about $80) is beginner-friendly.
- Cutting Compound: Try Meguiar’s Ultimate Compound ($15) for scratches.
- Polishing Compound: Chemical Guys V36 ($20) works great for shine.
- Foam Pads: Get a variety pack (cutting, polishing, finishing) for $20.
- Microfiber Towels: Grab a 6-pack for $10.
- Car Wash Soap and Bucket: Basic soap like Armor All costs $5.
- Masking Tape: Protects trim, about $3.
- Optional: Spray bottle with water for cooling pads ($2).
Safety Tip: Wear gloves and eye protection. Compounds can be messy, and polishers kick up dust.
Here’s a quick table to compare tool costs:
| Item | Brand Example | Cost | Where to Buy |
|---|---|---|---|
| Orbital Polisher | Turtle Wax Hybrid | $80 | Amazon, Walmart |
| Cutting Compound | Meguiar’s Ultimate | $15 | AutoZone |
| Polishing Compound | Chemical Guys V36 | $20 | Amazon |
Table 1: Basic Tools for Cutting and Buffing a Car
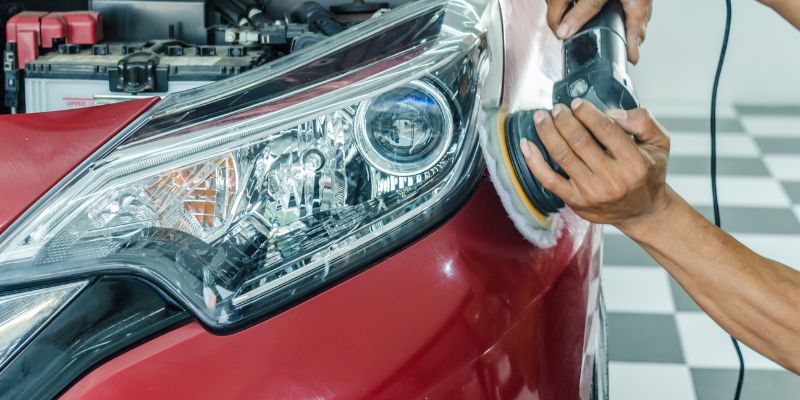
Step-by-Step Guide to Cut and Buff Your Car
Ready to shine? Follow these easy steps. I’ll keep it simple, like explaining to my nephew.
Step 1: Wash Your Car
Start with a clean car. Dirt can scratch the paint during buffing. Use car wash soap and a sponge. Rinse well and dry with a microfiber towel. I once skipped this step and ended up with tiny scratches—don’t make my mistake!
Step 2: Inspect the Paint
Check your car’s surface under sunlight. Look for swirls, scratches, or dull spots. Mark deep scratches with masking tape to focus on them. This helps you know where to cut harder.
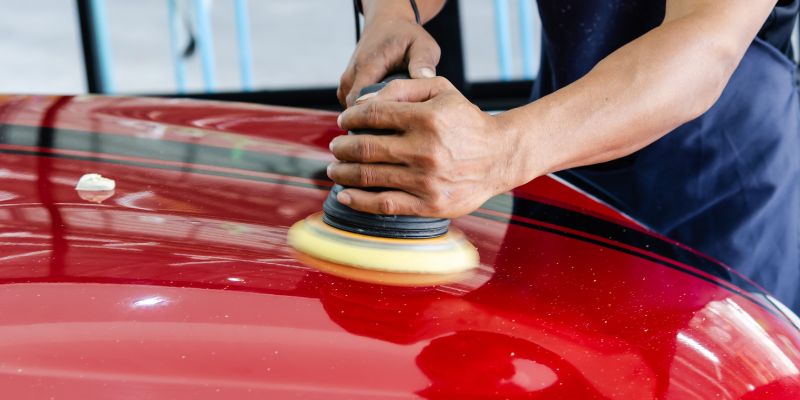
Step 3: Apply Cutting Compound
Put a dime-sized drop of cutting compound on a foam cutting pad. Set your orbital polisher to low speed (3-4 on most models). Work in small 2×2-foot sections. Press lightly and move the polisher in slow, overlapping circles. Wipe off the compound with a microfiber towel to check your progress.
Pro Tip: Mist the pad with water to keep it cool. A hot pad can burn paint!
Step 4: Polish for Shine
Switch to a polishing pad and apply polishing compound. Use a medium speed (4-5). Work in the same small sections, moving smoothly. This step brings out the gloss. Wipe clean to see that mirror finish!
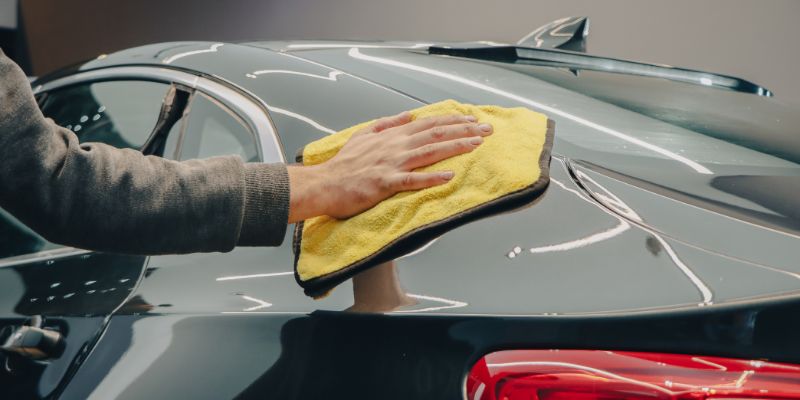
Step 5: Clean and Protect
Wash off any residue with soap and water. Apply a wax or sealant (like Meguiar’s Ultimate Liquid Wax, $20) with a soft foam pad for extra protection. Buff it off with a clean microfiber towel.
Here’s a quick checklist for success:
- Wash and dry the car.
- Cut scratches with compound and a polisher.
- Polish for a glossy finish.
- Protect with wax or sealant.
Visual Idea: A simple diagram showing a car divided into 2×2-foot sections for buffing would help beginners plan their work.
Common Mistakes to Avoid
I’ve goofed up plenty, so learn from my flops:
- Too Much Pressure: Pressing hard on the polisher can burn paint. Let the tool do the work.
- Skipping Wash: Dirt on the car causes scratches. Always wash first.
- Wrong Pad: Using a cutting pad for polishing leaves haze. Match pads to compounds.
Benefits and Drawbacks of Cutting and Buffing
Cutting and buffing is awesome but has trade-offs. It removes scratches and boosts shine, making your car look new. It’s also cheaper than a pro detailer. But it’s time-consuming, and overdoing it can thin your paint. If you’ve got deep scratches, you might need a pro or a touch-up pen instead. For minor flaws, this method is a winner.
Alternative Approach: If cutting and buffing feels too tricky, try a clay bar kit ($15) to smooth the surface before waxing. It’s easier but less effective for deep scratches.
My Personal Tips for a Perfect Finish
After years of polishing my old Mustang, here’s what I’ve learned:
- Work in Shade: Sunlight dries compounds too fast, leaving streaks.
- Start Small: Practice on a small spot, like the hood, to get the hang of it.
- Be Patient: Rushing leads to mistakes. Take breaks if your arms get tired.
Here’s a table comparing cutting vs. polishing for clarity:
| Process | Purpose | Tool/Pad | Time per Section |
|---|---|---|---|
| Cutting | Remove scratches, swirls | Cutting pad, compound | 5-7 minutes |
| Polishing | Add gloss, smooth finish | Polishing pad, polish | 3-5 minutes |
Table 2: Cutting vs. Polishing for Car Detailing
Visual Idea: A before-and-after photo of a car hood (scratched vs. shiny) would show the difference clearly.
Frequently Asked Questions
What’s the Difference Between Cutting and Buffing?
Cutting removes scratches with a rough compound, like sanding wood. Buffing polishes the paint for a shiny finish. Think of cutting as fixing flaws and buffing as adding sparkle.
Can I Cut and Buff by Hand?
Yes, but it’s hard work! Use a microfiber towel with cutting compound for small spots. A polisher is faster and gives better results for big areas.
How Often Should I Cut and Buff My Car?
Once or twice a year is enough for most cars. Doing it too often can thin the paint. Check your car’s finish to decide.
Will Cutting and Buffing Remove Deep Scratches?
It works for light scratches. Deep ones need a pro or touch-up paint. Test a small spot first to see if it helps.
What’s the Best Polisher for Beginners?
A random orbital polisher, like the Turtle Wax Hybrid, is safe and easy. It’s about $80 and won’t burn paint if you’re careful.
How Do I Avoid Swirl Marks?
Use clean pads and microfiber towels. Work in small sections and don’t press too hard. Check your work in sunlight to catch swirls early.
Is Cutting and Buffing Safe for All Cars?
Most cars are fine, but delicate paints (like matte finishes) need special care. Check your car’s manual or ask a pro if unsure.
Wrapping It Up
Cutting and buffing your car is like giving it a new outfit—it shines and feels great! You’ve got the steps: wash, cut, polish, and protect. With a $100 budget and a free afternoon, you can transform your ride. Avoid my early mistakes, like skipping the wash or rushing the job. Try it on a small spot first, and you’ll be amazed at the results. Share your shiny car pics with friends or ask me for more tips! Ready to make your car gleam? Grab a polisher and get started!