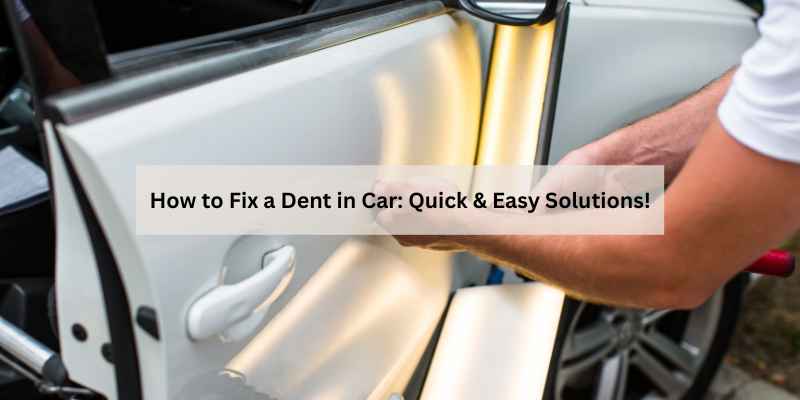
How to Fix a Dent in Car: A Diagnostic Guide That Saves You Time and Money
You walk out to the parking lot and spot it: a fresh dent on your door, right at eye level. Your stomach drops. You think about the repair bill, the insurance deductible, the hassle. But before you panic, know this: many dents are fixable at home in under an hour, with basic tools and a little patience. The trick is knowing which dents you can tackle yourself and which ones will only get worse if you touch them.
This guide walks you through the full diagnostic process. You’ll learn how to assess the damage, which method works for your specific dent, and exactly when to stop and call a professional. You’ll also see the cost difference between DIY kits and professional paintless dent repair (PDR), so you can make a smart call for your car and your wallet.

GLISTON
GLISTON 45pcs Paintless Dent Repair Tool Dent…
- UPGRADE DESIGN: Compared to the old version paintless dent repair kit, the new dent lifter can adjust more 1 cm height and more 3.…
- WIDELY USE: The pops a dent bridge kit with 5 different size tabs for dents, the dent lifter can choose 16 different size tabs. De…
- EASY to OPERATION: The paintless dent repair kit is suitable for any person to operate, even the girl can easily repair. Most of t…
If you’re dealing with a dent on a lower door panel, the technique differs slightly from a hood or fender. For a quick primer on that specific spot, check out this lower door dent guide.
For medium dents on flat surfaces, a glue puller kit is your best DIY friend. The GLISTON 45pcs Paintless Dent Repair Tool Kit includes a bridge puller, glue gun, and 16 different tab sizes, so you can match the tool to the dent’s shape. It’s a solid middle ground between a $10 suction cup and a $200 professional PDR set.
Assess the Damage: Is This a DIY Dent or a Job for a Pro?
Not all dents are created equal. The first step is a honest look at what you’re dealing with. Grab a flashlight and run your fingers over the dent. Feel the edges. Look at the paint under bright light. Ask yourself three questions:
- Is the paint cracked or chipped? If yes, this is not a PDR candidate. You’ll need body filler and touch-up paint, or a professional.
- Is the dent on a crease or body line? Creases are where the metal is folded sharply. They’re extremely hard to pull out cleanly, even for pros.
- Is the panel plastic or metal? Plastic bumpers react differently than steel doors. You’ll use different methods for each.
The “Fingernail” Test for Paint Damage
Run your fingernail across the dent. If it catches on a scratch or chip, the paint is broken. That means moisture can get under the clear coat and cause rust later. You can’t just pull the dent; you’ll need to seal the paint. If your fingernail glides smoothly, the paint is intact, and PDR-style methods will work.
Material Matters: Plastic vs. Metal Panels
Plastic bumpers are flexible. Heat them with hot water or a heat gun, and they’ll often pop back out on their own. Metal panels are rigid. They need a pulling force from the outside or access from behind. Knowing which you’re dealing with changes your whole approach. Check with a magnet: if it sticks, it’s steel. If it doesn’t, it’s plastic or aluminum.
Essential Tools and Materials for Dent Repair
Here’s what you’ll need for most DIY dent repairs. You probably own some of this already.
- Hot water or a heat gun/hair dryer
- Plunger (clean, dedicated to the car)
- Compressed air (the kind for cleaning electronics, not a compressor)
- Glue puller kit with tabs and a bridge (like the GLISTON dent puller kit)
- Body filler (Bondo), spreader, and sandpaper (80 to 300 grit)
- Primer, touch-up paint, and clear coat
- Polishing compound and wax
That’s the full list. For a simple dent, you’ll only use a few of these. For a deep dent with paint damage, you’ll use most of them.
Method 1: The Hot Water & Plunger Trick (For Plastic Bumpers)
This is the cheapest and easiest method. It works only on plastic bumpers, so confirm that first with a magnet.
- Boil a large pot of water. Pour it slowly over the dent. The heat makes the plastic pliable.
- Immediately press a plunger (or a large suction cup) over the dent. Make sure the cup covers the entire area.
- Pull firmly and quickly. The dent should pop out. If it doesn’t, repeat the hot water and try again.
- Once it’s out, pour cold water over the area to set the plastic.
This method works best on shallow dents, about the size of a fist or smaller. If the dent has sharp creases or the plastic is cracked, skip this. You’ll need filler or a new bumper.
Method 2: The Hair Dryer & Compressed Air Technique (For Small, Sharp Dents)
This trick is for small, sharp dents — the kind you get from a stray shopping cart or a door ding. It works on metal panels because it uses rapid temperature change to contract the metal.
- Heat the dent with a hair dryer on high for about 30 seconds. Keep it moving so you don’t blister the paint.
- Quickly spray the same area with compressed air (the can for cleaning keyboards) held upside down. That sprays a cold liquid, not just air.
- The sudden temperature drop makes the metal contract and pull the dent out. You might need a few cycles.
Safety warning: Never use a heat gun near fuel lines, plastic trim, or electrical wiring. A hair dryer is safer than a heat gun because it runs cooler. Also, keep the compressed air away from sensors or cameras in the bumper — the cold can damage them.
Method 3: The Glue Puller & Tabs Method (For Medium Dents on Flat Surfaces)
This is the most reliable DIY method for medium dents on flat metal panels. It’s what the GLISTON kit is designed for. The idea is simple: glue a tab to the dent, pull it out with a bridge, and then remove the glue.
- Clean the dent area with rubbing alcohol. It must be free of wax and dirt for the glue to stick.
- Heat the glue gun. Apply a generous blob of glue to the center of the dent.
- Press a tab into the glue, hold it for 30 seconds, and let the glue cool and harden.
- Attach the bridge puller over the tab. Tighten the screw slowly until the dent pops out. You’ll hear a slight pop.
- Loosen the screw, remove the bridge, and twist the tab off. The glue will peel away with it. Any leftover glue comes off with rubbing alcohol.
This method works best on dents that are 1 to 3 inches wide, with no paint damage. It’s not great for creases or edges. The GLISTON kit includes 16 different tab sizes, so you can find one that matches the dent’s shape. The arched bridge design spreads the pulling force evenly, which reduces the risk of making the dent worse.
Method 4: The Body Filler & Sanding Approach (For Deep Dents with Scratches)
If the paint is cracked or the dent is too deep for pulling, you’ll need body filler. This is more involved, but it’s doable at home if you’re patient.
Step-by-Step: Applying Filler, Sanding, and Priming
- Sand the area with 80-grit sandpaper to rough up the surface and remove any loose paint. Feather the edges so there’s no sharp step.
- Mix the body filler according to the instructions. Work fast — it sets in 5-10 minutes.
- Apply the filler with a spreader, slightly overfilling the dent. Let it cure completely.
- Sand the filler with 120-grit, then 220-grit, until it’s smooth and level with the surrounding paint. Use a block for flat areas.
- Apply primer to the bare metal. Let it dry, then sand lightly with 400-grit.
- Apply touch-up paint in thin coats. Let each coat dry before the next.
- Finish with clear coat to match the factory shine.
This method takes a few hours and requires a steady hand. If you’ve never done bodywork, practice on an old panel first. It’s easy to sand through the surrounding paint or leave a low spot.
Protecting Your Repair: Clear Coat, Polish, and Wax
Once the dent is out, you’re not done. The repaired area is vulnerable to moisture and UV damage. Here’s how to seal it properly.
- If you used body filler, you already applied primer, paint, and clear coat. Wait 24 hours for it to cure.
- If you used a glue puller, the paint is intact, but the glue can leave a residue. Clean it off with rubbing alcohol.
- Polish the area with a fine compound to blend the clear coat and remove any sanding marks.
- Apply a coat of wax to the entire panel. This adds a layer of protection against water and road salt.
Skipping this step is the most common DIY mistake. Without wax, the repaired area can fade or start to rust within months.
When to Call a Professional: The Hidden Costs of DIY
DIY dent repair can save you $150 to $300 per dent, but it’s not risk-free. Here’s a realistic cost comparison:
| Method | Tool Cost | Time | Risk Level | Best For |
|---|---|---|---|---|
| Hot water & plunger | $0-10 | 15 min | Low | Plastic bumpers, shallow dents |
| Hair dryer & compressed air | $10-20 | 20 min | Medium | Small, sharp dents on metal |
| Glue puller kit | $30-50 | 30-60 min | Medium | Medium dents on flat surfaces |
| Body filler & sanding | $20-50 | 2-4 hours | High | Deep dents with paint damage |
| Professional PDR | $150-300 | 1-2 hours | Very low | Any dent without paint damage |
The hidden cost of DIY is the risk of making the dent worse. A glue puller can stretch the metal if you pull too hard. Body filler can crack if you don’t mix it right. If you’re unsure, get a quote from a PDR pro first. Many will give a free estimate, and you can decide based on the price.
Also consider insurance. If the dent is from a collision, your comprehensive coverage might pay for it, minus your deductible. A small dent might not be worth a claim, but a large one could be.
How to Prevent Future Dents (Parking Strategies & Protection)
Once you fix the dent, you want to keep it that way. Here are a few practical habits that reduce your risk:
- Park far from store entrances. The extra walk is worth it.
- Use a parking spot with a curb on one side and a car on the other, so you only have one exposed side.
- Avoid parking under trees — falling branches and bird droppings can damage paint.
- Install door edge guards and bumper protectors. They’re cheap and absorb small impacts.
- If you park on the street, consider a car cover. It also protects against hail.
For hail damage specifically, a cover won’t stop large hailstones, but a thick one can soften the impact. If you live in a hail-prone area, parking in a garage or under a carport is your best bet.
Frequently Asked Questions
Can I fix a dent on a crease or body line at home?
Probably not. Creases are sharp lines where the metal is folded. Pulling them out usually leaves a wavy surface or cracks the paint. Professionals use special tools and techniques for creases. If you have a crease, get a quote before attempting anything.
How long does a DIY dent repair last?
If you do it right, it can last for years. The key is proper paint protection. If you skip the clear coat or wax, the repair can fade or rust within months. If you use body filler, it can last the life of the car if applied correctly.
Will a plunger work on a metal door dent?
Sometimes, but only for shallow, round dents on flat areas. The plunger needs a good seal, and the metal must be flexible enough to pop back. Most door dents are too sharp for a plunger. A glue puller gives you more control.
Is paintless dent repair safe for my car’s paint?
Yes, when done correctly. PDR tools work from behind the panel, gently massaging the metal back into shape. The paint is not touched. That’s why it’s the preferred method for hail damage and door dings. The risk is low, but not zero — a careless tech can crack the paint.
Can I use a glue puller on a plastic bumper?
You can, but it’s not ideal. Plastic is flexible, so the glue tab might pull the paint off before the dent comes out. The hot water and plunger method is safer for plastic. If the plastic is cracked, no DIY method will work.
Final Thoughts: What to Do Next
You now have a clear decision path:
- Assess the dent: size, location, paint condition, and material.
- If the paint is intact and the dent is on a flat metal panel, try a glue puller kit.
- If it’s a plastic bumper, start with hot water and a plunger.
- If the paint is damaged, plan for body filler and touch-up paint.
- If the dent is on a crease or you’re not confident, get a professional quote.
- Protect the repair with clear coat, polish, and wax.
- Park smart to avoid future dents.
DIY dent repair is a genuine money-saver, but it’s not for every situation. The smartest move is to diagnose first, then decide. You’ll either fix it yourself with confidence or know exactly why you’re calling a pro.
For related repairs, check out how to remove a dent from a car with additional methods, or learn the hood dent repair process for a specific panel.
Products related to this article
Sponsored / affiliate links. As an Amazon Associate I earn from qualifying purchases. I may earn additional commission from eligible campaigns.