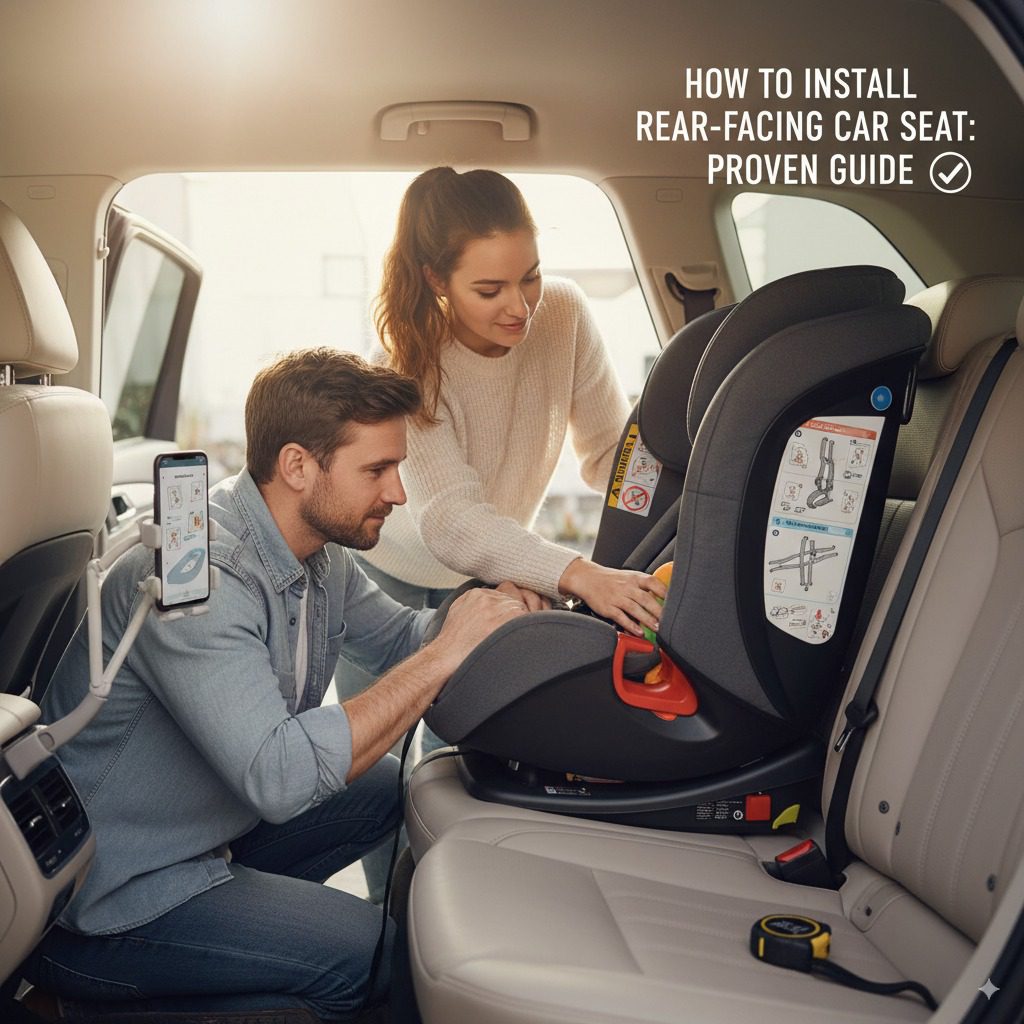
How to Install Rear Facing Car Seat: Proven Guide
Installing a rear-facing car seat correctly is crucial for your baby’s safety. This guide will walk you through the essential steps to ensure a secure and proper fit, providing peace of mind on every journey. Follow these proven methods for a safe ride.
Welcome, fellow drivers! As your trusted automotive guide, Md Meraj, I know that keeping your little ones safe in the car is your absolute top priority. One of the most important ways to do this is by correctly installing their car seat in the rear-facing position. It might seem a bit daunting at first, with all the straps and angles, but I promise it’s something you can absolutely master. This guide is designed to break down every step into simple, easy-to-understand instructions. We’ll cover everything from understanding your car seat’s manual to achieving that perfect, snug fit. Let’s get your precious cargo riding safely!
Why Rear-Facing is So Important for Little Ones
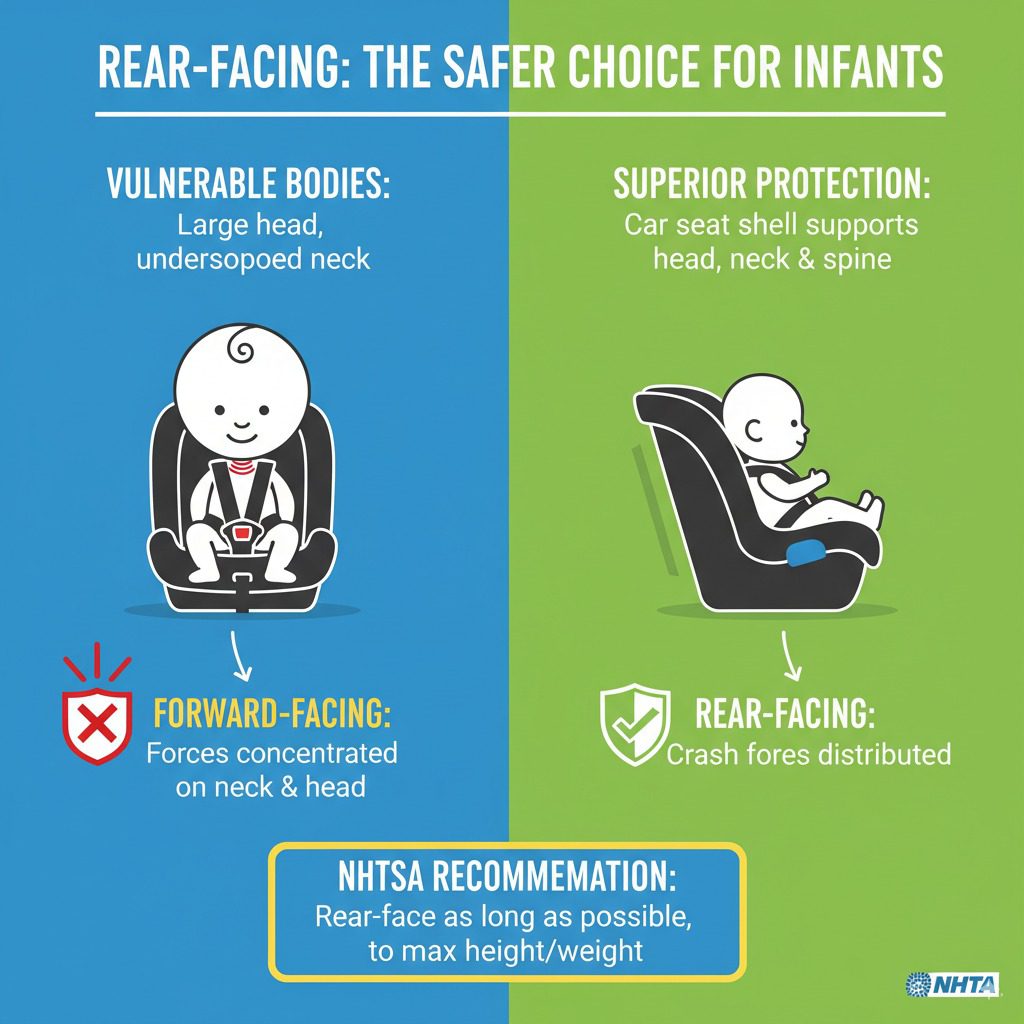
Before we dive into the “how-to,” let’s quickly touch on why rear-facing is the safest option for infants and young children. Babies have large heads and underdeveloped necks, which are vulnerable in a crash. When a car seat is rear-facing, the car seat shell supports the head, neck, and spine, distributing crash forces more evenly. This significantly reduces the risk of serious injury compared to forward-facing. Safety organizations like the National Highway Traffic Safety Administration (NHTSA) strongly recommend keeping children rear-facing for as long as possible, until they reach the maximum height or weight limit specified by the car seat manufacturer.
Understanding Your Car Seat and Vehicle Manuals
This is arguably the most critical step, and it’s the one many people skip! Every car seat is different, and every vehicle’s seating area is unique. Your car seat manufacturer’s manual is your personal instruction book for that specific seat. It will detail its unique features, weight and height limits, and installation instructions. Similarly, your vehicle’s owner’s manual has vital information about your car’s safety features, including how to properly use the LATCH system (if applicable) and where to install car seats.
Always refer to both manuals before you begin. If you can’t find your original manuals, you can usually find digital copies on the car seat manufacturer’s website or your vehicle manufacturer’s website. Think of these manuals as your best friends in this process!
Essential Tools and Prep Work
You don’t need a lot of fancy equipment to install a car seat correctly. Most of what you need is already part of the car seat and your vehicle. However, a few things can make the process smoother:
- Your Car Seat Manual: We’ve already stressed this, but it’s worth repeating!
- Your Vehicle Owner’s Manual: Essential for understanding your car’s LATCH system and seat belt routing.
- A Pool Noodle or Rolled Towel (Optional): Sometimes, car seats don’t achieve the correct recline angle for an infant. A pool noodle or a tightly rolled towel placed under the base (not the seat itself) can help adjust the angle. Check your car seat manual, as some manufacturers prohibit this.
- A Car Seat Wrench or Slot Tool (Rarely Needed): Some vehicles have very tight LATCH anchors that might benefit from a specially designed tool if you’re struggling to connect the strap. However, this is uncommon.
- A Mirror: To see what you’re doing, especially when tightening straps.
Before you start installing:
- Read through your car seat manual.
- Read the relevant section in your vehicle manual about car seat installation.
- Choose the vehicle seat location. The center rear seat is often safest as it’s furthest from potential side impacts, but check your manuals to see if your car seat or vehicle recommends against it (some vehicles don’t allow LATCH in the center, or the seat belt may not be long enough).
Understanding Car Seat Installation Methods
There are two primary ways to install a car seat: using the vehicle’s seat belt or using the LATCH (Lower Anchors and Tethers for Children) system. Both are safe when used correctly, but you can only use ONE method at a time for the seat belt or LATCH anchors. Never use both simultaneously.
Method 1: Using the Vehicle Seat Belt
This method is available in all vehicles but often requires more strength to get a tight fit. It’s also the only option if your vehicle doesn’t have a LATCH system or if you’ve reached the weight limit for using LATCH (check your manuals for this limit).
- Position the Car Seat Base: Place the car seat base on the vehicle seat where you plan to install it.
- Route the Seat Belt: Find the seat belt path on the car seat base. Your car seat manual will have diagrams showing exactly where the seat belt needs to go. Thread the vehicle’s seat belt through the designated belt guides on the car seat base. Let the seat belt buckle click into place.
-
Lock the Seat Belt: This is crucial! Vehicle seat belts have different locking mechanisms.
- Auto-Retracting (Most Common): Pull the shoulder belt out all the way until it locks. Then, allow it to retract slowly. It should ‘click’ as it retracts and stay permanently locked, preventing the seat belt from loosening.
- Switchable Retractor: You may need to pull the shoulder belt out fully once to engage the locking mode described above.
- Locking Clip (Older Vehicles): If your vehicle doesn’t have self-locking belts, you might need a locking clip. Consult your vehicle manual.
NHTSA Tip: Make sure your vehicle seat belt is locked correctly. You can test this by trying to pull the shoulder belt out again; it should not move out any further.
- Tighten the Seat Belt: With the seat belt buckled and locked, press down firmly on the car seat base with your weight (you can use your knee or hand). While pressing down, pull the shoulder belt portion of the seat belt as tightly as possible. This removes all slack.
- Check for Movement: Grab the car seat base near where the seat belt is routed. Try to move it side-to-side and front-to-back. It should not move more than one inch in any direction. If it does, drain more slack from the seat belt and try tightening again.
- Check the Recline Angle: For rear-facing seats, the angle is critical. Most infant seats have a bubble indicator or a line on the side of the base. Ensure the seat is at the correct recline angle recommended by the manufacturer, especially for newborns who need their airways to remain open. If the angle isn’t right, you may need to use a pool noodle or rolled towel as mentioned earlier, if permitted by your car seat manual.
Method 2: Using the LATCH System (Lower Anchors and Tethers for Children)
LATCH systems make installation often feel easier and quicker, as they have dedicated anchor points and straps on the car seat. However, remember the weight limits for using LATCH. These limits are the combined weight of the car seat and the child. Once you exceed this, you must switch to using the vehicle seat belt.
- Locate LATCH Anchors: In your vehicle’s rear seats, you’ll find small metal anchors, usually located in the crease of the seat cushion. They might be marked with a small symbol. Your vehicle manual will show you their exact location.
- Attach the LATCH Connectors: Connect the car seat LATCH connectors to the vehicle anchor points. Most connectors are a push-on style or have a release button. Ensure they click securely into place.
- Tighten the LATCH Strap: Similar to the seat belt method, press down firmly on the car seat base with your weight. While applying pressure, pull the LATCH adjustment strap to tighten the connection. Pull as hard as you can.
- Check for Movement: Grab the car seat base near the LATCH strap connection. Test side-to-side and front-to-back movement. It should not move more than one inch in any direction. If it does, drain more slack from the strap and try again.
- Check the Recline Angle: Again, ensure the recline angle is correct for rear-facing. Use the level indicator on the seat or base. Adjust with a pool noodle or rolled towel if necessary and permitted by your manual.
- Attach the Top Tether (Forward-Facing ONLY for rear-facing installation): Note: You do not use the top tether strap for a rear-facing car seat. The top tether is only for forward-facing installations.
The “Inch Test” – Your Golden Rule for a Secure Fit
We’ve mentioned it in both installation methods, but it bears repeating: the “inch test” is paramount. After you think you’ve installed the seat tightly, grab the base of the car seat where it’s genuinely connected to the vehicle – at the seat belt path or the LATCH strap. Try to wiggle it. Does it move more than an inch in any direction (front-to-back or side-to-side)? If it does, it’s too loose, and you need to tighten it further. This one simple test is your best indicator of a secure installation. If you can’t get it tight enough with either method, consult a certified Child Passenger Safety Technician (CPST) or consider a different car seat or vehicle location.
Car Seat Recline Angle: Why It Matters So Much
For rear-facing infants, the correct recline angle is non-negotiable. A seat that is too upright can allow a baby’s head to flop forward, obstructing their airway and making it difficult to breathe. Conversely, a seat that’s too reclined might not be as safe in certain crash types. Most infant car seats have built-in indicators (like a bubble level or colored lines) to help you achieve the correct angle.
What to do if the angle is off:
- Check your car seat manual. It will tell you if you can use a tightly rolled towel or a pool noodle placed under the base of the seat to help achieve the proper angle.
- Ensure you are using the correct recline position stated in the manual (some seats have multiple recline positions).
- Some vehicles have sloped seats that make it difficult to get the right angle. This is where a CPST can be invaluable.
Important Note: Never place towels or bunched-up padding between the car seat and the vehicle seat if it compromises the belt path or LATCH connection, or if the car seat manual prohibits it. The only acceptable additions are usually specific to the base and approved by the manufacturer for angle adjustment.
Securing Your Child in the Rear-Facing Seat
Once the seat is installed correctly, it’s time to buckle in your little one. The harness straps are designed to protect your child, so proper adjustment is key.
- Harness Height: The harness straps should emerge from the car seat slots that are at or below your child’s shoulders for rear-facing.
- Strap Tightness: The harness should be snug. You should not be able to pinch any slack in the webbing at your child’s collarbone. This is often called the “pinch test.”
- Chest Clip: The chest clip (if your seat has one) should be positioned at armpit level. This keeps the shoulder straps from slipping off.
- No Bulk Under Straps: Avoid bulky clothing or blankets between your child and the harness. These can compress in a crash, leaving the harness too loose. Dress your child in thin layers and place blankets over the buckled harness.
Common Mistakes to Avoid
Even with the best intentions, parents sometimes make mistakes. Being aware of these common pitfalls can help you avoid them:
- Loose Installation: The most common error. Always perform the inch test.
- Incorrect Seat Belt Locking: Not properly locking the vehicle seat belt, leading to a loose installation.
- Using Both Seat Belt and LATCH: Never use both simultaneously.
- Wrong Recline Angle: Especially for infants, an incorrect angle can be dangerous for breathing.
- Loose Harness Straps: Not tightening the harness enough, or the chest clip being too low.
- Using the Seat Outside of Manufacturer Limits: Exceeding weight or height limits for the seat or for the LATCH system.
- Aftermarket Products: Using unapproved inserts, padding, or attachments not made by the car seat manufacturer.
- Not Reading Manuals: This leads to many of the other mistakes.
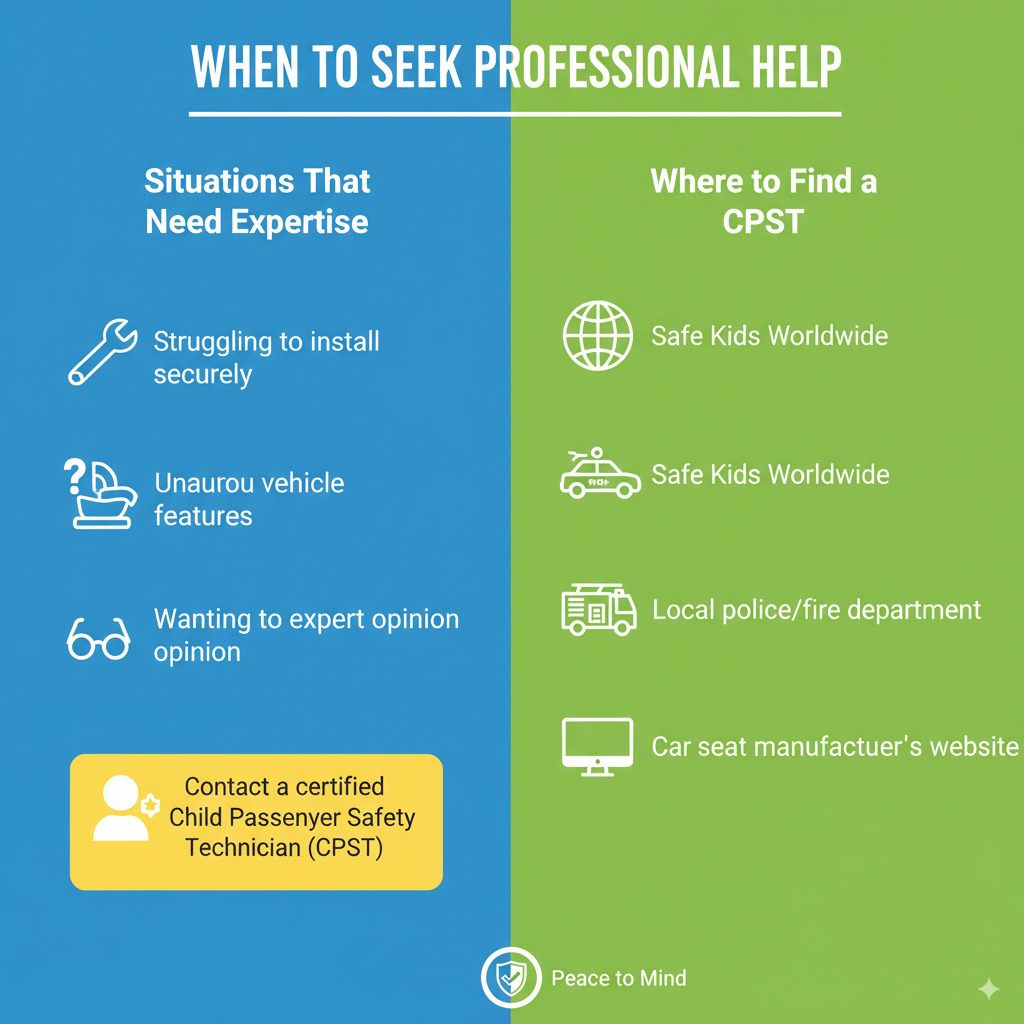
When to Seek Professional Help
While this guide breaks down the process, some situations might require expert assistance. If you are struggling to get a secure installation, if your vehicle has unusual seating or seat belt features, or if you simply want an extra set of experienced eyes on your work, contact a certified Child Passenger Safety Technician (CPST). They offer free checks and can ensure your car seat is installed correctly.
You can find a local CPST through resources like:
- Safe Kids Worldwide
- Your local police or fire department (many have a designated CPST)
- Your car seat manufacturer’s website
A quick check by a CPST can provide invaluable peace of mind.
Car Seat Installation Checklists & Tables
To help you remember all the crucial checkpoints, here are a couple of handy checklists.
Car Seat Installation Checklist
| Check Point | Yes | No | Notes |
|---|---|---|---|
| Both Car Seat and Vehicle Manuals Read? | |||
| Correct Installation Location Chosen? | Consider center seat privacy, vehicle manual | ||
| One Method Used (Seat Belt OR LATCH)? | Never use both | ||
| Seat Belt Locked Properly (if used)? | Test by pulling belt | ||
| Tight Installation (Inch Test Passer)? | No more than 1″ movement | ||
| Correct Recline Angle Achieved? | Check level indicator/manual | ||
| LATCH Connectors Attached Securely (if used)? | Hear or feel a click | ||
| LATCH Weight Limit Adhered To? | Check manual for limits | ||
| No Gaps Between Seat and Vehicle Seat? | Except for authorized angle adjusters |
Child Harness Check
| Check Point | Yes | No | Notes |
|---|---|---|---|
| Harness Straps at or BELOW Shoulders? | For rear-facing | ||
| Harness Snug (Pinch Test Passed)? | Cannot pinch slack at collarbone | ||
| Chest Clip at Armpit Level? | Ensures straps stay positioned | ||
| No Bulky Clothing Under Harness? | Dress thin, blanket over |
Frequently Asked Questions (FAQ)
1. How tight should a rear-facing car seat be?
A rear-facing car seat should be installed very snugly. You should not be able to move the seat side-to-side or front-to-back more than about an inch at the belt path when you push or pull it.
Additionally, the harness straps should be tight against the child’s body. You should not be able to pinch any excess webbing at the shoulders. The chest clip should sit at armpit level to keep the child secure.
Proper installation is crucial for safety, so if in doubt, you can have it checked by a certified child passenger safety technician.