How to Remove Adhesive From Car: Proven Guide
Removing adhesive from your car is achievable with the right tools and gentle methods. You can safely lift stubborn residue, stickers, and tape from paint, glass, and plastic using common household items like soap, rubbing alcohol, or specialized automotive adhesive removers, followed by a good cleaning.
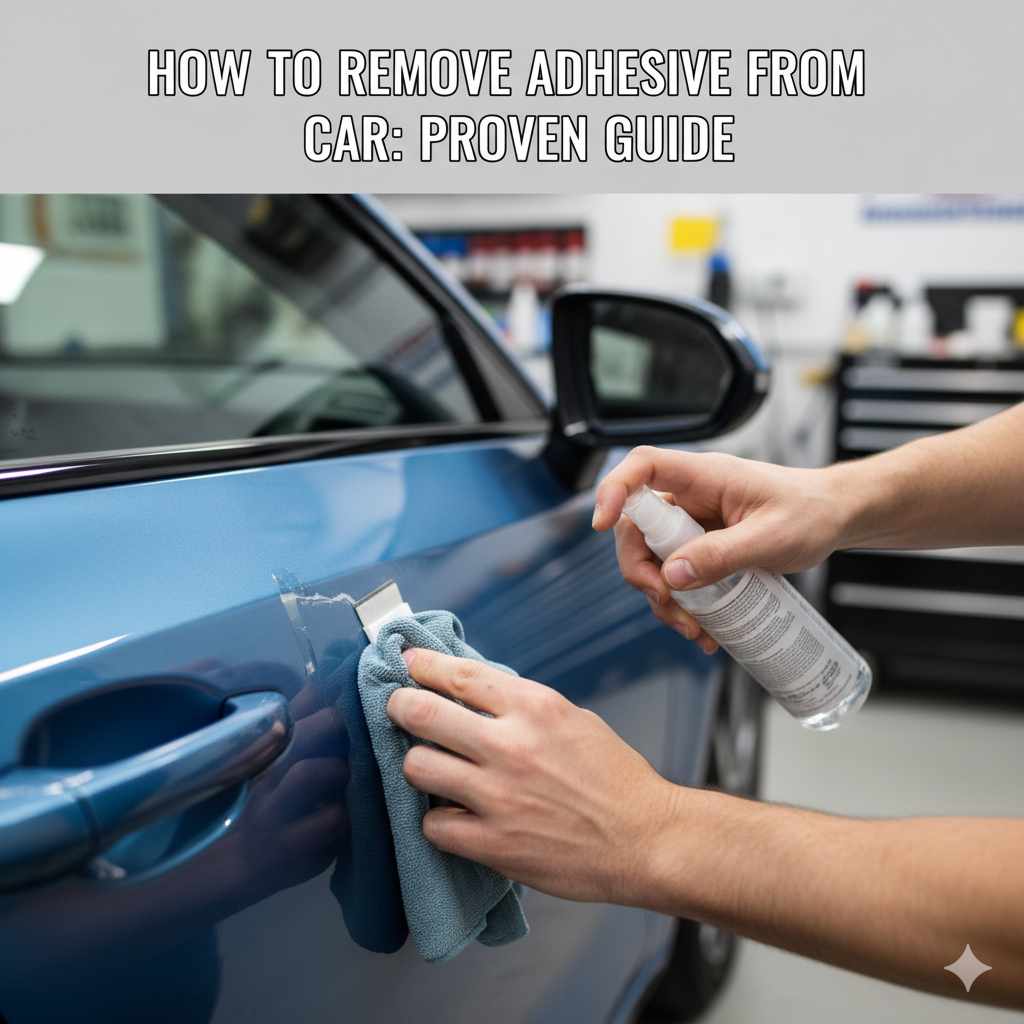
Ever noticed those stubborn sticky spots on your car? Maybe it’s leftover tape from a temporary sign, residue from a sticker, or even a Goo Gone® disaster that didn’t fully clean up. Don’t worry! These sticky situations happen to the best of us, and thankfully, getting rid of them is usually simpler than you think. I’m Md Meraj, your go-to guide for making car care easy, and I’m here to help you tackle adhesive removal with confidence. We’ll walk through safe and effective steps to restore that smooth, clean look to your car, whether it looks like a billboard or just has a little sticky surprise. Ready to say goodbye to the goo? Let’s get started!
Why Adhesive Becomes a Problem on Cars
Adhesives on cars can come from many places. Sometimes, it’s factory-applied trim or badges. Other times, it might be residue from temporary decals, parking permits, or even a poorly applied car bra. Over time, sun exposure can bake these adhesives onto the surface, making them harder to remove. Windshield sticker residue from toll passes or inspection stickers is another common culprit. Whatever the source, sticky gunk can ruin your car’s appearance and even start to degrade the surface if left for too long. The good news is that most adhesives can be removed without damaging your car’s paint or materials if you use the right techniques.
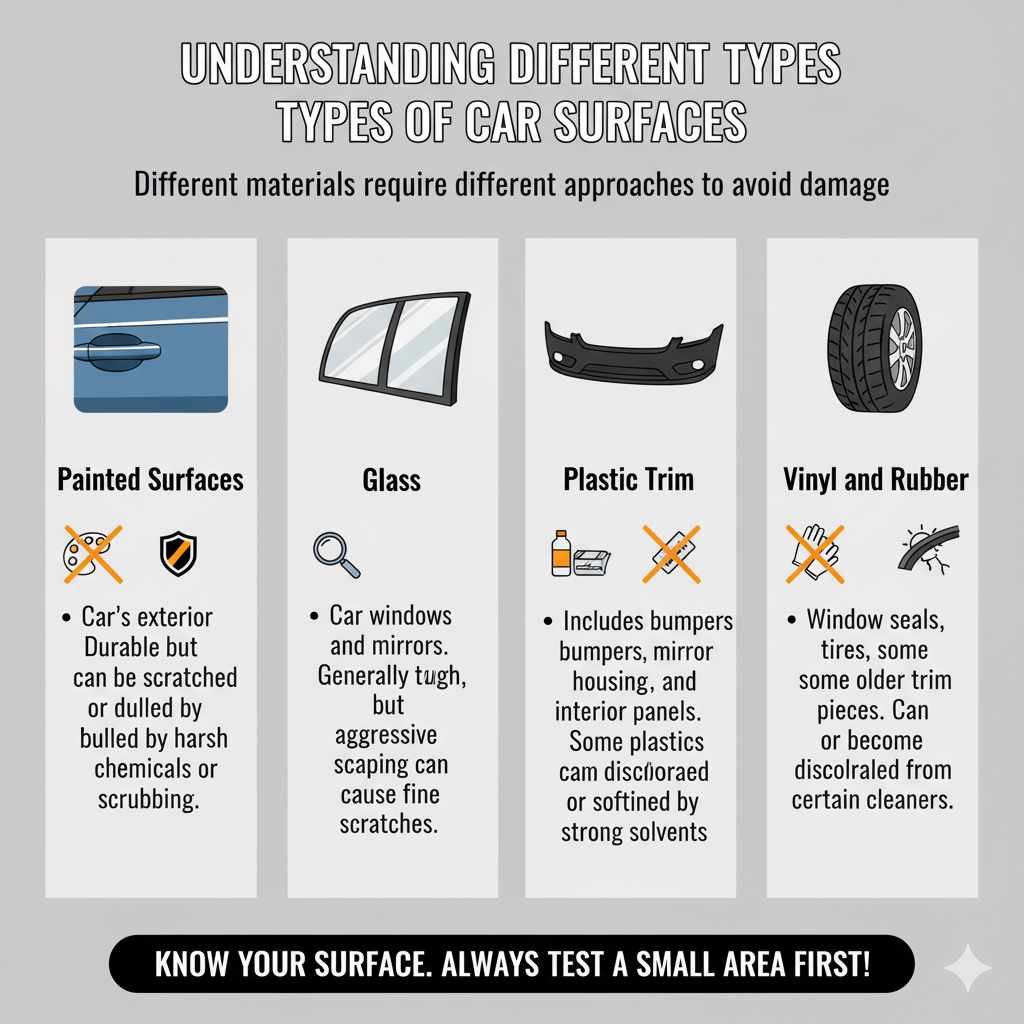
Understanding Different Types of Car Surfaces
Before we dive into removal, it’s super important to know what surface you’re dealing with. Different materials require different approaches to avoid damage:
- Painted Surfaces: This is your car’s exterior paint. It’s durable but can be scratched or dulled by harsh chemicals or aggressive scrubbing.
- Glass: Car windows and mirrors are generally tough, but aggressive scraping can cause fine scratches.
- Plastic Trim: This includes bumpers, mirror housings, and interior panels. Some plastics can be discolored or softened by strong solvents.
- Vinyl and Rubber: Think window seals, tires, and some older trim pieces. These can dry out, crack, or become discolored from certain cleaners.
Knowing your surface will help you pick the safest and most effective removal method. Always remember to test a small, inconspicuous area first!
Essential Tools and Supplies for Adhesive Removal
You probably have most of these at home already! Having the right gear makes the job much easier and safer for your car.
Basic Toolkit: What You’ll Need
- Microfiber Towels: Plenty of these are essential for applying solutions, wiping away residue, and buffing. Microfiber is great because it traps dirt and grime effectively without scratching.
- Plastic Scrapers or Old Credit Cards: These are gentler than metal blades and won’t scratch paint or glass.
- Spray Bottles: For applying cleaning solutions.
- Warm Soapy Water: A classic and safe cleaner for general grime.
- Rubbing Alcohol (Isopropyl Alcohol): Effective for breaking down many sticky residues. Use a concentration of 70% or higher.
- Dedicated Automotive Adhesive Remover: Products like Goo Gone Automotive, 3M Adhesive Remover, or Turtle Wax Label & Sticker Remover are specifically designed for cars.
- Detailing Clay Bar (Optional but Recommended): Excellent for removing stubborn, embedded residues from paint.
- Car Wash Soap and Wax: For a final clean-up and protection.
- Gloves: To protect your hands from chemicals.
- Safety Glasses: To protect your eyes, especially when working overhead.
Step-by-Step Guide: How to Remove Adhesive From Car Surfaces
Here’s how to tackle that sticky mess, broken down by method and surface type.
Method 1: The Gentle Approach (Mild Residue & Fresh Adhesive)
This is your first line of defense and often works wonders for less stubborn adhesives. Always start here!
- Clean the Area: Wash the spot with warm soapy water and a microfiber towel. Rinse and dry completely. This removes dirt that could scratch the surface during removal.
- Apply Warm Soapy Water: Spray the area generously with warm, soapy water. Let it soak for a few minutes to soften the adhesive.
- Gently Scrape: Use a plastic scraper or an old credit card at a low angle to carefully lift the edges of the adhesive. Work slowly and patiently. If it’s not budging, don’t force it – move to a stronger method.
- Wipe Away: Use a clean microfiber towel to wipe away any loosened adhesive and soapy water.
- Rinse and Dry: Rinse the area with clean water and dry thoroughly with another microfiber towel.
Method 2: Using Rubbing Alcohol (For Light to Moderate Residue)
Rubbing alcohol is a fantastic solvent that evaporates quickly and is generally safe for most car surfaces, but always test first!
- Clean and Dry: Ensure the area is clean and dry, just as in Method 1.
- Apply Alcohol: Dampen a clean microfiber towel with rubbing alcohol. Don’t soak it, just make it moist.
- Dwell Time: Hold the damp towel against the adhesive for 30-60 seconds. This allows the alcohol to break down the sticky bond.
- Rub Gently: Gently rub the adhesive area in a circular motion with the damp towel. You should start to see the residue loosening.
- Scrape if Needed: If some residue remains, use your plastic scraper or credit card at a shallow angle to gently lift it.
- Repeat if Necessary: For stubborn spots, you might need to repeat steps 2-5.
- Final Clean: Once the adhesive is gone, clean the area again with car wash soap and water, rinse, and dry.
Method 3: Specialized Automotive Adhesive Removers (Tough Residues)
When household items don’t cut it, a product made for automotive use is your best bet. These are formulated to be strong on adhesives but safe for car paint and finishes.
Using Goo Gone Automotive or Similar Products
- Read the Product Instructions: Different removers have slightly different application methods. Always follow the manufacturer’s guidelines.
- Apply Directly: Spray the adhesive remover directly onto the sticky residue. Don’t spray it everywhere; target the spot.
- Let it Sit: Allow the product to penetrate the adhesive for the recommended time (usually 1-5 minutes). Some products suggest covering it with a plastic wrap to keep it from drying out.
- Gently Work the Residue: Use a plastic scraper or a plastic putty knife to gently lift the softened adhesive. You can also use a microfiber towel to rub it away.
- Wipe Clean: Wipe away all loosened residue and excess product with a clean microfiber towel.
- Rinse Thoroughly: It’s crucial to remove all traces of the product. Wash the area with car wash soap and water, rinse well, and dry.
- Inspect: Check the area for any leftover spots or haziness. Repeat if necessary.
Product Comparison Table
Here’s a quick look at some popular solutions:
| Product Type | Pros | Cons | Best For |
|---|---|---|---|
| Warm Soapy Water | Safest, readily available, cheap | Least effective on tough adhesives | Light dust, fresh sap, minor residue |
| Rubbing Alcohol (IPA) | Breaks down many adhesives, evaporates quickly, affordable | Can dry out some plastics if used too often or undiluted | Sticker residue, tar, some glue marks |
| Goo Gone Automotive | Specifically formulated for cars, effective on tough stuff | Requires rinsing, can leave oily residue if not washed off | Tar, bugs, tape residue, bumper stickers |
| 3M Adhesive Remover | Strong, fast-acting, designed for automotive paints | Stronger chemicals, higher risk of paint damage if misused, requires careful application | Heavy-duty tape, emblems, graphic removal |
| Detailing Clay Bar | Removes embedded contaminants from paint, safe for clear coats | Requires lubrication (clay lube or soapy water), not a solvent for sticky goo itself | Stubborn overspray, bonded contaminants, final paint decon |
Method 4: For Stubborn Paint Protection Film (PPF) or Vinyl Decals
Removing old PPF or vinyl can be tricky. Often, a heat gun or hairdryer is used to soften the adhesive and make removal easier. Be very careful with heat, as too much can damage paint or plastic.
- Clean the Area: Wash and dry the surface thoroughly.
- Apply Gentle Heat: Use a heat gun on a low setting or a hairdryer on a medium setting. Hold it about 6-8 inches away from the surface, constantly moving it to avoid overheating any one spot. The goal is to make the material pliable, not hot to the touch.
- Slowly Peel: Start at a corner and gently peel the film or decal back at a very low angle (almost parallel to the surface). The heat should help the adhesive release.
- Address Residue: As you peel, you’ll likely encounter leftover adhesive. Use a dedicated automotive adhesive remover (like those from 3M or Goo Gone Automotive) on any remaining goo. A plastic razor blade can also be used carefully on painted surfaces, but always on a wetted surface and at a very low angle. For glass, a proper razor blade scraper is more effective.
- Final Wash and Wax: Once all the film/decal and adhesive are removed, wash the area thoroughly with car wash soap and water. It’s highly recommended to apply a coat of wax to protect the paint.
Method 5: Removing Adhesive Residue from Glass
Glass is more forgiving than paint, allowing for slightly more aggressive tools if needed.
- Soak it: Spray the residue with a glass cleaner or a solution of hot water and soap. Let it soak for several minutes.
- Scrape: Use a new, sharp razor blade scraper (designed for glass) held at a low angle. Gently scrape away the softened adhesive. Always keep the glass surface wet with cleaner or soapy water while scraping to provide lubrication. Be sure to handle sharp tools with extreme care to avoid injury.
- Alcohol or Remover: For any remaining small bits, follow the rubbing alcohol or automotive adhesive remover steps described earlier.
- Clean Glass: Finish by cleaning the glass with your preferred glass cleaner for a streak-free shine.
Method 6: Cleaning Interior Surfaces (Dashboards, Door Panels)
Interior plastics and vinyl can be sensitive. Harsh chemicals can cause discoloration or damage.
- Identify Material: Is it hard plastic, soft-touch plastic, vinyl, or leather?
- Test First: ALWAYS test any cleaner on an inconspicuous spot (like the underside of the dash or a hidden door panel corner).
- Mild Cleaners: Start with a mild interior cleaner or a solution of water and a few drops of mild dish soap on a microfiber towel.
- Gentle Rubbing: Gently rub the adhesive residue. You might need to use a plastic scraper for thicker bits.
- Rubbing Alcohol (Use with Caution): For tougher interior spots, a slightly damp microfiber towel with rubbing alcohol can work, but use it sparingly and immediately follow with a clean, damp cloth to remove alcohol residue, then dry. Avoid prolonged contact, especially on matte or soft-touch finishes, as alcohol can sometimes alter the texture or sheen.
- Specialized Interior Detailers: If the above doesn’t work, look for interior-specific adhesive removers or detailers.
- Wipe Down: After removing the adhesive, wipe the area with a clean, damp cloth to remove any cleaner residue, then dry.
What NOT to Do When Removing Adhesive
To save yourself a headache (and your car from damage), avoid these common mistakes:
- Don’t use abrasive pads or steel wool: They will scratch paint and plastic.
- Don’t use harsh solvents like acetone or lacquer thinner on paint: These can eat through paint and clear coat very quickly.
- Don’t use metal razor blades on paint: Only use on glass, and even then, with caution and lubrication.
- Don’t apply excessive heat: Overheating can bubble paint or warp plastic.
- Don’t scrub aggressively: Patience and the right product are more effective than brute force.
- Don’t forget to rinse and clean after using removers: Leftover chemicals can cause long-term damage.
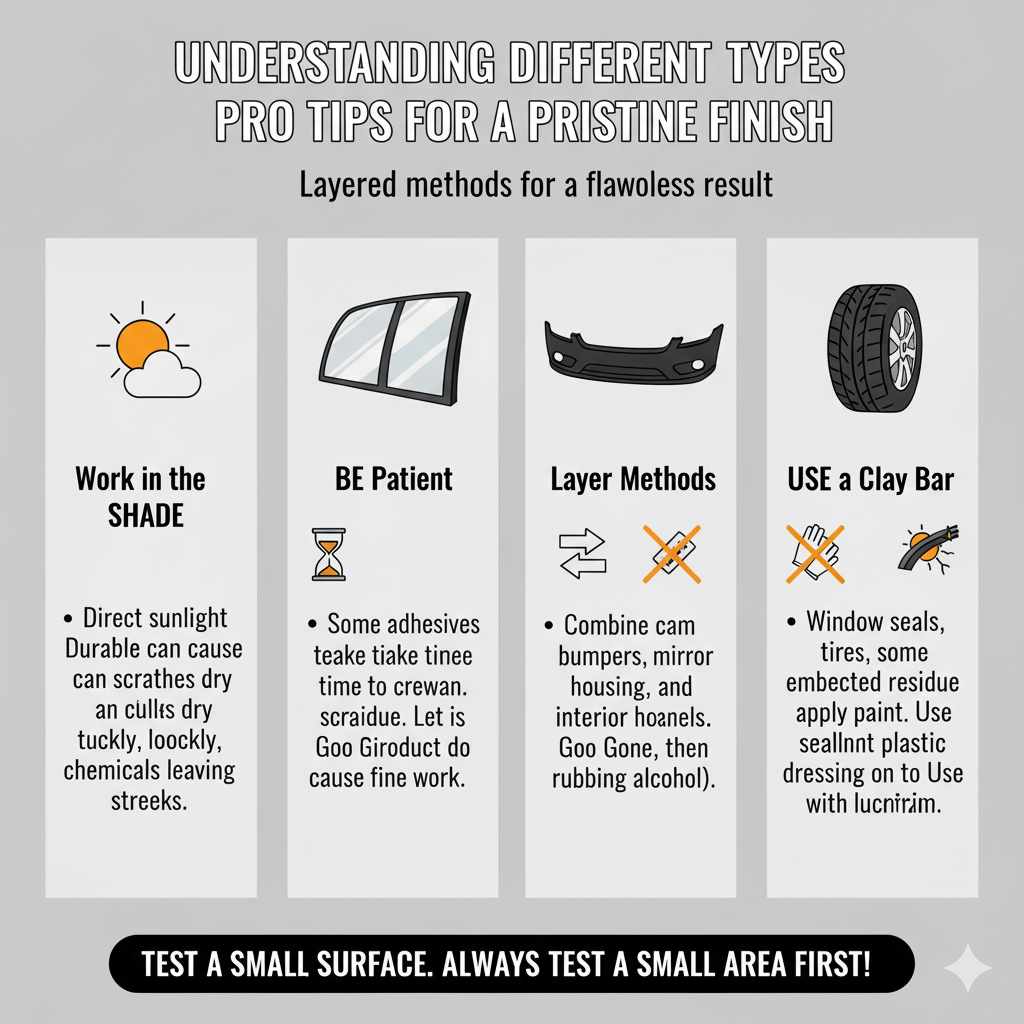
Pro Tips for a Pristine Finish
- Work in the Shade: Direct sunlight can cause cleaners to dry too quickly, leaving streaks or making them less effective.
- Be Patient: Some adhesives take time to break down. Let the product do the work.
- Layer Methods: If one method doesn’t fully work, don’t be afraid to try another. For example, you might use a Goo Gone product to lift the bulk of the adhesive, then follow up with rubbing alcohol for any stubborn remnants before washing.
- Protect Your Work: After successfully removing adhesive and cleaning the area, consider applying a coat of wax or sealant to the paintwork. On trim, a plastic dressing can restore its look and add protection.
- Use a Clay Bar: For deeply embedded residue on paint that resists other methods, a clay bar, used with a clay lubricant, is excellent for decontaminating the surface and restoring smoothness.
Frequently Asked Questions (FAQ)
Here are some common questions about removing car adhesive.
Q1: Can I use nail polish remover to remove sticker residue from my car?
A: It’s generally not recommended. Nail polish remover typically contains acetone or other strong solvents that can damage your car’s paint and plastic trim. Stick to automotive-specific removers or rubbing alcohol for safer results.
Q2: How do I remove residue from a parking permit sticker on my windshield?
A: For windshields, start by soaking the residue with glass cleaner or soapy water. Then, use a new razor blade scraper held at a very low angle to gently lift the residue. Follow up with rubbing alcohol for any persistent spots.
Q3: Is a heat gun safe for removing decals from car paint?
A: Yes, but with extreme caution. Use a heat gun on its lowest setting and keep it moving constantly about 6-8 inches from the surface. The goal is to warm and soften the adhesive, not to overheat the paint. Too much heat can damage the paint or clear coat.
Q4: What’s the difference between Goo Gone and Goo Gone Automotive?
A: While both are adhesive removers, Goo Gone Automotive is specifically formulated to be safe for automotive finishes, including paint, plastic, and metal. The original Goo Gone might be too aggressive for some car surfaces.
Q5: Can I use WD-40 to remove adhesive from my car?
A: Yes, WD-40 can be effective at breaking down many types of adhesives and sticky residues. Apply it, let it sit for a few minutes, then gently wipe or scrape the residue away. Be sure to wash the area thoroughly with car soap and water afterward, as WD-40 can leave an oily film.
Q6: What if the adhesive has been on my car for a very long time?
A: For old, baked-on adhesive, you might need a stronger, dedicated automotive adhesive remover and potentially multiple applications. Patience is key. You may also need to carefully use a plastic razor blade to aid in lifting stubborn bits after the remover has softened them.
Q7: Do I need to wax my car after removing adhesive?
A: It’s a good idea, especially if you used any solvents or scraped the area. The cleaning process can strip away existing wax, leaving the paint exposed. Applying a fresh coat of wax will restore protection and shine.