How to Fix Scratches on Car Interior (Plastic, Vinyl & Leather)
Car interior scratches on plastic and vinyl usually buff out with a trim restorer or a few seconds of gentle heat — but leather and deep gouges need a color-matched repair kit instead. Using the wrong method can melt soft-touch trim or leave a mismatched patch more noticeable than the original scratch. This guide covers testing a scratch’s depth, the right fix for plastic, vinyl, and leather, and when a professional repair beats DIY.
Insert your Affiliate Disclosure reusable block here.
Quick Answer
Light scratches on plastic or vinyl usually disappear with a trim restorer or a few seconds of gentle heat from a hair dryer. Deeper scratches that catch a fingernail need a filler-based interior scratch repair kit, and leather always needs its own dedicated repair kit with color-matched dye — never a plastic product.
Quick Overview: Fixing Car Interior Scratches in 5 Steps
- Check the scratch depth: Run your fingernail across the mark. If it glides over smoothly, it’s a light surface scratch. If your nail catches, it has gone below the surface coating.
- Clean the area: Wipe the scratch and surrounding trim with a pH-neutral interior cleaner or diluted (about 70%) isopropyl alcohol, testing on a hidden spot first.
- Treat light scratches: Buff with a microfiber cloth and a plastic or vinyl trim restorer, or apply a few seconds of gentle heat from a hair dryer so the plastic re-flows slightly.
- Treat deep scratches: Use an interior scratch repair kit for plastic or vinyl, or a dedicated leather repair kit for leather, filling and color-matching as the product instructs.
- Finish and protect: Buff off any excess product, let fillers cure fully according to the label, then apply a UV-protectant dressing to reduce fading and future scratching.
Understanding Car Interior Materials and Scratches

Before we dive into fixing them, it’s important to understand what you’re working with. Car interiors are typically made from a variety of materials, each with its own unique properties and susceptibility to damage. The most common culprits for those annoying scratches are:
- Hard Plastics: Found on dashboards, door panels, center consoles, and trim pieces. These are often made of ABS (Acrylonitrile Butadiene Styrene) or polypropylene. They are durable but can show scratches quite readily, especially lighter ones that affect the surface texture or coating.
- Soft-Touch Plastics/Vinyl: These offer a more premium feel and are often found on higher-end vehicles for areas like the dashboard top or door armrests. They are softer and can be more prone to scuff marks and deeper scratches than hard plastics.
- Leather: Used for seats, steering wheels, and gear shifts. Leather is susceptible to surface scratches from sharp objects, pet claws, or even rough clothing. The depth and nature of the scratch will determine the repair method needed.
- Fabric/Carpet: While less prone to visible scratches, fabric interior elements like seats or floor mats can get snagged, causing pulls or scuffs that are aesthetically unpleasant.
The depth of a scratch is the most critical factor in determining how easy it is to fix. Surface-level scratches, often called scuffs or swirl marks, usually only affect the very top layer of the material and are the easiest to repair. Deeper scratches that go beyond the surface coating or penetrate the material itself require more intensive methods and may not be fully removable, but their appearance can often be significantly improved.
📊 Instrument panels — the single most scratch-prone interior part — are projected to account for roughly 27.6% of the entire global automotive plastic interior trim market by 2025, more than any other interior component. Source: Future Market Insights, Automotive Plastic Interior Trims Market Report
How Deep Is the Scratch? Quick Severity Check Before You Start
Every method below works on a different type of damage, so the fastest way to pick the right one is to test the scratch before you buy or apply anything. Run a clean fingernail across the mark using light, even pressure.
- Nail glides over smoothly: This is a light surface scratch or scuff — it only affects the top coating. A cleaning, trim restorer, or brief heat treatment will usually make it disappear.
- Nail catches slightly: This is a moderate scratch that has broken through the surface finish. Expect to need a repair kit with filler, even on plastic.
- Nail catches and snags, or you can see raised or curled plastic: This is a deep gouge. On plastic, trim any raised edges with a fresh razor blade first, then sand and fill. On leather, this level of damage almost always needs a full repair kit rather than conditioner alone.
| Scratch Depth | Best Method | Typical Result |
|---|---|---|
| Light (nail glides over) | Cleaning + trim restorer, or gentle heat | Scratch becomes invisible or nearly so |
| Moderate (nail catches slightly) | Interior scratch repair kit (plastic/vinyl) or leather conditioner + filler | Significantly less visible, may show under close inspection |
| Deep (nail snags, raised edges visible) | Sand + repair kit + texture matching, or professional replacement | Improved but rarely 100% invisible without repainting the panel |
Essential Tools and Supplies for Car Interior Scratch Repair
Gathering the right tools before you start is key to a successful repair — the same basics most pros reach for during a full interior detailing job. Most of these items are readily available at auto parts stores, online retailers, or even your local hardware store. Having them on hand will make the process smoother and give you the best chance of achieving professional-looking results. Here’s a rundown of what you’ll likely need:
- Microfiber Towels: You’ll need several clean, soft microfiber cloths for cleaning, applying products, and buffing.
- Interior Cleaner: A dedicated, pH-neutral interior cleaner or a mild soap and water solution for cleaning the affected area thoroughly.
- Rubbing Alcohol (Isopropyl Alcohol): Diluted rubbing alcohol (around 70%) can be useful for cleaning and preparing surfaces, especially plastics. Always test in an inconspicuous area first.
- Heat Gun or Hair Dryer: Essential for some plastic and vinyl repair methods to gently warm the material, making it more pliable.
- Plastic Trim Restorer/Dressing: These products can help mask minor imperfections and restore a uniform look to plastic and vinyl surfaces.
- Interior Scratch Repair Kits: These kits often contain specialized compounds, fillers, and applicators designed for specific interior materials.
- Fine-Grit Sandpaper (1200–2000 grit) and a Razor Blade: For deeper plastic gouges — trimming raised edges and smoothing filler flush with the surrounding surface.
- Leather Cleaner and Conditioner: For leather surfaces, proper cleaning and conditioning are crucial before and after any repair attempt.
- Leather Repair Kit (if needed): For deeper leather scratches or cracks, a dedicated leather repair kit with fillers and colorants might be necessary.
- Applicator Pads/Sponges: For applying fillers, conditioners, or restorers evenly.
- Masking Tape: To protect surrounding areas during the repair process.
- Small Brushes or Cotton Swabs: For precise application of repair compounds in tight areas.
It’s always a good idea to read the instructions that come with any specific repair products you purchase, as they might have unique application requirements. Safety is paramount; ensure you are working in a well-ventilated area, especially if using heat or chemical products.
Best Interior Scratch Repair Pick
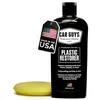
CAR GUYS Plastic Restorer (8 oz Kit)
A trim restorer built for exactly the light-to-moderate plastic and vinyl scratches Method 1 above covers, with a foam applicator included.
- Best for: Light scuffs and scratches on hard plastic dashboards, door panels, and trim
- Why we picked it: Restores a uniform finish without leaving a greasy residue that attracts dust
- Main drawback: Masks light scratches rather than filling deeper gouges — not a fix for damage a fingernail catches on
Compare more interior scratch repair options
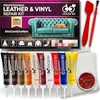 Option 1 Coconix Leather & Vinyl Repair Kit
|
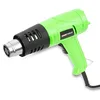 Option 2 OEMTOOLS Dual Temperature Heat Gun
|
 Option 3 The Rag Company Applicator Sponges (6-Pack)
|
As an Amazon Associate we earn from qualifying purchases.
Step-by-Step Guide: How to Fix Scratches on Car Interior
Now, let’s get down to business. The method you choose will depend heavily on the type of material and the severity of the scratch. We’ll cover the most common interior materials. Remember, patience and a gentle approach are key!
Method 1: For Light Scratches on Plastic and Vinyl Surfaces
These are often the easiest to deal with and can frequently be resolved with simple cleaning and conditioning.
Step 1: Clean the Area Thoroughly
Start by cleaning the scratched area. Use a good quality interior cleaner or a mild soap and water solution with a clean microfiber towel. Gently wipe the area to remove any dirt, dust, or grime that could interfere with the repair or cause further scratching during the process. For stubborn grime on plastics, a diluted isopropyl alcohol solution (about 70%) can be effective, but always test it on an inconspicuous spot first to ensure it doesn’t damage the material.
Consumer Reports has additional detailed advice on cleaning and maintaining different car interior surfaces if you want a deeper reference before you start.
Step 2: Apply a Plastic Trim Restorer or Dressing
For very light scuffs that haven’t actually removed material, a good quality interior plastic trim restorer or dressing can often make them disappear. Apply a small amount of the product onto a clean applicator pad or microfiber cloth. Gently rub it into the scratched area and the surrounding trim. These products work by filling in tiny imperfections and restoring the luster of the plastic, often making light scratches invisible. Buff off any excess product with a clean, dry microfiber towel.
Step 3: Gentle Buffing with a Microfiber Cloth
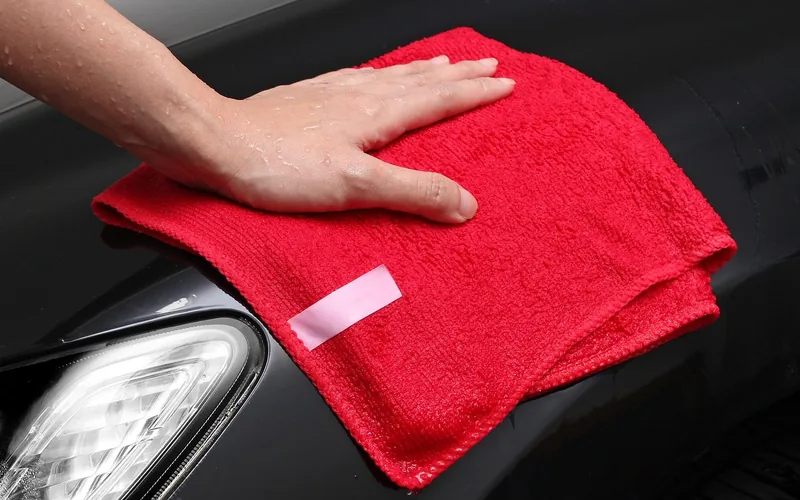
Sometimes, a light scratch is just a surface abrasion that can be buffed out. After cleaning, use a clean, dry microfiber cloth and apply gentle, circular pressure to the scratched area. If the scratch is very superficial, this might be enough to reduce its visibility significantly.
Method 2: Using Heat for Minor Surface Scratches on Plastic
This method can be surprisingly effective for minor thermal plastic scratches, making the plastic flow slightly to fill the imperfection. It requires a careful, steady hand.
Step 1: Prepare the Surface
Clean the scratched area thoroughly as described in Method 1, Step 1. Ensure it’s completely dry.
Step 2: Apply Gentle Heat
Using a heat gun on its lowest setting or a hairdryer, hold it about 6-8 inches (15-20 cm) away from the scratched plastic. Move the heat source constantly over the area, applying heat for only a few seconds at a time. The goal is to slightly soften the plastic, not melt or discolor it. Watch the scratch closely; as the plastic warms, the scratch may appear to level out or become less defined. You might need to repeat this process a couple of times, allowing the area to cool slightly between applications.
Step 3: Allow to Cool and Assess
Let the plastic cool completely. Once cooled, assess the scratch. If it’s still noticeable, you can repeat the gentle heating process, being very careful not to overheat. After you’re satisfied, or if the scratch is still visible, you can apply a plastic trim restorer (as in Method 1, Step 2) to help even out the finish.
Important Caution: Overheating can permanently damage and warp the plastic, making the problem worse. Always start with the lowest heat setting and keep the heat source moving. Practice on a scrap piece of similar plastic if possible.
Method 2B: Sanding and Grain-Matching for Deeper Plastic Gouges
If a scratch is deep enough that your fingernail snags on it, or plastic has curled up along the edges, heat alone usually isn’t enough. This method takes longer but handles damage that Methods 1 and 2 can’t.
Step 1: Trim Raised Edges
Use a fresh razor blade to carefully shave off any plastic that’s been pushed up or curled along the scratch, holding the blade nearly flat against the surface. This keeps the repair from catching on clothing or a fingernail later.
Step 2: Wet-Sand the Area
Working from roughly 800-grit up to 1200 or even 2000-grit wet/dry sandpaper, lightly sand the scratch and a small area around it with a few drops of water on the paper. Sand in the same direction as the panel’s existing texture grain, not against it, and stop as soon as the gouge is level with the surrounding surface.
Step 3: Restore the Surface Texture
Most interior plastic has a fine textured grain, not a smooth finish, so a sanded patch will look flat and out of place until the texture is put back. A grain pad or texture pad — a small textured mat pressed into a filler or gently heated area — can recreate a close match. Press the pad against an undamaged section of the same panel first to test the pattern, then apply it to the repaired area while the surface is still slightly warm and pliable.
Step 4: Finish with a Trim Restorer
Once the texture is restored and the area has fully cooled, apply a plastic trim restorer as in Method 1, Step 2. This blends the sheen of the repaired section with the rest of the panel so the fix doesn’t stand out.
Method 3: Using Interior Scratch Repair Kits
For more stubborn scratches that haven’t responded to the above methods, specialized kits are your next best bet.
Step 1: Clean and Prepare
As always, begin with a thoroughly cleaned and dried surface around the scratch.
Step 2: Follow Kit Instructions Carefully
Most kits come with specific instructions tailored to the type of plastic or vinyl they are designed for. This often involves applying a filler compound, a colored compound, or a smoothing agent directly into the scratch. Use the provided applicators for precise application.
- Some kits use a filler that you apply, let dry, and then lightly sand or buff smooth.
- Others might involve a warming element or a specific polishing compound.
- For textured plastics, there might be a way to recreate the texture after the scratch is filled — see Method 2B above for the manual version of this technique.
Step 3: Allow to Cure and Finish
Let any fillers or compounds cure completely according to the product’s instructions. Once cured, you may need to gently buff the area with a clean microfiber cloth to blend the repair with the surrounding surface. A plastic trim restorer can help enhance the finish and mask the repair.
Method 4: Fixing Scratches on Leather Surfaces
Leather requires a different approach. Minor surface scuffs can often be improved, while deeper scratches may need more specialized products.
Step 1: Clean the Leather
Use a dedicated leather cleaner and a soft microfiber cloth to gently clean the scratched area. This removes dirt that could impede the repair or cause damage. Ensure the leather is dry.
Step 2: Leather Conditioner for Minor Scuffs
For very light surface scuffs on leather, sometimes applying a good quality leather conditioner can help. The oils in the conditioner can sometimes plump up the leather fibers and make minor abrasions less noticeable, especially if the scratch is only in the leather dye. Apply with a microfiber cloth and buff gently.
Step 3: Using a Leather Repair Kit
For deeper scratches, nicks, or color loss, a leather repair kit is the most effective solution. These kits typically contain:
- Leather Filler: A flexible compound to fill the scratch.
- Sub-coats: To build up the repaired area.
- Colorant/Dye: Matched to your interior’s leather color.
- Finishing Sealant: To protect the repair.
Follow the kit’s instructions meticulously. This usually involves cleaning, applying filler and letting it dry, potentially repeating for deeper damage. Then, carefully apply the colorant to match the surrounding leather. Finally, apply a sealant to protect the repair. Patience and accurate color matching are what separate a good leather repair from an obvious patch. Reputable brands like Leather Doctor offer detailed guides and dedicated products for DIY leather repairs.
Step 4: Color Matching
Achieving a perfect color match for leather can be challenging. Many kits come with a range of basic colors and instructions on how to mix them to achieve your specific shade. Test the color on an inconspicuous area first.
Method 5: Dealing with Fabric or Carpet Scratches (Snags)
While not true “scratches,” fabric snags can look just as unsightly — and the repair approach for a torn or damaged fabric seat is different again; see our guide on fixing a burn or hole in a car seat if the damage goes beyond a simple snag.
Step 1: Trim Loose Threads
If you have a snagged thread on fabric or carpet, use a small, sharp pair of embroidery scissors or a craft knife to carefully trim the protruding thread as close to the surface as possible without cutting the surrounding fabric fibers.
Step 2: Use a Lint Roller or Soft Brush
Use a lint roller or a soft-bristled brush to gently brush the area and try to lay the fibers down neatly. For deeper snags, sometimes a tiny amount of fabric glue or a specialized fabric repair adhesive can be used sparingly to secure loose fibers, but this should be done with extreme caution.
Tips for Successful Interior Scratch Repair
To ensure your DIY scratch repair goes smoothly and yields the best results, keep these tips in mind:
- Work in Good Lighting: A well-lit space will help you see the scratch clearly and assess your progress accurately. Natural daylight is often best.
- Test Products First: Always test any cleaning product, repair compound, or filler on an inconspicuous area of your car’s interior (like under the dashboard or on a spare trim piece if available) to ensure it doesn’t cause discoloration or damage.
- Less is More: Start with the least aggressive method and product. You can always try something stronger if needed, but you can’t undo damage from overly aggressive techniques.
- Patience is Key: Rushing the process can lead to mistakes. Allow ample time for cleaning, application, and drying or curing of any products used.
- Use the Right Tools: Invest in good quality microfiber towels and applicators. Cheap tools can sometimes cause more damage than they fix.
- Ventilation: Ensure good ventilation when working with chemical products or using heat.
- Protect Surrounding Areas: Use masking tape to protect any adjacent surfaces that you don’t want to accidentally scratch or stain with repair products.
Following these tips will significantly increase your chances of a successful and satisfying repair.
Preventing Interior Scratches
The best way to deal with scratches is to prevent them from happening in the first place! Here are some proactive measures you can take:
- Be Mindful of Items in Pockets: Remove keys, loose change, or sharp objects from your pockets before sitting in the car.
- Use Car Seat Covers or Mats: Especially if you have pets or small children, consider using protective seat covers or durable floor mats to guard against spills, mud, and sharp objects.
- Clean Regularly: Dust and grit act like sandpaper under friction. Regular cleaning with soft cloths helps prevent abrasions.
- Avoid Placing Items Directly on Surfaces: Don’t set bags, electronics, or any items with potentially sharp edges directly onto your dashboard or door panels.
- Careful with Keys and Other Accessories: Avoid leaving keys, charging cables, or other accessories loose in cup holders or on top of the console where they can easily scratch surfaces.
- Use Door Edge Guards and Bumper Protectors: While these are for the exterior, being mindful of how you open doors in tight spaces can prevent accidental impacts that might jar items loose inside.
Consistent small efforts can go a long way in maintaining your car’s interior in pristine condition for years to come, saving you the hassle of repairs.
Common Interior Materials and Repair Durability
Understanding how different materials hold up to repairs can set your expectations. Here’s a general overview:
| Interior Material | Common Scratch Types | DIY Repair Effectiveness | Factors Affecting Durability |
|---|---|---|---|
| Hard Plastics (ABS, Polypropylene) | Light scuffs, surface abrasions, deeper gouges. | High for light scuffs, moderate for deeper scratches with fillers. | Surface coating durability, depth of scratch, quality of repair product. |
| Soft-Touch Plastics/Vinyl | Scuff marks, light to moderate scratches, indentation marks. | Moderate. Heat method can work well. Fillers can be tricky to blend. | Flexibility of the material, ability to match texture, depth of indentation. |
| Leather (Finished Nappa, Protected Aniline) | Surface scratches, scuffs, light cracks, color loss. | Very high for surface issues. High for deeper repairs with good kits. | Type of leather finish, color matching accuracy, proper application of fillers and dyes. |
| Fabric/Carpet | Snags, pulls, light scuffs. | Low to Moderate. Trimming is best. Adhesives are risky. | Type of fabric weave, ability to blend repaired fibers. |
| Chrome or Gloss Trim | Surface scratches, swirl marks. | Moderate. Can often be polished out with fine plastic polish. | Hardness of the coating, depth of scratch. |
It’s worth noting that the durability of a DIY repair can vary. While a well-executed leather repair or a properly filled plastic scratch can last for a very long time, a repair that relies solely on a dressing might fade as the product wears off and require reapplication.
When to Call a Professional
While many interior scratches are manageable with DIY methods, there are times when seeking professional help is the best option — especially when the risk of making the damage worse outweighs the cost of paying someone else to fix it.
- Large or structural cracks: If the plastic panel itself is cracked, not just scratched, filler and heat won’t restore its strength.
- Highly visible, premium surfaces: A mismatched color or texture on a leather seat or a gloss dashboard trim piece is often more noticeable — and more expensive to fix after a botched DIY attempt — than the original scratch.
- Lease-return or resale concerns: If you’re preparing to turn in a leased vehicle or sell a car where interior condition affects the price, a professional finish reduces the risk of a visible repair costing you money at inspection.
- Multiple or widespread scratches: A single panel with many scratches across a large area is often faster and more consistent for a shop to buff, dye, or replace than to spot-treat piece by piece.
Costs vary widely by the type and extent of damage. Shops typically charge somewhere between $90 and $300 to buff out or fill a lighter dashboard scratch. A cracked or severely gouged panel that needs full dashboard repair or replacement runs closer to $1,500 to $2,000 once parts and labor are factored in, so it’s worth trying the DIY methods above first on anything short of structural damage.
Frequently Asked Questions
Can you actually remove a scratch from car interior plastic?
Yes — light surface scratches on plastic or vinyl usually buff out completely with a trim restorer or a few seconds of gentle heat from a hair dryer. Deeper scratches that catch a fingernail won’t fully disappear, but a color-matched filler from an interior scratch repair kit can make them far less noticeable.
Does toothpaste remove scratches from a car dashboard?
Not reliably. Toothpaste’s mild abrasives can slightly soften the look of very light surface marks, but modern automotive plastics are harder than what toothpaste is designed to polish, so the effect is usually minimal and temporary. A dedicated plastic trim restorer works better and won’t need reapplying every few days.
Is it safe to use a Magic Eraser on car interior plastic?
With caution, yes — on hard, unpainted interior plastic. Magic erasers are made of melamine foam, a fine abrasive that can flatten a panel’s texture, dull gloss black trim, or strip coatings on soft-touch plastic and leather. Test a hidden spot first, use minimal pressure, and avoid it entirely on leather or glossy surfaces.
How much does it cost to professionally fix a scratched dashboard?
Professional shops typically charge $90 to $300 to buff out or fill a lighter dashboard scratch. Full dashboard repair or replacement — needed for cracked or severely gouged panels — runs closer to $1,500 to $2,000 once parts and labor are included.
How can you tell how deep an interior scratch is?
Run your fingernail across the mark. If your nail glides over it smoothly, it’s a surface scratch that cleaning, heat, or a trim restorer can usually fix. If your nail catches or snags in the scratch, it has gone below the surface coating and will need a filler-based repair kit instead.
Can leather scratches be fixed as easily as plastic ones?
No — leather needs a different process than plastic or vinyl. Light surface scuffs often respond to a leather conditioner alone, but deeper scratches or color loss require a dedicated leather repair kit with filler, colorant, and sealant, plus careful color-matching that plastic repairs don’t need.
The Bottom Line
Most car interior scratches are a Saturday-afternoon fix, not a trip to the dealership. Test the depth with your fingernail first, match the method to the material — trim restorer or heat for light plastic marks, a repair kit for deeper plastic or vinyl damage, and a dedicated leather kit for seats and steering wheels — and you’ll get results close to what a detail shop would charge $90 or more for.
Products related to this article
Sponsored / affiliate links. As an Amazon Associate I earn from qualifying purchases. I may earn additional commission from eligible campaigns.