How to Remove the Base from a Graco Car Seat: A Step-by-Step Guide
Hey there, friend! If you’re scratching your head wondering, “How do I remove the base from a Graco car seat?” you’re in the right place. As a parent who’s spent countless hours wrestling with car seats, I know how tricky it can be to figure out those latches and straps. I’ve been there, tugging and twisting in the backseat, trying to free a Graco base without losing my cool. Whether you’re switching cars, cleaning, or upgrading to a new seat, removing the base is a key skill.
So, grab a coffee, get comfy, and let’s walk through everything you need to know about detaching that Graco car seat base like a pro. By the end of this article, you’ll be ready to tackle it with confidence and maybe even help a friend out too!
Why You Might Need to Remove a Graco Car Seat Base
Let’s start with why you’d want to remove the base in the first place. Graco car seats, especially their infant models like the SnugRide or Click Connect series, come with a base that stays in the car. This base makes it easy to snap the car seat in and out without reinstalling every time. But there are plenty of reasons to take it out.
Maybe you’re moving the base to another vehicle, like when I needed to switch my son’s car seat from my car to my husband’s truck for a weekend trip. Or perhaps you’re deep-cleaning your car and want to get under the base where crumbs and juice spills love to hide. Sometimes, your child has outgrown the seat, and it’s time to store or sell it. Whatever the reason, knowing how to remove the base safely is a must for any parent or caregiver.
Understanding the Graco Car Seat Base
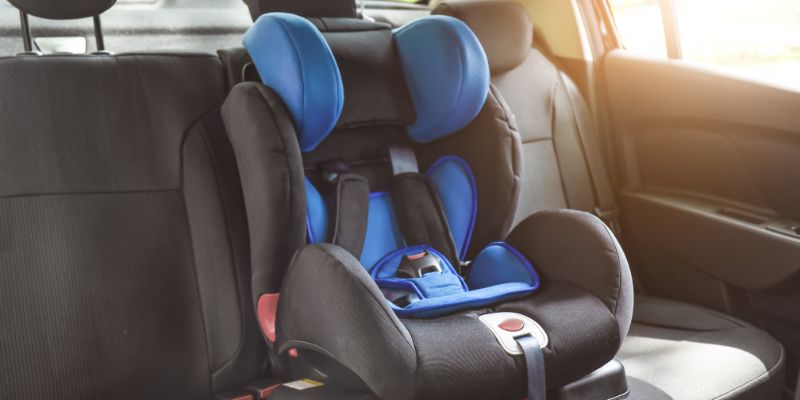
Before we dive into the how-to, let’s talk about what the Graco car seat base is. It’s a sturdy platform that secures to your car’s seat using either the LATCH system or the vehicle’s seat belt. The car seat clicks into the base, locking it in place for safety. Most Graco bases, like those for the SnugRide, SnugLock, or 4Ever models, have a release mechanism to detach the seat and adjustable straps to secure the base itself.
I remember the first time I looked at the base of my Graco SnugRide. It seemed like a puzzle with all those straps and buttons! But once you understand the parts—like the LATCH connectors, seat belt path, and release levers—it’s much less intimidating. Always check your car seat’s manual for model-specific details, as designs can vary slightly.
Tools You Might Need for the Job
Good news: you don’t need a toolbox to remove a Graco car seat base! Most of the time, your hands are enough. However, depending on your situation, a few items can make it easier:
- Flathead Screwdriver: Helpful for prying LATCH connectors or loosening stuck straps.
- Your Car Seat Manual: This is your best friend for model-specific instructions.
- A Helper: Sometimes, an extra pair of hands makes all the difference.
- Knee or Body Weight: Applying pressure can help loosen tight straps.
When I was struggling with a stubborn LATCH strap on my Graco base, a screwdriver saved the day by gently prying the connector loose. Just be careful not to damage anything, and never force it too hard.
How to Remove the Car Seat from the Base First
Before you can remove the base, you need to detach the car seat itself. This step is super easy but crucial. Here’s how I do it with my Graco SnugRide:
- Raise the Carrier Handle: Push the handle buttons on both sides and pull it up to the upright position. This gives you better access to the release mechanism.
- Locate the Release Handle: Find the handle or lever at the back of the car seat, usually near the headrest area.
- Squeeze and Lift: Squeeze the release handle firmly with one hand. While squeezing, lift the car seat straight up with both hands. You should hear a click as it releases.
- Check It’s Free: Give the seat a gentle tug to make sure it’s fully detached.
The first time I did this, I was surprised how quick it was—less than 10 seconds! If your seat doesn’t budge, double-check that the handle is up and you’re squeezing the right spot. Some models, like the Graco Click Connect, have a lever instead of a handle, so check your manual if you’re unsure.
Removing the Graco Car Seat Base: LATCH System
Most Graco bases are installed using the LATCH (Lower Anchors and Tethers for Children) system, which connects to anchors in your car’s seat. Here’s how I remove a LATCH-installed base:
- Locate the LATCH Straps: Find the two LATCH connectors on either side of the base. They’re usually metal hooks clipped to anchors in the car’s seat belt (the crease where the seat and backrest meet).
- Loosen the Straps: Look for the adjustment tab or button on the LATCH strap, often near the front or side of the base. Press the gray button or pull the tab while gently tugging the strap to create slack. This can be tricky if the strap is super tight.
- Apply Pressure: If the strap won’t loosen, kneel on the base or press down with your body weight. This compresses the car seat cushion and gives you more slack. I had to do this once when my base was practically glued to the seat!
- Release the Hooks: Press the red button on each LATCH connector and push the hook toward the anchor. Twist it sideways and pull it out. Repeat for the other side.
- Lift the Base: Once both hooks are free, lift the base out of the car.
I remember breaking a nail trying to loosen a tight LATCH strap. Kneeling on the base while wiggling the adjustment tab did the trick. If it’s still stuck, try rocking the base gently to ease the tension.
Removing the Graco Car Seat Base: Seat Belt Installation
If your base is installed with the vehicle’s seat belt, the process is a bit different. Here’s how I handle it:
- Unbuckle the Seat Belt: Press the seat belt release button and pull the belt out of the buckle.
- Locate the Belt Path: Find where the seat belt threads through the base. Most Graco bases have a designated path or lock-off mechanism.
- Release the Lock-Off: If your base has a lock-off clip, open it to free the belt. Some models require you to lift a lever or press a button.
- Pull the Belt Out: Carefully slide the seat belt out of the base’s path. If it’s tangled, take your time to avoid damaging the belt.
- Lift the Base: With the belt removed, lift the base out of the car.
I once had a seat belt installation that was so tight I thought I’d need to cut it! But gently wiggling the belt while opening the lock-off made it slide right out. Always check for twists in the belt before reinstalling.
Common Challenges and How to Overcome Them
Removing a Graco base isn’t always a breeze. Here are some issues I’ve faced and how to fix them:
- Tight LATCH Straps: If the straps won’t loosen, apply more weight to the base or use a screwdriver to gently pry the adjustment tab. Be patient to avoid breaking anything.
- Stuck Connectors: Sand or dirt can jam LATCH hooks. Wipe them down with a damp cloth and try again. I had this issue after a beach trip, and a quick clean fixed it.
- Hard-to-Reach Anchors: If you can’t reach the anchors, recline the car seat slightly to create more space.
- No Manual: If you’ve lost your manual, check Graco’s website for a digital version or call their customer service at 1-800-345-4109.
When my base got stuck after a sandy vacation, I panicked, thinking I’d need a new one. A quick wipe-down and some elbow grease got it free, saving me a trip to the store.
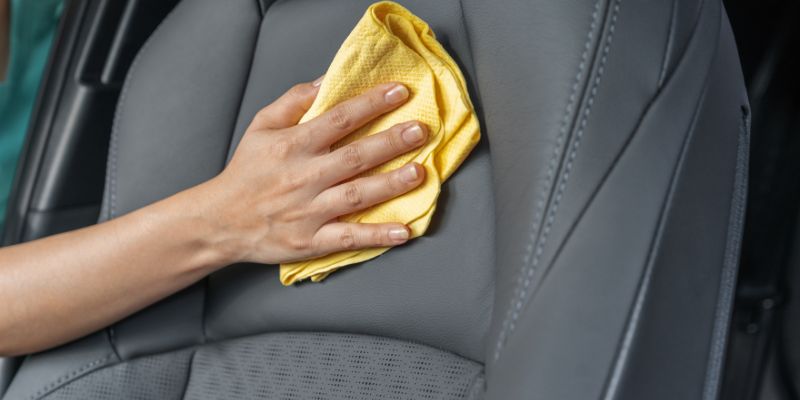
Cleaning and Storing the Base After Removal
Once the base is out, you might want to clean it before storing or reinstalling. I always give mine a good wipe-down to remove crumbs, dust, or spills. Use a damp cloth with mild soap—never soak the base, as water can damage the straps or mechanisms.
For storage, wrap the LATCH straps around the base to prevent tangling. Store it in a dry, cool place, like a garage shelf or closet. I keep mine in a plastic bin to protect it from dust. If you’re selling or donating the base, check that it’s not expired (usually 7-10 years from the manufacture date, found on a sticker on the base).
Reinstalling the Graco Car Seat Base
If you’re moving the base to another car or putting it back after cleaning, reinstalling is just as important. Here’s how I do it with the LATCH system:
- Check for Damage: Inspect the base for cracks, loose parts, or worn straps.
- Place the Base: Set the base flat on the car seat, ensuring it’s level.
- Attach LATCH Hooks: Clip each hook to the car’s lower anchors. You’ll hear a click when they’re secure.
- Tighten the Straps: Pull the LATCH strap tight while pressing down on the base. Kneel on it for extra leverage.
- Check the Angle: Use the base’s level indicator to ensure the correct recline for rear-facing seats. Adjust with a rolled towel if needed.
- Test for Stability: Tug the base side-to-side. It shouldn’t move more than an inch.
For seat belt installation, thread the belt through the base’s path, buckle it, and pull it tight while pressing down. Lock the belt or use the lock-off mechanism, then check for stability.
I always double-check my installation by giving the base a good shake. If it’s rock-solid, I know my kid is safe.
Why Proper Removal and Installation Matter
Removing and reinstalling the base correctly is about more than convenience—it’s about safety. A loose or improperly installed base can reduce the car seat’s ability to protect your child in a crash. I’ve seen parents skip steps to save time, but it’s not worth the risk. Always follow the manual and check that the base is secure.
When I first installed my Graco base, I thought I had it tight, but it wobbled. After reading the manual and tightening it properly, I felt so much better knowing my son was secure. Take the extra minute—it’s peace of mind you can’t put a price on.
When to Replace a Graco Car Seat Base
Sometimes, you might need to replace the base instead of just removing it. Here are signs it’s time for a new one:
- Damage: Cracks, broken straps, or worn connectors mean the base isn’t safe.
- Expiration: Graco bases expire 7-10 years after manufacture. Check the sticker for the date.
- Recall: Check Graco’s website or the NHTSA for recalls on your model.
- Compatibility Issues: If you’re upgrading to a new Graco seat, the old base might not work.
I once kept a base past its expiration date, thinking it was fine. Then I learned expired bases might not meet current safety standards. Now, I always check the date before reinstalling.
Tips for a Smooth Removal Process
Here are some tricks I’ve learned to make removing a Graco base easier:
- Work in a Cool Environment: Heat can make straps stickier. I try to do it in the morning or in a garage.
- Have a Helper: An extra person can hold the base while you work the straps.
- Watch a Video: Graco’s YouTube channel has tutorials for many models, like the SnugRide 35.
- Contact Graco: If you’re stuck, their customer service is super helpful. Call 1-800-345-4109.
When I couldn’t budge a base, a quick YouTube video showed me exactly where to press. It’s like having a friend walk you through it.
Common Graco Car Seat Models and Their Bases
Graco makes a bunch of car seats, and the base removal process can vary slightly. Here’s a quick guide to popular models:
| Model | Base Removal Method | Notes |
|---|---|---|
| SnugRide SnugLock 35 | Squeeze handle at back, lift seat; loosen LATCH straps | Easy release handle, common in newer models |
| Click Connect Series | Not always removable; consult the manual for cleaning | Lever varies by model; check the manual |
| 4Ever DLX | Not always removable; consult manual for cleaning | Convertible seat, base may be integrated |
| Extend2Fit | Gray base may have screws under rubber feet | Check for hidden screws for deep cleaning |
I have a SnugRide, and the handle method is a breeze. But when I helped a friend with an Extend2Fit, we had to hunt for screws under rubber feet to remove the gray base for cleaning. Always check your specific model’s manual.
The Importance of Reading Your Manual
I can’t stress this enough: your Graco car seat manual is gold. It has model-specific instructions for removing the base, adjusting straps, and reinstalling. If you’ve lost it, download a copy from Graco’s website using your model number (found on the base or seat). I keep my manual in my glovebox for quick reference—it’s saved me more than once!
When to Seek Professional Help
If you’re struggling to remove the base or it’s stuck, don’t force it. Local fire stations or police departments often offer free car seat checks and can help with removal. I took my base to a fire station once, and the firefighter had it out in seconds while showing me the right technique. You can also call Graco’s customer service for advice or to report a defective base.
The Environmental Impact of Car Seat Bases
Once you’ve removed the base, you might wonder what to do with it if it’s expired or damaged. Don’t toss it in the trash—car seats contain plastics and metals that should be recycled. Many Graco retailers, like Target or Walmart, have car seat recycling programs. I dropped off an old base at a Target event, and they gave me a coupon as a bonus! Check Graco’s website for local recycling options.

Conclusion
Well, there you go—everything you need to know about how to remove the base from a Graco car seat! From loosening those tricky LATCH straps to handling seat belt installations, you’re now armed with the know-how to get that base out like a pro. I’ve been through the frustration of stuck straps and confusing levers, but with a little patience and the right steps, it’s totally doable. Whether you’re cleaning, switching cars, or upgrading, this guide has you covered.
Thanks for joining me on this journey through the world of Graco car seat bases. I hope you feel confident tackling this task and keeping your little one safe. Now, go grab that car seat base and show it who’s boss! Drive safe, and happy parenting!
Frequently Asked Questions
How do I know if my Graco car seat base is installed with LATCH or a seat belt?
Check the base for LATCH hooks clipped to your car’s anchors or a seat belt threaded through the base’s path. The manual will also specify the installation method.
Can I remove a Graco car seat base without tools?
Yes, most bases can be removed with just your hands by loosening the LATCH straps or seat belt. A screwdriver might help with stubborn straps.
Why is my Graco base so hard to remove?
Tight straps, sand, or debris can make it tough. Apply weight to the base, clean the connectors, and wiggle the adjustment tab to loosen the straps.
Can I use a Graco car seat without the base?
Some Graco infant car seats, like the SnugRide, can be installed without the base using the vehicle’s seat belt. Check your manual for instructions.
What do I do if my Graco base is stuck?
Try applying weight to the base, cleaning the connectors, or watching a model-specific video. If it’s still stuck, contact Graco or visit a fire station for help.
How do I clean under the Graco car seat base?
After removing the base, use a damp cloth with mild soap to wipe down the surface. Avoid soaking the straps or mechanisms.
Is it safe to reuse a Graco car seat base?
Yes, if it’s not damaged, expired, or recalled. Check the manufacture date and Graco’s website for recall info before reusing.