How to Remove a Car Seat from Its Base (Without Fighting It)
You’re parked, it’s raining, and the baby is crying. You push the release button on the car seat base, pull up on the handle, and nothing happens. The carrier stays locked in place like it’s welded there. You push harder, wiggle it, maybe curse a little. Still stuck.
This scenario plays out in parking lots every day. Most infant car seats work the same way, but the release mechanism isn’t always obvious. And when it jams, you need more than brute force. This guide walks through the entire process: detaching the carrier from the base, removing the base from your vehicle, fixing common stuck situations, and getting everything clean and safe for the next ride.

BUCKLEBEE
Bucklebee Easy Car Seat Buckle Release Aid…
- Proven product designed to reduce the unbuckling force for a child or caregiver. Car seat buckle release tool installs in 4 simple…
- The original carseat buckle helper. If you suffer from any joint or hand pain this seat belt buckle booster is for you! It's the c…
- Save your nails by using this car seat clip opener. No more catching your thumb or other nails on the edges of the carseat opener.…
One small tool makes this easier if you have hand pain or short nails. The Bucklebee release aid attaches to the buckle and gives you extra leverage so you don’t have to jam your thumb into a tight crevice. It’s a simple plastic piece, but it changes the angle of force, which helps when the button is stiff.
Why You Need to Remove the Carrier from the Base
The obvious reason is getting the baby out of the car. But there are others. You might be switching vehicles, moving the base to a different seat position, or cleaning up after a diaper blowout that somehow reached the crevices of the carrier. The base itself also needs periodic removal to vacuum underneath and check for debris or damage.
Knowing how to detach the carrier quickly matters in an emergency. If you’re in an accident, you want to get the child out without fumbling. Practice the release motion at home a few times so it becomes muscle memory. It takes about ten seconds once you know what you’re doing.
Before You Start: Read the Manual and Check the Handle
Every seat has a manual. Find it. The release mechanism location and motion vary slightly between brands, and guessing wrong can damage the latch. The manual also tells you the correct handle position for removal, which is often the key to the whole operation.
Most seats require the handle to be in the carry position, locked upright, before the release button will work. If the handle is in a different position, the carrier won’t detach. It’s a safety feature. Check the handle first before you start pushing buttons.
Also check the recline foot on the base. Some bases have a foot that adjusts the angle. If it’s extended all the way, it can press against the carrier and make removal harder. Tuck it in if you can.
Step-by-Step: How to Detach the Carrier from the Base
Locating the Release Lever or Button
The release is almost always at the top of the base, near where the carrier handle sits. It could be a single button in the center, two buttons on the sides, or a pull lever. On Graco seats, it’s often a single button on the front of the base. Chicco uses a lever on the handle area. Nuna has a button integrated into the base’s top edge.
Run your hand along the top edge of the base. You’ll feel a protrusion or a gap. That’s your target. If you can’t find it, the manual has a diagram. Don’t skip this step.
Pressing and Lifting: The Correct Motion
Here’s where most people go wrong. You don’t just press the button and pull straight up. You press the release, then lift the carrier at the handle while slightly tilting the bottom toward you.
The motion is a two-step: press and lift. On some models, you need to press two buttons simultaneously. On others, you pull the lever while lifting with your other hand. The carrier should release with a firm click and separate cleanly. If it doesn’t, stop pushing. You’re fighting the mechanism, and you’ll break it.
Confirming the ‘Click’ and Visual Check
When you reattach the carrier, you must hear a click. Not a soft thud, not a half-hearted snap. A full, solid click. Then do a visual check: look at the connection points on both sides of the base. They should be fully seated with no gaps.
Here’s the trap. Sometimes the carrier clicks into place on one side but not the other. This is called a false click. You think it’s secure, but it’s only latched on one side. Always tug upward on the handle after installing to verify both sides are locked. If it lifts even slightly, detach and try again.
How to Remove the Base Itself from Your Vehicle
Once the carrier is off, the base is next. This is where most online guides stop, but it’s half the job. Removing the base means unbuckling whatever holds it to the vehicle seat: LATCH connectors or a seat belt.
Unbuckling the LATCH Connectors
LATCH stands for Lower Anchors and Tethers for Children. The connectors are the metal clips at the end of the straps that attach to the anchor points in your car’s seat crease. To release them, press the button on the connector and pull it off the anchor.
Some connectors have a pull-tab instead of a button. Push the tab or button, then slide the connector off. The straps often have tension on them, so the connector might snap off when released. Keep your fingers clear.
Unthreading the Seat Belt Path
If the base is installed with a seat belt, you’ll need to unthread it. The belt goes through a specific path on the base, usually behind the carrier area and around the back. Unbuckle the seat belt first, then pull it out of the path.
Pay attention to how the belt routes before you pull it out. You’ll need to rethread it when you reinstall the base. Taking a photo with your phone before you remove it saves a lot of frustration later.
Troubleshooting: When the Car Seat is Stuck
Sometimes the release button won’t budge. The carrier is stuck, and you’re stuck with it. Here’s how to fix the most common issues.
Fixing a Jammed Release Button
A stuck button usually means something is pressing against it. Check the carrier handle position again. If the handle is slightly off, it can block the button’s travel. Adjust it to the exact carry position.
If that doesn’t work, check for debris. Crumbs, sand, or dried formula can get into the release mechanism and jam it. Use a can of compressed air to blow out the crevice. If you don’t have that, a toothpick works to dislodge the gunk.
Another culprit is the recline foot. If it’s extended, it can push the base into a position where the release lever is misaligned. Retract the foot and try again.
Dealing with a Tight Fit or Recline Foot Interference
Sometimes the base is wedged tightly between the vehicle seat and the one in front. You can’t get enough leverage to press the button. Slide the front seat forward or recline it to create more space. You can also press the release while a second person lifts the carrier.
If the recline foot is the issue, you might need to release the base’s recline adjustment first. Look for a second lever near the foot. Pull it to flatten the base, then attempt the carrier release again.
Brand-Specific Release Mechanisms
Chicco seats use a handle-mounted release. You squeeze a lever on the back of the carrier handle while lifting. It’s a one-handed operation once you get the hang of it, but the lever is stiff when new. It loosens up after a few weeks of use.
Graco uses a single button on the front of the base. Press it firmly with your palm and lift the carrier with the other hand. The button is large, so it’s easy to find, but it takes a solid press. A weak press won’t release the latch.
Nuna’s release is a button on the top edge of the base, near the foot end. It’s recessed, so you need to press with a finger or a tool. The Bucklebee car seat release tool works well here because it gives you a larger surface to push with. The mechanism is smooth, but the recessed design is awkward for people with large hands.
| Brand | Release Location | Motion | Common Issue |
|---|---|---|---|
| Chicco | Lever on carrier handle | Squeeze and lift | Stiff lever when new |
| Graco | Single button on front of base | Press and lift | Needs firm press |
| Nuna | Recessed button on top edge | Press with finger/tool | Awkward access |
| Evenflo | Dual buttons on sides | Press both and lift | Requires two hands |
Cleaning and Maintaining the Base and Carrier
With everything out of the car, it’s the perfect time to clean. The base gets dusty and collects crumbs from the vehicle seat. The carrier has seen spills, drool, and worse. Both need attention.
Wipe the base with a damp cloth and mild soap. Don’t submerge it in water. The base has metal parts and springs inside that will rust. Use a crevice tool on your vacuum to get the dust out of the LATCH belt path and the release mechanism.
The carrier’s fabric cover is usually removable. Check the manual for removal instructions. Most covers unzip or unsnap. Machine wash on a gentle cycle with cold water and air dry. Never put the cover in the dryer; it will shrink and warp the fit.
While the cover is off, wipe the plastic shell with a soapy cloth. Pay attention to the harness straps. Wipe them down but don’t soak them. The straps are load-bearing, and harsh chemicals or excessive water can weaken the fibers.
Safety Checks Before Reinstallation
Before you put everything back, inspect the base and carrier for damage. Look for cracks in the plastic, especially around the belt path and the release mechanism. Check the LATCH straps for fraying or worn stitching. If you see any damage, replace the seat. It’s not worth the risk.
Check the expiration date. Car seats expire, usually six to ten years from the manufacture date. The date is stamped on the bottom of the base or the side of the carrier. If it’s past, the plastic has degraded and won’t perform in a crash. Dispose of the seat and buy a new one.
Finally, check the harness and buckle. The buckle should click firmly and release only when you press the button. If it sticks, clean it with warm water and let it dry completely. Do not lubricate it. Grease attracts dirt and makes the problem worse.
For more on removing a stubborn base from a specific brand, see this guide on Graco base removal. And if you’re dealing with a base that’s stuck in the vehicle, this car seat base removal article covers the general process.
Frequently Asked Questions
Why won’t my car seat release from the base?
The most common cause is the handle not being in the correct carry position. If the handle is rotated to a different angle, the release button is mechanically blocked. Check the handle, then check for debris in the release button. If both are clear, the recline foot might be extended and pressing against the carrier.
Do I need to remove the base every time I take the carrier out?
No. The base stays in the vehicle. You only remove the base when you need to clean it, switch vehicles, or move it to a different seat position. The carrier detaches for transport and indoor use.
How do I know if the carrier is securely attached to the base?
Listen for a solid click on both sides. Then grab the handle and tug upward. If the carrier lifts or rocks, it’s not fully latched. Detach and reinstall. A false click happens when one side latches but the other doesn’t. Always do the tug test.
Can I use the car seat without the base?
Yes, most infant carriers are approved for installation without the base using the vehicle’s seat belt. Check your manual for the specific belt routing. The carrier will have a belt path on the back. This is a common setup for taxis or travel, but the base is generally easier and safer for daily use.
What should I do if the release button is broken?
Stop using the seat immediately. A broken release mechanism compromises the seat’s ability to stay secure in a crash. Contact the manufacturer for replacement parts or warranty service. Do not try to rig it with tape or zip ties. The seat needs to be repaired or replaced.
Final Verdict
The whole process takes less than a minute once you know the steps. Here’s what to remember:
- Set the handle to the carry position before touching the release button.
- Press the release and lift the carrier at the handle, not the sides.
- Always do the tug test after reattaching to avoid a false click.
- Remove the base by pressing the LATCH connector buttons or unthreading the seat belt.
- Clean the base with a damp cloth and wash the carrier cover on gentle cycle.
- Inspect for cracks, fraying, and the expiration date before reinstalling.
- If the release is stuck, check the handle, clear debris, and retract the recline foot.
If you struggle with the buckle release due to hand pain or short nails, the Bucklebee unbuckling tool is a small investment that makes the daily click-and-lift routine easier on your hands. It won’t fix a jammed mechanism, but it does give you a better angle on the button.
Products related to this article
Sponsored / affiliate links. As an Amazon Associate I earn from qualifying purchases. I may earn additional commission from eligible campaigns.
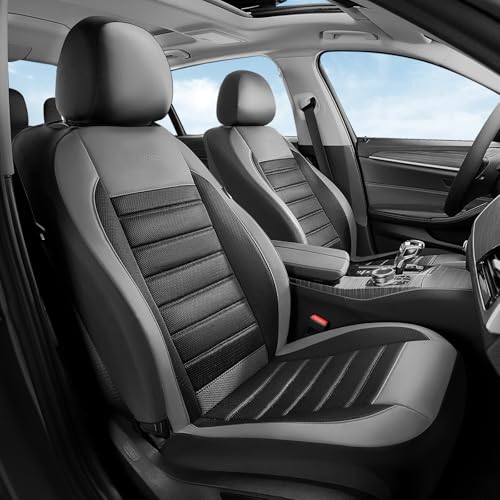 Coverado Car Seat Covers Front Seats, Luxury Leather Car Seat Covers, Automotive Mesh Seat Covers 2 Pack, Airbag-Compatible, Black Gray Seat Covers for SUV Sedan Truck
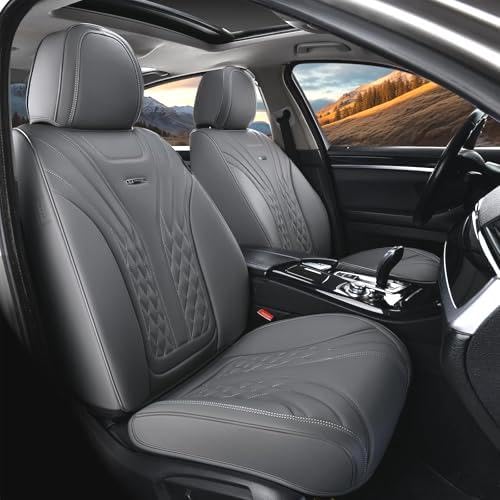 Coverado Car Seat Covers, Car Seat Covers Front Seats, 2-Pack Front Seat Cover, Nappa Leather Waterproof Seat Covers, Car Seat Protectors, Automotive Seat Covers Universal Fit for Most Vehicles