How To Remove Car Tint Adhesive: A Simple DIY Guide
I’ll never forget the first time I tried to remove car tint adhesive from my old sedan’s windows. It was a hot summer day, and I was armed with a bottle of soapy water and a lot of enthusiasm—only to end up with a sticky mess and a scratched window! But don’t worry, I’ve learned the tricks since then, and I’m here to share a super easy guide to help you remove car tint adhesive like a pro. Whether you’re a beginner, a car enthusiast, or a seasoned DIYer, this article will walk you through every step with simple tips, tools, and safety advice to make the process a breeze. Let’s dive in and get those windows sparkling clean!
What Is Car Tint Adhesive?
Car tint adhesive is the sticky stuff that holds window tint film to your car’s glass. It’s like super-strong glue that keeps the tint in place, blocking sunlight and adding privacy. But when you peel off the tint—maybe because it’s bubbling or you want a new look—that adhesive often stays behind, leaving a gooey mess. Removing it properly is key to keeping your windows clear and scratch-free. Trust me, I learned the hard way that rushing this job can make things worse!
Why Remove Car Tint Adhesive?
You might want to remove car tint adhesive for a few reasons. Maybe your tint is peeling, bubbling, or turning purple—yuck! Or perhaps you’re selling your car, and sticky residue could lower its value. Clean windows also make your car look sharp and help you spot any scratches or cracks. Plus, it’s satisfying to see that glass shine again!
Tools and Materials You’ll Need
Before you start, grab these simple tools and materials. Most are probably in your garage or at a local store.
- Heat gun or hair dryer: Softens the adhesive for easier removal.
- Plastic scraper: Safer than metal to avoid scratching glass.
- Soapy water: Mix dish soap with water in a spray bottle.
- Adhesive remover: Try isopropyl alcohol, white vinegar, or a product like 3M Adhesive Remover.
- Microfiber cloths: For wiping and cleaning without streaks.
- Gloves and safety glasses: Keep your hands and eyes safe from chemicals.
- Garbage bags: Catch peeled tint and keep your car clean.
Table 1: Tool Comparison for Removing Car Tint Adhesive
| Tool | Cost | Pros | Cons |
|---|---|---|---|
| Heat Gun | $20-50 | Fast, effective | Can overheat glass |
| Hair Dryer | $10-30 | Safe, common household | Slower than heat gun |
| Plastic Scraper | $5-10 | Won’t scratch glass | Less durable |
| Isopropyl Alcohol | $5-10 | Cheap, effective | Strong smell |
Caption: Compare tools to find what’s best for your budget and skill level.

Step-by-Step Guide to Remove Car Tint Adhesive
Here’s a simple, beginner-friendly guide to get that adhesive off your car windows. Follow these steps, and you’ll be done in no time!
Step 1: Prepare Your Car
Park your car in a shaded, well-ventilated spot—direct sunlight makes adhesive harder to remove. Clean the window with soapy water to remove dirt. Roll the window down a bit to expose the tint’s edge. This makes peeling easier and keeps your car’s interior safe.
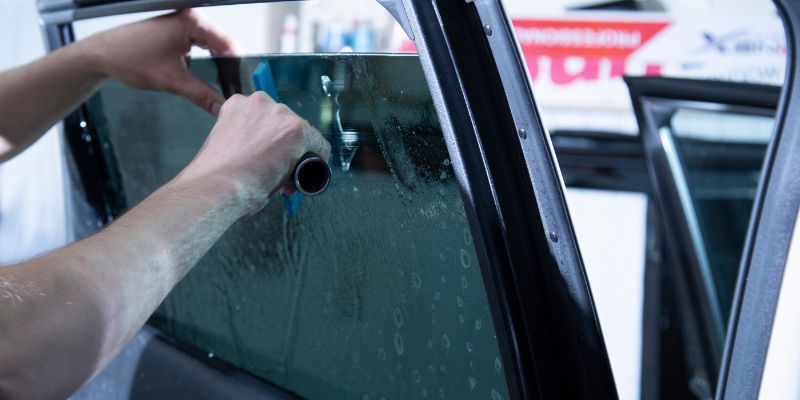
Step 2: Heat the Tint
Use a heat gun or hair dryer to warm the tint film. Hold it a few inches from the glass and move it around for 2-3 minutes. The heat softens the adhesive, making the tint curl at the edges. Be careful not to overheat—glass can crack if it gets too hot!
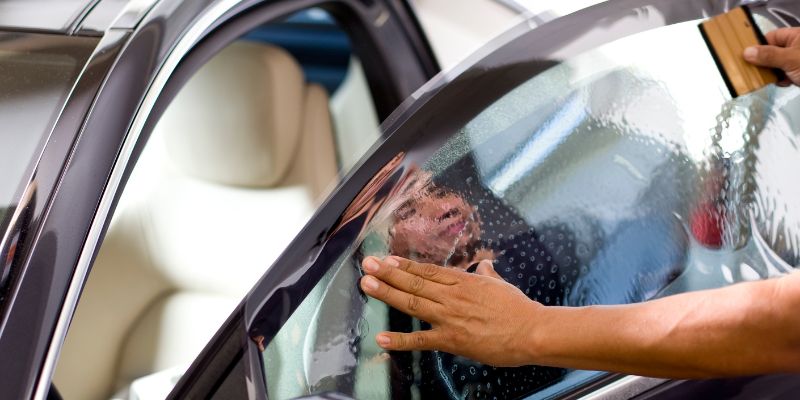
Step 3: Peel Off the Tint
Grab a plastic scraper or your fingernail to lift a corner of the tint. Pull slowly and evenly to avoid tearing. If it resists, apply more heat. Peel the whole film off, and don’t worry if adhesive stays behind—we’ll tackle that next.
Step 4: Remove the Adhesive
Spray the leftover adhesive with isopropyl alcohol or white vinegar. Let it sit for 15-20 minutes to soften the glue. Use a plastic scraper to gently scrape it off. Wipe the area with a microfiber cloth. Repeat if needed until the glass is clean.
Step 5: Clean the Window
Wash the window with soapy water to remove any leftover adhesive or cleaner. Rinse with clean water and dry with a microfiber cloth for a streak-free finish. Step back and admire your clear, shiny window!
Tips for Success:
- Work slowly to avoid scratching the glass.
- Test adhesive remover on a small spot first.
- Use a plastic scraper, not metal, to protect your window.
Benefits and Drawbacks of DIY Adhesive Removal
Removing car tint adhesive yourself has some big wins. It’s cheap—most tools cost under $50 total. You control the process and can work at your own pace. Plus, it’s satisfying to do it yourself! But there are downsides. It takes time, especially for beginners. You might scratch the glass if you’re not careful. And tough adhesives, like those on ceramic tints, can be a real pain.
Table 2: DIY vs. Professional Adhesive Removal
| Method | Cost | Time | Risk of Damage |
|---|---|---|---|
| DIY | $20-50 | 1-3 hours | Moderate |
| Professional | $60-100 | 30-60 mins | Low |
Caption: Weigh DIY vs. professional help based on your time and budget.
Alternative Approaches
If heating and scraping don’t work, try these methods:
- Ammonia Method: Mix equal parts ammonia and water in a spray bottle. Spray the window, cover with a garbage bag, and let it sit in the sun for an hour. Peel the tint and scrape off adhesive.
- Steamer Method: Use a clothing steamer to loosen the tint and adhesive. Steam both sides of the glass, then peel and clean as above.
- Commercial Products: Products like 3M Adhesive Remover or Rapid Remover are made for tough glue. Follow the instructions carefully.
Visual Idea 1: A diagram showing how to hold a heat gun at a safe distance from the glass.
Visual Idea 2: A step-by-step infographic of the peeling process.
Visual Idea 3: A chart comparing adhesive removers (alcohol, vinegar, commercial products).
My Personal Tips and Mistakes to Avoid
After years of tinkering with cars, I’ve got some tricks up my sleeve. First, always use a plastic scraper—my first try with a metal blade left scratches I still regret. Second, don’t skip the heat step; it makes peeling way easier. Third, protect your car’s interior with towels or garbage bags to catch drips. Common mistakes? Rushing the job or using too much force can damage the glass or defroster lines, especially on rear windows. Be patient—it’s worth it!
Top 3 Mistakes to Avoid:
- Using a metal scraper—scratches are permanent!
- Skipping the heat step—makes adhesive harder to remove.
- Not protecting your car’s interior—chemicals can stain seats.
Frequently Asked Questions
What Is the Easiest Way to Remove Car Tint Adhesive?
Spray isopropyl alcohol or white vinegar on the adhesive, let it sit for 15 minutes, and scrape with a plastic scraper. Wipe clean with a microfiber cloth for a shiny finish.
Can I Use a Razor Blade to Remove Tint Adhesive?
Yes, but be super careful. Use a new razor blade and keep the glass wet with soapy water to avoid scratches. Plastic scrapers are safer for beginners.
Will Adhesive Remover Damage My Car’s Glass?
No, products like isopropyl alcohol or 3M Adhesive Remover are safe if used correctly. Test on a small area first and avoid getting it on interior plastics.
How Do I Protect Defroster Lines on Rear Windows?
Avoid metal scrapers and harsh chemicals near defroster lines. Use a plastic scraper and gentle cleaners like soapy water or vinegar to keep lines safe.
How Long Does It Take to Remove Car Tint Adhesive?
It takes 1-3 hours per window, depending on the adhesive and your skill. Heating the tint and using a good adhesive remover speeds things up.
Can I Reuse Old Tint After Removing It?
No, old tint is usually damaged during removal and won’t stick well. It’s best to apply new tint for a clean, professional look.
What’s the Best Adhesive Remover for Tough Glue?
3M Adhesive Remover or Rapid Remover works great for stubborn glue. White vinegar is a cheap, effective alternative for lighter adhesives.
Conclusion
Removing car tint adhesive doesn’t have to be a headache. With simple tools like a heat gun, plastic scraper, and some isopropyl alcohol, you can make your windows look brand new. Start by heating the tint, peel it off carefully, and clean up that sticky residue with patience. My biggest tip? Take your time to avoid scratches. Try this project on a weekend, and you’ll be amazed at the results! Share your success stories or ask questions in the comments—I’d love to hear how it goes. For more car care tips, check out trusted sites like 3M’s automotive section or Car and Driver. Happy cleaning!